

How to Retrieve Files Permanently Deleted from Recycle Bin

Summary
This guide explains how to retrieve files permanently deleted from recycle bin by covering Windows built-in recovery features, professional data recovery software options, and critical factors like TRIM status that affect success rates. It outlines methodical steps for both command-line and graphical tools while clarifying realistic expectations for different storage scenarios.


| Item | Detailed Description |
|---|---|
Supported Windows Versions | Windows 8 / Windows 10 / Windows 11 (UI partially hidden in Win11) |
Prerequisites / Conditions | External drive or network share required; must be enabled beforehand; covers only user libraries (Desktop, Documents, Pictures, etc.) |
Environment Limitations | NTFS‑only; unavailable if backup drive disconnected; no support for custom folders; no history if never configured |
General Effectiveness | Fast version recovery; reliable for incremental snapshots; ineffective for unprotected folders or pre‑activation deletions |
Steps
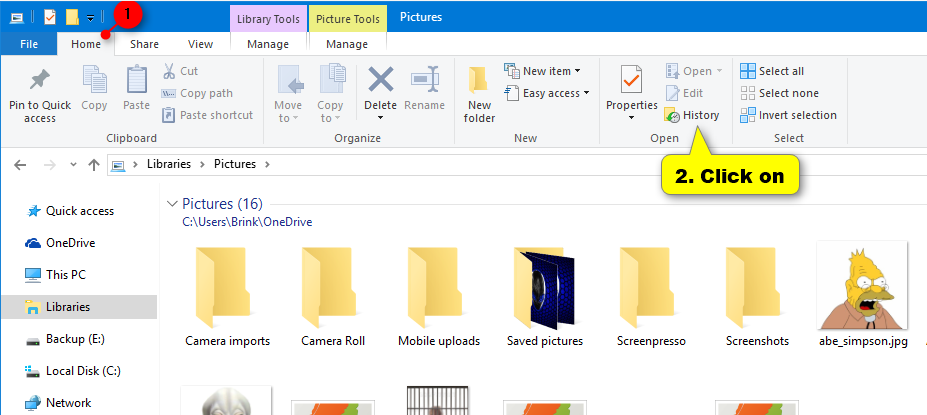
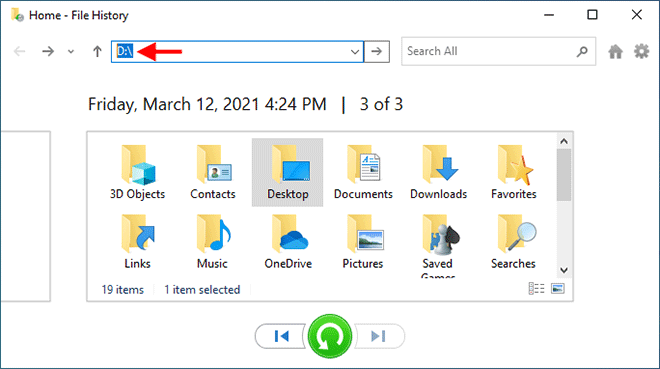
Disadvantages:
- Only works if pre-configured
- limited to specific folders
- Requires external drive or network location setup


Strong to recover Recover data from the storage devices sustaining many bad sectors.
Supported devices SD card, SDHC, SDXC, USB flash drive, hard disk, computer, etc.
Supported file types Image, video, audio, text, email, etc.
Easy to use Recover by 3 steps and support to preview scan results.
Multiple scan modes Fast partition/whole partition/whole disk scan.
Easy to use Recover by 3 steps.
Multiple scan modes Fast partition/whole partition/whole disk scan.
Supported devices SD card/USB/hard disk, etc.
Free TrialFree TrialFree Trial 800 people have downloaded!| Item | Detailed Description |
|---|---|
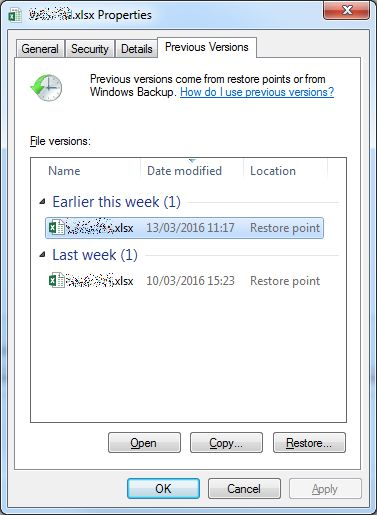
Supported Windows Versions | Windows 7 / 8 / 10 / 11 (behavior varies by version) |
Prerequisites / Conditions | System Protection enabled beforehand; restore points available; File History snapshots (optional source) |
Environment Limitations | No restore points = no versions; limited to NTFS volumes; unavailable on drives with System Protection disabled; snapshot frequency not guaranteed |
General Effectiveness | Useful for quick rollbacks; effective when restore points exist; not reliable for recent files; cannot recover items never captured in snapshots |
Disadvantages:
- Dependent on System Protection being enabled
- snapshots not guaranteed
- May not capture recently created files before deletion
Steps
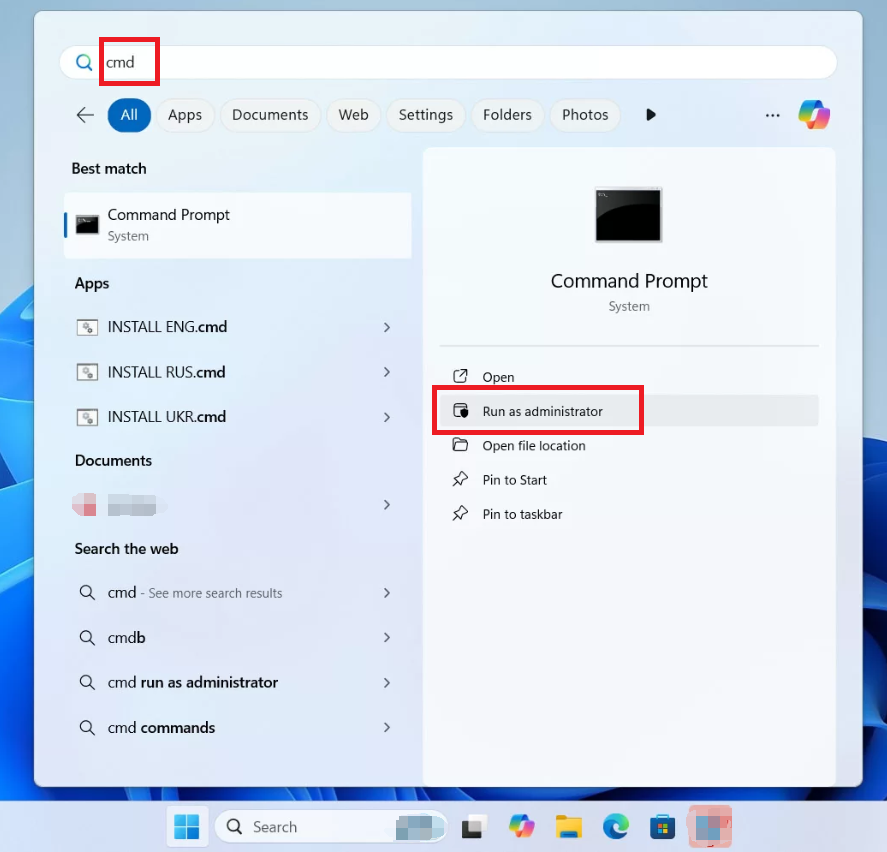
fsutil behavior query DisableDeleteNotify
Easy to use Only simple steps to recover data from storage devices.
Multiple scan modes Fast partition scan, whole partition scan and whole disk scan for different recovery needs.
File types Support to recover pictures, videos, audios, documents, mails, etc.
Supported storage devices Recover data from recycle bin, SD card, external disk, etc.
Supported systems Windows 11,10, 8.1, 8, 7, Vista, XP, 2000 and Mac OS X10.6, 10.7, 10.8+.
Easy to use Only simple steps to recover data from storage devices.
Multiple scan modes - 3 scan modes for different recovery needs.
Supported storage devices Recover data from recycle bin, SD card, external disk, etc.


| Best Case | Worst Case |
|---|---|
Few new writes after deletion | Heavy daily use (installs, saves, copying) |
HDD (no TRIM) | SSD with TRIM enabled (may clear deleted data quickly) |
Recovery attempted within hours/days | Recovery attempted weeks later |
Is Renee Undeleter safe to use on SSDs? How does TRIM affect recovery?
How long do permanently deleted files remain recoverable on a typical Windows PC?
What’s the difference between Fast Partition Scan and Whole Partition Scan for Recycle Bin recovery?
Does Shift+Delete require a different recovery method than emptying the Recycle Bin?
Easy to use Only simple steps to recover data from storage devices.
Multiple scan modes Fast partition scan, whole partition scan and whole disk scan for different recovery needs.
File types Support to recover pictures, videos, audios, documents, mails, etc.
Supported storage devices Recover data from recycle bin, SD card, external disk, etc.
Supported systems Windows 11,10, 8.1, 8, 7, Vista, XP, 2000 and Mac OS X10.6, 10.7, 10.8+.
Easy to use Only simple steps to recover data from storage devices.
Multiple scan modes - 3 scan modes for different recovery needs.
Supported storage devices Recover data from recycle bin, SD card, external disk, etc.
Relate Links :
How to Recover Deleted Files from a Network Drive (Windows Server & NAS)
21-05-2026
Jennifer Thatcher : This guide outlines systematic approaches to recover deleted file from network drive across Windows Server and NAS environments....
How to Recover Deleted Excel Files on Windows 11/10 : Free Methods + Best Local App
07-02-2026
Jennifer Thatcher : Learn the most effective ways to Recover Deleted Excel Files in Windows 11/10 for 2026, from checking the...
How to Recover Deleted Media Files on Windows 11/10 – Get Your Photos & Videos Back Fast

02-12-2025
Amanda J. Brook : Learn how to recover media files on Windows 10 and 11—even after emptying the Recycle Bin or using...

26-11-2025
Ashley S. Miller : Images are among the most frequently lost files during data loss incidents. Knowing how to recover them—especially high‑quality...


User Comments
Leave a Comment