author avatar
    Technology Manager of Test Dept.
 

Summary
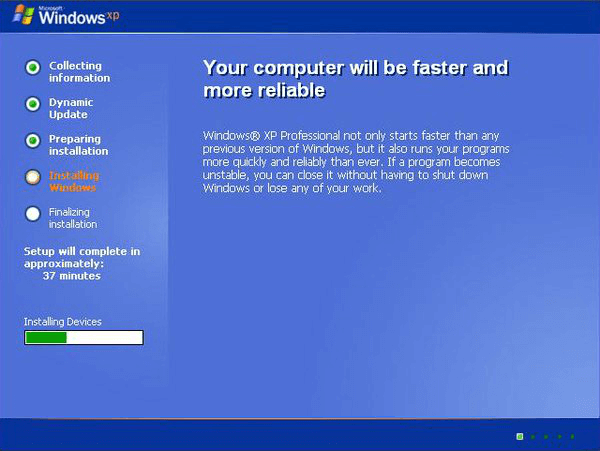
As we all known, SSD has well property performance. A system will run faster if it is installed on a SSD. Can Windows XP be installed on a SSD? In this essay, we will talk about how to install Windows XP on SSD.


how to install windows xp on ss

Part 1: Limitations of Windows XP Installation on SSD

Have you ever heard of the opinion that Windows 7 and the higher versions are applicable to SSD. However, some people still need Windows XP because their old applications are incompatible with the advanced system versions.
To install Windows XP on a SSD, you need AHCI mode enabled in BIOS/UEFI. Windows XP doesn’t support the SSD TRIM command. The system will run slowly and the SSD will be worn greatly if Windows XP is installed on the SSD. The common tool, such as SSD Trim, is incapable of sending TRIM command. We recommend TxBENCH, the tool supporting users to manually restore the TRIM function under Windows XP. TRIM should be on at [Drive Informaion] – [Drive Information] when you use this tool.
how to install windows xp on ss with TxBENCH
What is TRIM command?

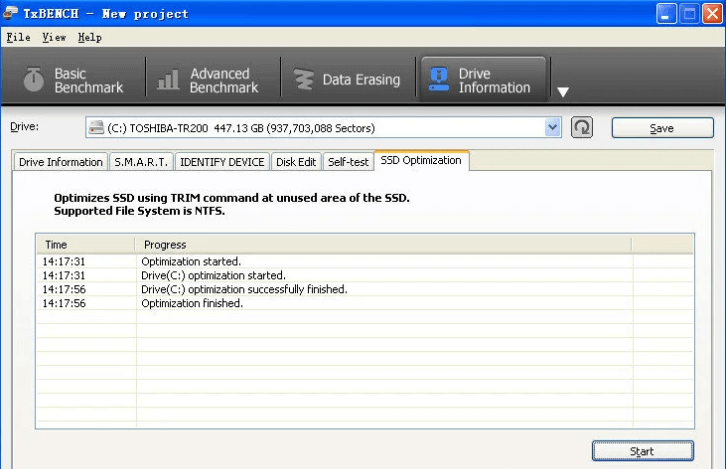
A trim command allows an operating system to inform a solid-state drive (SSD) which blocks of data are no longer considered to be ‘in use’ and therefore can be erased internally. TRIM is co-developed by Microsoft and the SSD suppliers, and it is applicable to the ATA8-ACS specification. A file cannot be absolutely removed from the operating system, but the file data is marked as blank when you delete it. Your operation is merely within the file system. The hard disk doesn’t mark the data as invalid until the system tells the hard disk to write new data into the “blank” place. That needs the TRIM command.

After learning about the limitation of Windows XP installation on SSD, we are going to talk about how to install Windows XP on a SSD.

Part 2: How to Install Windows XP on SSD?

1. Use Renee Becca

You can use Renee Becca to quickly transfer the whole system to a SSD, including the installed applications and the system settings. In addition, the software offers the automatic 4K alignment. The read-write performance will be improved when the system is transferred to SSD.
What is Renee Becca?
Renee Becca is the tool specializing in system and hard disk back up. It is used to back up and restore the computer data, including programs, system configuration, emails, photos, videos, documents and bookmarks. With the incremental/differential backup technology, it can back up system, partitions, disks and files, but also it can redeploy system and clone disks.
- Hard disk clone/clone system disk: Copy everything from the source hard disk to the target one
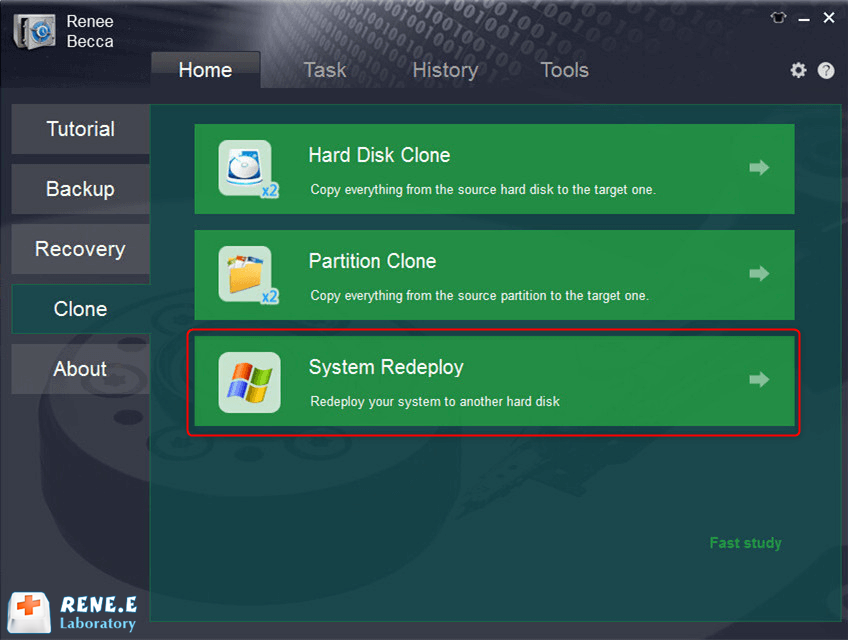
- Partition clone: Copy everything from the source partition to the target one
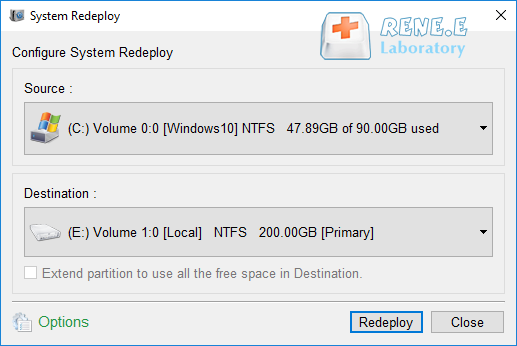
- System redeploy: Redeploy your system to another hard disk
Renee Becca - Reliable Data Backup & Restore Software

Quick Backup files at up to 3,000MB/min.

Fullfill different backup needs Supports system backup, disk / partition backup, file backup and disk clone.

Intelligent Automatically analyze the differences between source and backup data.

Convenient Support VSS, allowing to freely view webpages when backing up system.

Highly compatible Supports various files and storage devices.

Quick Backup files at up to 3,000MB/min.

Fullfill different backup needs Backup for disk, partition and system. Save disk space by backing up incremental /differential data.

Highly compatible Supports various files and storage devices.

Free TrialFree Trial 2000 users have downloaded and enjoy Renee Becca!
How to clone the system to SSD with Renee Becca?
It is convenient to clone the system to SSD with Renee Becca. Here are the steps.
Step 1: Download and install Renee Becca. Then, open the software and select [Clone] – [System Redeploy].
clone windows 10 to ssd with Renee becca
Step 2: Please select the original disk which saves Windows system and the target disk. Then click [Redeploy] to process the system migration.

Note: You should replace the solid state disk with a larger one. When the data is transferred to the new SSD, all data will be emptied. Please back up data beforehand.

select a destination to redeploy system with renee becca
Step 3: Click on [Redeploy] to begin and click on [OK] as the process is finished. Then, you should set the new disk as the first boot order in BIOS and get into the system. Click here to learn about how to change the boot order in BIOS.
move the system to ssd in Renee Becca
These are the steps to transfer Windows XP to a SSD. It is easier than installing a new system on the SSD. In the followings, you can learn about how to install a system on a SSD.

2. Use Installation Disc

Preparations:

• CD containing Windows XP Home or the legal copy of Windows Professional

• Valid product key (code number with 25 digits)

• Motherboard, graphics card, sound card and the installed drivers of these devices

• Network connection for activation

Steps:
Step 1: First, get into BIOS by pressing the hot key. Follow to select [Storage] – [Storage Options] – [SATA Emulation] – [AHCI Mode]. Save the settings and exit BIOS.
enable ahci mode in bios
Step 2: Put the installation disc into the CD slot. Then, get into BIOS again. Go to the tab [Boot] and set [CD-ROM] as the first boot order. Press the F10 key to save and exit BIOS.
set cd rom as the first boot order
Step 3: Restart the computer. Follow the prompt to press any key to boot from CD. Then, begin installing the system.
press any key to boot from cd rom
Step 4: After getting into the Windows XP menu, use the arrow key to select a partition or disk to install the system. In this case, install the system into the SSD. After that, press the Enter key to begin. Note: The operating system should be installed on the C disk.
install windows xp on c disk
Step 5: In the following window, select [NTFS] to format the SSD. After the installation file is copied, the computer will reboot. Don’t take the Windows XP CD out of the drive, and do nothing when you see the prompt saying [Press any key to boot from CD]. The installation process will begin automatically. Next, follow the prompt to select language, time and date formats, currency formats and the other options. Enter the 25-character product code to activate the system.
how to install windows xp on a ssd
Step 6: Set a computer name and the administrator password. Then, set the modem and the network connection.
how to install windows xp on a ssd
Step 7: Windows XP is installed in the computer when you see the below image. Click on [Next] to get more system settings.
how to install windows xp on a ssd
Step 8: Install required drivers for your motherboard, graphics cards, sound card, and any other device installed in your computer. Or download the drivers on another computer and copy them over via a writable CD or USB drive.
To verify or update a driver, click on the Start button, then right-click on [My Computer], and select [Properties] – [Hardware] – [Device Manager]. The Device Manager presents you with information and status for every device in your computer. Devices presented with a Question Mark, an Exclamation mark, or a red X indicate the device either does not have a driver installed, or that there is a problem preventing the device from functioning properly. Right click at the device to install or update the drivers.
how to install windows xp on a ssd