

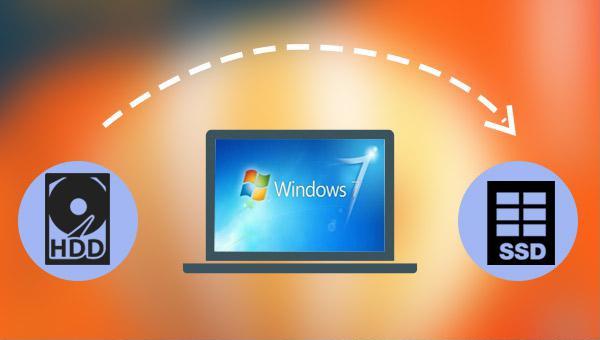
How to Clone HDD to SSD on Windows 7: Boost Your PC Speed Instantly

Summary
Learn how to clone HDD to SSD Windows 7 efficiently, boosting performance and minimizing hassle. This guide covers tool selection, SSD compatibility, and step-by-step instructions—ideal for readers looking to rejuvenate their systems.

Table of contents
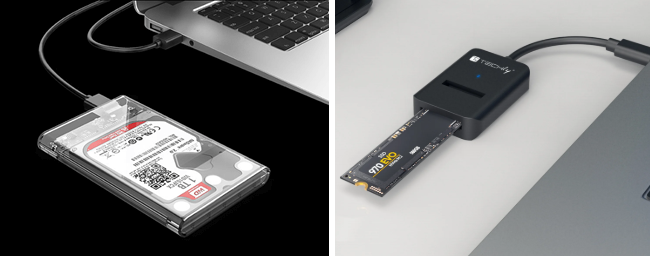
Here’s what you’ll need:
| Brand | Model | Capacity | Interface | Notes |
|---|---|---|---|---|
Timetec | 2.5" SATA III 3D NAND SSD | 512GB–2TB | SATA III | Affordable, plug-and-play |
Patriot | P210 2.5" SATA III SSD | 256GB–2TB | SATA III | Reliable TLC NAND |


Steps:
- Connect your HDD (source) and SSD (target) to the cloner.
- Press the clone button and wait 10-60 minutes, depending on data size.
- Install the SSD, then enter BIOS (press Del or F2 on startup) to set it as the first boot device.
(refer:https://www.reddit.com/r/msp/comments/10vlkn8/preferred_bootable_hard_drive_cloning_software/)

Automatic 4K alignment Improves SSD performance during system migration.
Support GPT and MBR Automatically adapt to the suitable partition format.
Support NTFS and FAT32 Redeploy various files in different file systems.
Back up quickly Back up files at up to 3,000MB/min.
Overall backup schedule Support system redeployment/system backup/partition backup/disk backup/disk clone.
Automatic 4K alignment Improve SSD performance
Support GPT and MBR Intelligently adapt to a partition format
Support NTFS and FAT32 Redeploy files in different file systems
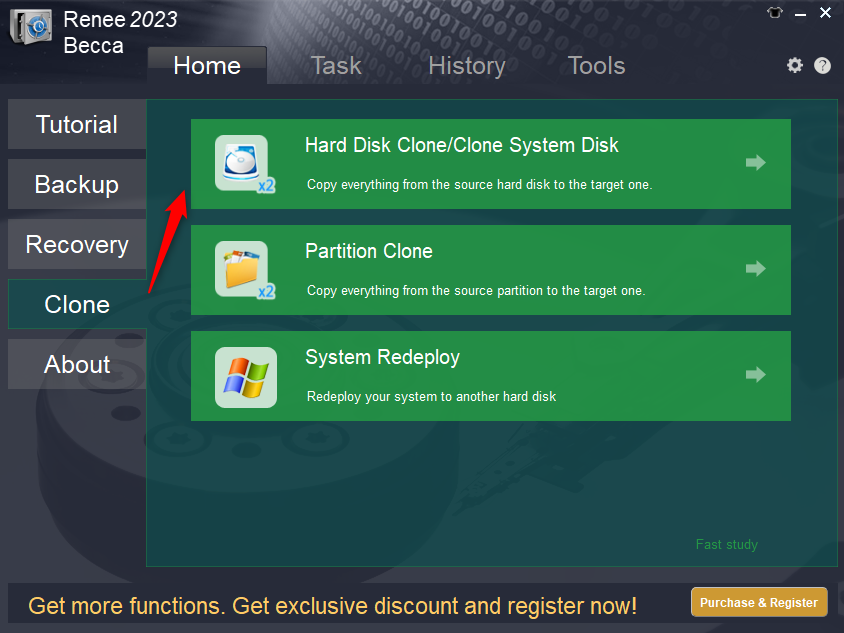
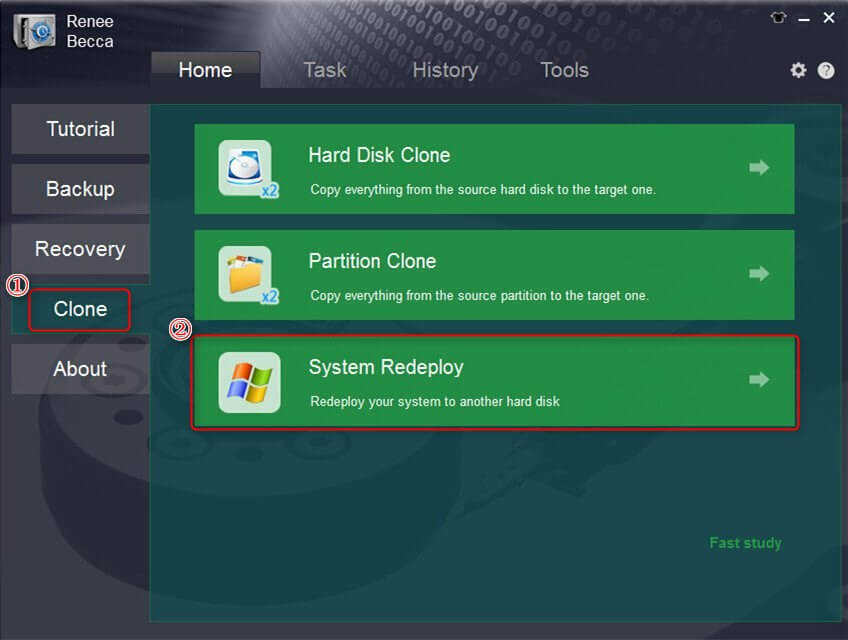
Step 1: Download and install Renee Becca on your PC/laptop.
Step 2: Use suitable functions to transfer your data and system.
| Function Name | Feature | Suitable For |
|---|---|---|
Hard Disk Clone/Clone System Disk | Creates an exact copy of the selected disk, supports adjusting partition size by moving the boundary with the mouse, and enables booting from the cloned disk. | Complete SSD Replacement |
System Redeploy | Migrates only the Windows system partition to another disk. | Dual-Drive Setup, HDD-to-SSD System Migration |
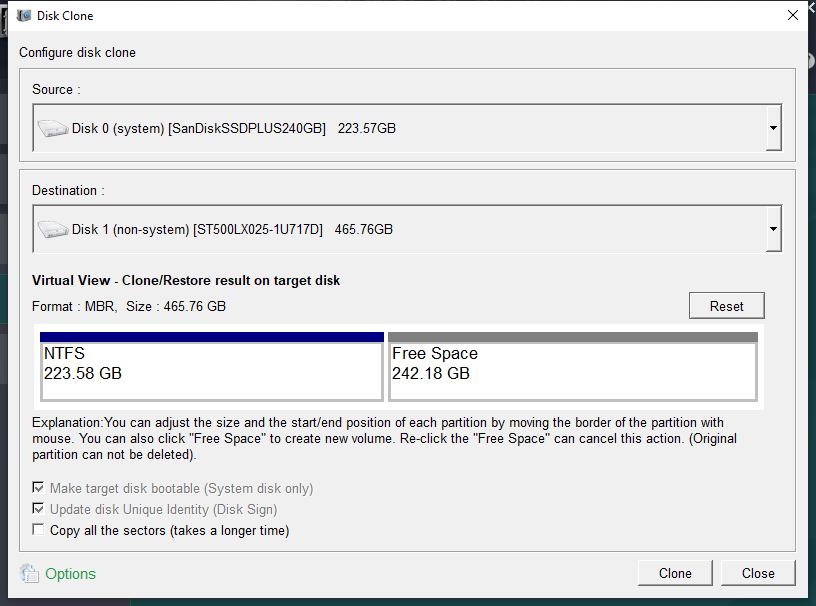

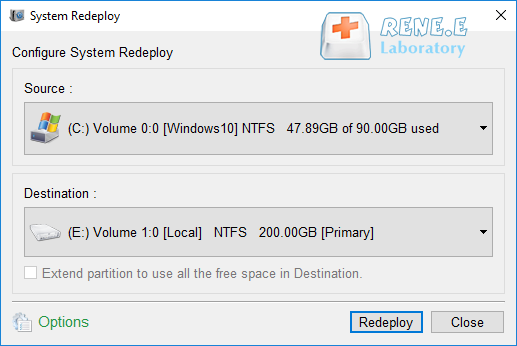
Step 3: Wait for the progress bar to reach 100% to indicate successful migration.
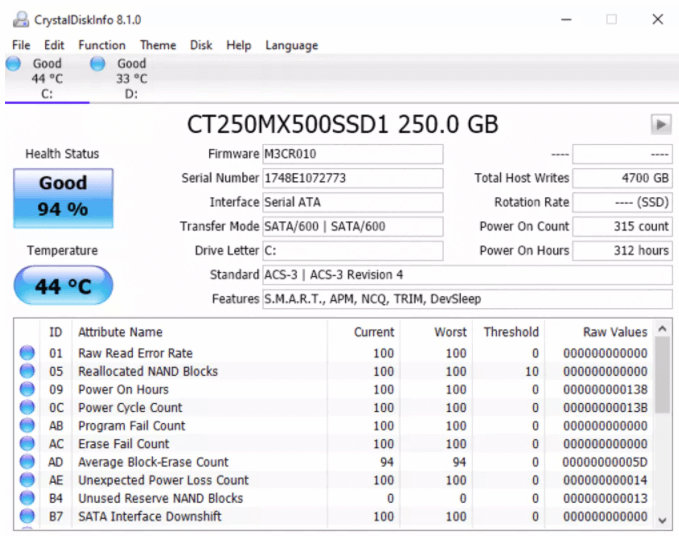
Step 4: Verify your new drive status with tools like CrystalDiskInfo.
Steps

Latest Notes (2025)
bootrec /fixmbr
bootrec /fixboot
bootrec /rebuildbcd
Heads‑Up
Automatic 4K alignment Improves SSD performance during system migration.
Support GPT and MBR Automatically adapt to the suitable partition format.
Support NTFS and FAT32 Redeploy various files in different file systems.
Back up quickly Back up files at up to 3,000MB/min.
Overall backup schedule Support system redeployment/system backup/partition backup/disk backup/disk clone.
Automatic 4K alignment Improve SSD performance
Support GPT and MBR Intelligently adapt to a partition format
Support NTFS and FAT32 Redeploy files in different file systems
1. Check for Disk Errors
chkdsk C: /f /r
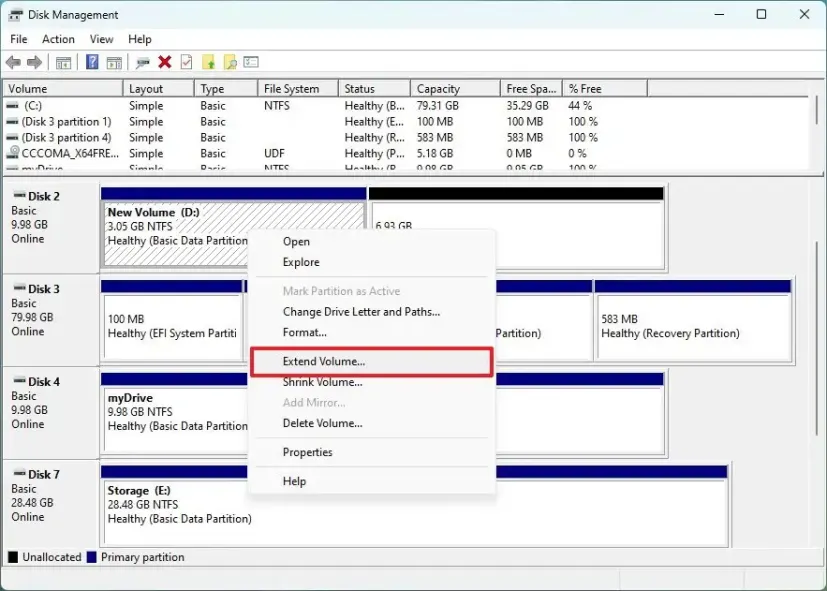
2. Verify and Adjust Partitions
- After cloning, open Disk Management (diskmgmt.msc) to confirm that all partitions were copied correctly.
- If the cloned drive shows unallocated space, right‑click the main partition (usually C:) and select Extend Volume to use the full capacity of the SSD.
- If partitions are misaligned, consider third‑party tools like MiniTool Partition Wizard or GParted to realign them for better SSD performance.
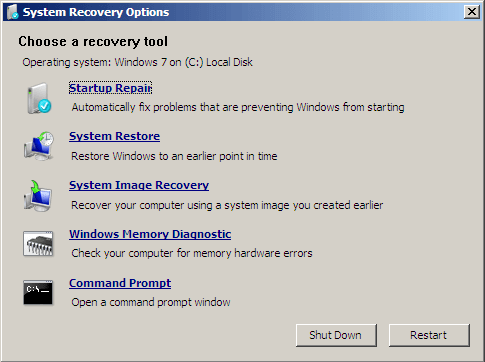
3. Fix Boot Configuration
bootrec /fixm
brbootrec /fix
bootbootrec /rebuildbcd
4. Enable AHCI Mode
5. Consider Drive Health
6. Confirm TRIM is active
fsutil behavior query DisableDeleteNotify
fsutil behavior set DisableDeleteNotify 0
Will cloning my HDD to SSD delete data on my original HDD?
How long does cloning HDD to SSD on Windows 7 take?
Can I clone to a smaller SSD than my HDD?
What if my cloned SSD doesn’t boot?
Can I use the cloned SSD in another computer?
Is cloning to SSD worth it on Windows 7 in 2025?
Automatic 4K alignment Improves SSD performance during system migration.
Support GPT and MBR Automatically adapt to the suitable partition format.
Support NTFS and FAT32 Redeploy various files in different file systems.
Back up quickly Back up files at up to 3,000MB/min.
Overall backup schedule Support system redeployment/system backup/partition backup/disk backup/disk clone.
Automatic 4K alignment Improve SSD performance
Support GPT and MBR Intelligently adapt to a partition format
Support NTFS and FAT32 Redeploy files in different file systems
Relate Links :
[2025] How to Clone Windows 10/11 to a Smaller SSD Without Reinstalling

28-08-2025
Ashley S. Miller : Learn how to clone Windows 10/11 to a smaller SSD step-by-step, keeping all your files and apps. This...
[2025] How to Clone Your SSD to a New One Without Reinstalling Windows
22-08-2025
Ashley S. Miller : Easily clone your entire system—Windows OS, files, and applications—to a new SSD without reinstalling or losing data. This...
Effortless OS Migration: Transfer Your Windows from One Samsung SSD to Another Without the Headache
13-08-2025
Ashley S. Miller : Learn how to transfer Windows from one Samsung SSD to another with confidence. This guide provides trusted, step-by-step...
How to Upgrade Your Dell XPS: Step-by-Step SSD Cloning Guide
29-07-2025
Amanda J. Brook : This expert guide shows how to perform a dell xps ssd clone upgrade, helping you transfer data safely...


User Comments
Leave a Comment