

How to Upgrade Your Dell XPS: Step-by-Step SSD Cloning Guide

Summary
This expert guide shows how to perform a dell xps ssd clone upgrade, helping you transfer data safely and efficiently to a new SSD while maintaining smooth laptop performance.

Table of contents
| Model(s) | Size | SSD Interface | SSD Slots | SSD Upgradeable | RAM Upgradeable | RAM Slots |
|---|---|---|---|---|---|---|
XPS 13 (9350, 9360, 9370) | 13.3" | M.2 SATA/NVMe | 1 | ✅ Yes | ❌ No (soldered) | 0 |
XPS 13 (9380, 7390, 9300–9315) | 13.4" | M.2 NVMe | 1 | ✅ Yes | ❌ No (soldered) | 0 |
XPS 13 Plus (9320, 9340) | 13.4" | M.2 NVMe Gen 4 | 1 | ✅ Yes | ❌ No (soldered) | 0 |
XPS 15 (9550, 9560, 9570) | 15.6" | M.2 NVMe | 1 | ✅ Yes | ✅ Yes | 2 |
XPS 15 (9500, 9510, 9520, 9530) | 15.6" | M.2 NVMe Gen 3 | 1 | ✅ Yes | ✅ Yes | 2 |
XPS 16 (9640) | 16.3" | M.2 NVMe Gen 4 | 1 | ✅ Yes | ❌ No (soldered) | 0 |
XPS 17 (9700, 9710, 9720, 9730) | 17.0" | M.2 NVMe Gen 3 | 2 | ✅ Yes (dual) | ✅ Yes | 2 |
Notes & Tips

1. Choose a Compatible SSD for Your Dell XPS Laptop
2. Back Up Your Old SSD to Prevent Data Loss
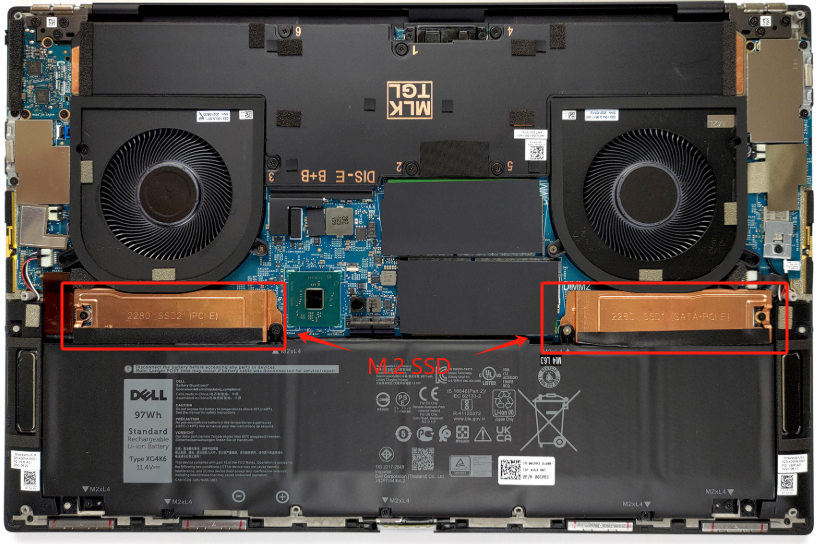
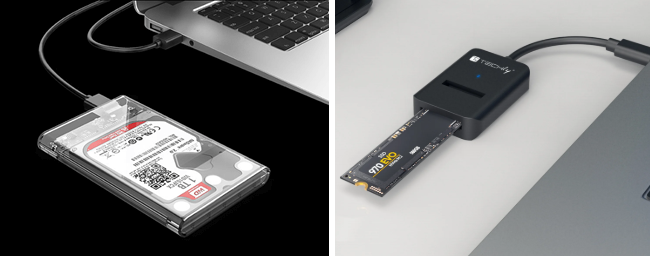
3. Gather Tools to Access Your Laptop
4. Install the New SSD

5. Format the New SSD (Optional)

Automatic 4K alignment Improves SSD performance during system migration.
Support GPT and MBR Automatically adapt to the suitable partition format.
Support NTFS and FAT32 Redeploy various files in different file systems.
Back up quickly Back up files at up to 3,000MB/min.
Overall backup schedule Support system redeployment/system backup/partition backup/disk backup/disk clone.
Automatic 4K alignment Improve SSD performance
Support GPT and MBR Intelligently adapt to a partition format
Support NTFS and FAT32 Redeploy files in different file systems
- Full System Migration: Clone your entire SSD—OS, apps, and files—to the new drive effortlessly.
- Flexible Options: Clone the whole disk or just the system partition, depending on your needs.
- Customizable Layouts: Resize partitions with a drag-and-drop interface to match your new SSD’s capacity.
- Broad Compatibility: Works with SSDs and HDDs from brands like Samsung, WD, Crucial, and more.
- Thorough Cloning: Copies every sector, including hidden areas that might hold important data.
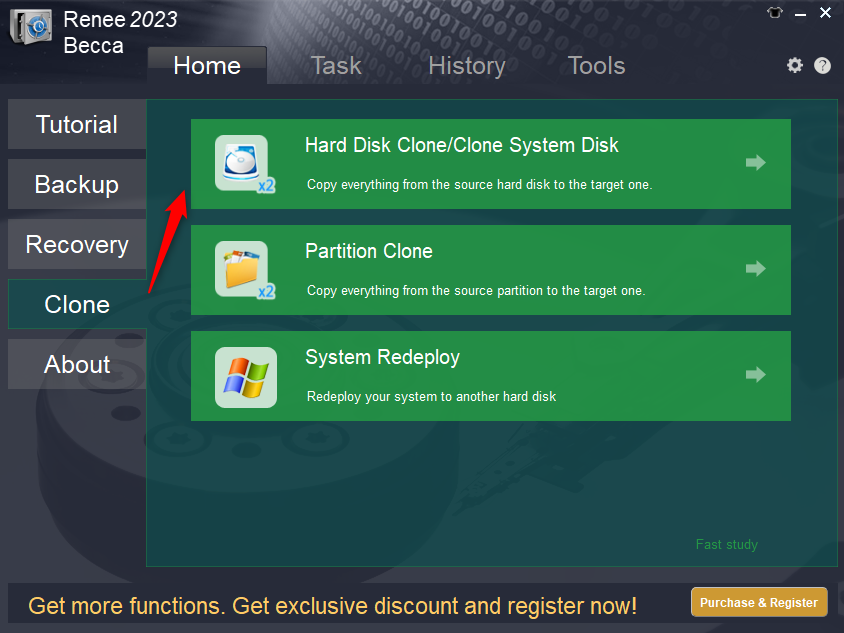
Step 1: Download and Install Renee Becca
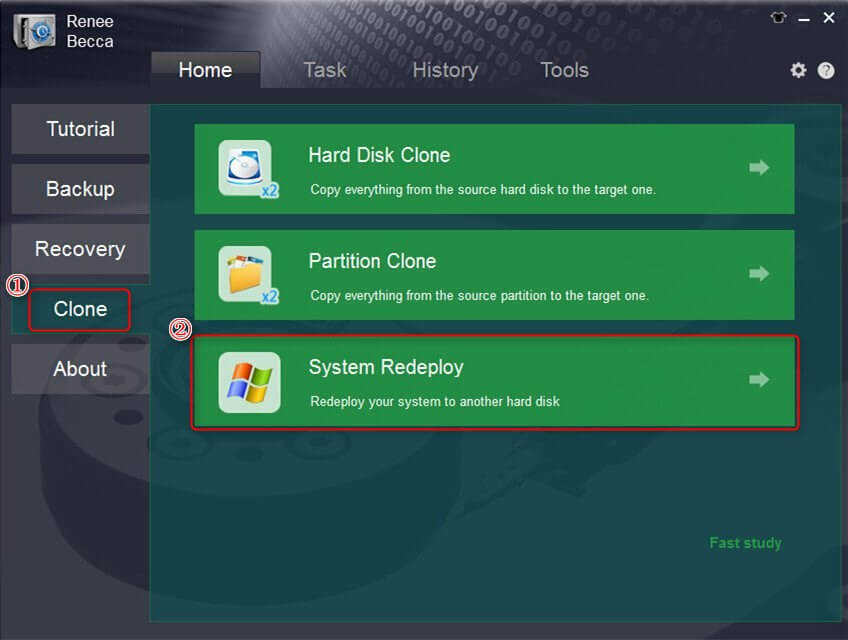
Step 2: Choose the Right Cloning Function
| Function Name | Feature | Suitable For |
|---|---|---|
Hard Disk Clone/Clone System Disk | Copies the entire SSD, including all partitions, with adjustable sizes. | Full SSD replacement |
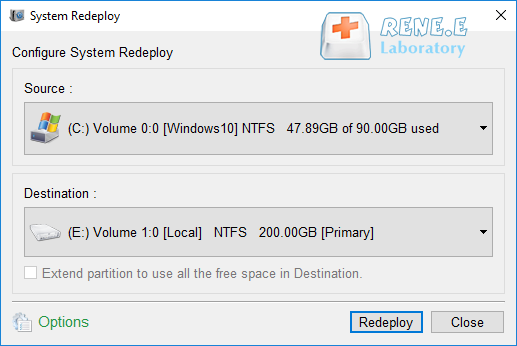
System Redeploy | Moves only the Windows system partition to the new SSD. | Dual-drive setups or system-only upgrades |
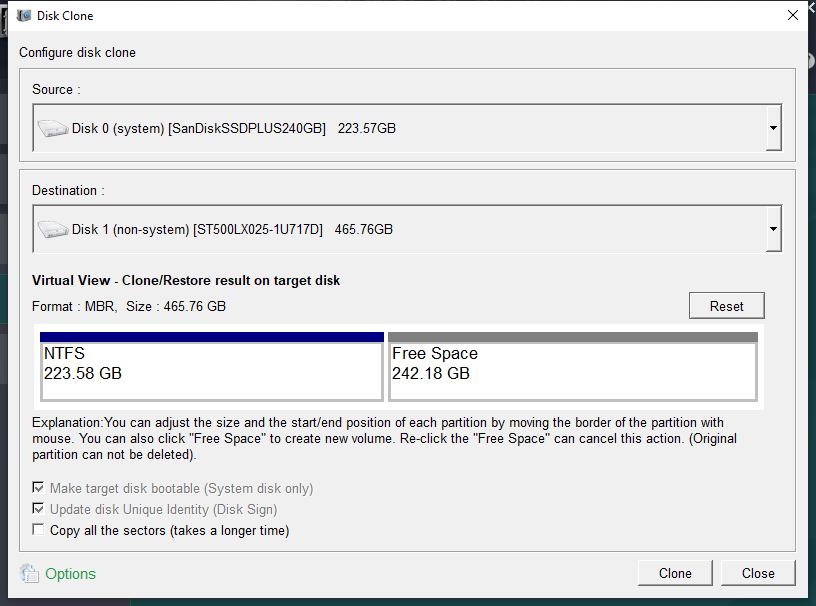

Step 3: Monitor the Cloning Process
Step 4: Verify the New SSD
Automatic 4K alignment Improves SSD performance during system migration.
Support GPT and MBR Automatically adapt to the suitable partition format.
Support NTFS and FAT32 Redeploy various files in different file systems.
Back up quickly Back up files at up to 3,000MB/min.
Overall backup schedule Support system redeployment/system backup/partition backup/disk backup/disk clone.
Automatic 4K alignment Improve SSD performance
Support GPT and MBR Intelligently adapt to a partition format
Support NTFS and FAT32 Redeploy files in different file systems
- The primary drive must boot into Windows.
- The new SSD needs more capacity than the old one.
- Disable BitLocker (check Dell’s guide for steps).
- Keep your laptop plugged into power throughout.
- If it shuts down mid-process, restart from scratch.


Automatic 4K alignment Improves SSD performance during system migration.
Support GPT and MBR Automatically adapt to the suitable partition format.
Support NTFS and FAT32 Redeploy various files in different file systems.
Back up quickly Back up files at up to 3,000MB/min.
Overall backup schedule Support system redeployment/system backup/partition backup/disk backup/disk clone.
Automatic 4K alignment Improve SSD performance
Support GPT and MBR Intelligently adapt to a partition format
Support NTFS and FAT32 Redeploy files in different file systems
How do I know if my new SSD is compatible with my Dell XPS for a clone upgrade?
Will cloning my Dell XPS SSD improve my laptop’s performance?
What happens if my Dell XPS SSD clone upgrade fails midway?
Do I need a mounting adapter for my new SSD in a Dell XPS?
Can I clone my Dell XPS SSD to a smaller drive?
How long does a Dell XPS SSD clone upgrade take?
Will cloning my Dell XPS SSD void my warranty?
Automatic 4K alignment Improves SSD performance during system migration.
Support GPT and MBR Automatically adapt to the suitable partition format.
Support NTFS and FAT32 Redeploy various files in different file systems.
Back up quickly Back up files at up to 3,000MB/min.
Overall backup schedule Support system redeployment/system backup/partition backup/disk backup/disk clone.
Automatic 4K alignment Improve SSD performance
Support GPT and MBR Intelligently adapt to a partition format
Support NTFS and FAT32 Redeploy files in different file systems
Relate Links :
Boost Performance: Upgrading the SSD in Your Samsung Galaxy Book 2

26-07-2025
John Weaver : This guide breaks down everything you need to know about upgrading your Galaxy Book 2 SSD—covering compatibility checks,...
Step-by-Step Guide: How to Clone Windows to a Smaller SSD Effortlessly
17-07-2025
John Weaver : Learn how to clone Windows to a smaller SSD with this step-by-step guide. Perfect for users in the...
Ultimate Lenovo Legion SSD Upgrade Guide 2025: Maximize Your Gaming Speed
06-07-2025
Amanda J. Brook : This Lenovo Legion SSD upgrade guide for 2025 breaks down the process of expanding storage and boosting speed,...
SSD Caching Explained: The Key to Lightning-Fast Performance

03-07-2025
Ashley S. Miller : SSD caching mechanisms are transforming system performance by using fast storage to accelerate data access, vital for modern...


User Comments
Leave a Comment