author avatar
    Specialist of Customer Service Dept.
 

Summary
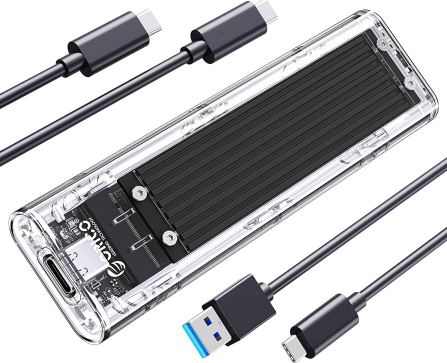
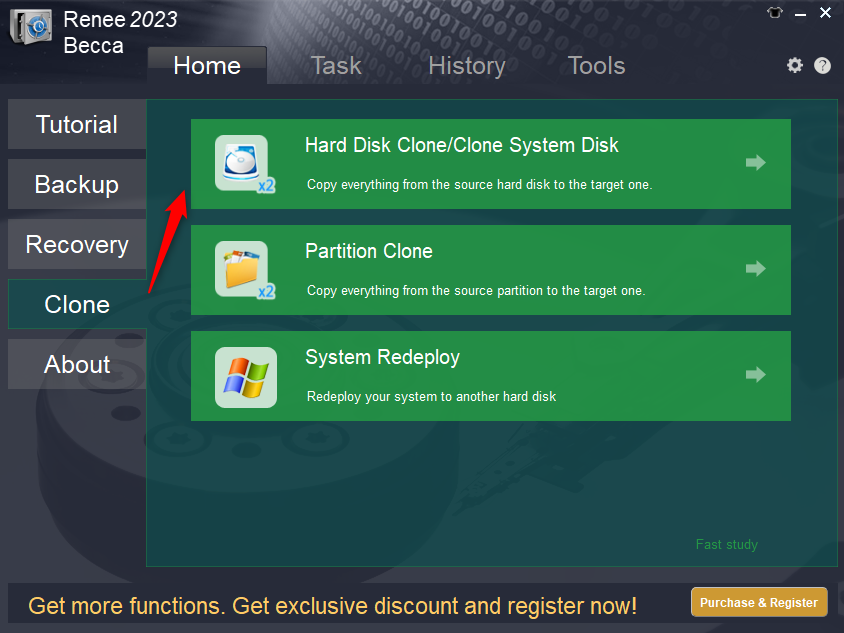
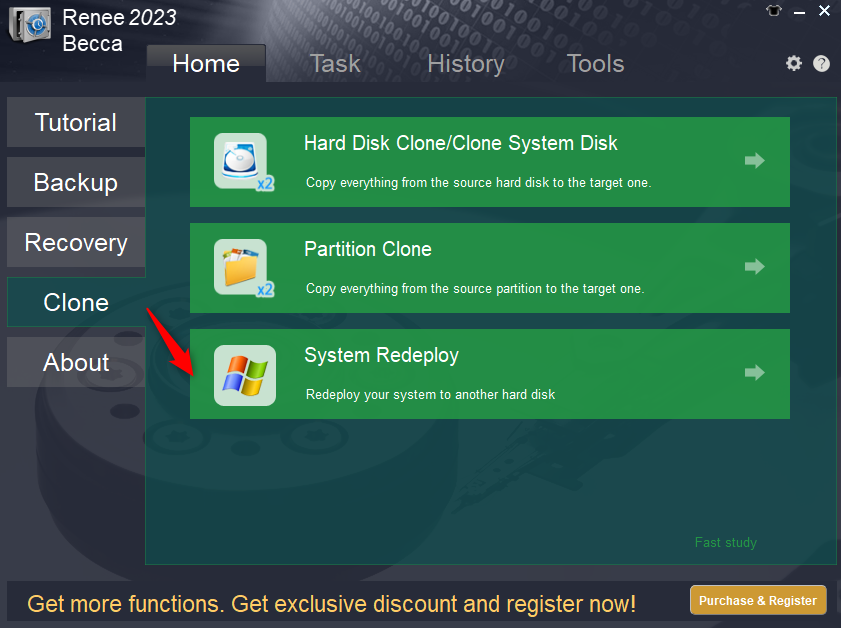
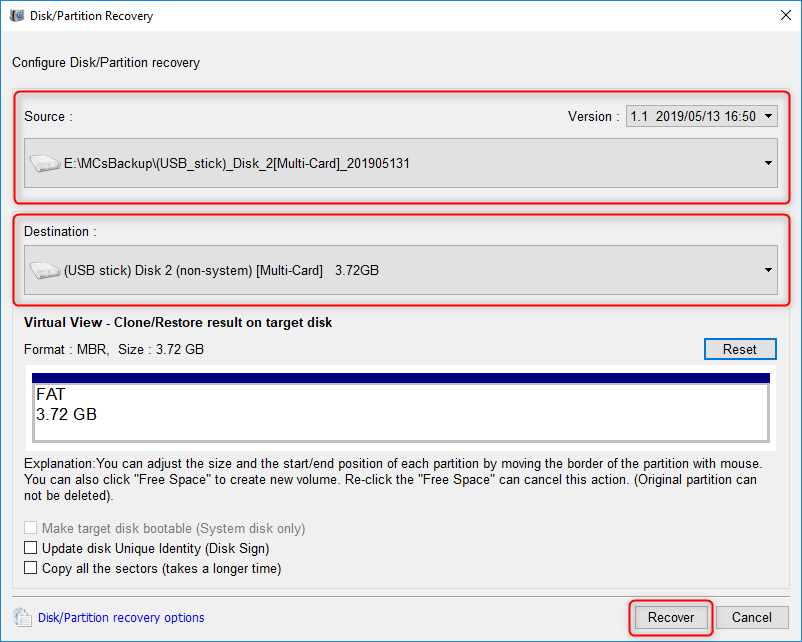
This article details how to utilize an external adapter and cloning tool to achieve M2 PCIe SSD data migration when there is only one M.2 slot. The steps are simple and straightforward, helping you to easily complete seamless cloning of SSDs.


In modern computer use, Solid State Drives (SSDs) have become the storage device of choice for many users due to their extremely fast read and write speeds. In particular, SSDs with M2 interface are popular among users for their smaller size and faster transfer rates. However, when you need to replace or upgrade your M2 SSD, data migration becomes an important issue. In this article, we will introduce you an easy method to help you easily clone the data of M2 SSD to ensure data integrity and system stability.
Speed of different SSDs

Step 1: Preparation

Before performing any operation involving data migration, it is vital to make adequate preparations. Below are the detailed preparation steps to ensure that the entire process goes smoothly.
Step 1: Back up important data ( optional ).
First, we need to back up the important data in the current M2 SSD. You can use an external hard drive, cloud storage or other storage devices for backup. When backing up, you can choose to copy files manually or use professional backup software. For example, using tools such as Acronis True Image, Renee Becca or Macrium Reflect , you can complete the backup operation quickly and effectively. Backing up data is to prevent accidental data loss that may occur during the cloning process.
Step 2: Make sure there is adequate power supply.
It is very important to maintain a constant power supply during the cloning process of the M2 SSD. It is recommended that you plug in the power adapter when performing the operation on a laptop; if you are doing it on a desktop computer, make sure the power cord is firmly connected and the power supply is working properly. A power failure or unstable power supply may cause the cloning process to fail or even damage the data.
Laptop Charging
After completing the above preparations, you can proceed to the next step. Next, refer to ” Step 2: Connect the new M.2 SSD to your computer using an external M.2 to USB adapter.” to learn how to connect the new M2 SSD to your computer to prepare for cloning.

Step 2: Connect the new M.2 SSD to the computer using an external M.2 to USB adapter

Prepare the adapter and hard disk
First, you’ll need an external M.2 to USB adapter . This adapter will connect your new M.2 SSD to your computer’s USB port so that it will be recognized as an external storage device. Prepare your new M.2 SSD and the adapter, then insert the SSD into the adapter. Make sure the SSD has good contact with the adapter to avoid connection issues.
External M.2 to USB Adapter
Connect to a computer
Connect the M.2 SSD to the computer via a USB cable. During this process, please make sure that the computer’s USB port is working properly to ensure that the adapter and SSD can be correctly recognized.
Open Disk Manager
After connecting, open the Windows built-in disk manager to confirm whether the computer recognizes the new M.2 solid-state drive . You can open the disk manager by following the steps below:
Press Win + X keys and select Disk Management . You will see a window showing all connected storage devices.
windows disk management right click start
Confirm SSD recognition status
In Disk Manager, locate the new M.2 SSD (it will usually appear as Disk 1 or another unassigned disk). If the new M.2 SSD is correctly identified, you will see it in the list. If not, check that it is properly connected and make sure that both the USB adapter and the SSD are working properly.
unallocated disk
If the connection is still unsuccessful, you can try to enter the BIOS to check the settings. Make sure the option about CSM (Compatibility Support Module) in the BIOS is enabled. You can follow the steps below:
1. After the computer is turned on, press the Delete key on the keyboard to enter the BIOS EZ Mode setting page.
2. Find the CSM option in BIOS and set it to Enabled .
3. Press F10 to save the BIOS options, click OK and restart the computer to confirm whether the hard disk or solid state drive is recognized.
TipsEnsure that the SSD makes good contact with the adapter to avoid connection problems.

Step 3: Download and install a hard disk cloning utility, such as Renee Becca, and make a clone

Step 1: Download and install the Renee Becca hard drive cloning tool. First, visit Renee Becca’s official website, find the installation package that suits your operating system, and click the Download button. After the download is complete, double-click the installation package file and follow the on-screen prompts to complete the installation process.
Hot Topic - ADsRenee Becca – Safe and Quick System Migration to SSD

Automatic 4K alignment Improves SSD performance during system migration.

Support GPT and MBR Automatically adapt to the suitable partition format.

Support NTFS and FAT32 Redeploy various files in different file systems.

Back up quickly Back up files at up to 3,000MB/min.

Overall backup schedule Support system redeployment/system backup/partition backup/disk backup/disk clone.

Automatic 4K alignment Improve SSD performance

Support GPT and MBR Intelligently adapt to a partition format

Support NTFS and FAT32 Redeploy files in different file systems

Free TrialFree TrialNow 2000 people have downloaded!
Step 2: Launch Renee Becca and select the Clone function. After the installation is complete, double-click the Renee Becca icon on the desktop to launch the software. In the main interface, click the Clone function and then select [Hard Disk Clone/Clone System Disk] to copy all the data from the old hard drive to the new M.2 SSD.
renee becca disk clone
If your M.2 SSD is too small to accommodate only the system partition, please select [System Migration].
becca system redeploy
Step 3: Select the source and destination disks. In the Disk Clone interface, first select the old hard drive as the Source Disk , and then select the new M.2 SSD as the Destination Disk . Make sure there is no important data on the destination disk, as the cloning process will overwrite everything on it.
clone data to the target place
Step 4: Start the cloning process. After confirming that the selection is correct, click the Start Clone button. At this time, Renee Becca will pop up a confirmation window, please confirm the source disk and the target disk again. After confirming that they are correct, click Confirm , and then the software will start cloning data. The time of the cloning process will vary depending on the size of the data and the speed of the hard disk, please be patient.
Step 5: Cloning is complete and verified. After the cloning process is finished, Renee Becca will prompt that the cloning is complete. At this point, you can verify whether the cloning was successful by reconnecting the new M.2 SSD and checking its data. Open the File Explorer to check whether the data in the new M.2 SSD is exactly the same as the old one.
At this point, you have completed the steps to clone your hard disk via Renee Becca. Next, please continue to “Step 4: Replace the new M.2 SSD, and setup BIOS to boot from M.2″ to complete the entire M.2 SSD replacement and boot setup process.
TipsMake sure that there is no important data on the target disk, because the cloning process overwrites everything on it.

Step 4: Replace the new M.2 SSD, and setup BIOS to boot from M.2

Step 1: Turn off the computer and disconnect it from the power source. Before proceeding, make sure the computer is completely turned off and disconnected from all power sources.
Step 2: Disassemble the computer case. Depending on your computer model, use the appropriate tools (such as a screwdriver) to open the case and locate the old M.2 SSD .
Step 3: Remove the old M.2 SSD . Carefully unplug the old M.2 SSD , taking care not to touch other hardware devices.
Step 4: Install the new M.2 SSD . Install the new M.2 SSD with cloned data into the corresponding slot and make sure it is firmly connected.
Installing an m.2 Solid State Drive
Step 5: Reassemble the computer and power on the computer. Replace the computer case, plug in the power cord and power on the computer.
Step 6: Enter BIOS or UEFI settings. When starting the computer, repeatedly press the corresponding key (such as F2 , F10 , F12 , ESC , DEL , etc.) to enter the BIOS or UEFI settings. For specific entry methods, please refer to the computer motherboard model description.
Step 7: Set the BIOS to boot from the new M.2 SSD . In the BIOS or UEFI interface, find the Boot option and set the new M.2 SSD as the first boot item. Save the changes and exit the BIOS .
Step 8: Verify the boot. After the computer restarts, check whether it can successfully boot from the new M.2 SSD . If it can boot normally and enter the system, it means the replacement is successful.

reach a verdict

With this easy guide, we detail how to successfully clone data from an existing M.2 PCIe SSD to a new M.2 SSD when there is only one M.2 slot.Firstly, preparations need to be made, including backing up important data and providing sufficient power. Next, connect the new M.2 SSD to your computer using an external M.2 to USB adapter. Then, download and install a hard disk cloning tool, such as Renee Becca, to clone your data. Finally, replace the new M.2 SSD and set up booting from the new M.2 in BIOS. By following these steps, you can easily complete your data migration for a seamless transition.