author avatar
    Specialist of Customer Service Dept.
 

Summary
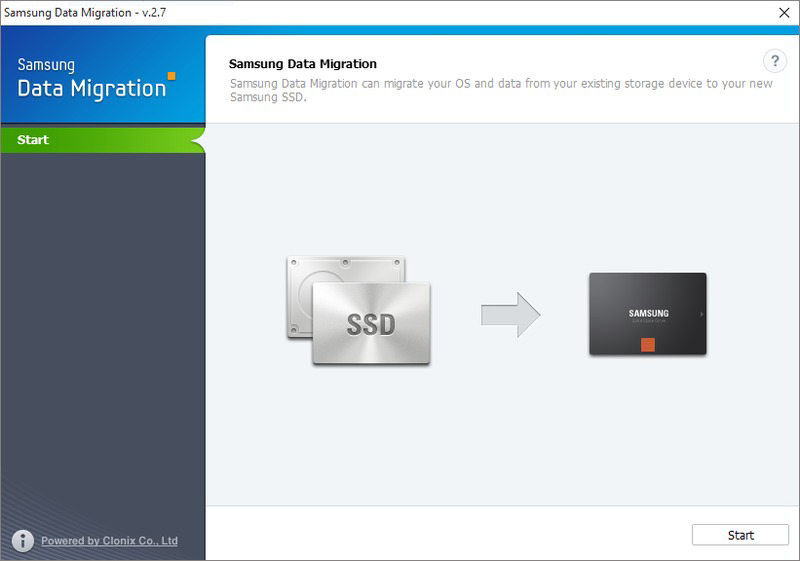
Learn how to seamlessly migrate your data from one Samsung SSD to another with this comprehensive guide. We compare Samsung Data Migration with other top cloning software and offer solutions for common issues. Maximize your efficiency and performance with these expert tips.


Upgrade your computer’s storage effortlessly with Samsung Data Migration from one SSD to another. This guide simplifies the installation, covering Windows cleanup tools, UEFI settings, and switching from IDE to AHCI in BIOS, ensuring a smooth SSD upgrade.

Detailed Explanation of SSD Migration Preparation

When you’re ready to boost your computer’s storage capabilities, Samsung’s Data Migration from one SSD to another offers a straightforward solution. It’s designed to streamline the transfer of your data to a new solid-state drive, simplifying the upgrade process and enhancing your system’s performance.
At first glance, the preparation for SSD migration(preparation for SSD migration Windows 7) might appear overwhelming, particularly if you’re not well-versed in the intricacies of computer components. Fear not—we’re here to demystify the process with clear, step-by-step guidance that will prepare you for a successful data transfer.

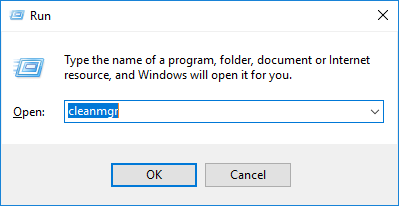
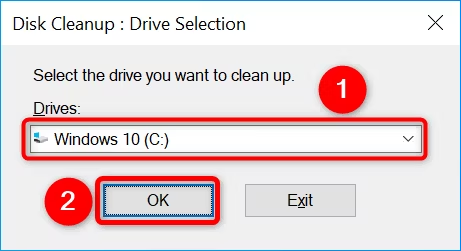
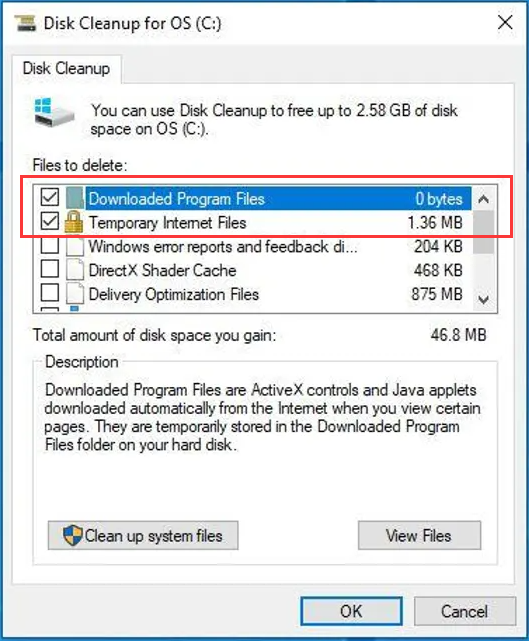
Using Windows Built-In Cleanup Tools

As a preliminary step, when using the Samsung data migration software to clone a disk, it is beneficial to remove unnecessary data from the source hard drive.
(1) The Disk Cleanup utility is a convenient built-in tool for this purpose.
To perform an efficient cleanup prior to disk cloning, first click Windows Key + R, type Cleanmgr.exe and click OK.
press win and r button
type cleanmgr in the run
disk cleanup drive selection
It provides an option to select files for deletion, including system files, by clicking “Clean up system files,” thereby streamlining the data migration process by reducing the volume of data to be cloned.
Select Temporary Files in Disk Cleanup
(2) Deep Cleaning with DISM
Tips:Before executing the DISM command, it is crucial to ensure that all your important files are backed up safely, as this process has the potential to erase critical data.
For more thorough cleaning, especially with regards to the WinSxS folder, the Deployment Image Servicing and Management (DISM) tool comes into play. Commands such as:
The WinSxS (Windows Side-by-Side) folder, located on the system drive (usually the C drive), stores backup files after Windows operating system updates and patches. Its purpose is to ensure system stability and compatibility. This folder contains files used for enabling or disabling Windows features, switching Windows versions, recovering damaged or missing system files, and nearly all other essential components of the operating system. However, please note that most of these files can be safely deleted.

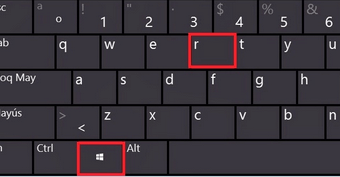
dism /Online /Cleanup-Image /SPSuperseded

and

dism /Online /Cleanup-Image /StartComponentCleanup

This two command can be executed to reduce the storage footprint, resulting in a faster and more efficient migration to your Samsung SSD.

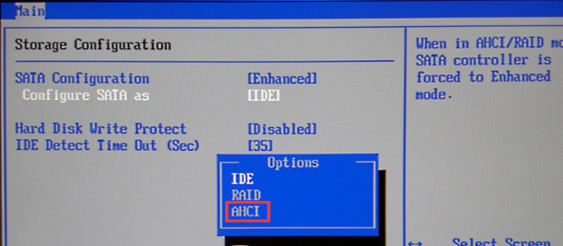
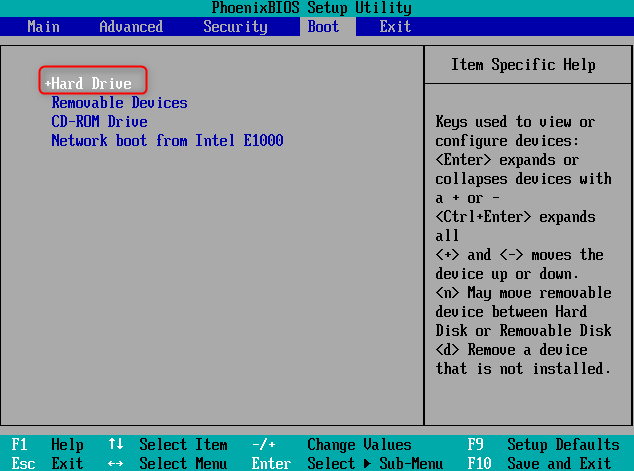
Change IDE mode to AHCI

In order for your new SSD to function properly, you may need to make changes to the IDE mode in BIOS. By switching to AHCI mode, you will ensure that your new SSD is recognized and utilized by your computer. This step is crucial, so be sure to follow your computer’s manual for specific instructions on how to make this change.
BIOS configure Sata To AHCI
Next, you can refer to the subsequent chapters for an overview of Samsung Data Migration and learn how to use it to migrate data from SSD to SSD. This software is specifically designed for Samsung SSDs and makes the migration process simple and efficient.

Overview of Samsung Data Migration

Samsung Data Migration (SDM) is a specialized tool developed by Samsung Electronics to streamline the process of transferring data from one storage device to another, specifically from an older Solid State Drive (SSD) to a new Samsung SSD. This software is particularly useful for users looking to upgrade their storage to a faster and more reliable Samsung SSD, which can lead to enhanced system performance and quicker boot times. SDM supports a variety of Windows operating systems, including Windows 7, Windows 8, Windows 10, and Windows 11, and is compatible with Samsung SSDs from the 800 series onwards.
Overview of Samsung Data Migration and how to use it to migrate data from SSD to SSD
Download address: https://semiconductor.samsung.com/consumer-storage/support/tools/
Limited Compatibility
Samsung Data Migration software, specifically tailored for Samsung SSD Series products such as the 980, 970, 960, 950, 870, 860 series, etc., is primarily designed to facilitate easy data transfer to a Samsung SSD. Its functionality is optimized for cloning system disks that contain the OS to Samsung-branded SSDs. Consequently, when it comes to cloning to SSDs from other manufacturers, users will find that the software does not recognize these non-Samsung SSDs, resulting in migration failure or undetected drives.
Tips:Make sure to check the compatibility of your current SSD with the Samsung Data Migration software before attempting to transfer data. If Samsung Data Migration does not support your SSD, please try to use Renee Becca instead.

Samsung Data Migration alternative - Renee Becca

Renee Becca is specially designed to help computer users to clone disk and migrate system. Renee Becca can not only to clone disk (including system)/partitions, but also supports to migrate system to other disk/partitions perfectly.
Besides, Renee Becca is also reliable on data backup and restore. It can backup and restore disks,system, partitions, folders and even files. It can perfectly clone system/partition/disk to new one, make the 4K Alignment automatically when migrating system. Help you get the best performance of SSD, migrate system with MBR/GPT partition table and migrate system with FAT/NTFS file system.
Step 1: Download and Install Renee Becca
Start by downloading Renee Becca from the official website and install it on your computer.
Renee Becca - Reliable Data Backup & Restore Software

Quick Backup files at up to 3,000MB/min.

Fullfill different backup needs Supports system backup, disk / partition backup, file backup and disk clone.

Intelligent Automatically analyze the differences between source and backup data.

Convenient Support VSS, allowing to freely view webpages when backing up system.

Highly compatible Supports various files and storage devices.

Quick Backup files at up to 3,000MB/min.

Fullfill different backup needs Backup for disk, partition and system. Save disk space by backing up incremental /differential data.

Highly compatible Supports various files and storage devices.

Free TrialFree Trial 2000 users have downloaded and enjoy Renee Becca!
Step 2: Choose the clone function
Then, open Renee Becca. Select [Clone] – [Hard Disk Clone/Clone System Disk]. You can use the external enclosure and the data reader to connect the new hard disk to the computer when the new hard disk is not installed in the computer.
renee becca disk clone
Step 3: Select the source and target disk
Next, select the source disk and the destination disk. Drag to adjust the size of each partition. If you clone the system disk, you can check the option [Make target disk bootable (System disk only)]. Finally, click on [Clone] to clone the data to the Samsung new hard disk.
clone data to the target place
Step 4: Modify the boot order
After cloning process completes, select the SSD as the first boot option via BIOS settings next time when the PC boots. After you go into BIOS, use the arrow key to choose the “Boot” tap and select the SSD as the first boot option. Then, press F10 to save the settings. Then restart your PC.
boot order
After computer boots from new hard disk successfully, format the original system disk to make use of the disk space. Or you can remove the HDD after the PC shuts down. Start the PC from the new hard disk and reconnect the original hard disk to PC for system disk formatting.
Pros:
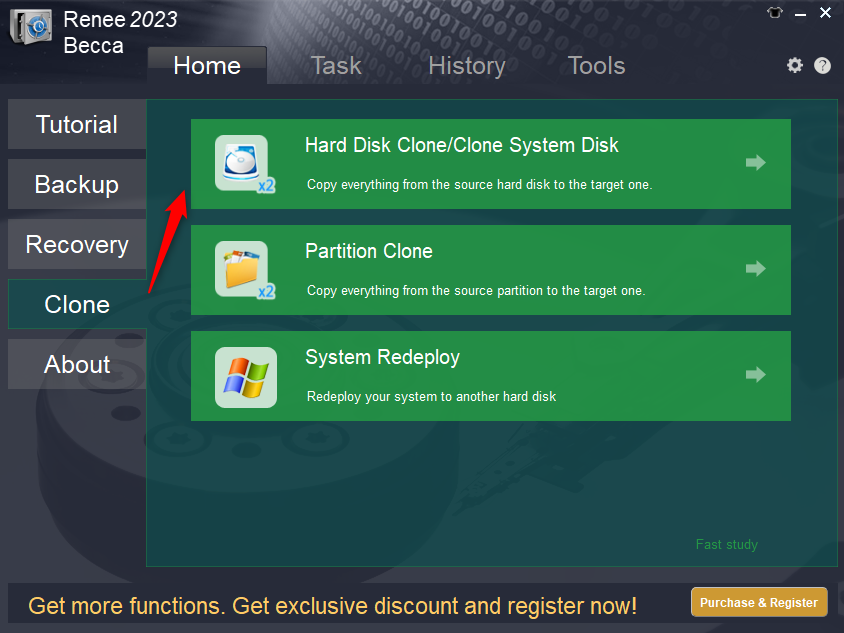
  • Provides a reliable alternative to clone HDD to SSD
  • Offers an intuitive interface and step-by-step instructions
  • Simplifies the process of cloning a hard disk

Cons:

  • Requires downloading and installing third-party software
  • Need to purchase a license code.

The Essential Guide to Check the migration result

After successfully cloning your SSD, the next crucial step is setting up your new Samsung SSD as the primary boot drive to ensure faster speed and improved performance. This can be achieved through the Drive Health Check, Information Check & Update, and instructions to boot from the new Samsung SSD post-migration. Follow the steps below to complete this process:
Step 1: Drive Health Check
To ensure the health of your new Samsung SSD, it is recommended to perform a drive health check. This will help detect any potential issues and allow you to take necessary precautions. To do this, simply launch the Samsung Data Migration software and click on the “Drive Health Check” tab. This will run a diagnostic scan and provide a report on the overall health of your SSD.
SAMSUMG SSD health check
Besides using “Drive Health Check” in samsung data migration, you may also try to use CrystalDiskInfo to check the health of your samsung SSD.
how to check ssd health with crystaldiskinfo
Step 2: Booting from Samsung SSD
Finally, to set your new Samsung SSD as the primary boot drive, you will need to enter your computer’s BIOS settings. This can usually be done by pressing a specific key during startup, depending on your computer’s manufacturer. Once in the BIOS settings, navigate to the “Boot” menu and change the boot priority to select your Samsung SSD as the first boot device. Save the changes and exit the BIOS.
Congratulations, you have successfully set up your new Samsung SSD as the primary boot drive!
For more detailed instructions and screenshots, please refer to the “Samsung laptop SSD upgrade kit” on the Samsung website.

Conclusion

Migrating data between Samsung SSDs requires evaluating software like Samsung Data Migration and alternatives like Renee Becca, focusing on cloning capabilities and SSD alignment. Hardware factors, including encrypted drive support and performance benchmarks, are also vital. During installation, correct UEFI settings and switching from IDE to AHCI mode in BIOS are necessary. Post-migration, it’s crucial to conduct drive health checks, update information, and boot from the new Samsung SSD to ensure a smooth transition. A methodical troubleshooting process is key for effective data transfer.