author avatar
    Senior Program Developer
 

Summary
Looking to upgrade your computer's storage with a new SSD? Learn how to easily clone your operating system to your new SSD without the need for a clean installation. This comprehensive guide covers everything you need to know about cloning your OS to an SSD on Windows 10, including troubleshooting tips and different methods to suit your needs.


The process of cloning your operating system (OS) to a solid-state drive (SSD) can greatly improve the performance and speed of your computer. This is especially true for Windows 10 users, as the latest version of the operating system is optimized for SSDs. However, before diving into the cloning process, it is important to adequately prepare and ensure that all necessary tools and software are available. This chapter will guide you through the necessary steps to successfully clone your OS to an SSD and provide recommendations for the essential tools and software you will need. With the help of this chapter, you will be well-equipped to make the transition to a faster and more efficient system.

Preparing for the Cloning Process

Before beginning the cloning process, it is crucial to ensure that you have all the necessary tools, equipment, and software ready. This will not only make the process smoother and more efficient but also reduce the risk of encountering any unexpected issues.
Step 1: Gather the Necessary Tools and Equipment
The first step in preparing for the cloning process is to gather all the necessary tools and equipment. This includes:
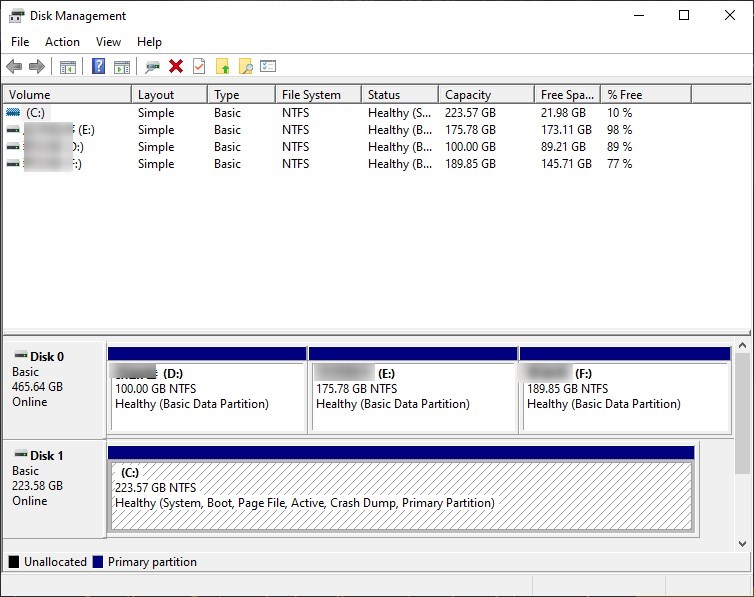
  1. Smaller SSD: Choose a suitable SSD with enough capacity to accommodate your data. It should also be compatible with your computer’s interface and have good performance and reliability ratings. Firsttly, ensure that the SSD has enough storage space to accommodate the cloned OS. If not, consider upgrading to a larger SSD or removing unnecessary files from the original hard drive before cloning.
  2. Compatibility issues: It is also important to ensure that all necessary drivers and software are updated and compatible with the new hardware.
  3. Screwdriver: Depending on your computer’s design, you may need a screwdriver to access the hard drive and SSD bays. Make sure to have the appropriate type of screwdriver on hand.
  4. SATA cables and power cables: These cables are essential for connecting the SSD to your computer’s motherboard and power supply. Have spare cables or purchase them beforehand.
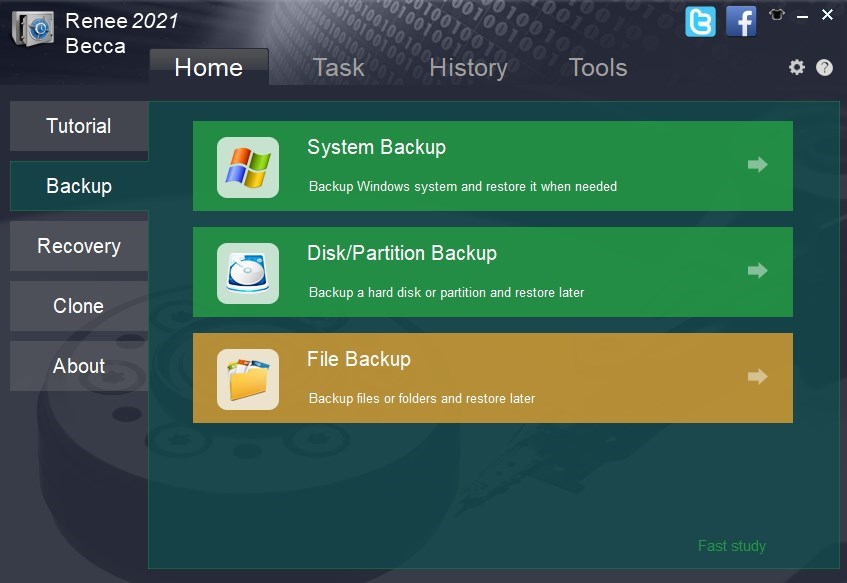
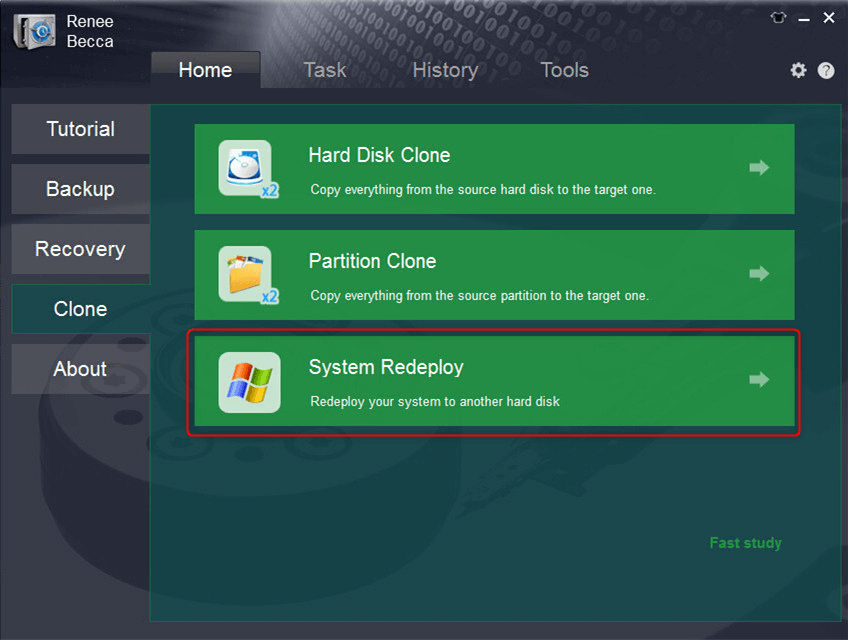
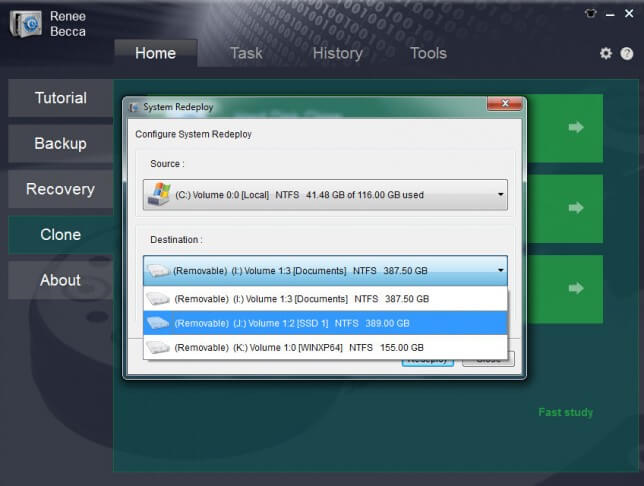
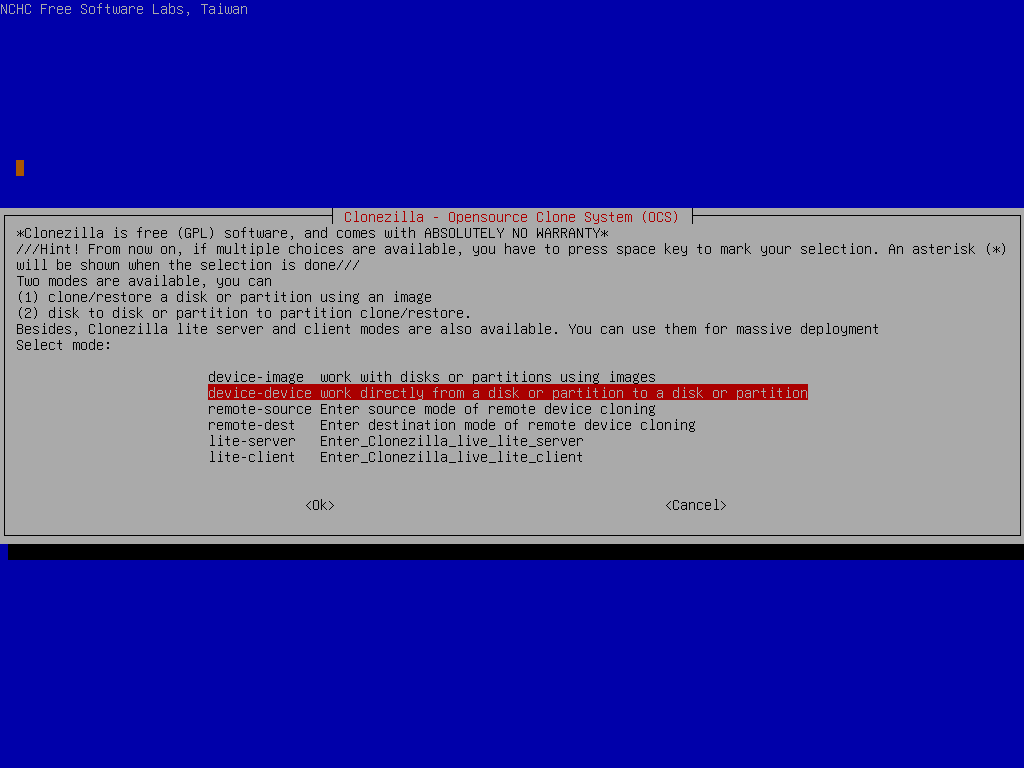
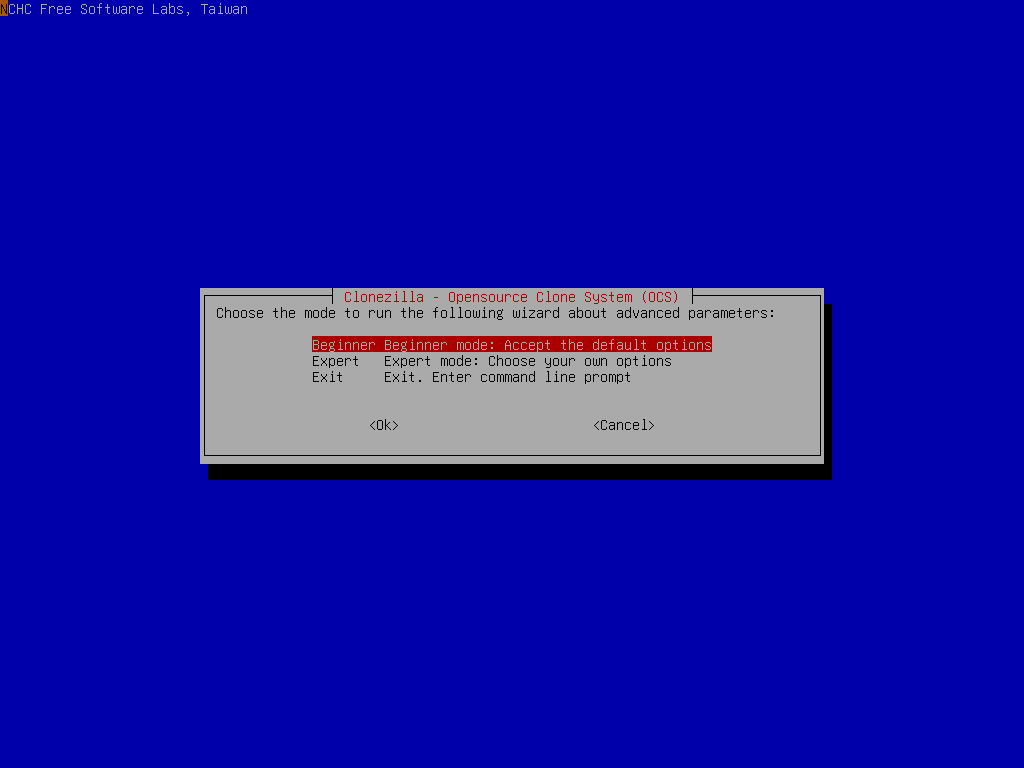
  5. Cloning software: Select a reliable cloning software that supports the process from a larger hard drive to a smaller SSD. Some reputable options are Clonezilla, Renee Becca, Macrium Reflect, and Acronis True Image.
  6. Backup storage: It is recommended to have an external storage device or cloud backup solution to create a backup of your important files before cloning.
  7. External bootable media: Depending on the cloning software you choose, you may need to create external bootable media, such as a USB drive, to initiate the cloning process.
  8. Internet access: Having internet access during the cloning process is helpful for downloading software updates, firmware updates for the SSD, and necessary drivers or tools.
Step 2: Install and Configure the New SSD
Once you have all the necessary tools and equipment, it’s time to install and configure the new SSD. Follow these steps:
  1. Physically install the new SSD into your computer. Make sure it is properly connected via the appropriate cables.
  2. If using a laptop, you may need to use an external enclosure or adapter to connect the SSD via USB.
  3. Initialize and format the SSD. If the SSD is new or uninitialized, this step is necessary to prepare it for use. Follow the instructions provided by your operating system to do this.
  4. Ensure the SSD is in good health. Check for any firmware updates from the manufacturer and install them if necessary.

Method 1: Clone OS to SSD Using Renee Becca

Cloning your OS to the new SSD is the most efficient and hassle-free method to get your system up and running on the new drive. By using disk cloning software like Renee Becca, you can create an exact copy of your Windows 10 system and migrate it to your new SSD without having to reinstall everything from scratch. In this chapter, we will guide you through the steps to clone your OS to SSD using Renee Becca.
Renee Becca is a tool specially used for system/hard disk data backup and restoration. It can help you back up and restore important data in your computer, such as programs, system configuration, emails, photos, videos, documents, bookmarks, etc. In addition, you can also use it to clone disk and system data. The software provides three cloning methods, including hard disk cloning/cloning system hard disk; partition cloning and system migration. You can choose the most suitable cloning method according to your different needs.
Here is a guide on how to use Renee Becca for cloning your Windows system to the SSD.
Hot Topic - ADsRenee Becca – Safe and Quick System Migration to SSD

Automatic 4K alignment Improves SSD performance during system migration.

Support GPT and MBR Automatically adapt to the suitable partition format.

Support NTFS and FAT32 Redeploy various files in different file systems.

Back up quickly Back up files at up to 3,000MB/min.

Overall backup schedule Support system redeployment/system backup/partition backup/disk backup/disk clone.

Automatic 4K alignment Improve SSD performance

Support GPT and MBR Intelligently adapt to a partition format

Support NTFS and FAT32 Redeploy files in different file systems

Free TrialFree TrialNow 2000 people have downloaded!
Step 1. Installing and Launching Renee Becca
First, download and install Renee Becca on your computer. Once installed, launch the software to begin the cloning process.
Step 2. Backing Up Important Data Before Cloning: A Crucial Step
Before you begin the cloning process, it is important to back up any important data on your system. While disk cloning software is generally reliable, there is always a risk of data loss during the cloning process. So, it is better to be safe than sorry and create a backup of your data.
Back up data
Step 3. Connecting the SSD to Your Computer
Next, connect your new SSD to your computer. You can do this by using an external enclosure or by connecting it directly to your motherboard.
Step 4. Selecting the Cloning Option. Click “System Redeploy” function in “Clone”.
select system redeploy function in renee becca
Step 5. Choosing the Source and Target Drives
Please select the original disk which saves Windows system and the target disk. Then click “Redeploy” to process the system migration.
select target disk and desination in system redeploy function in renee becca
Step 6. Customizing the Cloning Options
Renee Becca allows you to customize the cloning process by choosing to clone only the system and boot partitions, or the entire drive, including data partitions. You can also choose to resize the partitions on the SSD to match the capacity of the new drive. Once you have selected your preferred options, click on “Clone” to start the process.
Step 7. Completing the Cloning Process
The cloning process may take some time depending on the size of your system drive and the speed of your SSD. Once the process is completed, you will receive a notification. You can then disconnect the SSD from your computer and shut down your system.
By following these simple steps, you can seamlessly transfer your Windows OS to a new SSD using Renee Becca. This method eliminates the need for a fresh installation, saving you time and effort. Enjoy the improved performance and faster boot times that come with a new SSD!
Pros:
  • Allows safe migration of operating system without fresh installation.
  • Simple steps for a smooth and hassle-free transfer.
  • Improves performance and faster boot times with new SSD.

Cons:

  • Doesn't have a Mac version.

To view the next chapter about manually cloning the OS partition to the new SSD using built-in tools in Windows 10, click on the link below.

Method 2: Manually Cloning the OS Partition to the New SSD using Built-in Tools in Windows 10

In this chapter, we will discuss the second method of cloning your OS to a new SSD using built-in tools in Windows 10. This method may seem more complicated, but it is a viable option for those who prefer to use the tools already available in the operating system. It is essential to note that this method only clones the OS partition to the new SSD and not the entire disk like the previous method.
Step 1: Preparing the New SSD
The first step is to prepare the new SSD for the cloning process. This includes connecting the SSD to your computer through a SATA cable and ensuring that it is detected by the system. You can also use a USB to SATA adapter if your computer does not have an available SATA port. Once the new SSD is connected, you can proceed with the cloning process.
Before you clone Windows 10 to an SSD without reinstalling the OS, there are some things you need to prepare. These include having an SSD as the target disk, making sure the SSD has enough space to accommodate the used space on the source disk, and possessing a cloning tool.
Step 2: Create a System Image of the OS Partition
The next step is to create a system image of the OS partition. This file will contain all the necessary files and settings from your current OS partition that will be transferred to the new SSD. To create a system image, follow these steps:
  1. Open the Windows Start menu and type “Control Panel” to search for it.
  2. Click on “Backup and Restore (Windows 7)” from the list of options.
  3. In the left pane, click on “Create a system image“.
  4. Select the new SSD as the destination for the system image and click “Next“.
  5. On the confirmation screen, review the selected drives and click “Start backup“.
  6. Wait for the backup process to complete. This may take some time depending on the size of your OS partition.
Note: It is important to ensure that the disk space of the new SSD is equal to or larger than the used space on the source disk. Otherwise, the system image creation process may fail.
Step 3: Boot from the Windows 10 Installation Media
In this step, we will need to boot from the Windows 10 installation media to restore the system image to the new SSD. Follow these steps to boot from the installation media:
  1. Insert the Windows 10 installation media (DVD or USB drive) into your computer.
  2. Restart your computer and enter the BIOS menu. This can be done by pressing the respective keys (F1, F2, F10, F12, Del) depending on your hardware. You can check your computer’s manual for the specific key.
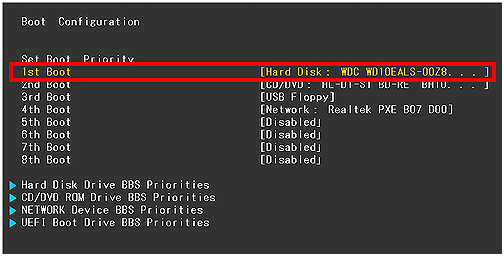
  3. In the BIOS menu, navigate to the “Boot” tab and change the boot order to prioritize the installation media.
  4. Save the changes and exit the BIOS menu.
Step 4: Restore the System Image to the New SSD
After booting from the installation media, follow these steps to restore the system image to the new SSD:
  1. Select your language, time, and keyboard layout preferences on the first screen of the Windows 10 installation.
  2. Click on “Repair your computer” at the bottom left of the screen.
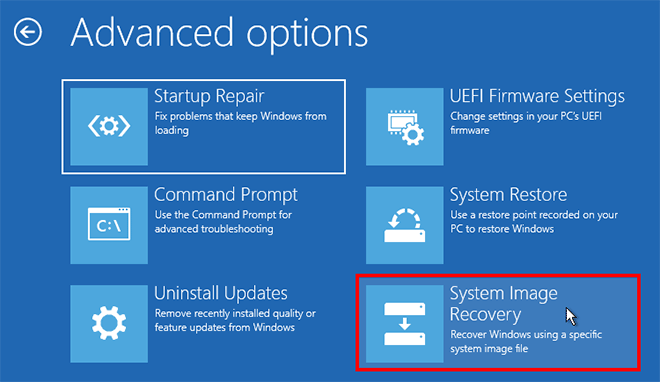
  3. In the repair options menu, select “Troubleshoot“.
  4. Click on “System Image Recovery“.
  5. Select the system image you created earlier from the list and click “Next“.
  6. Select the new SSD as the destination for the system image and click “Next“.
  7. On the confirmation screen, click “Finish” to start the restoration process.
  8. Wait for the process to complete. Once done, your OS partition will be transferred to the new SSD.

select System Image Recovery

Step 5: Change the Boot Order and Boot from the New SSD
After the restoration process is complete, you will need to change the boot order in the BIOS menu again to prioritize the new SSD. This will ensure that your computer will boot from the new SSD instead of the old OS partition on the previous disk. Save the changes and exit the BIOS menu. Your computer should now boot from the new SSD.
Congratulations! You have successfully cloned your OS partition to the new SSD using built-in tools in Windows 10. You can now enjoy the benefits of a faster and more reliable storage device for your operating system.
However, it is essential to note that this method has its limitations. It can only clone the OS partition and not the entire disk, so you will need to manually transfer your files and data to the new SSD.
Pros:
  • Free and reliable tool for your operating system

Cons:

  • Only clones the OS partition and not the entire disk
  • Manually transferring files and data to the new SSD

Method 3: Cloning with Freeware Clonezilla

If you wish to migrate just your Windows 10 operating system to a new SSD without the need for a clean installation, Clonezilla is the perfect tool for you. This method is ideal for experienced users who prefer a more technical approach to cloning their OS.
Step 1: Connect your new SSD to your computer.
Step 2: Install Clonezilla on your computer.
Step 3: Boot your computer from the Clonezilla bootable USB or CD.
Step 4: Select the “Clonezilla live (default settings, VGA 800×600)” option from the menu.
Step 5: Choose your language and keyboard layout.
Step 6: Select “Start Clonezilla.
Step 7: Choose “device-device” and then select “Expert” mode.
device device clone
Step 8: Select “disk_to_local_disk,” and choose your current disk as the source and your new SSD as the destination.
Step 9: Select “disk->partition” and choose the Windows OS partition on your current disk.
Step 10: Select the partition on your new SSD where you want to clone the Windows OS to.
Step 11: Confirm the cloning process by pressing “y” when prompted.
Step 12: Choose “beginner” mode to start the cloning process.
choose beginner mode
Step 13: Wait for the cloning process to finish.
Step 14: Remove the Clonezilla bootable USB or CD from your computer and boot from the new SSD.
By following these steps, you can easily clone only your Windows OS to your new SSD using Clonezilla.
Summarize: Cloning only the Windows OS to a new SSD with Clonezilla is a technical but effective option for experienced users. It allows you to clone only the Windows OS partition, saving time and space on your new SSD. However, it may be more complicated for beginners, and Clonezilla’s interface may be difficult for some users to navigate. It is important to make sure your SSD meets the requirements and backup important data before proceeding with the cloning process.
Pros:
  • This method allows you to clone only the Windows OS partition, which can save time and space on your new SSD.
  • Clonezilla is also a free and reliable software for disk cloning.

Cons:

  • This method may be more complicated for beginners and may require some technical knowledge.
  • Clonezilla does not have a user-friendly interface, which may be more difficult for some users to navigate.

Verifying If Cloning to SSD is Successful

When upgrading your computer’s storage to a faster solid-state drive (SSD), cloning your operating system (OS) is a smart move. However, the cloning process can be tricky and may not always be successful. In this chapter, we will discuss how to verify if cloning to SSD is successful, ensuring a smooth transition and avoiding potential challenges or troubleshooting during the process.
Step 1: Check the Disk Storage
After cloning your OS to the new SSD, the first step is to check the disk storage. Open File Explorer and check the properties of the SSD to ensure that the used and free disk space is the same as your old drive. Any significant difference could indicate an unsuccessful cloning process.
clone os to ssd windows 10
Step 2: Check the Partition Size
In addition to checking the disk storage, it’s also important to check the partition size of the new SSD. Open Disk Management and verify if the partition size of the new SSD matches your old drive. If it is smaller, this could mean that the cloning process failed or some data was not transferred. In this case, try running the cloning process again.
disk management
Step 3: Verify Bootable Status
The final step is to check the bootable status of the new SSD. Restart your computer and enter the BIOS or UEFI settings to change the boot order and prioritize the new SSD. If your computer boots up successfully and your OS runs smoothly, the cloning process was a success. Otherwise, you may need to troubleshoot and address any potential issues.
change the boot order in hard disk in boot configuration in BIOS
Here is a list of BIOS shortcut keys for different brands. Alternatively, you can observe the BIOS shortcut keys displayed on the screen during booting.
BIOS NameMethodThe Key or Keys
AcerPress Del or F2 immediately after powering onDel/ F2
CompaqPress F10 while the cursor in the top right corner of the screen is blinkingF10
DellPress F2 when the Dell logo appears/ or press every few seconds until the message Entering Setup appearsF2
eMachinesPress Tab or Del while the eMachine logo displays on the screenTab/ Del
FujitsuPress F2 once the Fujitsu logo appearsF2
GatewayPress the F1 key repeatedly after restarting the computerF1
HPPress the F1/ F10/ or F11 key after restarting the computerF1/ F10/ F11
IBMPress F1 immediately after powering on the computerF1
LenovoPress F1 or F2 after powering on the computerF1/ F2
NecPress F2 to enter the BIOS SetupF2
Packard BellPress F1/ F2/ or Del to enter BIOSF1/ F2/ Del
SamsungPress F2 to start the BIOS setup utilityF2
SharpPress F2 after the computer startsF2
SonyPress F1/ F2/ or F3 after turning on the computerF1/ F2/ F3
ToshibaPress F1 or Esc after powering on to access BIOSF1/ Esc
ARLTPress Del or F11 when the respective message is shownDel/ F11

Conclusion

In conclusion, upgrading your computer’s storage with a new SSD doesn’t have to be a daunting task. With the help of disk cloning software like Renee Becca or built-in tools in Windows 10, you can easily clone your operating system to your new SSD without the need for a clean installation. However, it is important to prepare for the process by backing up important data and files and being aware of potential challenges that may arise. By following the methods outlined in this guide, you can successfully clone your OS to the new SSD and verify its success by booting from the new drive. With a faster and more efficient storage system in place, you can now enjoy a smoother computing experience without the hassle of a clean installation. Say goodbye to slow performance and hello to a new and improved operating system with this ultimate guide to cloning your OS to a new SSD.