author avatar
    Senior Product Manager
 

Summary
Learn how to easily transfer your Windows 10 OS to an SSD without the need for a clean installation with different free methods or software such as Clonezilla, GParted, and Renee Becca. Upgrade your computer's speed and performance with this hassle-free process.
Have you ever experienced the frustration of waiting for your Windows 10 computer to boot up or launch a program? If so, it may be time to consider migrating your operating system (OS) to a solid-state drive (SSD). SSDs offer numerous benefits over traditional hard drives, such as faster boot times and improved system responsiveness. In this chapter, we will explore the advantages of migrating Windows 10 to an SSD. From increased efficiency to enhanced performance, you’ll discover how this simple change can have a big impact on your overall computing experience. Get ready to say goodbye to lengthy load times and hello to a faster, more responsive system.

Benefits of Migrating to an SSD

Migrating your operating system (OS) to a solid-state drive (SSD) can have numerous benefits, making it a popular option among computer users. In this chapter, we will explore the various benefits of migrating Windows 10 to an SSD and how it can improve your overall system performance.
1. Faster Boot Times
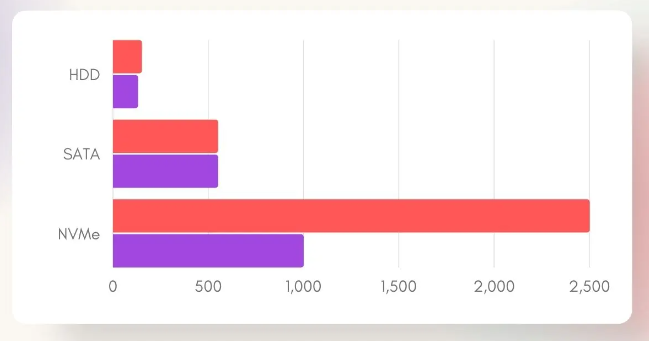
One of the biggest advantages of migrating Windows 10 to an SSD is the significant improvement in boot times. Unlike traditional hard drives, SSDs use flash memory to store data, resulting in much faster read and write speeds. This means that your computer will boot up much quicker, allowing you to start working or gaming faster.
migrate os to ssd windows 10 free
HDD VS M.2 SSD VS SATA SSD
2. Improved System Responsiveness
Along with faster boot times, an SSD can also significantly improve the overall responsiveness of your system. This includes tasks such as opening and switching between programs, accessing files, and loading web pages. With an SSD, these tasks are performed much faster, making your computer feel more snappy and efficient.
3. Enhanced User Experience
In addition to improved performance, migrating Windows 10 to an SSD can also enhance your overall user experience. With an SSD, you will notice a significant decrease in loading times for games and applications, smoother multitasking, and a generally more enjoyable and efficient computing experience.
4. Long-Term Reliability
Compared to traditional hard drives, SSDs have no moving parts and are less susceptible to physical damage. This makes them a more reliable long-term storage option for your operating system and important files. Additionally, SSDs typically have a longer lifespan than traditional hard drives, making them a sound investment for your computer.

Preliminary Work for Migrating to SSD

The process of migrating your operating system (OS) to a solid-state drive (SSD) can seem daunting and complex. However, with the right methods and software, it can be a relatively simple task. There are various options available to help you migrate your OS to an SSD effectively. In this chapter, we will explore some preliminary work that needs to be done before migrating Windows 10 to an SSD.
Connect the SSD to the PC
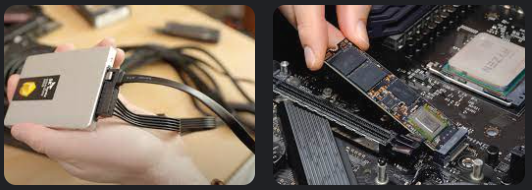
To start the process of migrating your OS to an SSD, you will first need to physically connect the SSD to your computer. Most desktops have the capability to install a second disk, but if you are using a laptop, you will need a SSD to USB adapter. Make sure to properly connect the SSD to your computer before proceeding with the migration.
Connect the SSD/M.2 to the PC
Ensure Sufficient Space on the SSD
After connecting the SSD, you will need to make sure it has enough unallocated space to hold the operating system. The space should be equal to or larger than the used space of your current OS partition. If the SSD is smaller than the used space of your current system drive, you can back up personal files to another location and do a disk clean to make room for the OS on the new SSD. 
Tips:Ensure the SSD’s total capacity is approximately 1.2 times the system disk’s total data volume.
Set Partition Style to Match Source Disk
To avoid any complications with the boot mode, it is important to set the partition style (MBR or GPT) on the SSD to be the same as the source disk. This will ensure a smooth migration process and prevent any potential issues.
It is important to note that if you are using a laptop, you may need to check your BIOS settings to enable booting from the new SSD after the migration is complete.
Migrating your Windows 10 OS to an SSD can provide numerous benefits, such as improved performance and faster boot times. However, it is important to complete some preliminary work before starting the migration process to ensure a smooth and successful outcome. This includes properly connecting the SSD, ensuring sufficient space, and setting the partition style to match the source disk. By following these steps, you can effectively migrate your OS to an SSD without any issues.
To continue with the migration process, please refer to the subsequent chapters about “Method 1: Using Free Software Clonezilla to Migrate Windows 10 to SSD Without Reinstalling.”

Method 1: Using Clonezilla

If you’re looking for a free solution to migrate your Windows 10 operating system to a new SSD, then Clonezilla is a great option to consider. This open-source disk cloning software allows you to clone your old hard drive to a new SSD without having to reinstall Windows 10. This method is suitable for those who want to save time and effort, as well as avoid the hassle of reinstalling Windows.
Tips:Clonezilla may not work with certain Windows configurations, so make sure to check the compatibility before proceeding with the migration process.
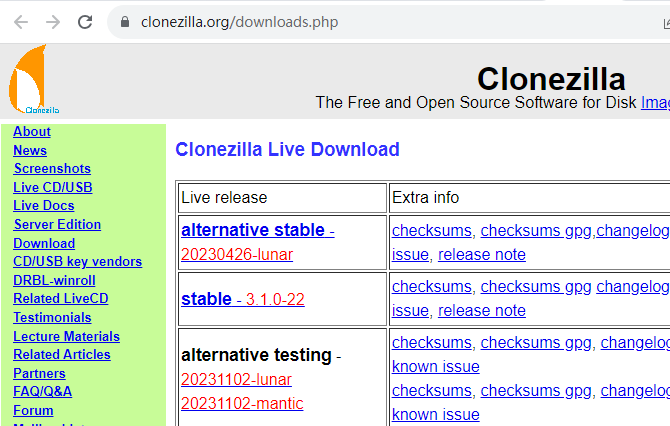
Step 1: The first step is to download and install Clonezilla onto your computer. Once it’s installed, you can launch the application and proceed with the migration process.
download Clonezilla
Step 2: Next, you’ll need to create a bootable Clonezilla disk. This can be done by burning the ISO image file onto a CD or DVD, or by using a USB drive. Once you have a bootable disk, insert it into your computer and restart it.
Step 3: When your computer restarts, you’ll need to boot from the Clonezilla disk. This can be done by pressing a specific key (usually DEL, F8, F10, or F12) during the boot process to access the boot menu. Select the bootable disk and press Enter.
Step 4: Once you have successfully booted from the Clonezilla disk, you’ll be taken to a welcome screen. Press Enter to continue.
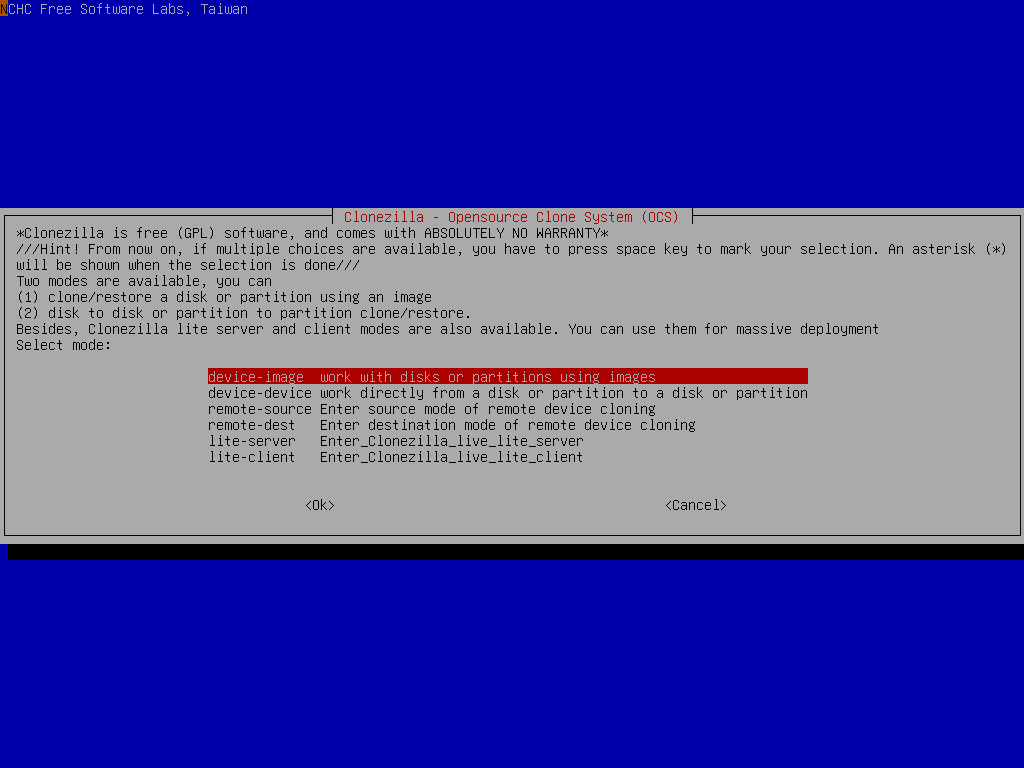
Step 5: Now, you’ll need to select the “device-image” option from the main menu. This will allow you to create an image of your old hard drive and transfer it to the new SSD.
select device-image Clonezilla
Step 6: In the next screen, you’ll need to choose the source and destination drives. The source drive will be your old hard drive, while the destination drive will be your new SSD. Make sure to select the correct drives to avoid any data loss.
Step 7: Once you’ve selected the drives, you’ll be asked to choose the mode for the image creation process. You can either choose the default “device-device” mode or select the “expert” mode for more customization options.
Step 8: After selecting the mode, you’ll be asked to confirm the image creation process. Press “y” to continue.
Step 9: The image creation process may take some time, depending on the size of your hard drive. Once it’s completed, you’ll be prompted to reboot your computer.
Step 10: After your computer restarts, remove the Clonezilla bootable disk and replace it with the new SSD. The image you created will now be transferred to the new drive.
Step 11: Once the transfer is complete, shut down your computer and remove the old hard drive. Start your computer and it should now boot from the new SSD, with the same Windows 10 OS and all your data and settings intact.
Using Clonezilla to migrate Windows 10 to SSD has several advantages. It is completely free to use and offers a simple and straightforward process. However, one disadvantage is that it may not work with all Windows configurations, so it’s important to check compatibility before proceeding with the migration process.
If you prefer a hassle-free Windows 10 to SSD migration, then you might want to consider using GParted instead. This software also offers a free solution to migrate your OS without having to reinstall Windows, and it comes with more advanced features and customization options. Check out the next chapter to learn how to use GParted for a hassle-free Windows 10 to SSD migration.
Pros:
  • Completely free to use
  • Simple and straightforward process

Cons:

  • May not work with all Windows configurations

Method 2: Using Renee Becca

Renee Becca is recommended here. It is a tool specially used for system/hard disk data backup and restoration. It can help you back up and restore important data in your computer, such as programs, system configuration, emails, photos, videos, documents, bookmarks, etc. In addition, you can also use it to clone disk and system data. The software provides three cloning methods, including hard disk cloning/cloning system hard disk; partition cloning and system migration. You can choose the most suitable cloning method according to your different needs.
Here is a guide on how to use Renee Becca for cloning your Windows system from HDD to the SSD.
Hot Topic - ADsRenee Becca – Safe and Quick System Migration to SSD

Automatic 4K alignment Improves SSD performance during system migration.

Support GPT and MBR Automatically adapt to the suitable partition format.

Support NTFS and FAT32 Redeploy various files in different file systems.

Back up quickly Back up files at up to 3,000MB/min.

Overall backup schedule Support system redeployment/system backup/partition backup/disk backup/disk clone.

Automatic 4K alignment Improve SSD performance

Support GPT and MBR Intelligently adapt to a partition format

Support NTFS and FAT32 Redeploy files in different file systems
Free TrialFree TrialNow 2000 people have downloaded!
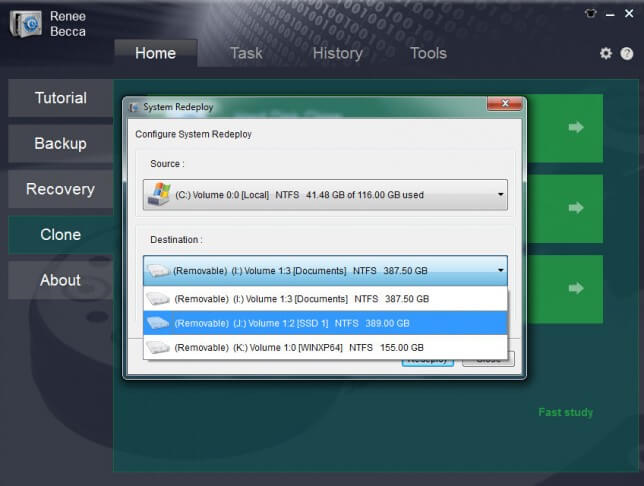
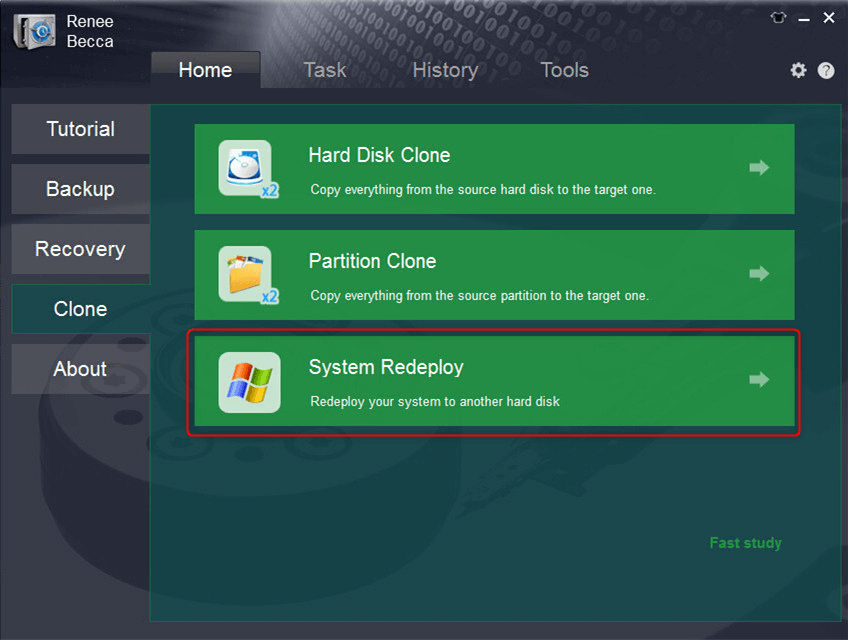
Step 1: Launch Renee Becca and click “System Redeploy” function in “Clone”.
select system redeploy function in renee becca
Step 2: Please select the original disk which saves Windows system and the target disk. Then click “Redeploy” to process the system migration.
select target disk and desination in system redeploy function in renee becca
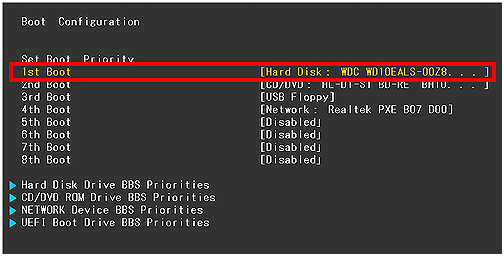
Step 3: After clone finish, please selec the new disk in BIOS as the boot disk. Then you can start the computer from the newly installed hard disk with the original system.
change the boot order in hard disk in boot configuration in BIOS
Here is a list of BIOS shortcut keys for different brands. Alternatively, you can observe the BIOS shortcut keys displayed on the screen during booting.
BIOS NameMethodThe Key or Keys
AcerPress Del or F2 immediately after powering onDel/ F2
CompaqPress F10 while the cursor in the top right corner of the screen is blinkingF10
DellPress F2 when the Dell logo appears/ or press every few seconds until the message Entering Setup appearsF2
eMachinesPress Tab or Del while the eMachine logo displays on the screenTab/ Del
FujitsuPress F2 once the Fujitsu logo appearsF2
GatewayPress the F1 key repeatedly after restarting the computerF1
HPPress the F1/ F10/ or F11 key after restarting the computerF1/ F10/ F11
IBMPress F1 immediately after powering on the computerF1
LenovoPress F1 or F2 after powering on the computerF1/ F2
NecPress F2 to enter the BIOS SetupF2
Packard BellPress F1/ F2/ or Del to enter BIOSF1/ F2/ Del
SamsungPress F2 to start the BIOS setup utilityF2
SharpPress F2 after the computer startsF2
SonyPress F1/ F2/ or F3 after turning on the computerF1/ F2/ F3
ToshibaPress F1 or Esc after powering on to access BIOSF1/ Esc
ARLTPress Del or F11 when the respective message is shownDel/ F11
In summary, using Renee Becca is an effective and free method for migrating your Windows 10 OS to an SSD. By following the above steps, you can quickly and easily backup and restore your system to the new SSD without the hassle of reinstalling all your software and searching for license keys.
Additionally, Renee Becca’s advanced options allow for optimization specifically for use with an SSD, ensuring a seamless and efficient migration experience. However, it is important to note that Renee Becca is only compatible with Windows systems and may not work for other operating systems. Additionally, make sure to properly disconnect and remove the original system disk before starting your computer to avoid any potential conflicts.
Pros:
  • Allows safe migration of operating system without fresh installation.
  • Simple steps for a smooth and hassle-free transfer.
  • Improves performance and faster boot times with new SSD.

Cons:

  • Doesn't have a Mac version.Paid software.
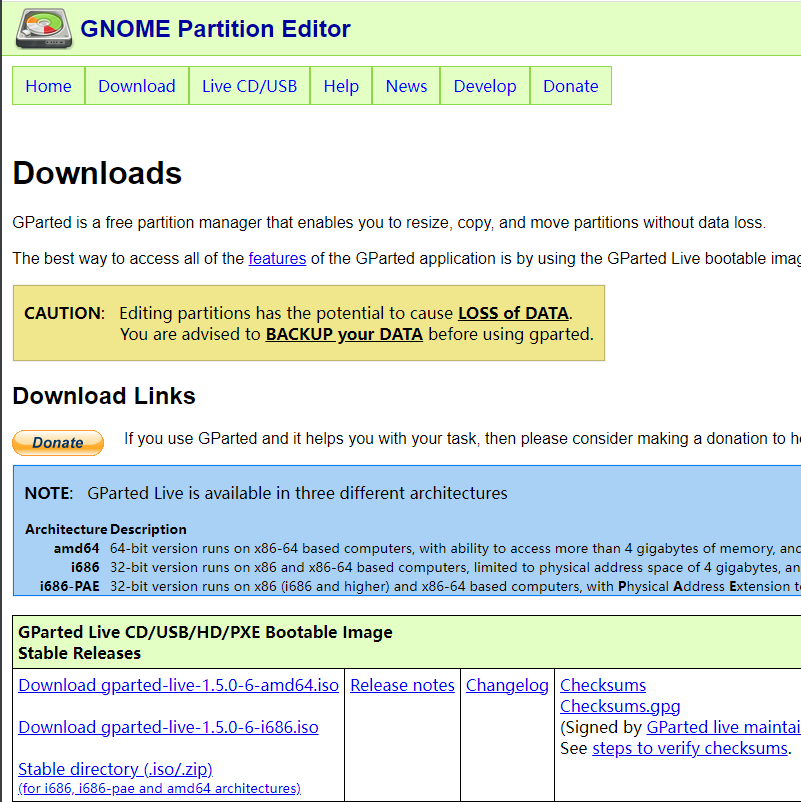
Method 3: Using GParted

If you don’t want to spend money on a paid software, you can still migrate your Windows 10 OS to an SSD without the hassle of reinstalling. GParted is a free and open-source tool that can help you do just that. Here’s how:
Step 1: Download and install GParted on your computer. You can get it from their official website for free.
GParted Download
Step 2: Once installed, launch GParted and connect your new SSD to your computer.
Step 3: In GParted, you’ll see a list of all the connected disks. Select your old hard drive from the list.
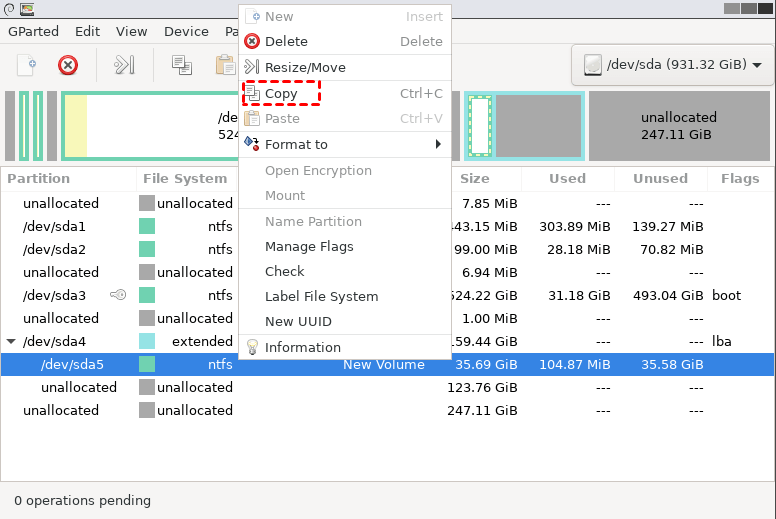
Step 4: Right-click on the partition that contains your Windows 10 OS and choose “Copy“.
copy selected partition
Step 5: Select your new SSD from the list and right-click on it. Choose “Paste“.
Step 6: Once the copying is complete, you’ll have an exact copy of your Windows 10 OS on your new SSD.
Step 7: Right-click on the partition on your old hard drive and choose “Unmount“. Then, right-click on the partition on your new SSD and choose “Mount“.
Step 8: Finally, click on the “Apply” button in the toolbar to apply the changes and start the migration process.
This process can take some time depending on the size of your OS. Once it’s completed, you can disconnect your old hard drive and boot your computer from the new SSD. Your Windows 10 OS should now be running seamlessly on your new SSD.
Now that you’ve successfully migrated your Windows 10 OS to your new SSD, you can enjoy the faster performance and improved overall experience. But if you want a more user-friendly and feature-rich software for system migration, you can continue to the next chapter to learn about Method 3: Using Renee Becca, a free system migration software, to backup and restore your Windows 10 OS to an SSD.
Pros:
  • GParted is a free and reliable tool for migrating your Windows 10 OS to an SSD without the hassle of reinstalling.
  • It also supports various file systems, making it suitable for different types of hard drives.

Cons:

  • GParted may not be suitable for beginners as it requires some technical knowledge and can be intimidating for non-technical users.

Post-Migration Steps

After successfully migrating your Windows 10 operating system to an SSD, there are a few important steps you should take to ensure optimal performance. In this chapter, we’ll guide you through the necessary post-migration tasks, including setting the boot order and removing the old HDD. These steps are essential for getting the most out of your new SSD and should not be skipped.
Step 1: Set Boot Order
Once you have migrated Windows 10 to an SSD, it’s important to change the boot order in your BIOS/UEFI settings. This will ensure that your computer boots from the new SSD instead of the old HDD. The steps to change the boot order may vary based on your computer’s manufacturer, but generally, it involves pressing a specific key (such as F2 or Del) during startup to access the BIOS/UEFI settings. Once inside, navigate to the “Boot” tab and change the boot order to prioritize the SSD. Save the changes and exit the BIOS/UEFI settings.
Step 2: Remove Old HDD
If you have successfully migrated Windows 10 to an SSD and have set the boot order correctly, you can now safely remove the old HDD from your computer. This step is optional, but recommended if you no longer need the extra storage space. Make sure to shut down your computer and disconnect all power sources before removing the HDD. Open your computer’s case and locate the old HDD. Unplug the cables connecting it to the motherboard and remove it from its mounting. Store the HDD in a safe place or repurpose it for a different use.
By following these two steps, you can ensure that your computer is truly utilizing the speed and performance benefits of the new SSD.

Conclusion

In conclusion, migrating your Windows 10 OS to an SSD can greatly improve your computer’s performance and overall user experience. With the hassle-free methods discussed, including using free software like Clonezilla, GParted, and Renee Becca, you can easily transfer your OS without the need for a clean installation. However, it is important to note that there are some preliminary steps that need to be taken and post-migration tasks that should be done, such as setting boot order and removing the old HDD. Knowing when to consider migrating, such as when your current computer is getting old or incompatible with Windows 11, is also important. With this guide, you can confidently migrate your Windows 10 to an SSD for a smoother and faster computing experience. Start enjoying the benefits of an SSD today!