

How to Clone SD Cards with Multiple Partitions: A Complete User Guide

Summary
Learn how to clone SD cards with multiple partitions safely and efficiently. This step-by-step guide covers the best tools and methods for preserving boot and data partitions, ensuring a flawless SD card duplication for any device.


| Scenario | Key Characteristics & Notes | Boot Support Required? | Partition Scheme & Max Partitions | Recommended Methods |
|---|---|---|---|---|
| Raspberry Pi Setup | FAT32 boot + ext4 root + optional data/log partitions. | ✅ Yes | MBR (default for Pi firmware). Max: 4 primary (or 3 + 1 extended with logicals). | PiClone (Pi-specific), Renee Becca, dd (Linux), Clonezilla for advanced multi-partition handling. |
| MiSTer FPGA Project | Multiple partitions for Linux base, cores, and user data. | ✅ Yes | MBR (commonly used). Max: 4 primary (extended partition allows more). | Clonezilla, dd for raw cloning, Renee Becca. |
| Nintendo Switch Games (SD Expansion) | exFAT/FAT32 partitions for game data only. | ❌ No | MBR (Switch expects MBR). Max: 4 primary. | Balena Etcher, dd for exact copy, Renee Becca for easy backup/restore. |
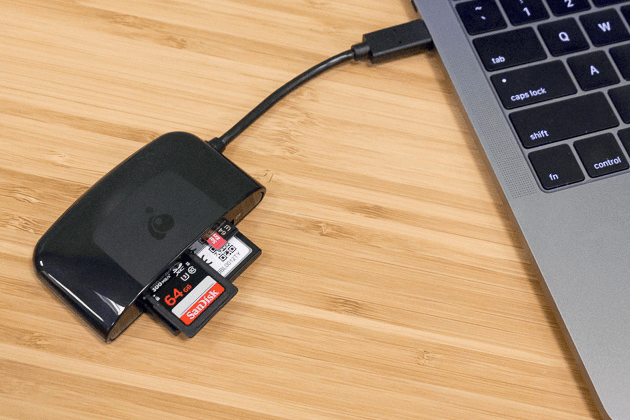
| Camera Files (Professional Use) | Usually single FAT32/exFAT; some cameras add metadata partitions. | ❌ No | MBR (most cameras). Max: 4 primary. | Renee Becca or commercial cloning software (easy GUI), dd for raw sector copy. |
| Drone Footage | FAT32/exFAT, may include hidden telemetry/firmware partitions. | ❌ Usually no | MBR (drone firmware expects it). Max: 4 primary. | Clonezilla, dd for exact sector copy, Renee Becca for user-friendly cloning. |
| Android Phone Storage Expansion | FAT32/exFAT for media + hidden/system partitions. | ❌ No | MBR on most microSD cards; GPT possible on newer Android versions. Max: 4 primary (MBR) or up to 128 partitions (GPT). | Clonezilla (multi-partition aware), dd for raw cloning, Renee Becca or commercial tools for GUI-based cloning, Balena Etcher. |
- On Raspberry Pi: Boot the new card in your Pi, run sudo raspi-config, and go to “Advanced Options” > “Expand Filesystem”.
- On a PC: Use a partition manager like GParted (a free bootable tool) to see and expand the Linux (ext4) partition into the unallocated space. Windows Disk Management can do this to extend FAT32/exFAT/NTFS partitions.

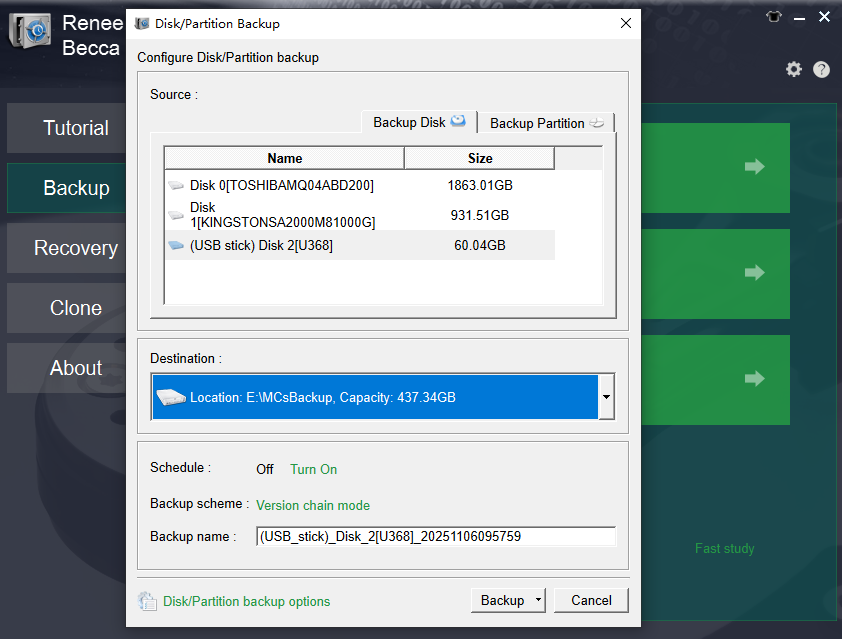
Automatic 4K alignment Improves SSD performance during system migration.
Support GPT and MBR Automatically adapt to the suitable partition format.
Support NTFS and FAT32 Redeploy various files in different file systems.
Back up quickly Back up files at up to 3,000MB/min.
Overall backup schedule Support system redeployment/system backup/partition backup/disk backup/disk clone.
Automatic 4K alignment Improve SSD performance
Support GPT and MBR Intelligently adapt to a partition format
Support NTFS and FAT32 Redeploy files in different file systems
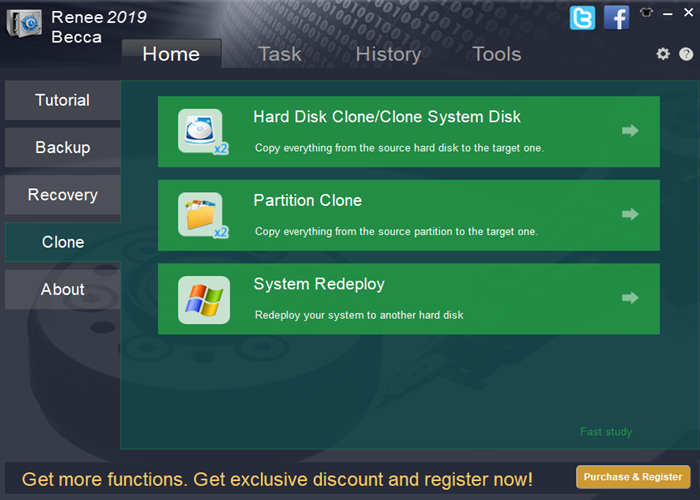
- Simple, clear interface that's easy to navigate
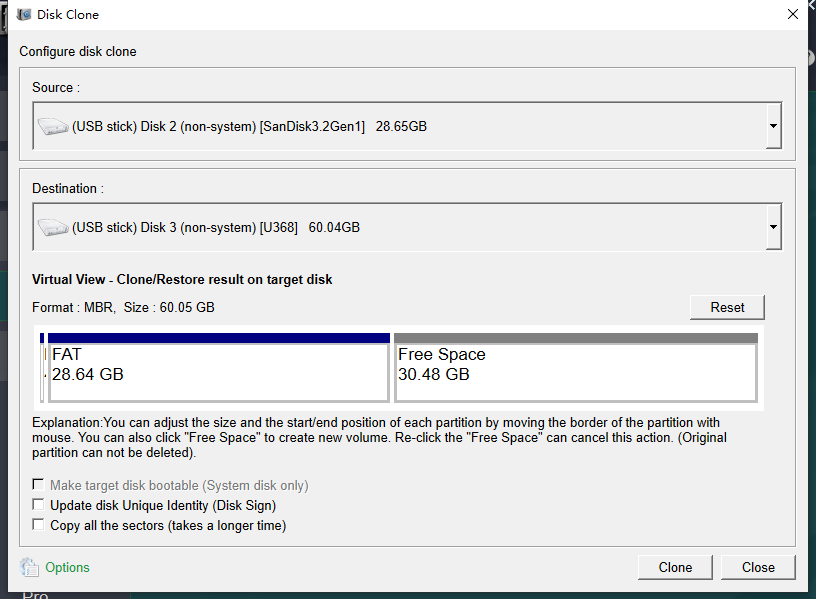
- Multiple cloning options to fit your needs, like full disk or partitions
- Supports resizing partitions during clone for larger targets
- Fast speeds and automatic backups for peace of mind
- Free for non-Windows disk cloning
Disadvantages:
- Windows-only, so Mac/Linux users need alternatives
- Advanced features might require the full version after trial

How to make full use of the remaining space
Automatic 4K alignment Improves SSD performance during system migration.
Support GPT and MBR Automatically adapt to the suitable partition format.
Support NTFS and FAT32 Redeploy various files in different file systems.
Back up quickly Back up files at up to 3,000MB/min.
Overall backup schedule Support system redeployment/system backup/partition backup/disk backup/disk clone.
Automatic 4K alignment Improve SSD performance
Support GPT and MBR Intelligently adapt to a partition format
Support NTFS and FAT32 Redeploy files in different file systems

- Official Pi tools, optimized for Raspbian
- Automatic resizing for upgrades
- No external PC needed
- Free and simple
- Handles Pi-specific partitions flawlessly
Disadvantages:
- Requires a running Pi setup
- GUI may glitch on remote access
- Not for non-Pi devices
- Limited to Linux-based Pi OS
- Slower for very large cards

How to make full use of the remaining space

- Free and works on Windows/Mac/Linux
- Automatic validation reduces errors
- User-friendly with minimal steps
- Handles unrecognized partitions well
- No installation needed for Etcher portable
Disadvantages:
- No direct partition editing or resizing
- Etcher doesn't create .img files by default (focuses on flashing)
- Disk Utility is Mac-only
- Slower for very large cards
- Limited to basic clones without extras like scheduling

How to make full use of the remaining space
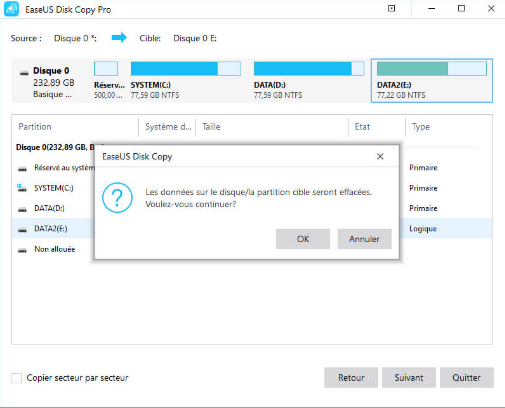
- Automatic layout adjustments for different sizes
- Supports selective partition cloning
- Fast and stable with error checks
- User-friendly previews
- Additional tools like recovery in 4DDiG
Disadvantages:
- Requires payment for full features
- Windows-focused, less cross-platform
- Overwrites targets without backup prompts
- Can be resource-heavy on older PCs
- Trials have limitations
Automatic 4K alignment Improves SSD performance during system migration.
Support GPT and MBR Automatically adapt to the suitable partition format.
Support NTFS and FAT32 Redeploy various files in different file systems.
Back up quickly Back up files at up to 3,000MB/min.
Overall backup schedule Support system redeployment/system backup/partition backup/disk backup/disk clone.
Automatic 4K alignment Improve SSD performance
Support GPT and MBR Intelligently adapt to a partition format
Support NTFS and FAT32 Redeploy files in different file systems

- Free and built-in on Linux/Mac
- Precise, retains all data including hidden partitions
- Customizable with block sizes for speed
- Cross-platform via terminals
- No extra software needed
Disadvantages:
- High risk of data loss if devices misidentified
- No GUI, steep learning curve
- Slow without optimizations
- No automatic resizing
- Requires unmounting partitions first
- The source is the SD card you want to clone (e.g., /dev/sdX or /dev/rdiskX)
- The target is the SD card you’re writing to (e.g., /dev/sdY or /dev/rdiskY)

sudo dd if=/dev/sdX of=/dev/sdY bs=4M conv=notrunc,noerror status=progress
- sudo — runs the command with administrative privileges
- dd — the disk duplication tool
- if=/dev/sdX — input file (your source SD card)
- of=/dev/sdY — output file (your target SD card)
- bs=4M — sets the block size to 4 megabytes for faster copying
- conv=notrunc,noerror —
- notrunc prevents truncating the output
- noerror tells dd to continue even if it encounters read errors
- status=progress — shows real-time progress during the copy
sync
How to make full use of the remaining space
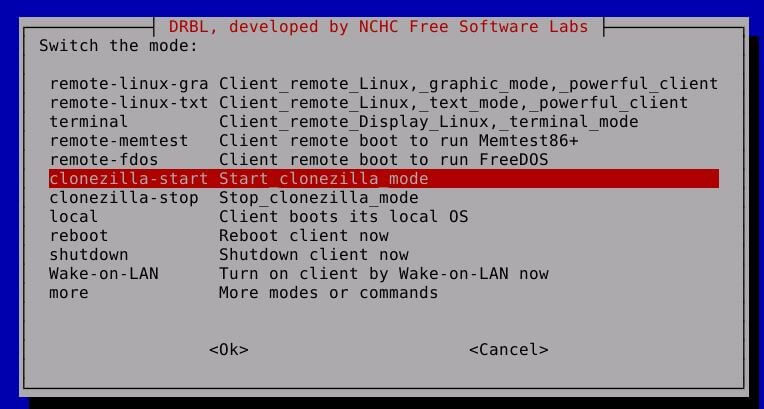
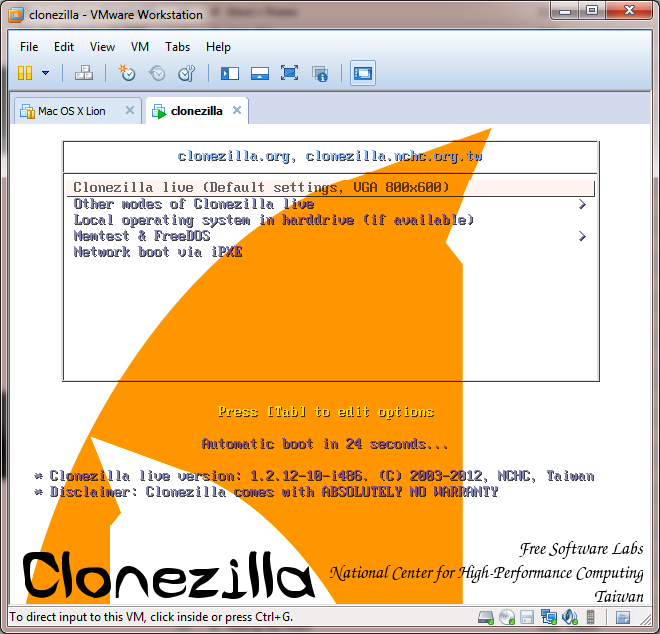
- Free and open-source
- Works offline via Live USB
- Compresses images to save space
- Verifies clones thoroughly
- Supports massive deployments
Disadvantages:
- Requires creating bootable media
- Menu-based, not fully GUI
- Time-consuming setup
- Overkill for simple tasks
- Needs tech knowledge for options

Automatic 4K alignment Improves SSD performance during system migration.
Support GPT and MBR Automatically adapt to the suitable partition format.
Support NTFS and FAT32 Redeploy various files in different file systems.
Back up quickly Back up files at up to 3,000MB/min.
Overall backup schedule Support system redeployment/system backup/partition backup/disk backup/disk clone.
Automatic 4K alignment Improve SSD performance
Support GPT and MBR Intelligently adapt to a partition format
Support NTFS and FAT32 Redeploy files in different file systems
Can SD cards have multiple partitions?
Can you clone a drive with multiple partitions?
Why isn't my cloned SD card booting properly after cloning?
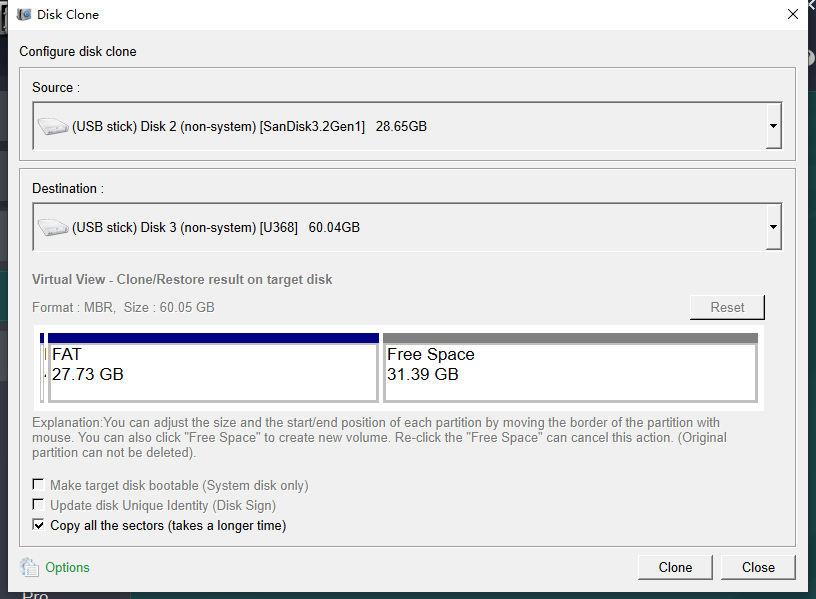
Can I clone an SD card with multiple partitions to a much larger one without wasting space?
What should I do if Windows only recognizes one partition on my multi-partition SD card?
Is it safe to clone an SD card while it's in use on my device?
How can I verify that all partitions cloned correctly without testing in the device?
What if my target SD card is from a different brand—will cloning still work?
Can I clone only specific partitions from an SD card with multiple ones?
Automatic 4K alignment Improves SSD performance during system migration.
Support GPT and MBR Automatically adapt to the suitable partition format.
Support NTFS and FAT32 Redeploy various files in different file systems.
Back up quickly Back up files at up to 3,000MB/min.
Overall backup schedule Support system redeployment/system backup/partition backup/disk backup/disk clone.
Automatic 4K alignment Improve SSD performance
Support GPT and MBR Intelligently adapt to a partition format
Support NTFS and FAT32 Redeploy files in different file systems
Relate Links :
Effortless OS Migration: Transfer Your Windows from One Samsung SSD to Another Without the Headache
13-08-2025
Ashley S. Miller : Learn how to transfer Windows from one Samsung SSD to another with confidence. This guide provides trusted, step-by-step...
Boost Performance: Upgrading the SSD in Your Samsung Galaxy Book 2

26-07-2025
John Weaver : This guide breaks down everything you need to know about upgrading your Galaxy Book 2 SSD—covering compatibility checks,...
Ultimate Lenovo Legion SSD Upgrade Guide 2025: Maximize Your Gaming Speed

06-07-2025
Amanda J. Brook : This Lenovo Legion SSD upgrade guide for 2025 breaks down the process of expanding storage and boosting speed,...
Cloned SSD Won't Boot? Discover the Fixes
21-08-2024
Ashley S. Miller : If your cloned SSD won't boot, don't worry. This guide covers common issues like improper installation and incorrect...


User Comments
Leave a Comment