

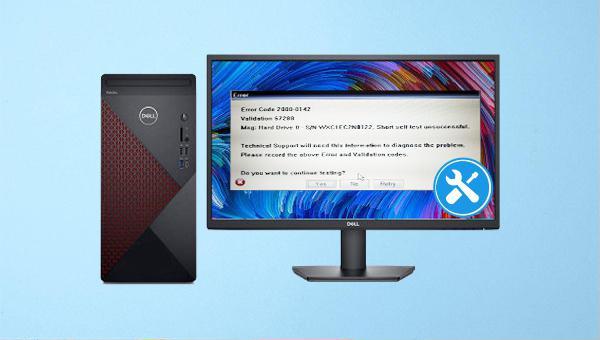
Fix DELL Hard Drive Diagnostic Error Code 2000-0142: Ultimate Solution

Summary
Learn how to fix the common Dell computer error message 2000-0142 and recover lost data with helpful solutions provided in this article.
MBR boot records, DBR error parameters, 0xc00000e, Windows system startup failure, black screen, or blue screen. Compatible with Windows 10/8.1/8/7/XP/Vista, it meets the system rescue needs of different users.
Easy to use 3 steps to transfer the files.
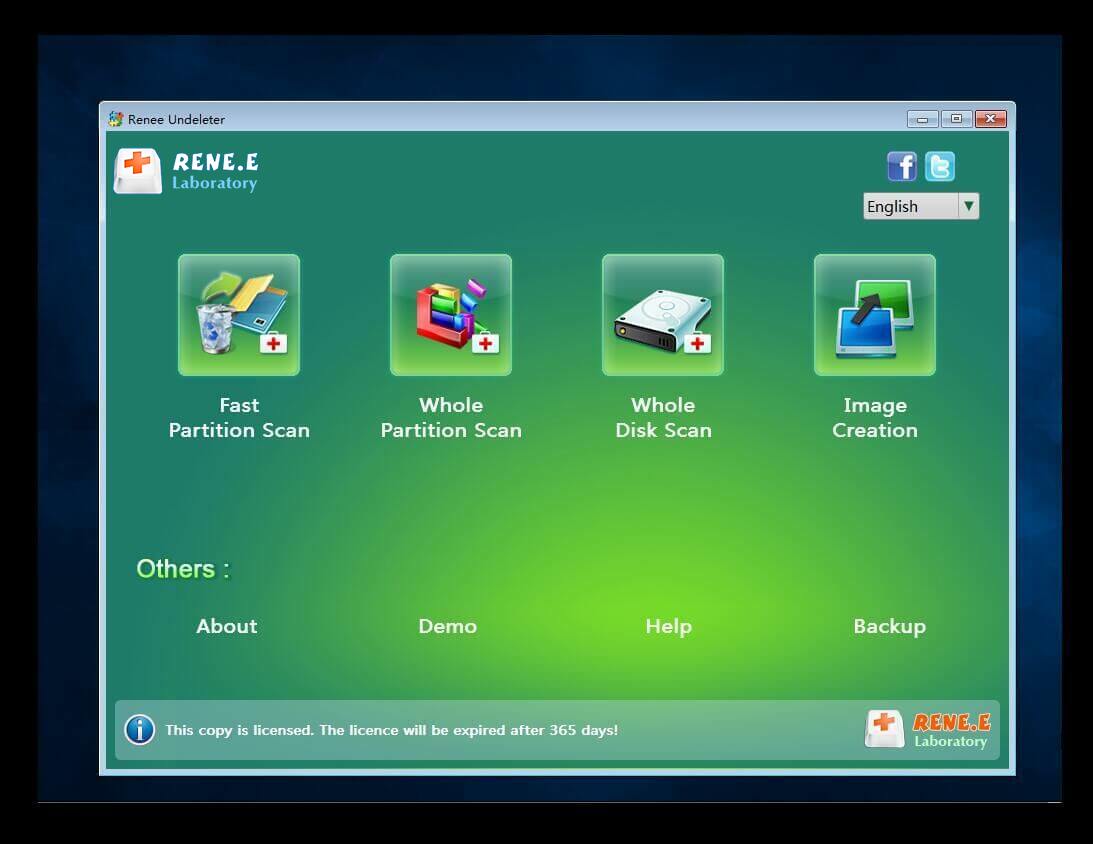
Transfer the files Transfer the important files of the computer without system.
Preview the files Preview the files while transferring the data.
Multifuctional Data recovery, Windows password reset, bootable problem recovery can be run without system.
Highly compatible Windows 10/8.1/8/7/XP/Vista. Also supports UEFI boot mode.
Easy to use 3 steps to transfer the files.
Transfer the files Transfer the important files of the computer without system.
Preview the files Preview the files while transferring the data.
Free TrialFree TrialNow 2000 people have downloaded!


(chkdsk X: /r /f) (X refers to the hard drive letter; /r and /f are chkdsk parameters) and press Enter to fix the error. After the fault repair is complete, remove the Windows 10 installation USB flash drive and restart the computer to check whether the problem is resolved.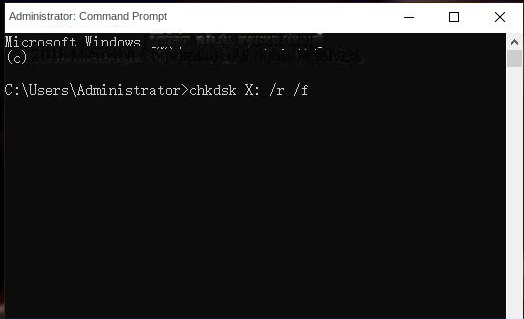
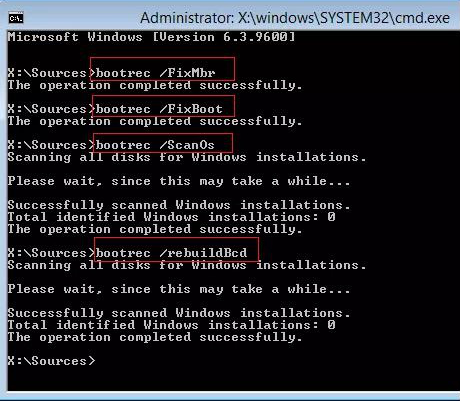
bootrec /fixmbr
bootrec /fixboot
bootrec /scanos
bootrec /rebuildbcd
Relate Links :
Windows 10 Repair Command Prompts: Simplified Guide

22-12-2023
Amanda J. Brook : Learn how to use Windows 10 repair command prompts to fix common system failures, including startup issues, blue...
Quick Tips to Fix Error "Operating System Not Found"

08-04-2024
Jennifer Thatcher : Discover the underlying causes and standard solutions for the "Operating System Not Found" error on Windows PCs. We'll...
How to solve the problem that boot device not found please install an operating system?
01-08-2023
John Weaver : Learn the causes and solutions for the problem "Boot device not found please install an operating system". Before...
Easy Guide to Fix The Error "Stop Code: BAD SYSTEM CONFIG INFO" on Windows 10
13-07-2023
Amanda J. Brook : Resolve the blue screen error "Stop Code: BAD SYSTEM CONFIG INFO" on Windows 10 with easy repair methods...

