author avatar
    Specialist of Customer Service Dept.
 

Summary
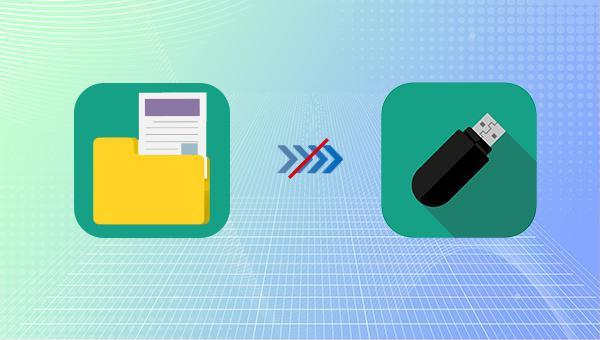
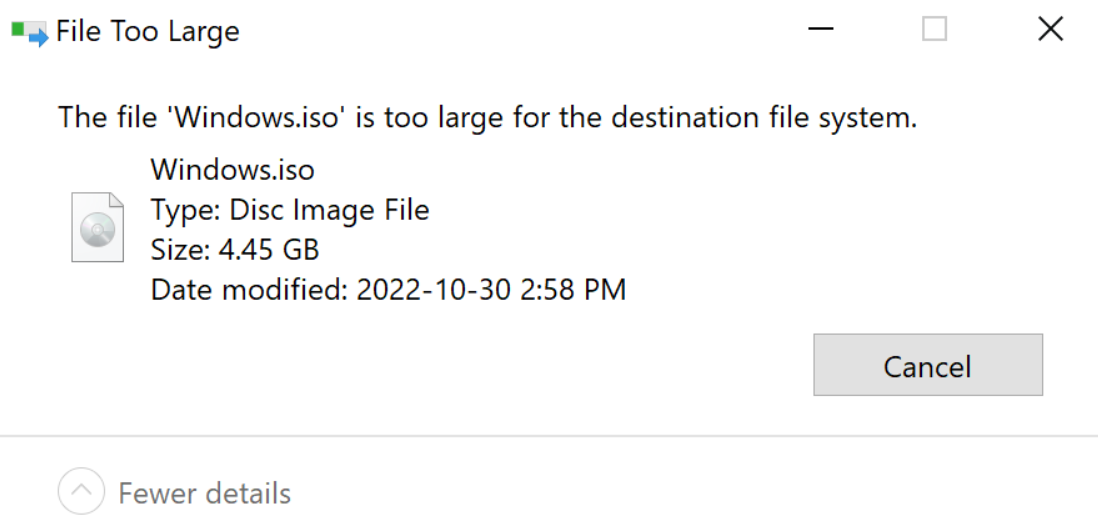
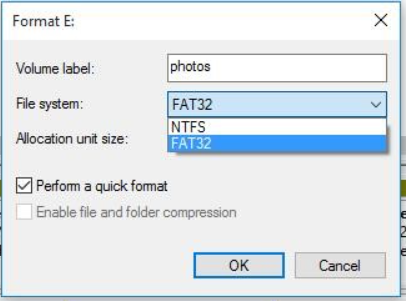
Learn why you can't copy a large file to your USB drive and find solutions to overcome the "file is too large for the target file system" error.


file too large to move to usb

I. Why can't I copy large files to the USB flash drive?

If your USB flash drive has more than 8GB or 16GB of free space and you try to copy a file larger than 4GB, you may encounter an error message stating that the file is too large. This is likely due to the limitations of the USB flash drive’s file system, which can only support a single file up to a certain size. This issue is common when the USB drive is formatted with the FAT32 file system, which was designed during the Windows 95 era when file sizes were much smaller and rarely exceeded 4GB. This file system is not suitable for modern file sizes.
The file is too large
To address this issue, reformat your USB flash drive to either exFAT or NTFS, as both support large file sizes. NTFS, standing for New Technology File System, was introduced with Windows NT and offers features like LZ77 compression, AES encryption, and access control. It’s commonly used in Windows environments. However, Mac systems can only read NTFS-formatted drives; to write or modify files, you’ll need software like Paragon NTFS for Mac, Tuxera NTFS for Mac, or Mounty for NTFS.
For transferring data between Windows and Mac systems using a USB drive, exFAT is the preferred format. Although it lacks the advanced features of NTFS, such as file permissions and access control, exFAT offers superior compatibility, functioning across not only Windows and Mac but also many Android phones and tablets.
After considering the cause of the large file size preventing the copying to a U disk, a solution would be to reformat the disk to reset the file system. To avoid any potential loss, it is advised to first backup or transfer any essential files from the U disk.

II. How to solve the problem that the file is too large and cannot be copied to the U disk?

1. Use Renee Becca to back up the files in the USB flash drive

Renee Becca is a dedicated tool for system and hard disk data backup and recovery, designed to back up and restore essential computer data, including programs, system settings, emails, photos, videos, documents, and bookmarks. Utilizing advanced incremental/differential backup technology, it efficiently saves time and disk space. It also provides features for partition, hard disk, and file backup, as well as disk cloning to meet diverse backup needs.
Renee Becca - Reliable Data Backup & Restore Software

Quick Backup files at up to 3,000MB/min.

Fullfill different backup needs Supports system backup, disk / partition backup, file backup and disk clone.

Intelligent Automatically analyze the differences between source and backup data.

Convenient Support VSS, allowing to freely view webpages when backing up system.

Highly compatible Supports various files and storage devices.

Quick Backup files at up to 3,000MB/min.

Fullfill different backup needs Backup for disk, partition and system. Save disk space by backing up incremental /differential data.

Highly compatible Supports various files and storage devices.

Free TrialFree Trial 2000 users have downloaded and enjoy Renee Becca!
Step 1: Download, install, and run Renee Becca on the computer. Select the (Disk/Partition Backup) option in the main interface. It will back up the entire USB disk. If you only need to back up some important data, you can also use the (file backup) function.
Renee Becca backup function
Step 2: Next, select the USB disk to be backed up in (source), and select the hard disk to store the backup in (destination).
back up disk in Renee Becca
Step 3: If you need to regularly back up the data in the USB disk, you can set the daily/weekly/monthly regular backup plan and the time to automatically start the backup using Scheduler.
schedule regular backup in Renee Becca
Step 4: Using the Backup Scheme, you can choose a suitable backup scheme mode according to your personal needs. Renee Becca offers 5 backup schemes, including version chain mode, single version mode, full mode, Incremental mode, and differential mode.
select a backup mode in Renee Becca
Renee Becca has 5 backup plans to choose from:
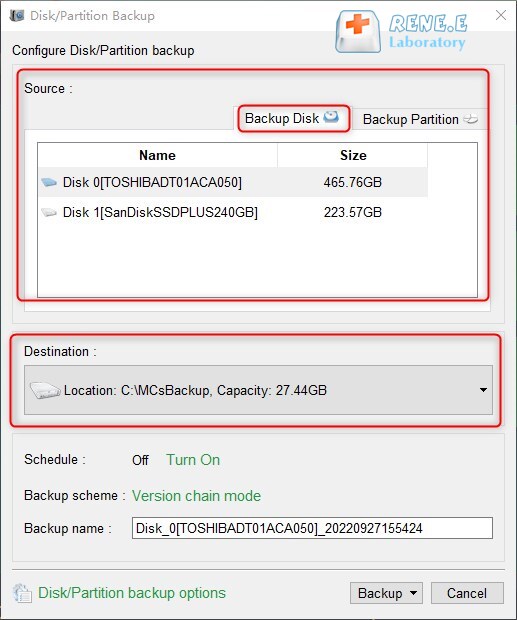
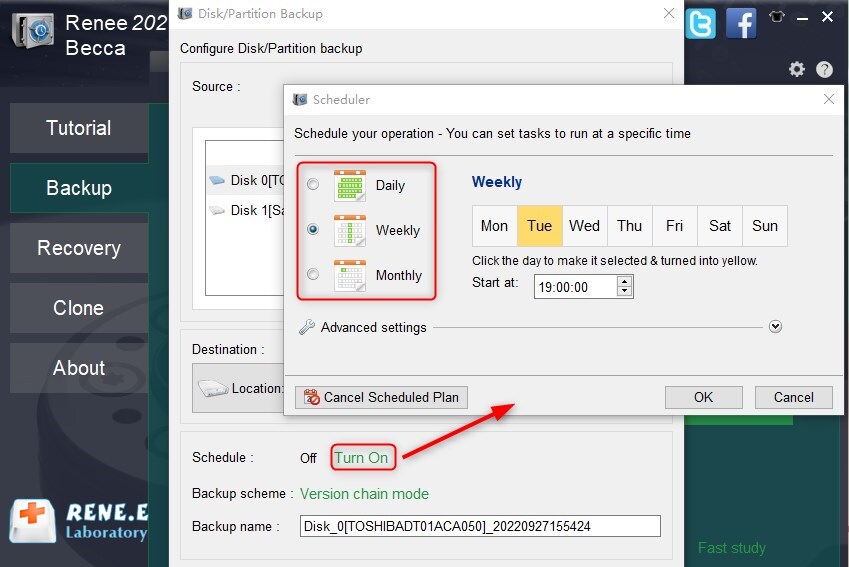
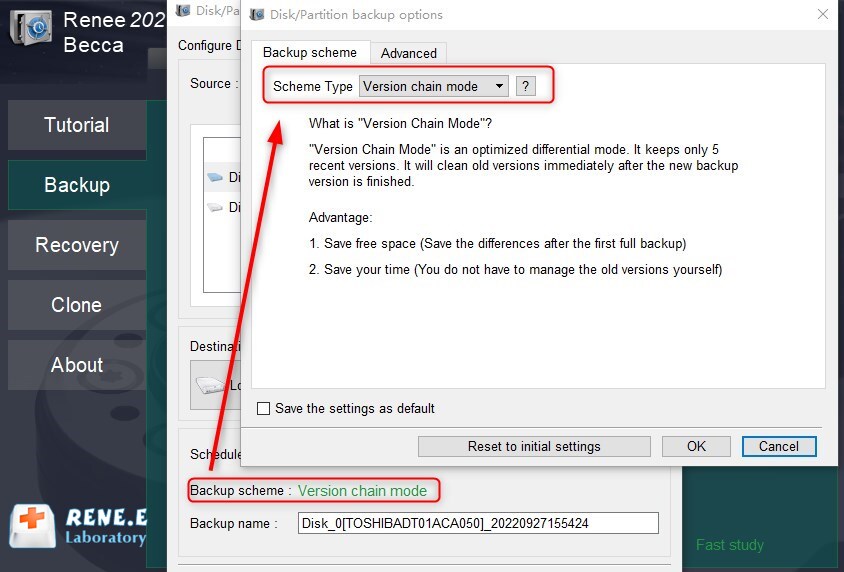
Version chain mode: Only the latest 5 versions are kept, and useless old versions are automatically deleted after the backup is complete.
Single version mode: Only the most recent version is kept, and the previous version is automatically deleted after the backup is complete.
Full mode: Create a full backup.
Incremental mode: After the initial full backup, only incremental backups are created.
Differential mode: After the initial full backup, only differential backups are created.
Step 5: Finally, click the (Backup) button to start backing up the USB disk.
Step 6: If you need to restore the backup of the USB disk, navigate to (Recovery)-(Disk/Partition Recovery).
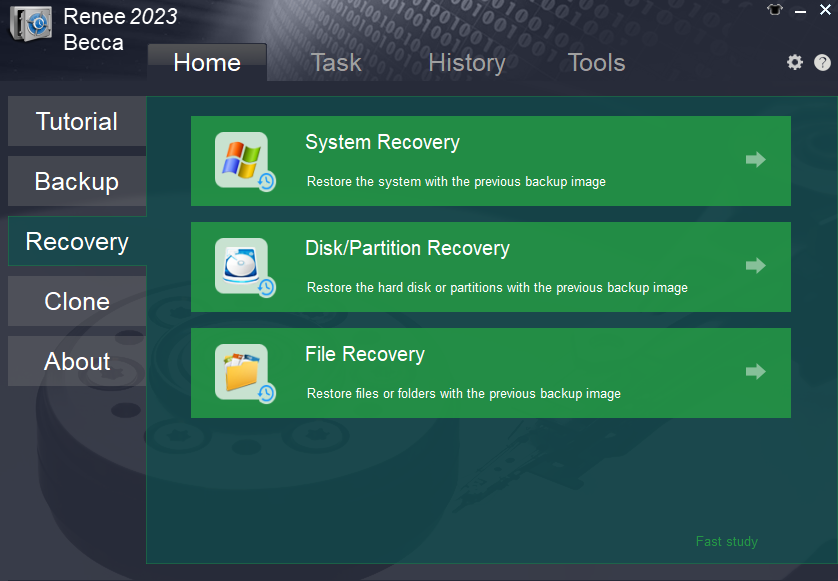
Please choose the previously saved USB disk image file in the (Source) section and then select target location in the (Destination) section. Next, click the (Recovery) button to begin the restoration process.
Restore Hard Disk or Partition
After backing up the files in the USB disk, let’s take a look at the specific steps to format the USB disk.

2. Format the U disk into exFat or NTFS file system

Step 1: Press the (Windows+X) keys on the keyboard at the same time. Then in the pop-up list, select the (Disk Management) option.
open windows disk management
Step 2: Find the USB flash drive you want to format, right click on it and select (Format).
format disk
Step 3: Select the appropriate “file system” according to your needs. If you want to use it in the Windows system, please choose (NTFS). If you need to use it on Windows and Mac as well as other mobile phones and tablets, please choose (exFat). Finally, click (OK).
Select the required file system
Kind tips If you haven’t backed up your important files before formatting your USB disk and have experienced data loss, don’t worry. Renee Undeleter’s format recovery function can help you scan the USB disk and retrieve your lost data. Just remember not to save any new data to the USB disk after the data loss, as this may overwrite the old data and make it impossible to recover.