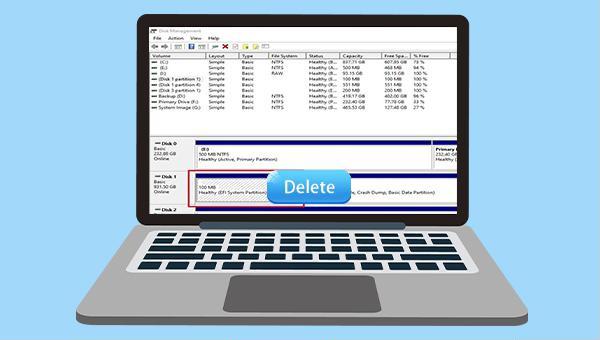
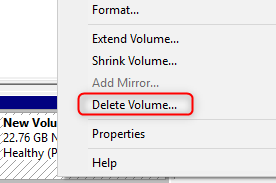
author avatar
    Specialist of Customer Service Dept.
 

Summary
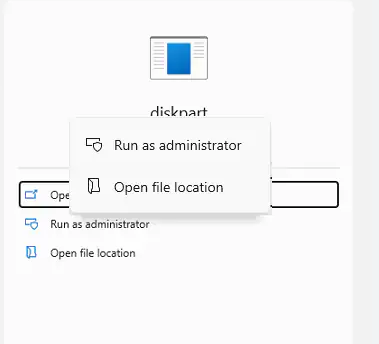
Learn the definition and function of the EFI system partition and how to delete EFI partition. Back up important files before attempting deletion to avoid data loss.


How to delete EFI partition class=

I. What is the EFI system partition? Can it be deleted?

The EFI system partition is created during the installation of the Windows operating system on a GPT disk. It typically has a size of 100MB or 200MB and does not have a designated drive letter. This partition is utilized by Windows computers to adhere to the Unified Extensible Firmware Interface (UEFI). Upon startup, the UEFI firmware accesses the files stored on the EFI system partition to initiate the operating system and essential utilities.
The EFI system partition mainly contains the following files:
● Bootloader required to start the boot process.
● All device drivers that help Windows communicate with computer hardware components (power supply, graphics card, CPU, etc.).
● Small system utilities to help get Windows up and running on initial startup.
● A data file with all the information needed about the startup process and any related logs.
NOTE: If you use BitLocker to encrypt your hard drive, the BitLocker data that must interact with the Trusted Platform Module (TPM) that is also stored on the EFI system partition.
Generally, the EFI system partition is not easily removable. It can be seen in the computer’s disk management by right-clicking it, but the “Delete Volume” option is grayed out and cannot be selected. This is because the EFI system partition is crucial for Windows to boot. If it is deleted, the motherboard’s UEFI firmware will assume that Windows is no longer present on the computer, rendering it unable to start.
Delete the volume
The EFI system partition can be deleted in certain situations. For example, when transferring the operating system to a new hard disk or upgrading to a larger hard disk, the original EFI system partition can be removed. However, if reinstalling the system on the same disk, the EFI system partition will be automatically deleted during installation. It is important to note that deleting the EFI system partition to free up space on the hard disk is not recommended. Instead, click here to learn the proper method for clearing disk space.

II. Before deleting the EFI system partition, please back up important data

Backing up your computer data is crucial, especially if you have important files saved on your computer. To avoid losing these files due to operational errors or other factors, it is highly recommended to back up your data before deleting the EFI system partition. For this task, we recommend using Renee Becca. This software not only supports automatic and regular backups, but also allows you to back up various objects such as systems, hard disks, partitions, and files. Keep reading for more details about this powerful software.

1. What is Renee Becca

Renee Becca is a tool dedicated to system/hard disk data backup and restoration. It can help you back up and restore important data in your computer, such as programs, system configuration, emails, photos, videos, documents, bookmarks, etc. It adopts the leading incremental/differential backup technology, which can save you more time and disk space. In addition to supporting system backup, it also supports partition backup, hard disk backup, file backup, disk cloning and system migration, etc. Meet your various needs.
Renee Becca - Reliable Data Backup & Restore Software

Quick Backup files at up to 3,000MB/min.

Fullfill different backup needs Supports system backup, disk / partition backup, file backup and disk clone.

Intelligent Automatically analyze the differences between source and backup data.

Convenient Support VSS, allowing to freely view webpages when backing up system.

Highly compatible Supports various files and storage devices.

Quick Backup files at up to 3,000MB/min.

Fullfill different backup needs Backup for disk, partition and system. Save disk space by backing up incremental /differential data.

Highly compatible Supports various files and storage devices.

Free TrialFree Trial 2000 users have downloaded and enjoy Renee Becca!

2. How to use Renee Becca to backup computer data?

Step 1: Download, install and run Renee Becca on a Windows computer. Select the (Disk/Partition Backup) option in the main interface (backup). This option can back up the data of the entire hard disk or partition.

If you intend to back up individual important data in daily life, you can use the (File Backup) function.

Renee Becca backup function
Step 2: Next, select the hard disk to be backed up in (source), and select the hard disk for data backup in (destination).

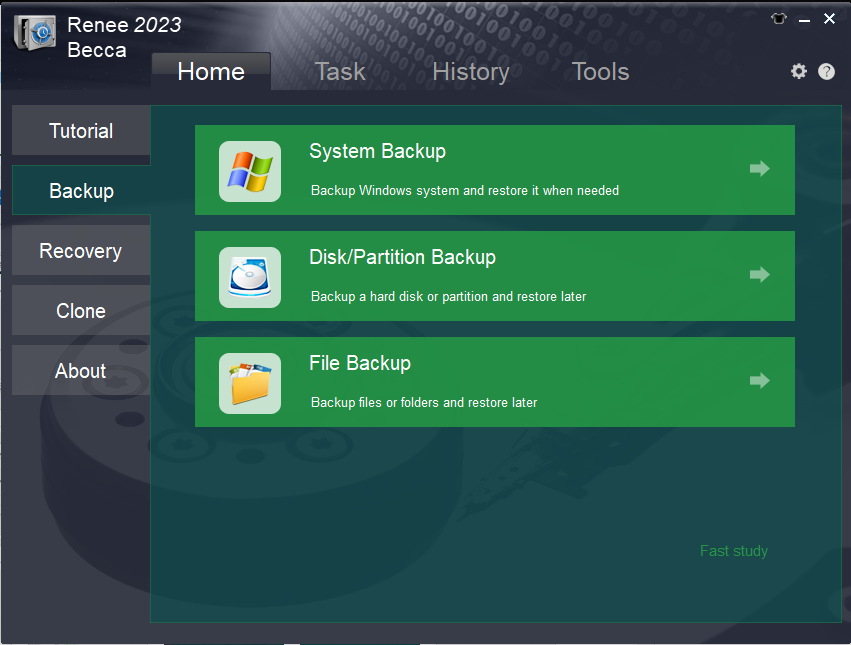
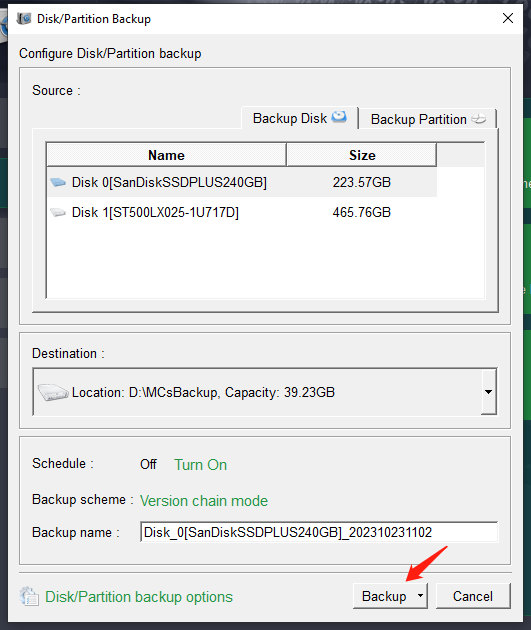
If you intend to back up the partition, you can select the (Backup Partition) option in the upper right corner.

Tip: For regular backups, you can enable the (Scheduler) and set a daily, weekly, or monthly schedule for automatic backups. Additionally, in the (Backup scheme) section, you can select from 5 different backup schemes offered by Renee Becca – version chain mode, single version mode, full mode, incremental mode, and differential backup mode – to find the one that best suits your individual needs.
clone the disk with Renee Becca
Step 3: Finally, click the (Backup) button to start the hard disk backup.
After backing up important files, we can safely delete the redundant EFI system partition. Please continue reading below.

III. How to delete the EFI system partition?

You can check the size and location of the EFI partition in Disk Management before deleting it. This will allow you to easily select the appropriate EFI partition based on its size and disk number for future actions.
There are two ways to open Disk Management:
①Run the computer, right-click the start menu, and select (Disk Management).
②Press (Windows key + R key) at the same time and enter (diskmgmt.msc) in the new dialog box, and click (OK).
After you see the EFI partition-related information in Disk Management, please continue to read the following steps.
Step 1: Run the computer, search for (Diskpart) in the search box in the lower left corner, right-click it, and select (Run as administrator) to open the Diskpart program.
diskpart run as administrator
Step 2: Then enter the following commands to change the EFI partition ID to a basic data partition, and press the (Enter) key after each command is entered.
list disk (list all disks in the computer)
select disk 0 (select the disk where the EFI partition is located, here is disk 0, you can first confirm the disk number where the EFI partition is located in the disk management)
list partition (list all partitions on the selected disk)
select partition 5 (The EFI partition that needs to be deleted)
SET ID=ebd0a0a2-b9e5-4433-87c0-68b6b72699c7 (Set the selected partition as a basic data partition, and you can learn more from Microsoft’s official page.)
Step 3: You can easily access Disk Management and right-click on the location of the EFI partition. From there, select the option to delete the volume, which will then turn the EFI partition into an “Unallocated” space. Alternatively, you can also use the DiskPart command to delete the EFI partition. Simply enter the following commands after changing the EFI system partition ID and press “Enter” after each one.
list partition (list all partitions on the selected disk)
select partition 5 (Partition 5 is the EFI partition that needs to be deleted)
delete partition override (the override parameter allows DiskPart to delete any type of partition)
exit (exit the DiskPart program)