

How to Install Windows 10/11 Without Losing Data on Other Drives: A Complete Guide

Summary
Learn how to install Windows 10/11 without losing data on other drives. This authoritative guide covers essential tips for users in the US and India to refresh or upgrade safely while protecting all your important files.


Remove Windows Login Password 3 steps for whole password remove process.
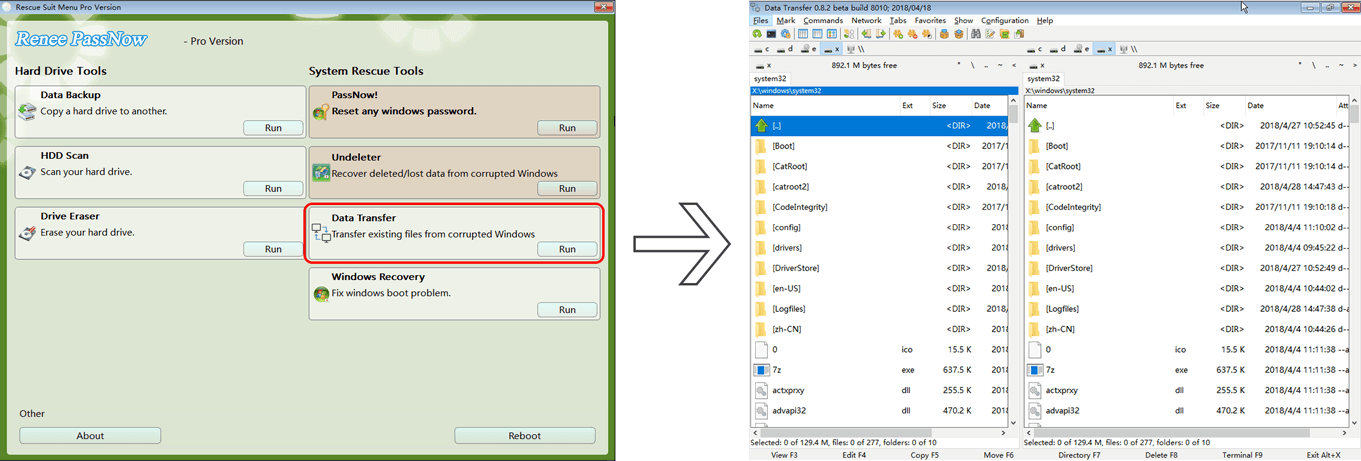
Recover the files Recover the deleted files without Windows system.
Transfer the data Transfer the important files of the computer with system.
Multifuctional Data transfer, data recovery, bootable problem recovery can be run without system.
Highly compatible Windows 11/10/8.1/8/7/XP/Vista. UEFI boot.
Remove Login Password Support Windows 11/10/8.1/8/7/XP/Vista. UEFI boot.
Recover the files Recover the deleted files without Windows system.
Transfer the data Transfer the important files of the computer with system.
Automatic 4K alignment Improves SSD performance during system migration.
Support GPT and MBR Automatically adapt to the suitable partition format.
Support NTFS and FAT32 Redeploy various files in different file systems.
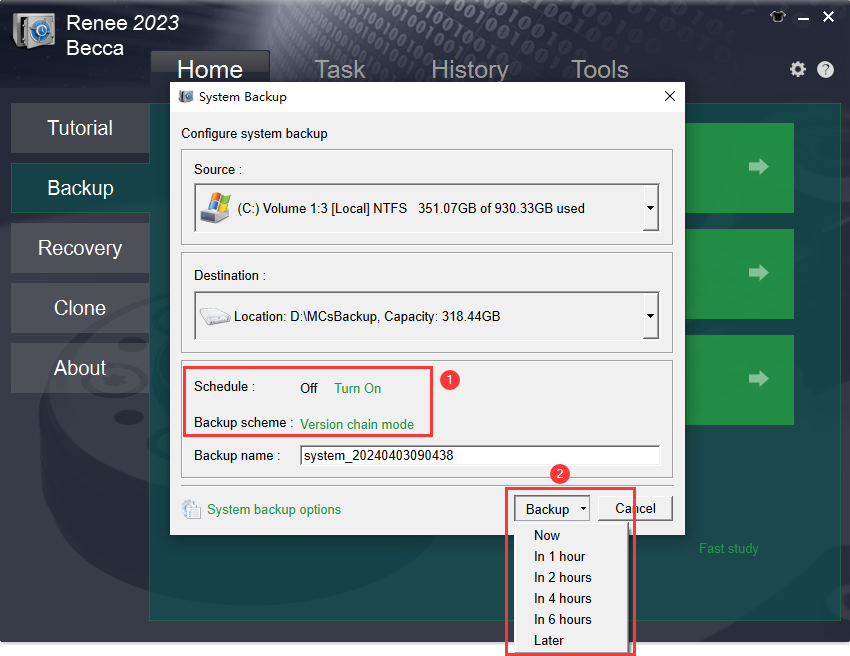
Back up quickly Back up files at up to 3,000MB/min.
Overall backup schedule Support system redeployment/system backup/partition backup/disk backup/disk clone.
Automatic 4K alignment Improve SSD performance
Support GPT and MBR Intelligently adapt to a partition format
Support NTFS and FAT32 Redeploy files in different file systems
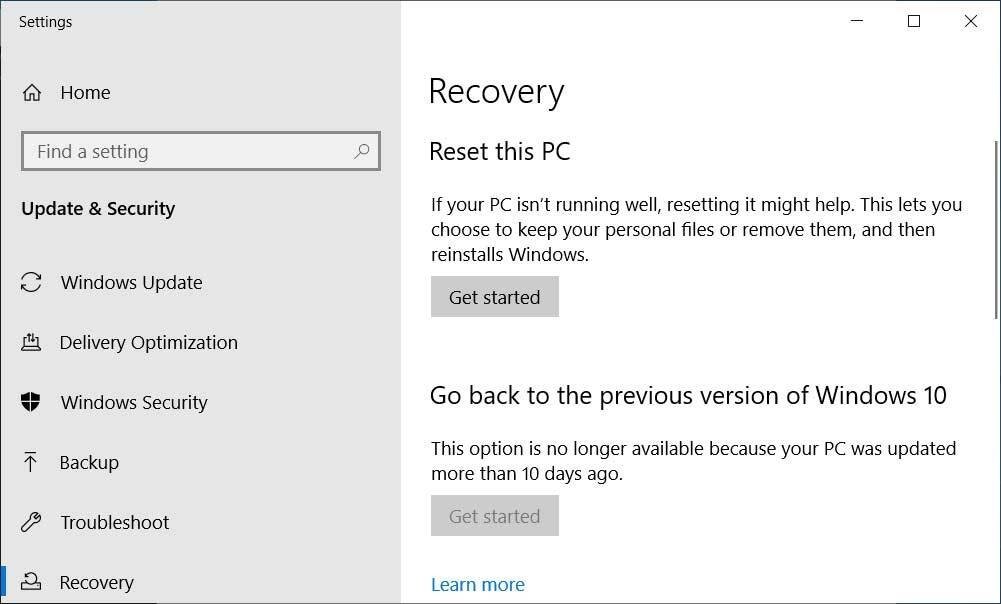
- Keeps your personal files safe: Your documents, photos, and other personal data on the C: drive stay intact. Files on other drives like D: or E: aren’t touched at all.
- No need for external tools or USB drives: It uses built-in Windows recovery files, so you don’t have to download anything or mess with bootable media.
- Fixes minor system issues quickly: Great for resolving slow performance, glitches, or weird behavior without doing a full reinstall.
- Much safer than a clean install: Since it doesn’t wipe your entire system, there’s less risk of losing important data or misconfiguring partitions.
- Removes all installed apps: Any third-party programs you’ve added (like Chrome, Photoshop, or Office) will be wiped. You’ll need to reinstall them manually.
- Resets your system settings: Customizations like display settings, Wi-Fi setups, and preferences will go back to default.
- May not fix deeper issues: If your system has serious corruption, malware, or driver conflicts, this reset might not be enough—you’d need a full clean install.

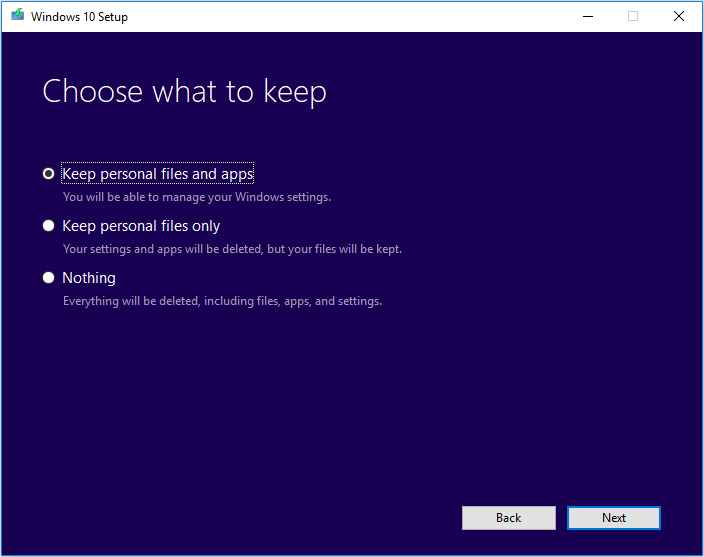
- Keeps all files, apps, and settings: Unlike Option A, this method doesn’t remove your installed programs or reset your preferences. Your system gets repaired, but your stuff stays put.
- Fixes deeper system problems
- No need to reinstall anything: Since your apps and data remain untouched, you won’t have to spend hours reinstalling software or restoring backups.
- Works even if Reset fails: If your built-in recovery files are damaged or missing, this method still works—because it uses a fresh ISO downloaded from Microsoft.
- Takes longer to set up
- Needs internet and disk space
- Won’t fix hardware issues
Automatic 4K alignment Improves SSD performance during system migration.
Support GPT and MBR Automatically adapt to the suitable partition format.
Support NTFS and FAT32 Redeploy various files in different file systems.
Back up quickly Back up files at up to 3,000MB/min.
Overall backup schedule Support system redeployment/system backup/partition backup/disk backup/disk clone.
Automatic 4K alignment Improve SSD performance
Support GPT and MBR Intelligently adapt to a partition format
Support NTFS and FAT32 Redeploy files in different file systems
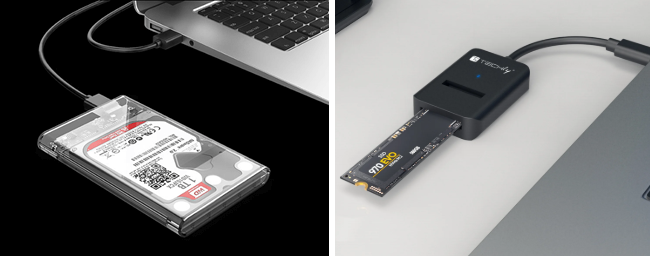
Install New Drive First

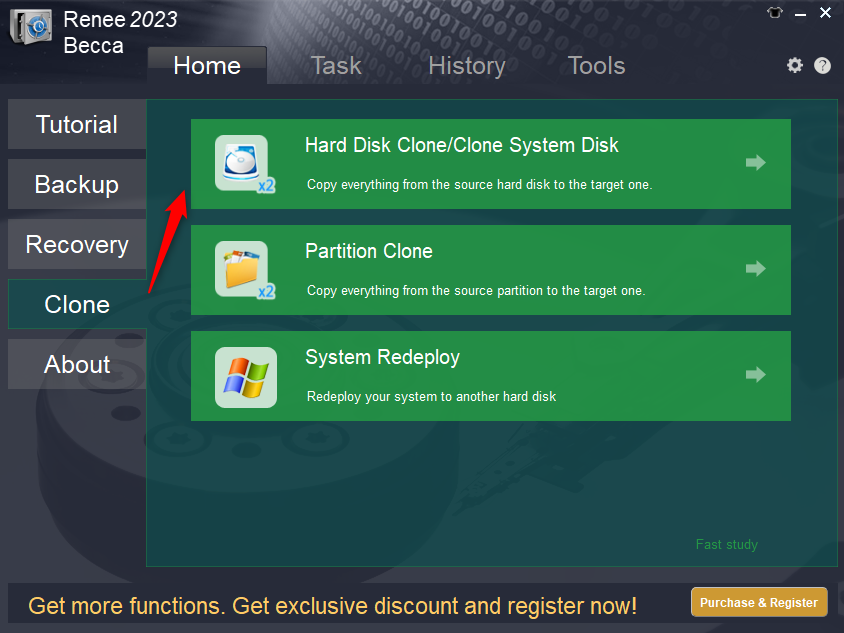
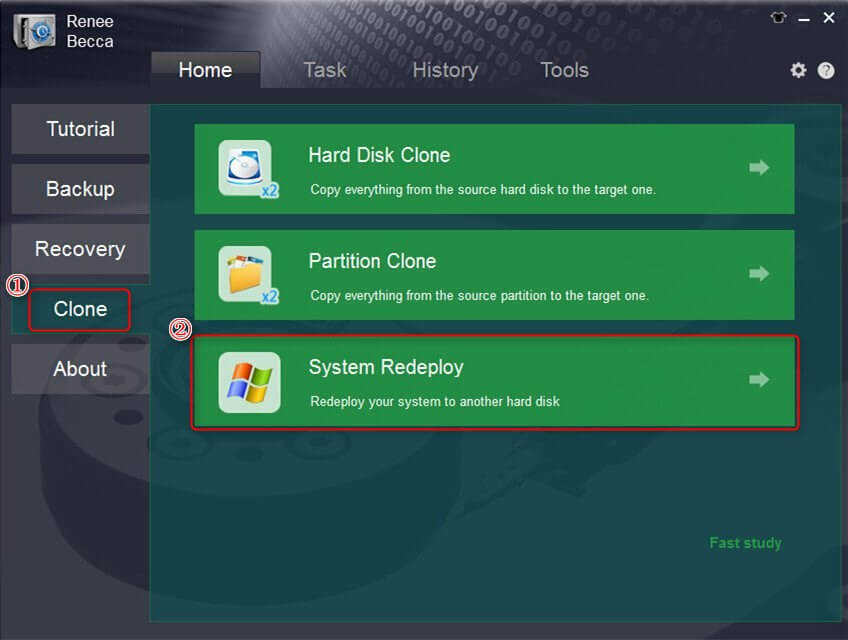
Step 1. Download and install Renee Becca on your computer.
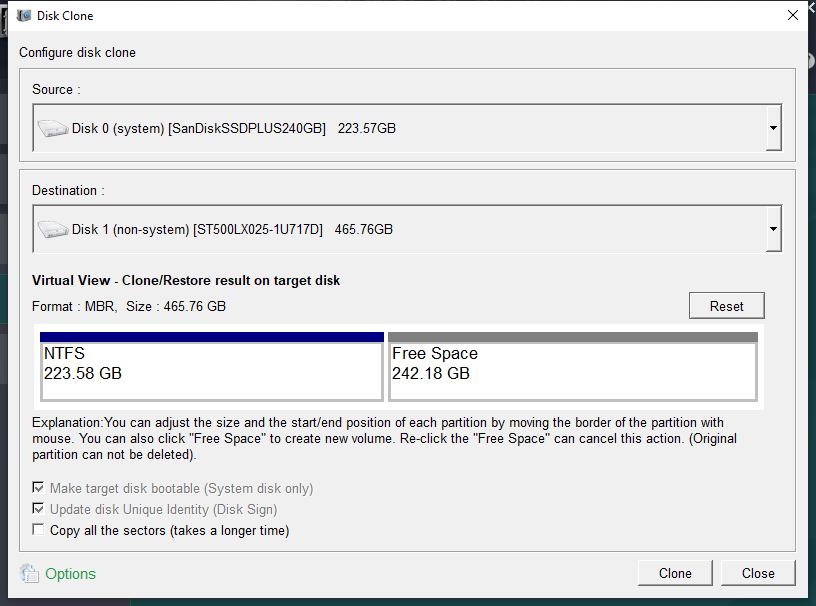
Step 2. Choose the right cloning function for your needs.
| Function Name | Feature | Suitable For |
|---|---|---|
| Hard Disk Clone/Clone System Disk | Creates an exact 1:1 copy of your entire original drive, including all partitions (system, data, recovery). | Replacing your old hard drive completely with a new SSD. |
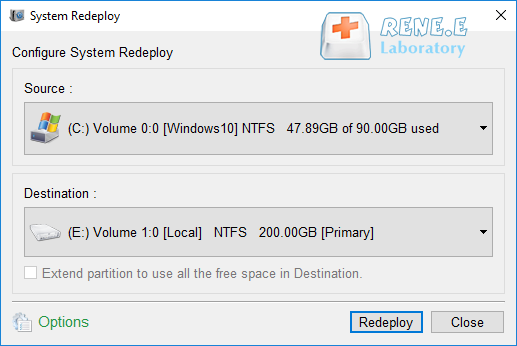
| System Redeploy | Migrates only the essential Windows system partitions to the new drive, saving time and space. | Moving your OS to a new SSD while keeping your old HDD as a secondary data drive. |

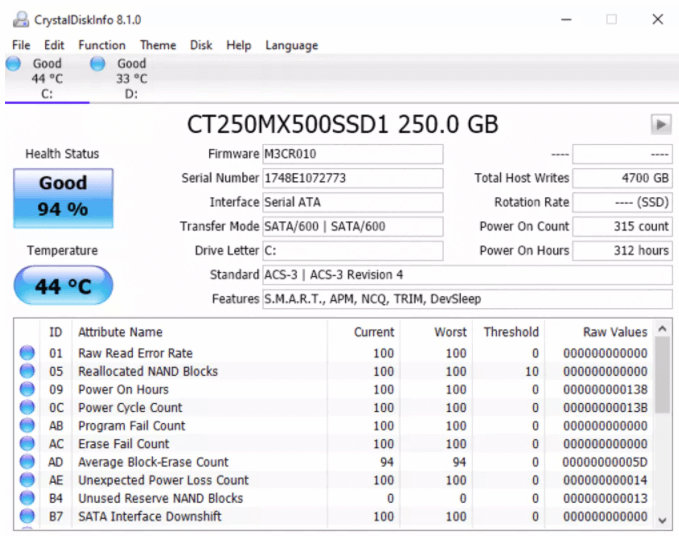
Step 3. Wait for the progress bar to reach 100% to indicate successful migration.
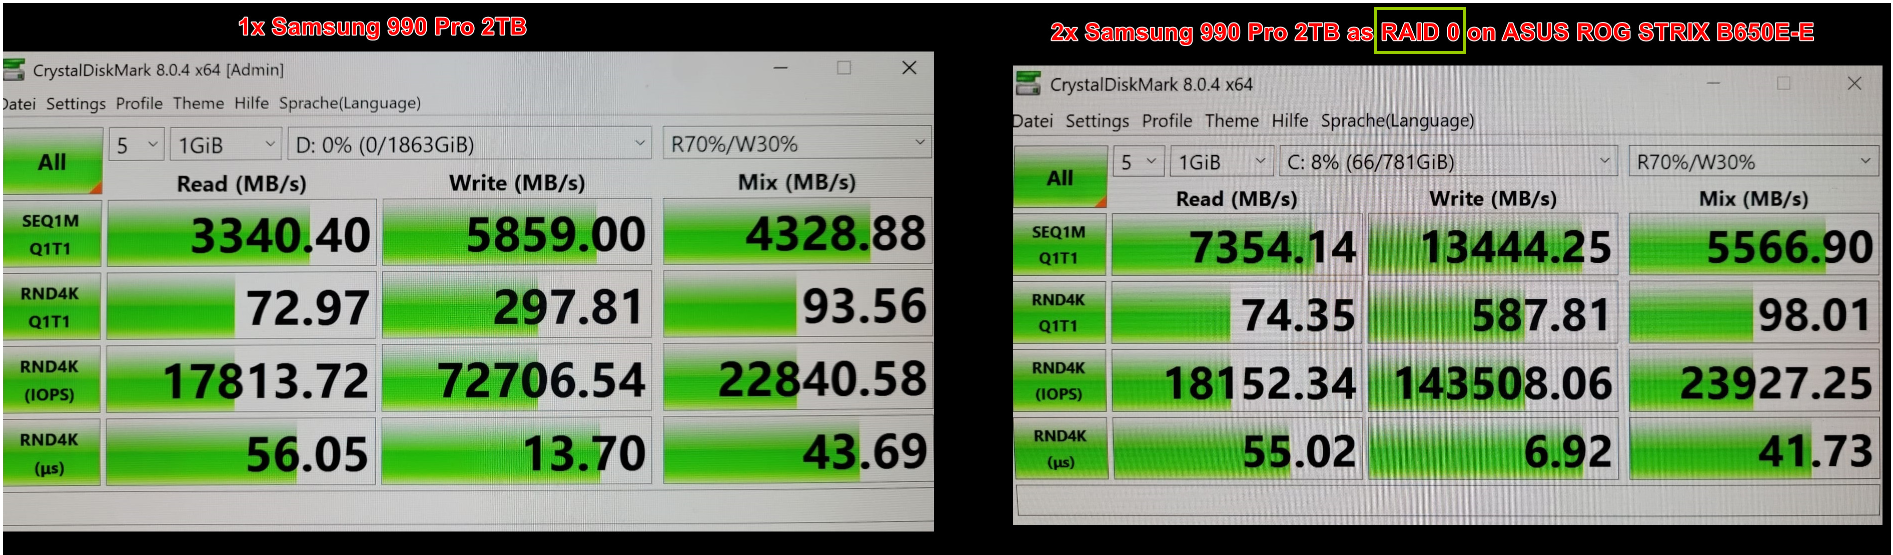
Step 4. Use softwares like CrystalDiskInfo to verify your new drive status.
- Macrium Reflect Free: A well-regarded tool for creating disk images and cloning drives. The free version has some limitations but is very capable for basic cloning tasks.
- Clonezilla: A powerful, open-source cloning tool. It’s extremely versatile but has a text-based interface and a steeper learning curve, making it more suitable for advanced users.
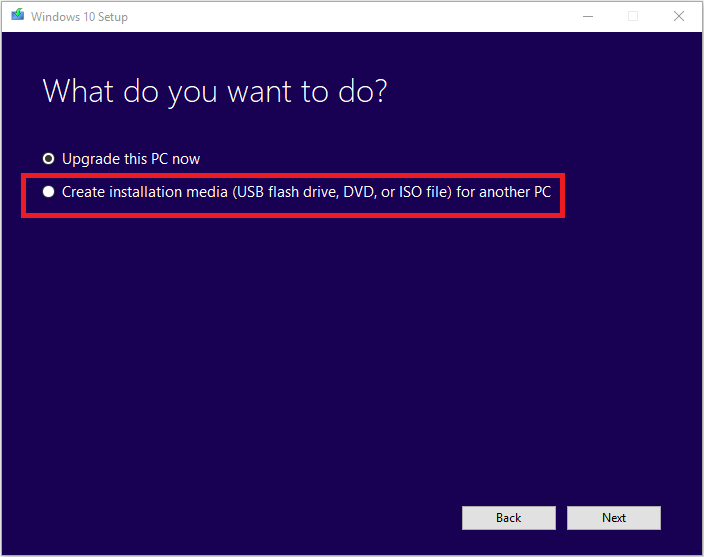
Stage 1: Create a Bootable Windows 10/11 USB
Microsoft Windows 10 or Microsoft Windows 11
download page to download the Windows Media Creation Tool.
Stage 2: Boot from the USB Drive
| Server Type | Enter boot menu method |
|---|---|
| DELL | Press the F12 key repeatedly before the Dell logo appears on the screen. |
| HP | Press the F9 key multiple times when the HP logo is displayed. |
| BIOS Name | Enter boot menu method |
|---|---|
| ASRock | DEL or F2 |
| ASUS | DEL or F2 for PCs/ DEL or F2 for Motherboards |
| Acer | DEL or F2 |
| Dell | F12 or F2 |
| ECS | DEL |
| Gigabyte / Aorus | DEL or F2 |
| Lenovo (Consumer Laptops) | F2 or Fn + F2 |
| Lenovo (Desktops) | F1 |
| Lenovo (ThinkPads) | Enter then F1 |
| MSI | DEL |
| Microsoft Surface Tablets | Press and hold Power and Volume Up buttons |
| Origin PC | F2 |
| Samsung | F2 |
| Toshiba | F2 |
| Zotac | DEL |
| HP | Esc/ F9 for Boot Menu/ Esc/ F10/ Storage tab/ Boot Order/ Legacy Boot Sources |
| INTEL | F10 |
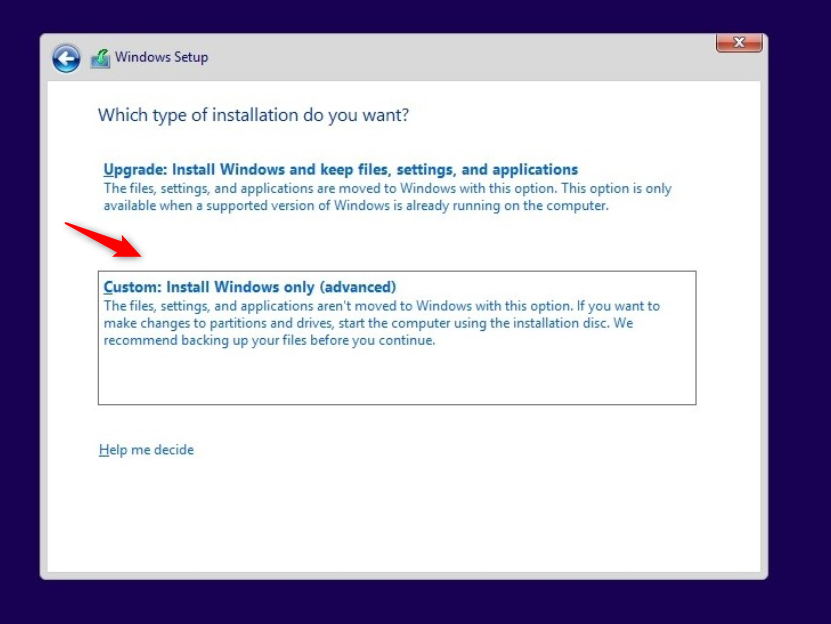
Stage 3: The Installation - Pay Close Attention!


🚫 PC Won’t Boot After Installation
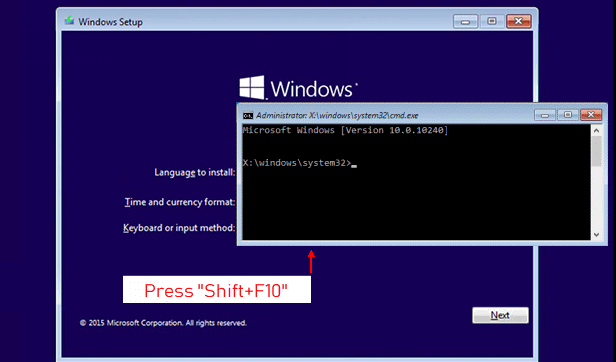
bootrec /fixmbr
bootrec /fixboot
bootrec /scanos
bootrec /rebuildbcd
I Accidentally Formatted the Wrong Drive!

Will upgrading from Windows 10/11 to Windows 11 delete my files on other drives?
How can I be 100% sure I don’t format my data drive during a clean install?
What’s the real difference between “cloning” a drive and a “clean install”?
My other drive isn't showing up after I installed Windows 10. What should I do?
Can I install Windows 10/11 on my D: drive and keep my old Windows on the C: drive?
Is it true that a fresh install only deletes data on the C: drive partition?
Automatic 4K alignment Improves SSD performance during system migration.
Support GPT and MBR Automatically adapt to the suitable partition format.
Support NTFS and FAT32 Redeploy various files in different file systems.
Back up quickly Back up files at up to 3,000MB/min.
Overall backup schedule Support system redeployment/system backup/partition backup/disk backup/disk clone.
Automatic 4K alignment Improve SSD performance
Support GPT and MBR Intelligently adapt to a partition format
Support NTFS and FAT32 Redeploy files in different file systems
Relate Links :
How to Reset a Sony VAIO Laptop to Factory Settings — Even If You Forgot the Password

11-10-2025
John Weaver : Learn how to reset Sony VAIO laptop to factory settings with this trusted guide. Follow easy steps to...
[2025] How to Clone Windows 10/11 to a Smaller SSD Without Reinstalling

28-08-2025
Ashley S. Miller : Learn how to clone Windows 10/11 to a smaller SSD step-by-step, keeping all your files and apps. This...
How to Use Command Prompt to Reset Computer to Factory Settings
27-08-2025
Ashley S. Miller : This guide explains how to use command prompt to reset computer to factory settings, covering essential precautions to...
[2025] How to Clone Your SSD to a New One Without Reinstalling Windows
22-08-2025
Ashley S. Miller : Easily clone your entire system—Windows OS, files, and applications—to a new SSD without reinstalling or losing data. This...


User Comments
Leave a Comment