

Retrieving Memories: A Guide to see your Deleted Photos again

Summary
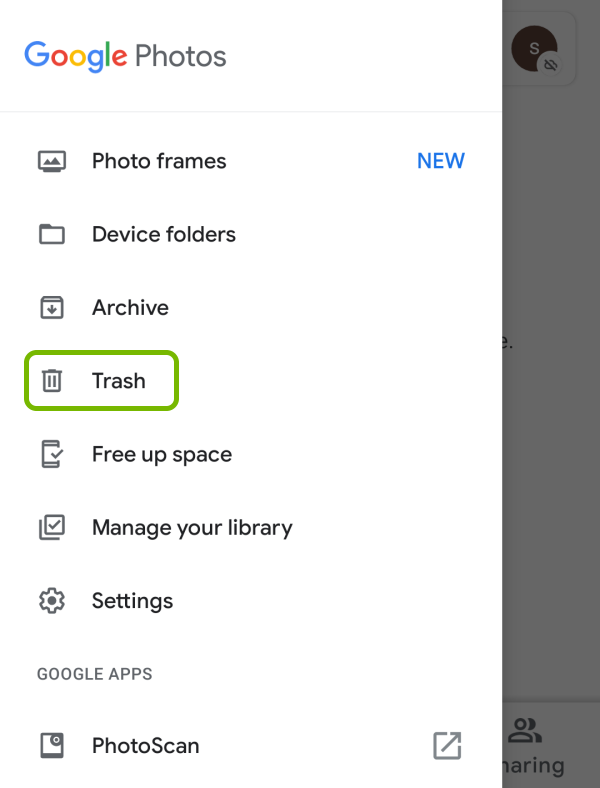
Learn how to see your deleted photos on any device with this comprehensive guide. From Windows PCs to Macs, iPhones to Android devices, and even digital cameras, we'll show you how to retrieve lost memories and prevent future photo loss.


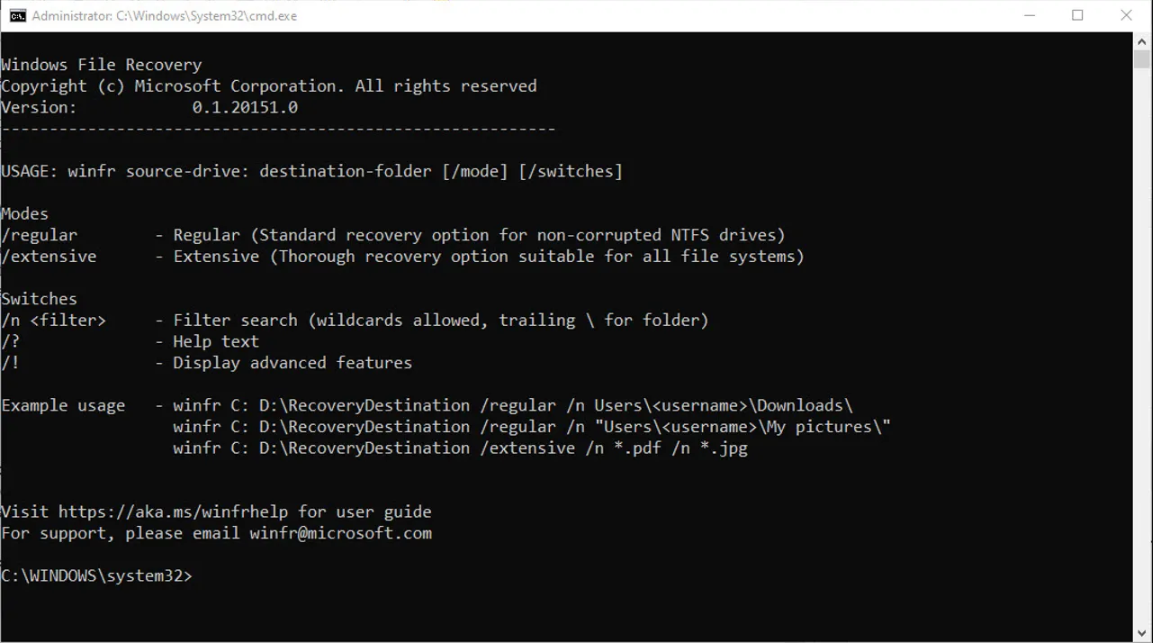
winfr source: destination
winfr C: C:\Users\YourUsername\Desktop

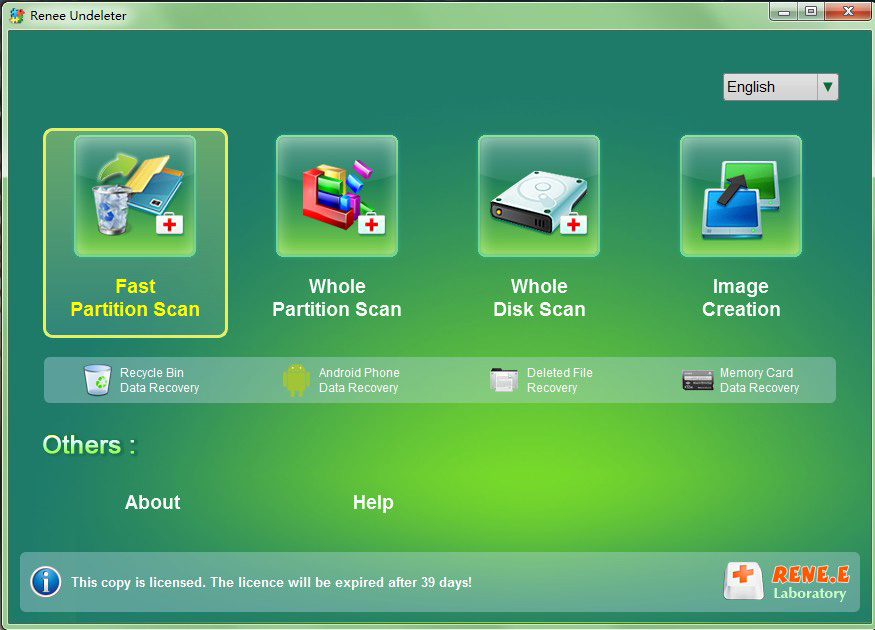
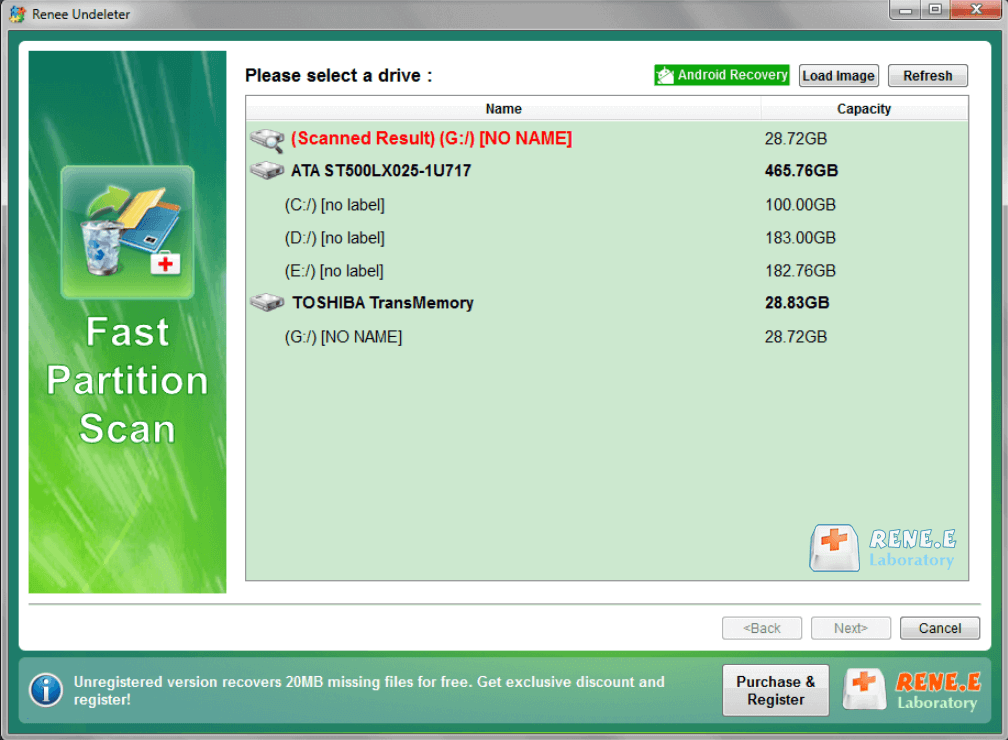
Easy to use Only simple steps to recover data from storage devices.
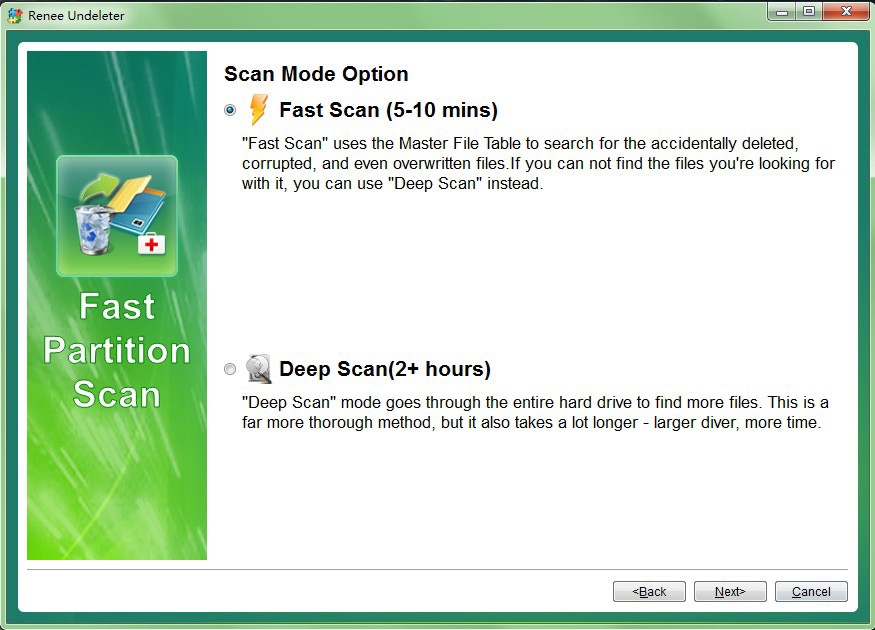
Multiple scan modes Fast partition scan, whole partition scan and whole disk scan for different recovery needs.
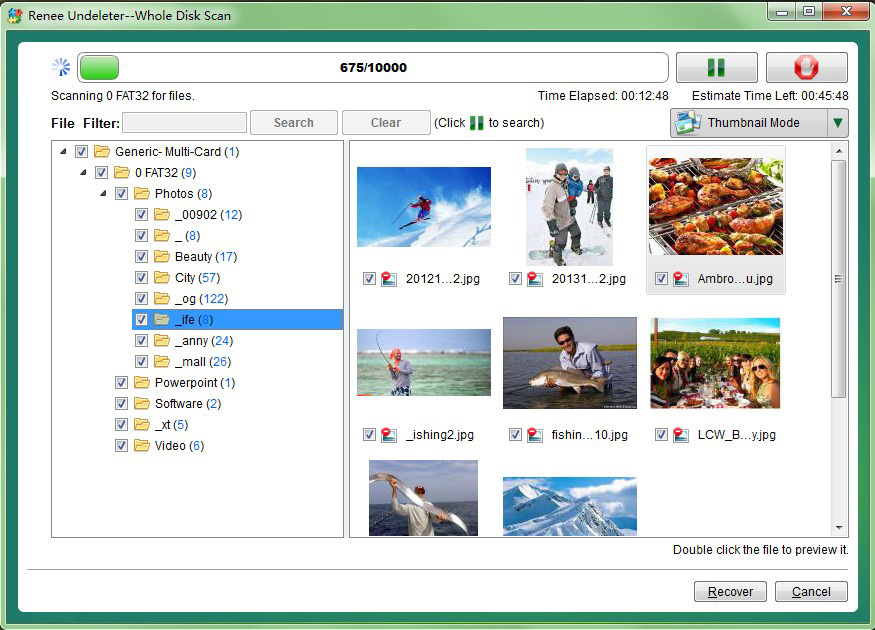
File types Support to recover pictures, videos, audios, documents, mails, etc.
Supported storage devices Recover data from recycle bin, SD card, external disk, etc.
Supported systems Windows 11,10, 8.1, 8, 7, Vista, XP, 2000 and Mac OS X10.6, 10.7, 10.8+.
Easy to use Only simple steps to recover data from storage devices.
Multiple scan modes - 3 scan modes for different recovery needs.
Supported storage devices Recover data from recycle bin, SD card, external disk, etc.

For Mac users seeking to retrieve deleted photos, Time Machine stands as the premier built-in utility. To access it, connect the drive where your backups are stored, click on the Time Machine icon in the menu bar, and choose “Enter Time Machine“. From here, you can navigate back to the date before the photo’s deletion and click “Restore” to recover your image. Ensure you have Time Machine set up and running before any data loss occurs.

The Photos application on macOS, replacing older apps like iPhoto and Aperture, also offers a safeguard against accidental deletion. Within the Photos app, deleted pictures are moved to the “Recently Deleted” album where they stay for 30 days before permanent removal. To restore, simply select the desired photo(s) and press “Recover“. The chronological library and the ability to sort into albums make managing and retrieving your photos straightforward.

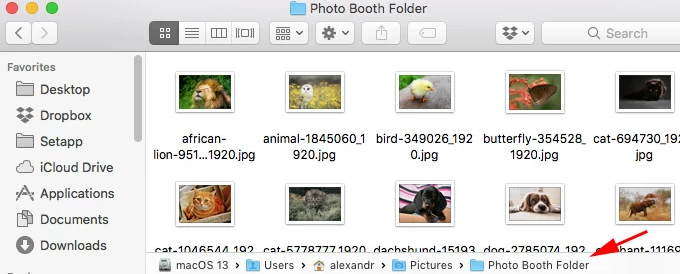
In instances where you’ve used Photo Booth—a camera application that comes standard with macOS—deleted photos might be recoverable if they were recently removed. Check the app’s library for thumbnails of saved images, as they may still be present. Although recovery options within Photo Booth are limited, the thumbnails provide a quick visual reference for recently captured images that may have been deleted elsewhere on your system.
When built-in options fall short, Mac users can turn to third-party software such as Undeleter, Disk Drill or PhotoRec for more robust recovery capabilities. These applications perform deep scans and can often recover files that are no longer visible to the user. They operate on the principle of file signatures, allowing them to identify various data types, including photos, and attempt to restore them. Remember to halt all use of the storage device immediately after data loss to prevent overwriting your deleted files.

If all software-based methods fail to yield results, and the photos are irreplaceable, seeking professional data recovery services may be the next step. Despite being more expensive, these services provide specialized recovery techniques, particularly in cases of physical damage to storage media, offering the highest probability of retrieval for your valuable memories.

Relate Links :
How to Recover Deleted Photos from Your Hard Disk
17-11-2023
Amanda J. Brook : Uncover your precious memories and restore deleted photos from your hard disk with these simple methods. From using...
Where Do Deleted Files Go? Exploring the Different Paths

15-11-2023
Ashley S. Miller : Discover the truth about where your deleted files actually go on a computer. From the Recycle Bin to...
Navigating USB Device Data Deletion: Where Do Deleted Files Go?
14-11-2023
Amanda J. Brook : Learn the truth about where your deleted USB files actually go and how you can retrieve them with...
Uncovering the Mystery: Where Do Deleted Photos Go?
13-11-2023
Ashley S. Miller : Uncover the mystery of where your deleted photos go and discover methods for recovering them on different operating...

