author avatar
    Senior Product Manager
 

Summary
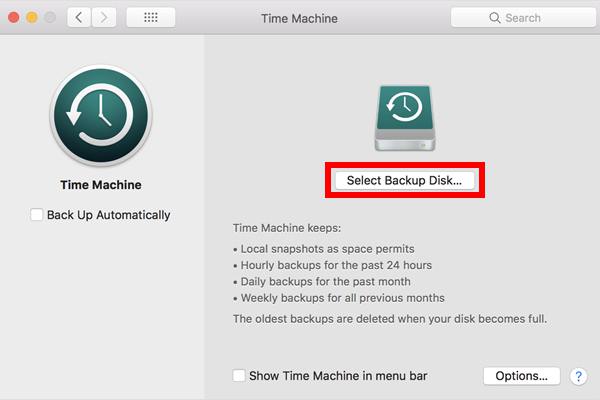
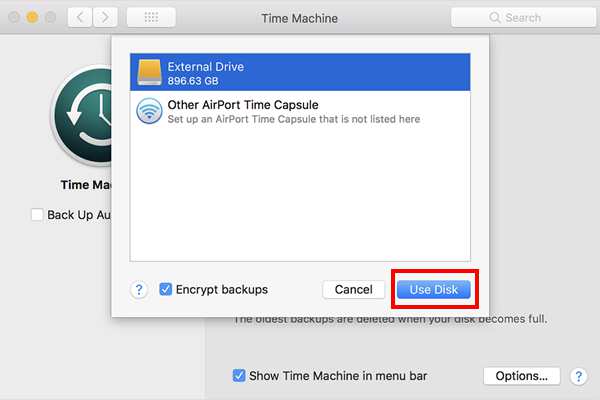
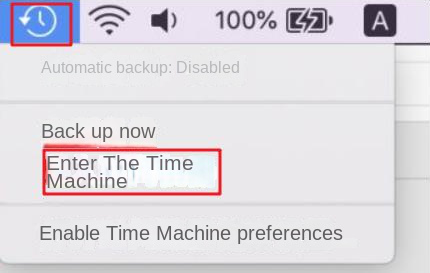
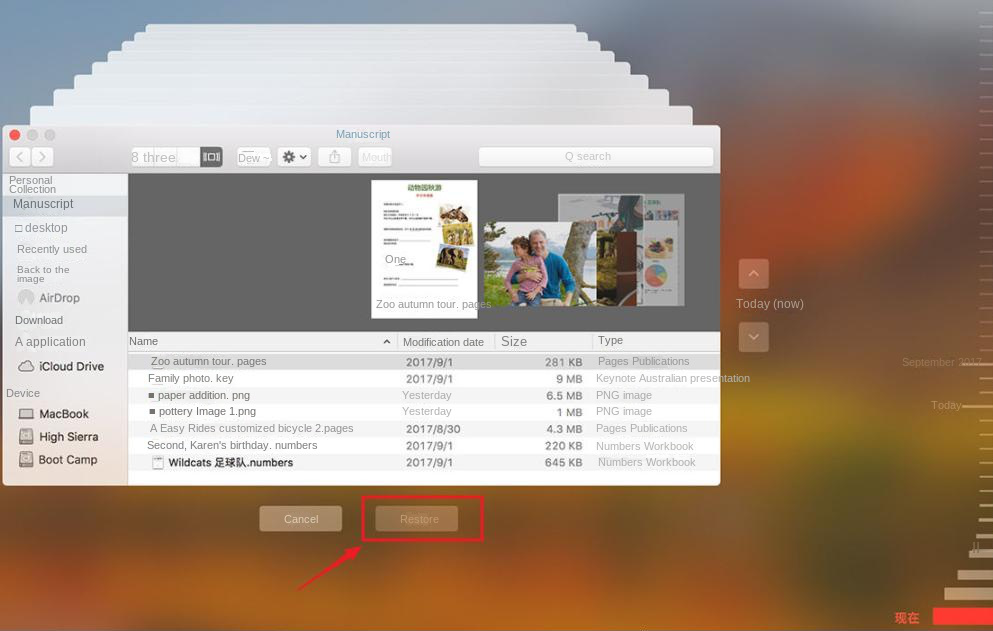
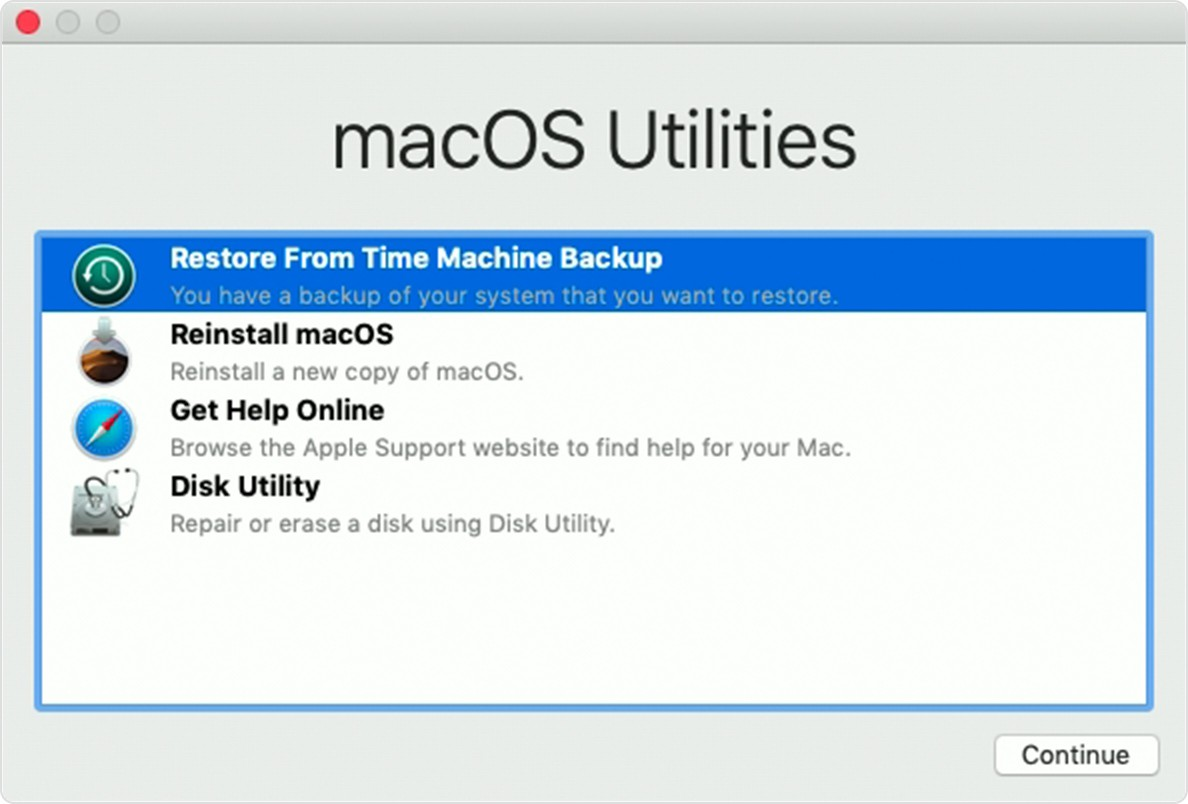
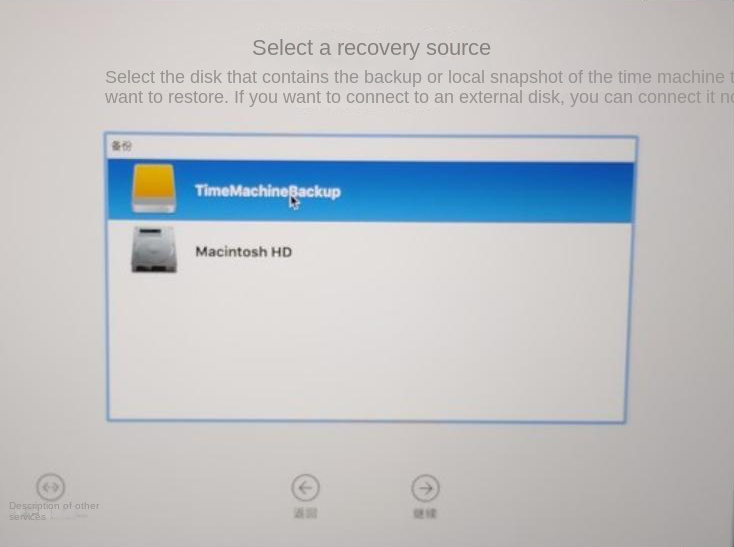
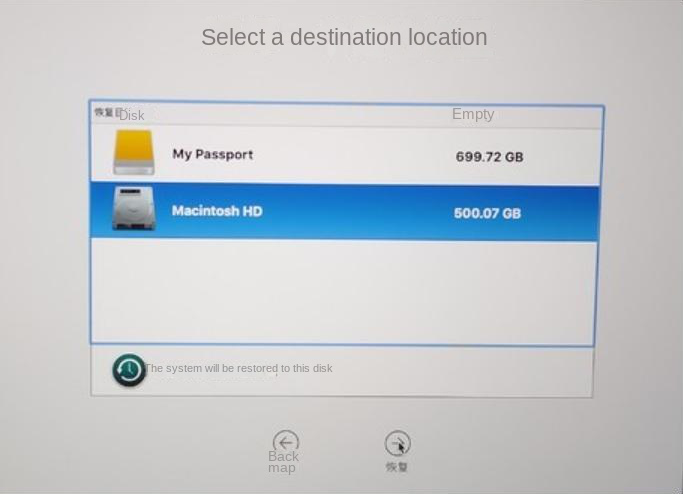
Learn the simple steps to recover your misplaced or unintentionally erased files using Time Machine, Mac's built-in backup tool. Plus, explore the recovery process using Renee Undeleter for those instances when a Time Machine backup isn't on hand.


restore from time machine on Mac

I. What is a Time Machine?

Time Machine is a built-in backup feature of macOS that automatically saves copies of your apps, music, photos, emails, and documents. When an external storage device is connected and designated as the backup disk, Time Machine performs hourly backups for the last 24 hours, daily backups for the previous month, and weekly backups for each month before that. Older backups are deleted when the backup disk is full. To configure Time Machine, simply connect an external drive and select it as your backup disk in the Time Machine settings.
Step 1: Connect an external high-capacity hard drive to the Mac computer as a hard drive for saving backups.
Step 2: Select (Time Machine) in the (System Preferences) of the Mac computer, and click (Select Backup Disk).
select backup disk
Step 3: Select a backup disk from the available choices. To encrypt your backup, select the Encrypt backup checkbox in the bottom left corner. Then, click on Use Disk located at the bottom right. If the disk requires reformatting for Time Machine use, an Erase alert will be displayed. Confirming this action will erase all data on the disk, so make sure to back up any important files prior to proceeding.
Back up MacBook

II. How to recover data using Time Machine?

1. Restore specific files

Step 1: Connect your Time Machine backup disk to your Mac computer. Open the folder containing the lost/deleted data.
Step 2: Click on the Time Machine icon located in the menu bar and select (Enter Time Machine).
mac access time machine
Step 3: Find the file you want to restore through the timeline on the right edge of the screen, select the file and click (Restore).
recover files from time machine

2. Restore system backup

If you’ve erased the macOS system disk and can’t boot, but have a “Time Machine” backup of your Macintosh HD, you can restore your system. Connect the external drive containing the Time Machine backup to your Mac and proceed with the recovery process.
Step 1: Turn on your Mac and immediately hold down (Command (⌘)+R). If prompted for a password, enter it, such as an administrator password.
Step 2: From the macOS Utilities window, select Restore from Time Machine Backup and click Continue. A warning will appear, alerting you that restoring the backup will erase the target disk. You have the option to use the Migration Assistant for restoring to a new computer. After confirming the details, click Continue to begin the process.
Restore from Time Machine Backup
Step 3: Within the recovery source interface, opt for the Time Machine backup file and click “Continue.” Subsequently, macOS backup files from a range of dates will be displayed; select the desired file and click “Continue” once more.
select recovery source mac
Step 4: Select Macintosh HD as the restore destination. Click Restore and wait for the process to complete before restarting your Mac.
Select the destination mac for recovery
Kind tipsIf “Time Machine” cannot successfully restore the data you need, you can also use professional data recovery software to scan the disk with lost data and restore it. For example, Renee Undeleter provides multiple scanning modes to meet most data recovery needs. Click Here you can view the specific steps of Renee Undeleter Mac version to restore data.

III. How to recover deleted files from Mac without Time Machine Backups?

Once the trash is emptied, it becomes challenging to recover deleted files. However, numerous professional data recovery programs exist to retrieve files before they’re overwritten by new data. Renee Undeleter is an excellent choice for this purpose.
Renee Undeleter is a specialized tool designed for the recovery of various data files. It proves highly effective when you’ve accidentally deleted important files, emptied the recycle bin, or formatted your disk, memory card, or USB drive. The software provides a robust solution to data loss with its four main functions: Fast Partition Scan, Whole Partition Scan, Whole Disk Scan, and Image Creation, addressing a wide array of data loss situations comprehensively.
Renee Undeleter - User friendly & Helpful Formatted Data Recovery Software

Easy to use 3 steps to recover formatted data back.

Multi Recovery Modes File recovery, Whole partition recovery and Whole disk recover are available.

Support Different File Types Photos, videos, audios, files, emails, etc.

Image Creation Creat image for disk or parititon.

Compatible with Different Devices SD card, SDHC, SDXC, USB disk, computer, etc.

Easy to go 3 steps for whole recovery.

Multi Recovery Modes Files/partition/disk recovery modes.

Support Different Devices SD card/USB disk/hard disk, etc.

Free TrialFree TrialFree Trial 800 users have downloaded and found data back!
The following will introduce the detailed operation of using Renee Undeleter after emptying the trash.
empty the trash
Step 1: Download, install and run Renee Undeleter on a Mac computer, and select the (Whole Partition Scan) option on the main interface.
Note: To prevent data overwriting, refrain from installing Renee Undeleter on the disk where data was lost. For internal hard disks in Macs without a secondary disk, download the software onto an external USB or portable drive, then execute the 
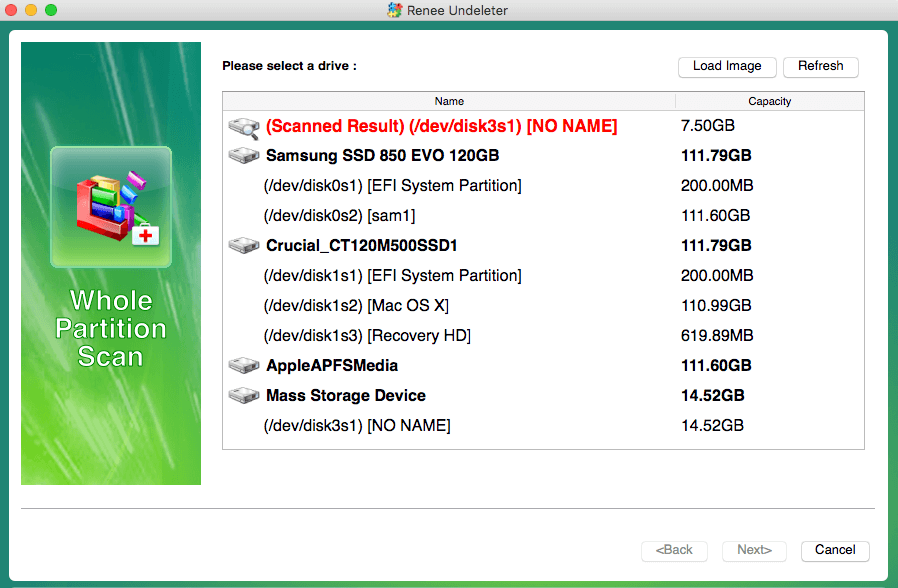
DMG file to copy the application to that drive. If you need to retrieve data from an external disk and lack additional ones, you may install the software on the Mac’s internal hard disk by adding it to the Mac applications.
select whole partition scan in renee undeleter on mac
Data Recovery Features:

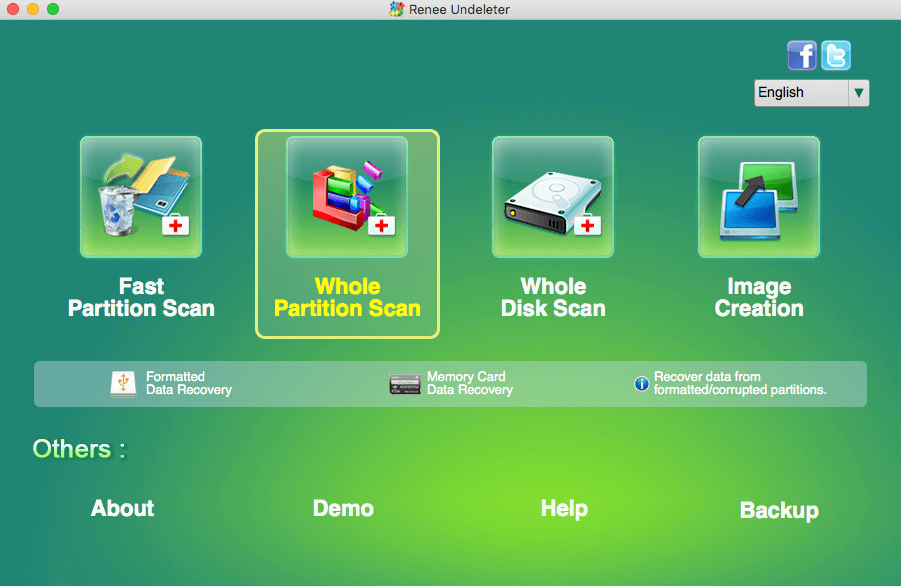
  • Fast Partition Scan: Recovers files lost from accidental deletions or recycle bin clearance.
  • Whole Partition Scan: Restores files from inaccessible or formatted partitions.
  • Whole Disk Scan: Analyzes partition information and conducts comprehensive scans.
  • Image Creation: Generates a partition mirror image for backup, allowing data restoration from the image.
Step 2: Next select the disk partition from which you want to recover data. After the selection is complete, click (Next).
If your Mac’s built-in disk isn’t visible for scanning, it may be because System Integrity Protection (SIP) is enabled. To scan the disk, you’ll need to temporarily disable SIP, proceed with the scan, and then re-enable SIP afterwards. For instructions on toggling SIP, please see the steps below:

  • 1. Restart your Mac and hold down the Command + R keys to enter Recovery Mode.
  • 2. Once in Recovery Mode, open a Terminal window from the Utilities menu.
  • 3. Type the command csrutil disable and press Enter.
  • 4. Restart your Mac normally to apply the changes.


To re-enable SIP:

  • 1. Follow steps 1 and 2 to re-enter Recovery Mode.
  • 2. In Terminal, type csrutil enable and press Enter.
  • 3. Restart your Mac again.
click to select a target drive in whole partition scan in renee undeleter on mac
Step 3: Wait for the scan to complete; duration varies based on the disk partition size. Search for the 
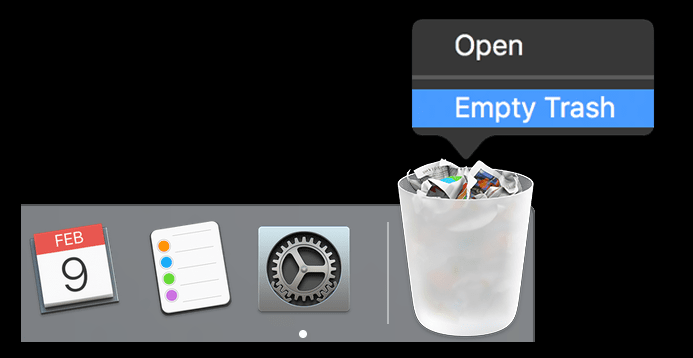
.Trashes folder or “extra found files” within the scan results to pinpoint files removed from the trash. You can preview files by double-clicking them during the scan. To retrieve a file, select it and press Recover to halt the scan and begin the recovery process, or hold off until the scan concludes to pick multiple files and click Restore to recover them to an alternate disk.
click to run sd card or usb data recovery on mac
TipsUsing Renee Undeleter to scan your Mac’s internal disk yields numerous results. To find specific files for recovery, use the file filter by entering the file format (e.g., 
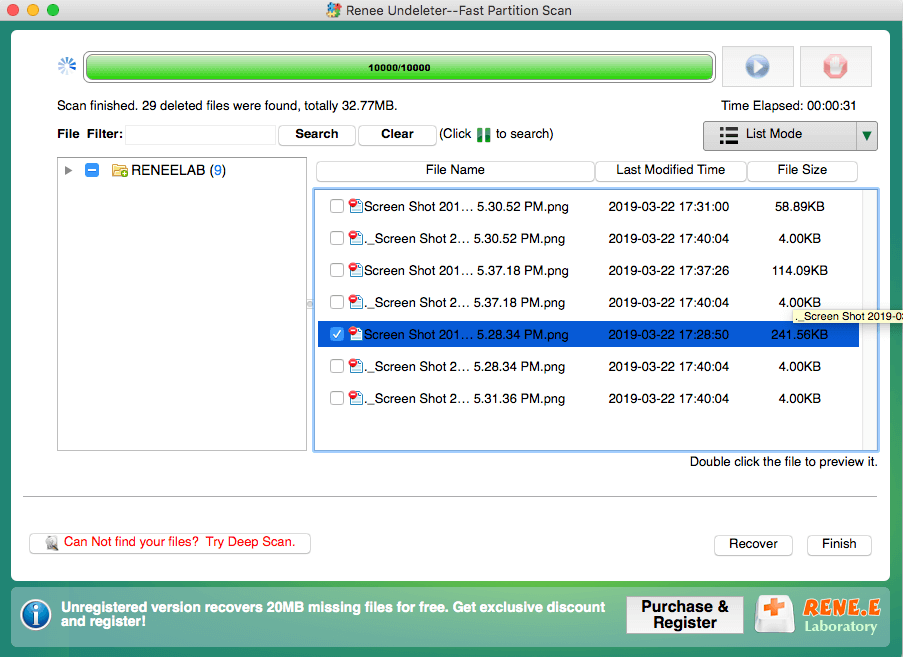
PNG, JPG, DOC, MP4) and click the Search button. Data recovery success rates vary due to factors such as post-deletion data writing or web browsing cache creation, which can overwrite lost data, potentially preventing recovery. It’s advisable to start with the free trial of Renee Undeleter, which offers full functionality except for a recovery limit of 50MB, unlike the unlimited official version.