author avatar
    Senior Product Manager
 

Summary
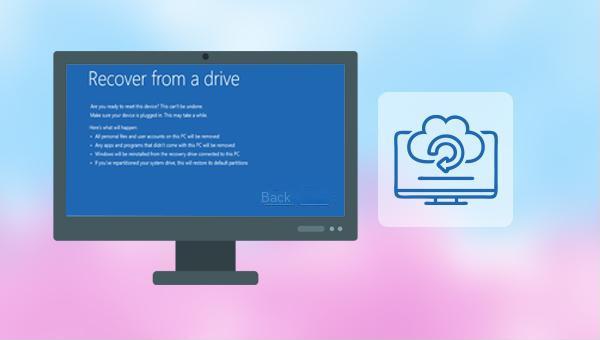
Discover the Windows 10 recovery tools for 32-bit and 64-bit system to swiftly restore your computer's functionality and prevent avoidable damages.


windows 10 recovery tool

I. What is Windows 10 Recovery Tool?

The Windows 10 recovery tool, also referred to as the Windows 10 recovery drive, is specifically crafted to handle unforeseen computer crashes. With the creation of a recovery drive, you have the ability to effortlessly restore your system and retrieve any lost data if your computer is unable to boot up normally due to a malfunction.

II. What are the Windows 10 recovery tools for 32-bit and 64-bit?

1. Windows built-in function: create recovery drive

Step 1: Run the Windows 10 device, enter (control panel) in the search box in the lower left corner to open the application.
search windows Control Panel
Step 2: Next, enter (recovery) in the search box in the upper right corner, and find the (system)-(create a recovery drive) option, and click on it.
create a recovery drive
Step 3: Afterwards, a window for creating a recovery drive will appear, check (Back up system files to the recovery drive) by default, and click (Next) after confirming that it is correct.
Back up system files to the recovery drive
Step 4: Wait for a while, the (connect USB disk) prompt will appear. At this time, connect the drive (USB disk), and back up all the contents on the drive in advance. Then click (Next). Note: The files in the drive will be deleted during the creation process.

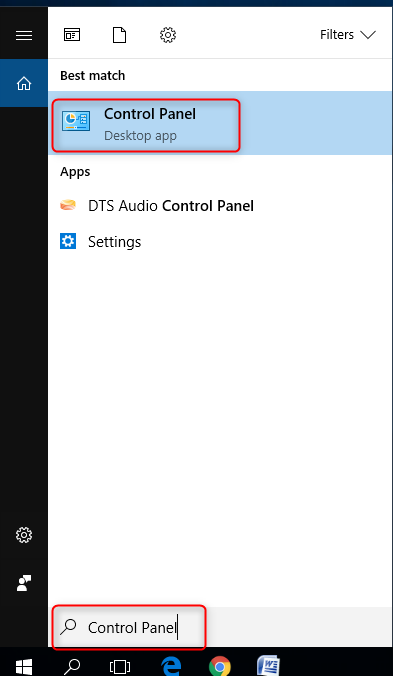
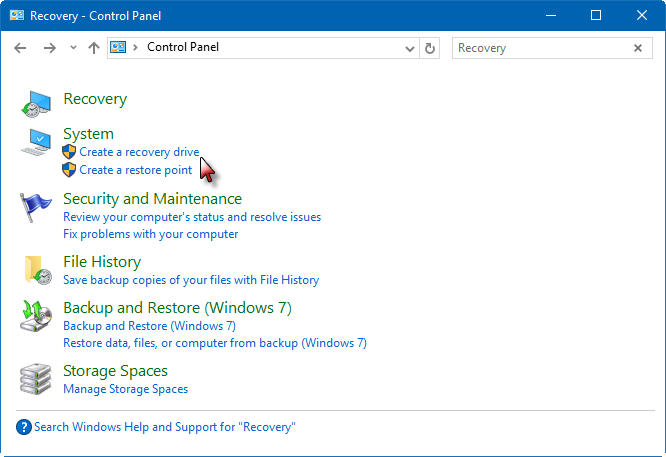
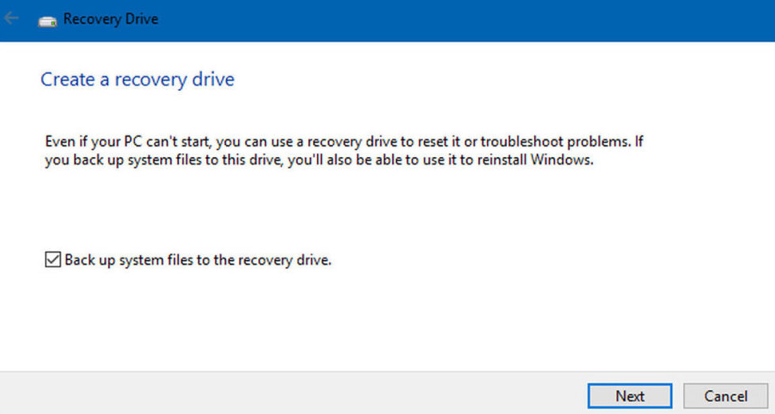
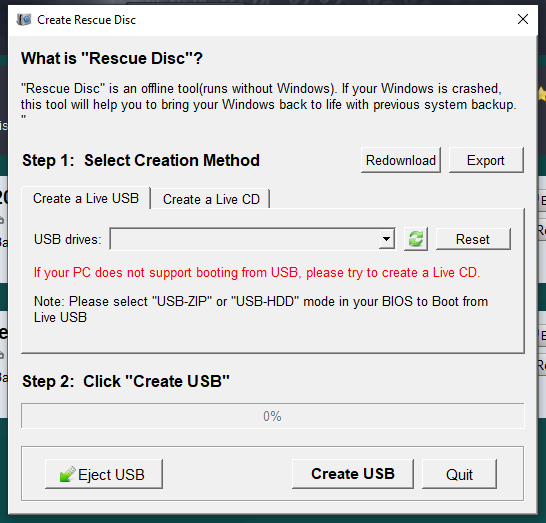
Then follow the prompts one by one until you see the (Create) button, please click it. After the recovery tool is created, safely eject the USB flash drive to complete the creation of the system recovery tool.

2. Renee Becca

Moreover, aside from utilizing the built-in tools of Windows to create a recovery drive, you can also opt for a more advanced approach by using professional data backup and restoration software. One such tool that I highly recommend is Renee Becca. With this tool, you can easily back up and restore your system. Let’s delve into the details of how to do this.
What is Renee Becca?
Renee Becca is a tool specially used for system/hard disk data backup and restoration. It can help you back up and restore important data in your computer, such as programs, system configuration, emails, photos, videos, documents, bookmarks, etc. It adopts leading incremental/differential backup technology, which can save you more time and disk space. In addition to system backup, it also supports partition backup, hard disk backup, file backup, and disk cloning to meet your different needs.
Renee Becca - Reliable Data Backup & Restore Software

Quick Backup files at up to 3,000MB/min.

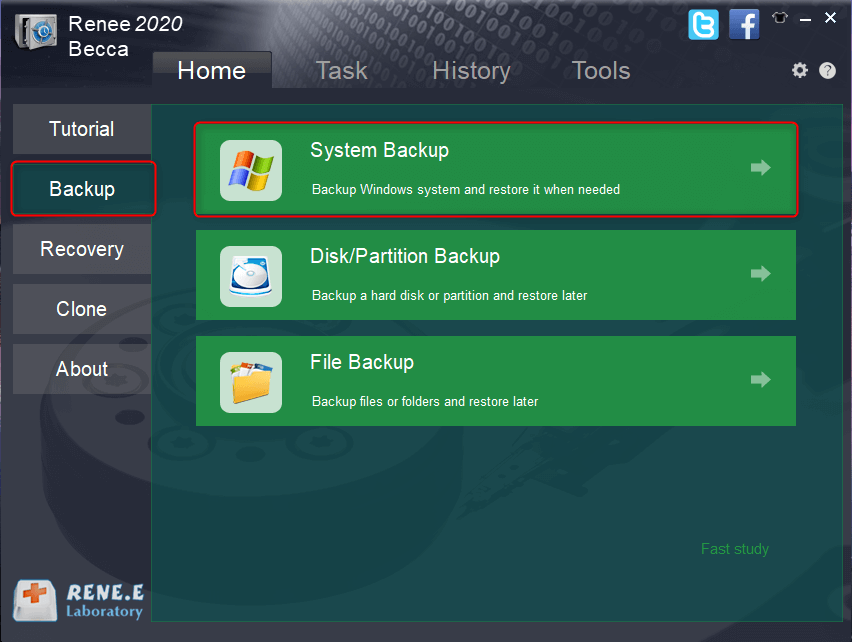
Fullfill different backup needs Supports system backup, disk / partition backup, file backup and disk clone.

Intelligent Automatically analyze the differences between source and backup data.

Convenient Support VSS, allowing to freely view webpages when backing up system.

Highly compatible Supports various files and storage devices.

Quick Backup files at up to 3,000MB/min.

Fullfill different backup needs Backup for disk, partition and system. Save disk space by backing up incremental /differential data.

Highly compatible Supports various files and storage devices.

Free TrialFree Trial 2000 users have downloaded and enjoy Renee Becca!
How to backup system with Renee Becca?
The steps are as follows:
Step 1: Download, install, and run Renee Becca on the computer, and select the (System Backup) option in the main interface (Backup).
how to reinstall windows 10 with renee becca
Step 2: Next, select the source(the system partition by default) and the destination.

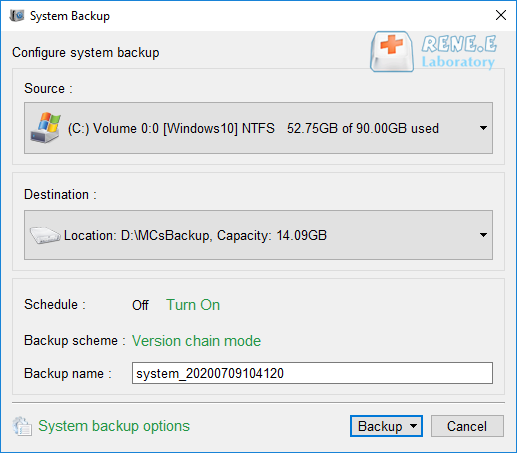
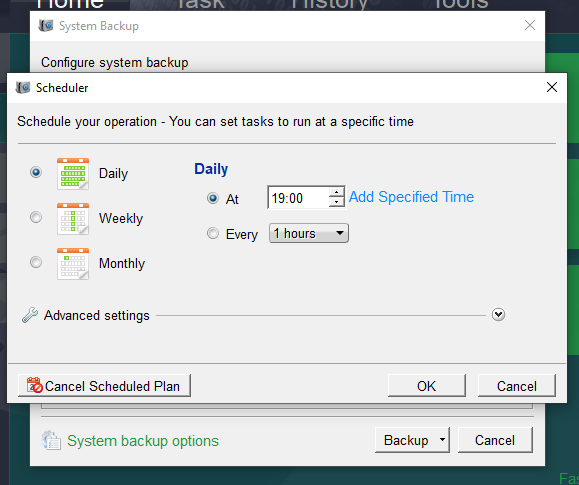
If regular backup is required, it is recommended to select a suitable backup plan mode according to individual needs in (Schedule). Renee Becca has 5 backup plans to choose from, namely version chain mode, single version mode, full mode, incremental mode, and differential mode.

back up system with renee becca
Renee Becca has 5 backup plans to choose from:
Version chain mode: Only the latest 5 versions are kept, and useless old versions are automatically deleted after the backup is complete.
Single version mode: Only the most recent version is kept, and the previous version is automatically deleted after the backup is complete.
Full mode: Create a full backup.
Incremental mode: After the initial full backup, only incremental backups are created.
Differential mode: After the initial full backup, only differential backups are created. You can view the difference between incremental backup and differential backup.
In addition, in (Scheduler), you can set a daily/weekly/monthly automatic backup plan and the time to start the backup, click (OK) to enable the automatic backup function.
system backup-schedule
Step 3: After all the settings are completed, click (Backup).
How to restore system with Renee Becca?
If you want to restore the system, please see the steps below.
Step 1: Run Renee Becca, switch to (Task) at the top of the interface, and then select the (Rescue CD) option. You can create a boot disk with this function.
rescue CD
Step 2: Select the type of rescue disk to be created. Please select according to your disk and computer conditions. After that, connect a blank CD or USB disk to the computer, and click Select (Next) to create a boot disk.
select the Pro version
create a rescue CD
Step 3: Connect the boot disk (CD/USB disk) to the computer where you need to restore the system. Then press the shortcut key when turning on the computer to enter into BIOS interface,  and change the boot order to boot from USB/CD.

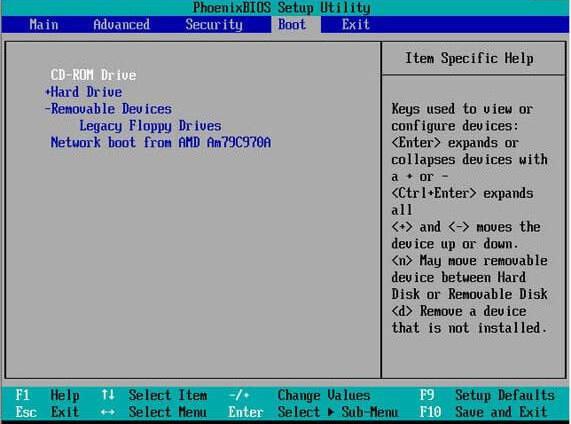
Take the following BIOS interface as an example, if you want to boot from a CD, please select (CD-ROM Drive), if you want to boot from a USB flash drive, please select (Removable Devices).

Change bios startup items
Step 4: After successful startup, select the system backup version you need to restore and the target location to restore in the window.

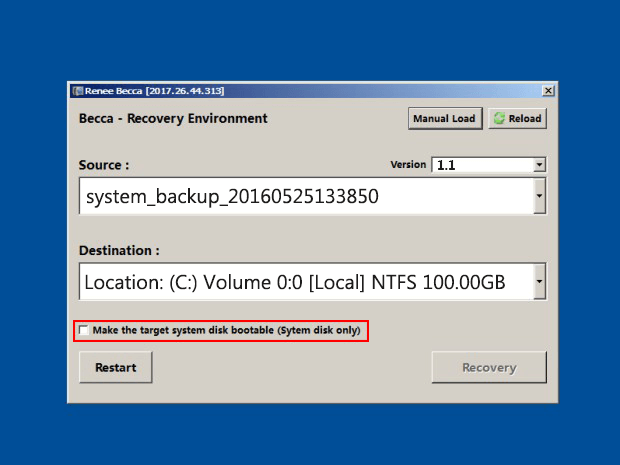
If the previously backed-up system is saved on an external hard disk, please connect it to the computer and select it. At the same time, check the “make the target system disk bootable (System disk only)” option. Finally, click the (Recovery) button to start the system.

recover-system-from-backup-files

III. How to use the Windows 10 recovery drive to restore the system?

After the Windows 10 recovery drive is created, it can be used to restore the system. The following will teach you how to use the recovery drive to restore the system.
Step 1: Insert the created recovery drive (USB disk) into the computer that needs to restore the system, then press the BIOS shortcut key to enter the BIOS menu when starting the computer, set the USB device as the first startup item, and then press F10 to save and restart.
change bios boot
Step 2: On the keyboard layout interface, select your language.
Step 3: In the “Choose an option” interface, select (Troubleshoot).
Troubleshooting
Step 4: To reinstall Windows 10, select (Recover from a drive). This will remove personal files, apps, and drivers you’ve installed, as well as change your settings.
Recover from drive
Step 5: If you want to reset the computer, you can choose the (Fully clean the drive) option; if you plan to keep this device for further use, you can choose the (Just remove my files) option. Then follow the on-screen instructions to complete the system restore process, and your computer will restart after completion.
remove my files