

Fix 0xc00000e9 Error Code with Ease

Summary
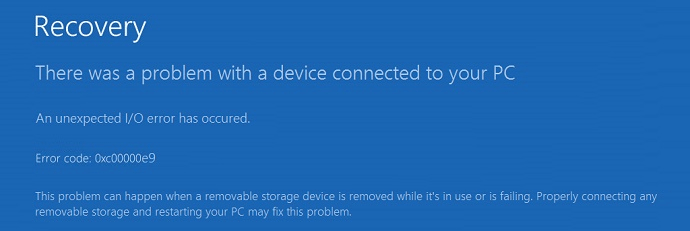
Learn how to fix the "An unexpected I/O error has occurred" with error code 0xc00000e9 that prevents Windows login. Discover causes and solutions here.
- The I/O port is damaged.
- There was a problem with Windows Update.
- Faulty external hardware or PC component.
- Virus or other malicious software installed in the boot sector.
- Corrupted system files or problems with the Windows registry.
- UEFI or BIOS configuration is incorrect.
- A component is not installed properly, such as a hard drive that is loosely attached to the motherboard.

Remove Windows Login Password 3 steps for whole password remove process.
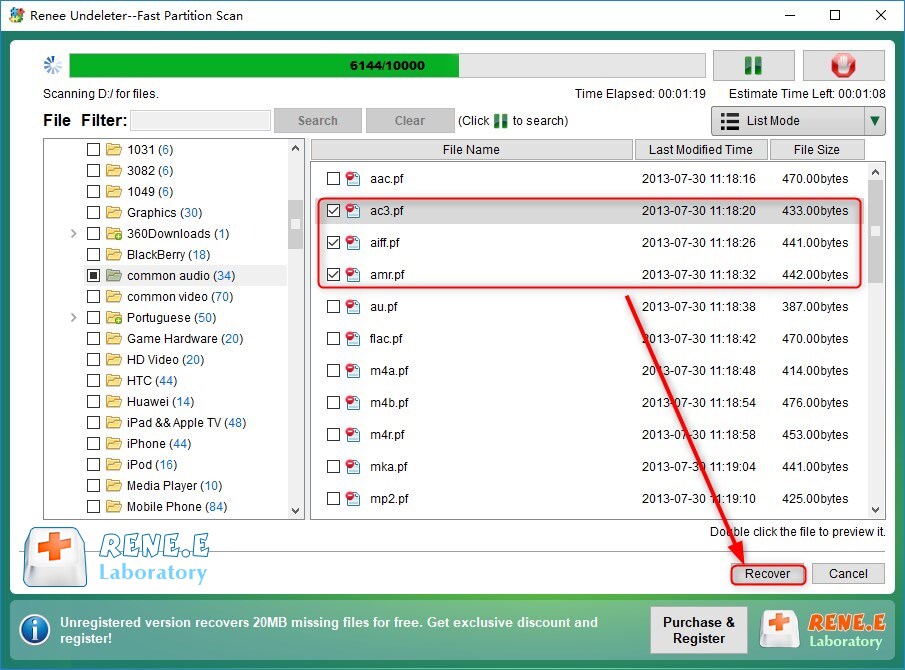
Recover the files Recover the deleted files without Windows system.
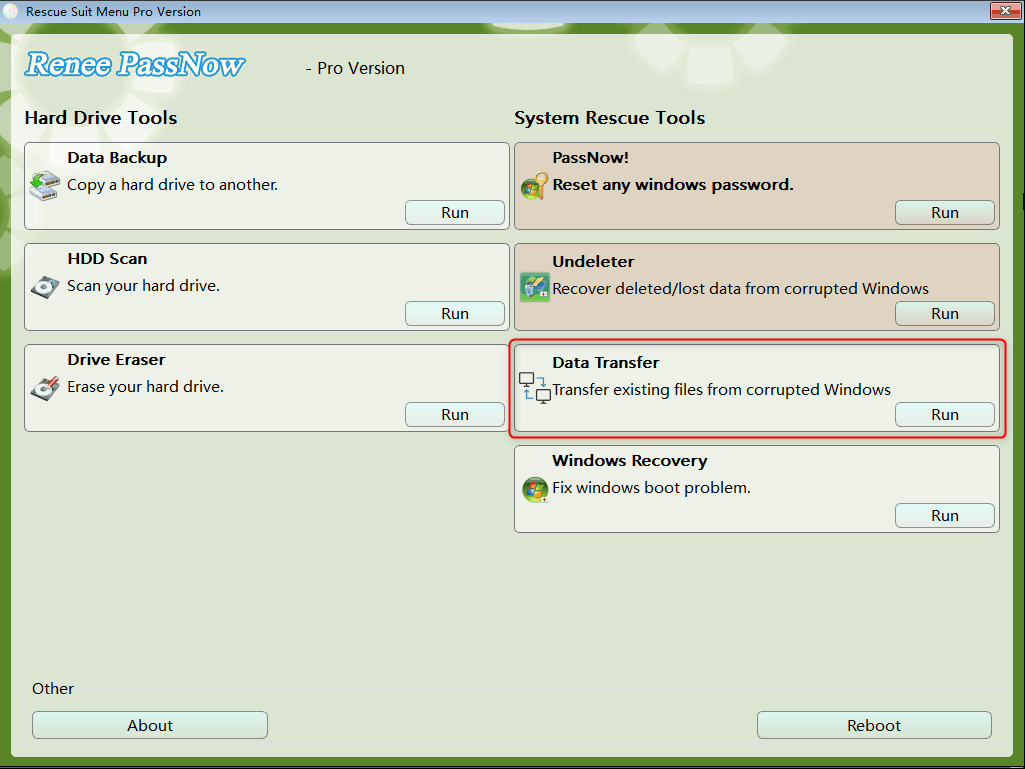
Transfer the data Transfer the important files of the computer with system.
Fix Windows startup error Fix various Windows startup failures or crashes.
Erase disk Completely erase disk files which will not be restored.
Remove Windows Login Password 3 steps for whole password remove process.
Recover the files Recover the deleted files without Windows system.
Transfer the data Transfer the important files of the computer without system.
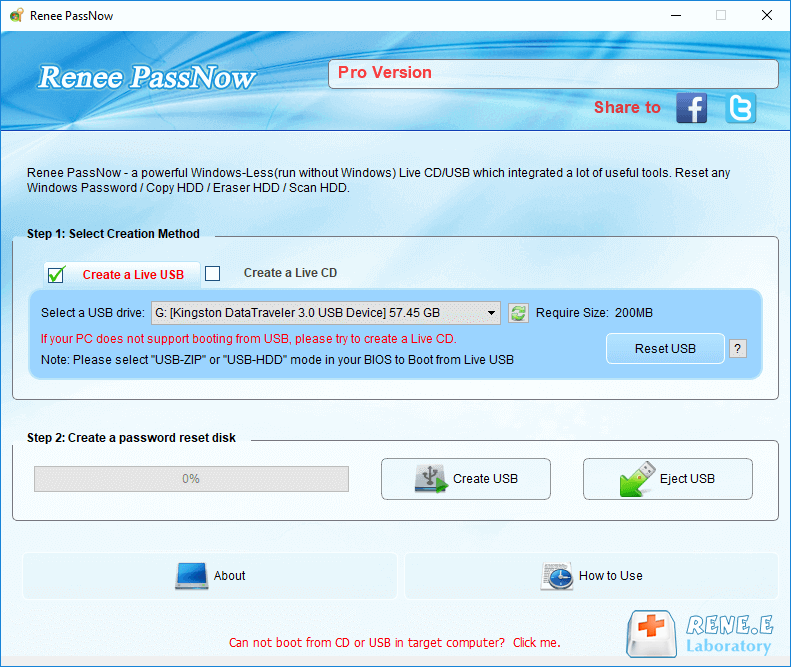
Free TrialFree TrialNow 2000 people have downloaded!Note: Please make sure that the important files in the USB disk have been saved in other locations because the operation will delete all the data in the USB disk.

In the BIOS (Boot) interface, set the USB disk or CD-ROM drive as the first boot option, then save it and exit.
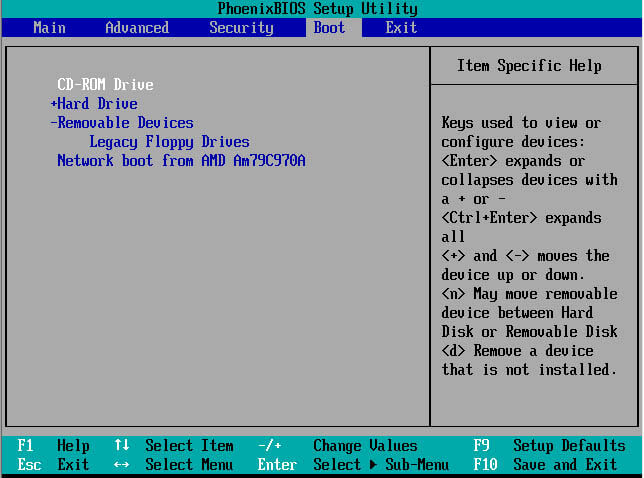

In the BIOS (Boot) interface, set the USB disk or CD-ROM drive as the first boot option, then save it and exit.


Relate Links :
Fix 0xc00000e9 Error Code with Ease
25-12-2023
John Weaver : Learn how to fix the "An unexpected I/O error has occurred" with error code 0xc00000e9 that prevents Windows...
Step-by-Step Guide to Fix Windows Error Code 0xE0000100

01-08-2023
Ashley S. Miller : Learn reasons for error code 0xE0000100 during Windows installation, updates, or driver installation. Discover common repair methods and...
A Complete Guide to Fix Dell Error Code 2000-0141

28-07-2023
Amanda J. Brook : Learn how to solve the error code 2000-0141 on Dell computers with this informative article. Transfer or backup...
How to Fix Windows Error Code 80070103 with Ease?
06-09-2024
Amanda J. Brook : Resolve Windows error code 80070103 with practical solutions. Backup crucial data to prevent loss from hardware or software...

