author avatar
    Senior Product Manager
 

Summary
Learn how to solve the error code 2000-0141 on Dell computers with this informative article. Transfer or backup your important data without entering the system.


error code 2000-0141

I. What is error code 2000-0141?

Error code 2000-0141 is an error message that appears on a Dell computer and means that the computer cannot detect your hard drive. No hard disk means no operating system and data, and no operating system means you cannot use your computer normally. The appearance of this error code may be related to the following factors:
1. The connection between the hard disk and the motherboard is loose
2. The hard disk cable or data cable is damaged
3.BIOS damage or setting error
4. The hard disk itself fails
Error code 2000-0141
The following will introduce the corresponding solutions for these factors, let’s take a look together.

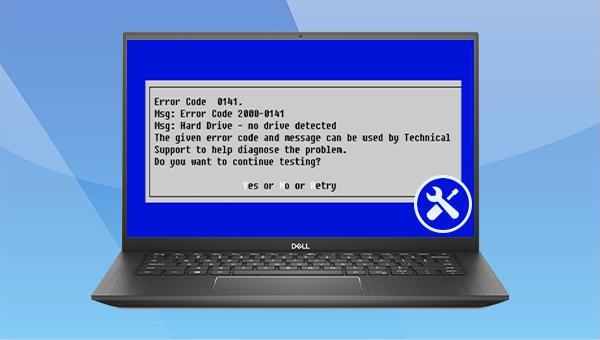
II. How to fix Dell computer error code 2000-0141?

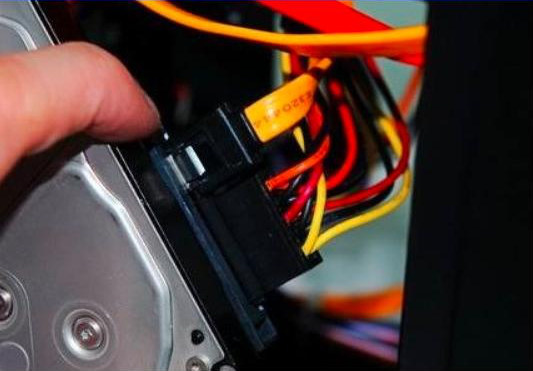
1. Check the connection between the hard disk and the motherboard

If the connection between the hard disk and the motherboard is loose, there may be a problem that the computer cannot detect the hard disk. You can find the corresponding hard disk location in the computer, and then check the connection between the hard disk and the motherboard. If the hard disk cable or data cable is loosely connected, you can disconnect it and then reconnect it. In addition, if the connection is unstable because there is a gap between the hard disk and the hard disk bracket, you can also consider using spacers to make the hard disk connection more stable.

2. Replace the hard disk cable or data connection cable

If you find that the hard disk cable or data connection cable is damaged, you can try to replace it with a new one or other cables and data cables that can be used normally. Then turn the Dell computer back on and check if the problem is resolved.
Check the cable

3. Reset BIOS settings

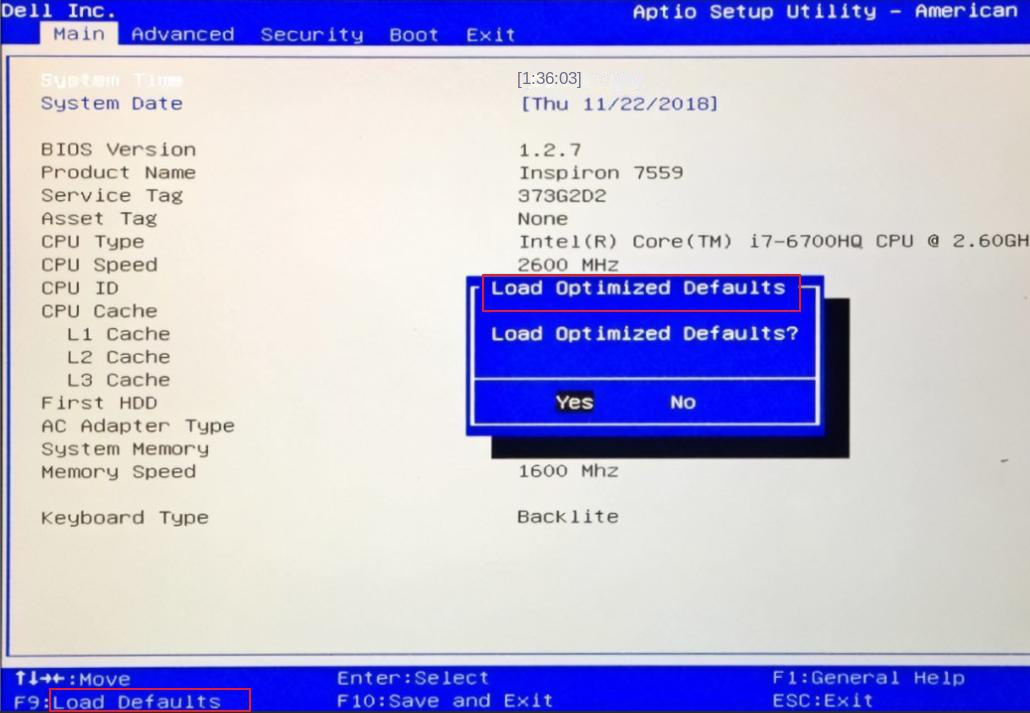
A problem with the BIOS settings may also cause the hard disk to not be detected when the computer starts. It is best to reset the BIOS to the default settings and check whether the problem is resolved.
Step 1: Click the shortcut key continuously during the boot process (the following picture is an example, the shortcut key is F2) to enter the BIOS setting.
Shortcut key for dell boot into BIOS
Step 2: After entering the BIOS setting interface, try to find the option containing “default”, such as (Load Defaults) or (Reset to Default) (Note: different computer brands or BIOS versions, the options may be slightly different). Take the following picture as an example, you can press F9 to reset the BIOS settings, and finally save the BIOS settings, restart the computer to check whether the Dell computer starts normally.
dell computer BIOS option load defaults

4. Repair the hard disk through the chkdsk command

If the hard disk has bad sectors or file system problems, you can use the chkdsk command to repair them. But because the Dell computer can no longer start normally, we can use the Windows installation disk to enter the recovery environment and then repair it. The Windows recovery environment has some useful repair tools, which can scan the system and try to repair damaged files, and can also repair various startup problems. If your computer cannot operate normally, you can enter the Windows recovery environment to solve the problem. Here we take the Windows 10 system as an example, the specific operation steps are as follows:
Step 1: Download the Windows 10 Media Creation tool on another computer to create a Windows 10 installation disk. download link:
https://www.microsoft.com/en-gb/software-download/windows10
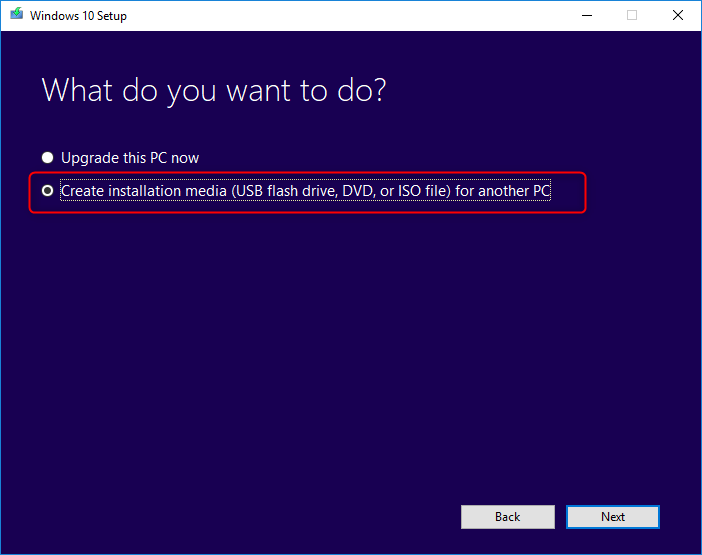
Step 2: Run the Windows 10 Media Creation tool, agree to the usage agreement, and then select Create installation media (USB flash drive, DVD, or ISO file) for another PC, and then click Next.
create media Windows 10
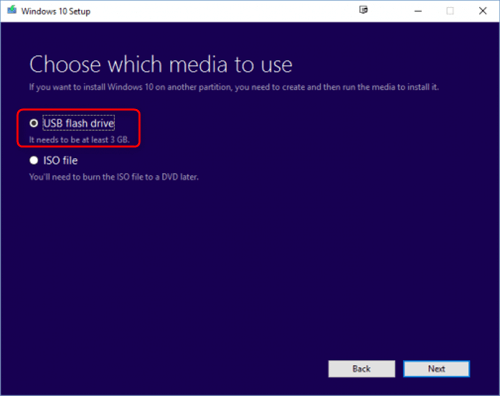
Step 3: When it comes to selecting the media to use, select the USB flash drive. (You need to ensure that the U disk space is at least 8G, otherwise this step will prompt an error.)
select media type
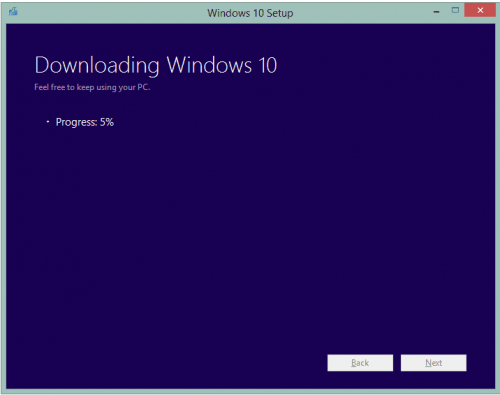
Step 4: You will be prompted that the Windows 10 installation file is being downloaded, please wait patiently for the download to complete.
downloading windows 10 iso
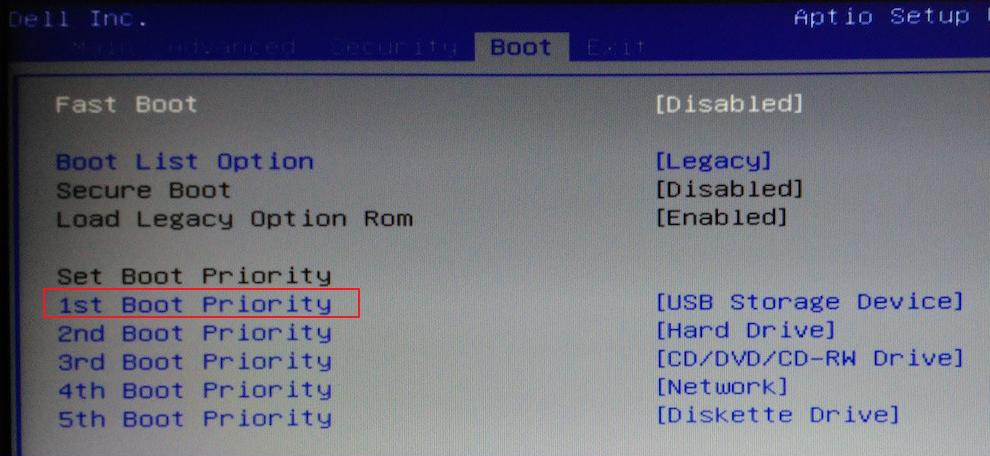
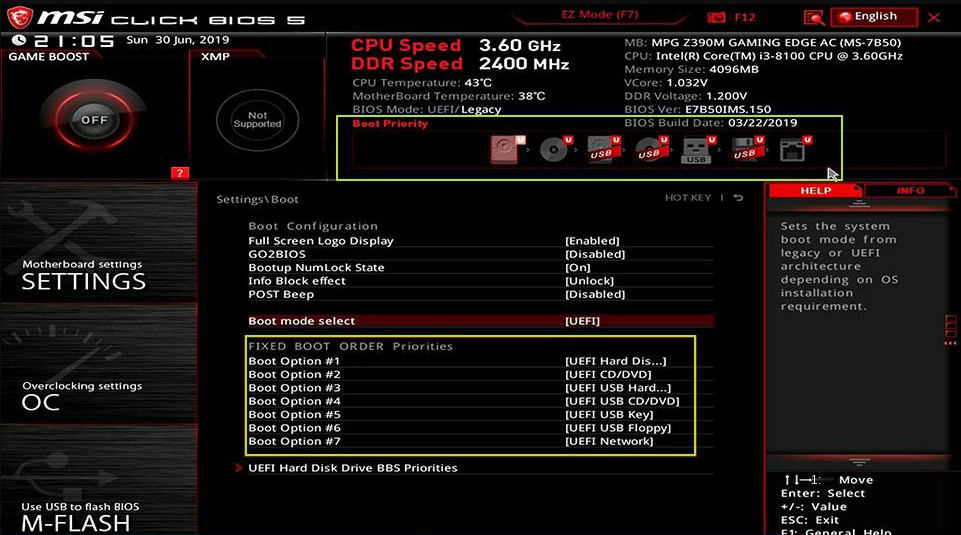
Step 5: Connect the completed installation USB flash drive to the target computer and press the shortcut key (such as F2/DEL/F10, etc., you can check the prompt in the boot interface) to enter the BIOS when starting the computer. Priority), choose to install the U disk, that is, the installation U disk is at the first place in the boot order, then save the settings and restart the computer.
dell bios adjust boot order
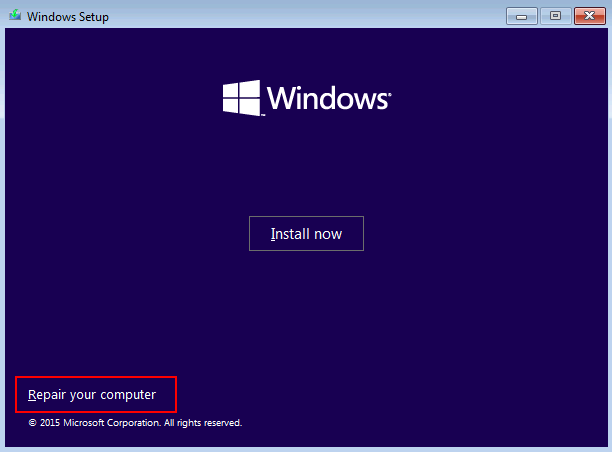
Step 6: After successfully booting from the installation U disk, you will enter the Windows 10 installation interface, and then click Repair your computer in the lower left corner to enter the recovery environment.
Repair your computer
Step 7: After entering the Windows Recovery Environment, please select the Troubleshooting > Advanced Options > Command Prompt option.
command prompt
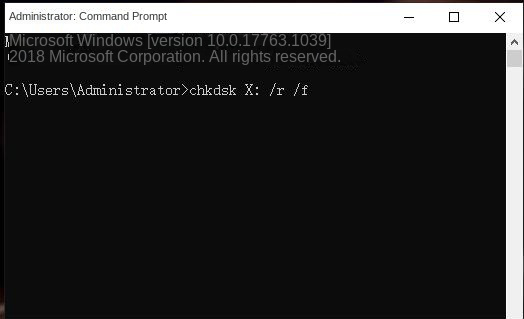
Step 8: Enter the command chkdsk X: /r /f in the command prompt window (X: refers to the hard disk drive letter to be repaired, here should be changed to the drive letter of your system disk; /r can find bad sectors and restore readable information, /f fixes errors found on the disk), and press Enter to fix errors. After the fault repair is complete, remove the Windows 10 installation USB flash drive and restart the computer to check whether the problem is resolved.
Enter the disk repair command

5. Replace the system hard disk

If none of the above methods can solve the problem that the computer cannot detect the hard disk, the error code 2000-0141 still appears and the system cannot be accessed. Then it may be that the hard disk where the system is located has a serious failure, and a new hard disk needs to be replaced at this time. It should be noted that if you do not have a deep understanding of computers, please seek the help of professional maintenance organizations or professionals, and do not remove and install the hard disk by yourself, so as not to cause damage to other components. If it is within the warranty period, you can consult and go to an official maintenance agency for repairs.
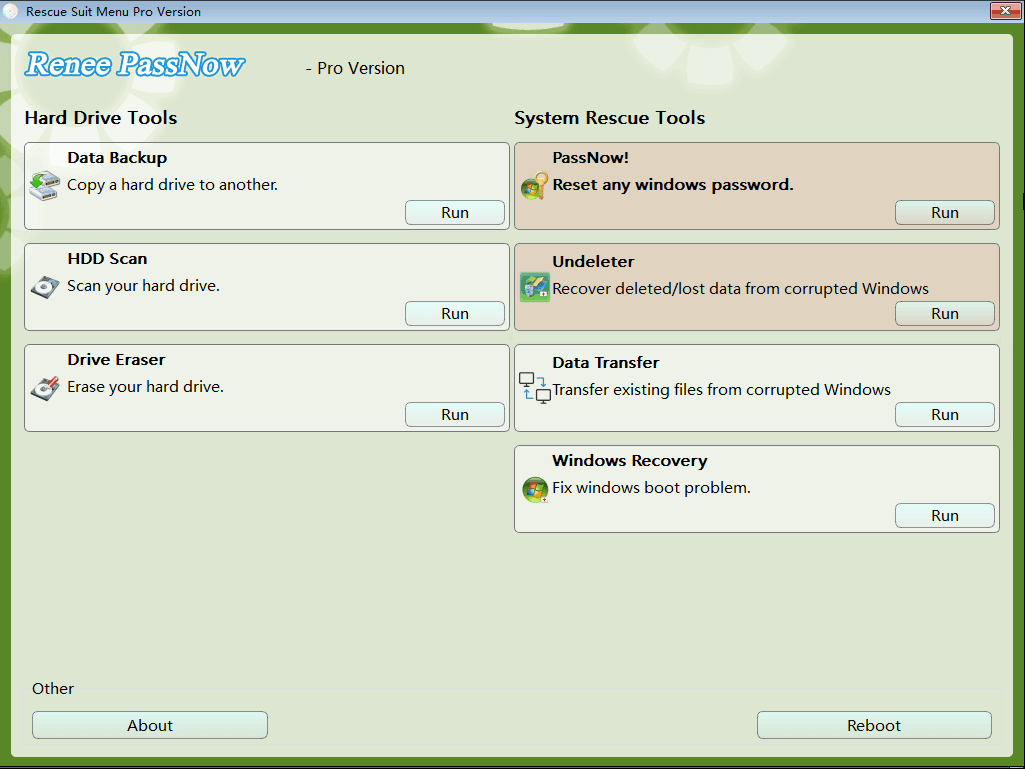
Before replacing the hard disk or sending the computer to a repair organization, it is recommended that you back up and transfer important data in the computer to avoid data loss. Since the computer can no longer be started normally, it is recommended that you use Renee PassNow to create a boot disk for subsequent operations without entering the Windows system.

III. When unable to enter the system, use Renee PassNow to backup or transfer important data

1. What is Renee PassNow?

Renee PassNow is a professional system rescue software, which can help Windows users clear Windows account passwords, create new administrator accounts; restore disk/memory card data, recover data after hard disk formatting; transfer disk files; erase or scan Disk files, etc. In addition, this software also supports repairing Windows system problems, such as: repairing MBR boot records, DBR error parameters, 0xc00000e, Windows system startup failure, and some problems that cause black screen or blue screen, etc. As a system rescue tool with various functions, it is perfectly compatible with multiple systems including Windows 10/8.1/8/7/XP/Vista, and can meet the system rescue needs of different users.
Hot Topic - ADsRenee PassNow – 3 Steps to transfer data from the crashed system

Easy to use 3 steps to transfer the files.

Transfer the files Transfer the important files of the computer without system.

Preview the files Preview the files while transferring the data.

Multifuctional Data recovery, Windows password reset, bootable problem recovery can be run without system.

Highly compatible Windows 10/8.1/8/7/XP/Vista. Also supports UEFI boot mode.

Easy to use 3 steps to transfer the files.

Transfer the files Transfer the important files of the computer without system.

Preview the files Preview the files while transferring the data.

Free TrialFree TrialNow 2000 people have downloaded!

2. How to use Renee PassNow to backup or transfer data?

Step 1: Download and install Renee PassNow on other computers that can log in and run normally, then connect the U disk to the PC, run Renee PassNow, and then check in “Step 1: Select creation method” (Create a Live USB) option. (Note: Before performing this operation, please make sure that the important files in the U disk have been saved in other locations, because the operation process will delete all the data in the U disk.)
Step 2: Next, select (x64) or (x86) according to the system type, click the (Download Now) button to download the ISO file, click the (Create a Live USB) button after the file is downloaded, and click the (Eject USB) button.
use renee passnow to create usb to reset passnword
Step 3: Connect the created boot device to the computer that needs to transfer data, turn on the computer, and then the shortcut key to enter the BIOS will be displayed on the computer screen (the display time of this interface is very short, maybe only one or two seconds), click continuously BIOS shortcut key to enter the BIOS setting interface, and then set the boot U disk as the first in the boot sequence in Boot Priority, then save the settings and restart the computer.
select boot order
Step 4: After booting the computer from the bootable USB flash drive and entering the application, select the option Data Backup. This option is equivalent to completely cloning the hard disk to other hard disks, so the hard disk capacity for saving backup files needs to be larger.
functions of Renee PassNow
Step 5: Select the hard disk to back up files in the source list, select the hard disk to save files in the destination list, and finally click the button clone and wait for the cloning to complete to successfully back up the computer files.
Select the drive
Step 6: If you only need to transfer some important files, the function Data Transfer will be more suitable for you.
Windows 10 recovery drive select data transfer function in Renee Passnow to sovle windows 10 won't boot from USB
Step 7: You can click on each disk drive letter (C/D/E/F, etc.) to find the files to be transferred. It is recommended that you transfer them to an external disk. The operation of transferring data is very simple. For example, if you want to transfer the data in the C drive to the G drive, you can first select the C drive on the upper left, select the G drive on the upper right, and then select the files in the C drive, and click the Copy function button in the middle. Disk data can be easily transferred. If there is a file you want to delete, you can also click the Delete button in the middle after selecting the file, but the deletion operation cannot be undone, please operate with caution.
data transfer in Renee Passnow
Kind tips If you find that files are lost during the process of backing up or transferring data, please select the option Undeleter on the main function interface to perform data recovery operations.