III. How to fix 0xc0000185 error code?
1. With the help of the computer's startup repair function
The built-in startup repair function in the Windows system recovery environment can solve the problem that the computer cannot enter the system normally. Let’s learn the detailed operation method below:
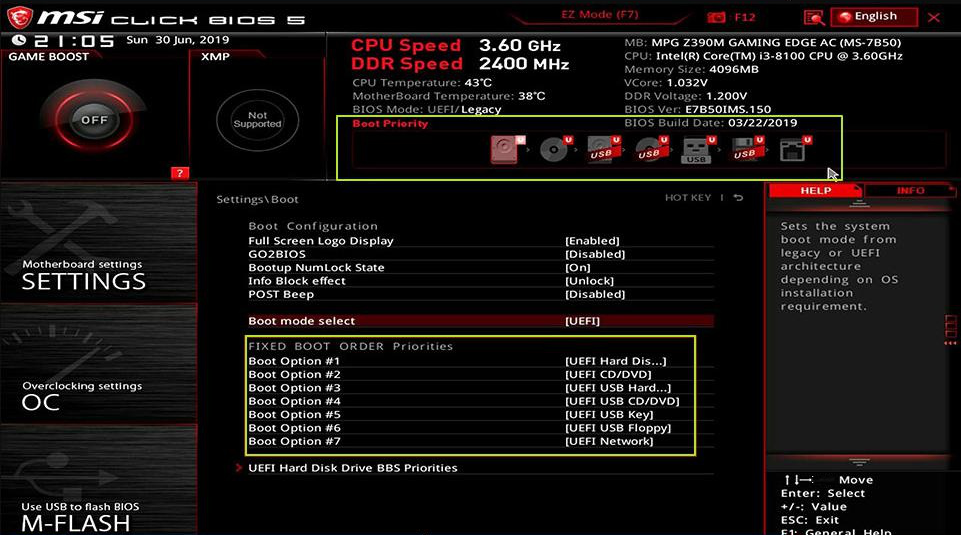
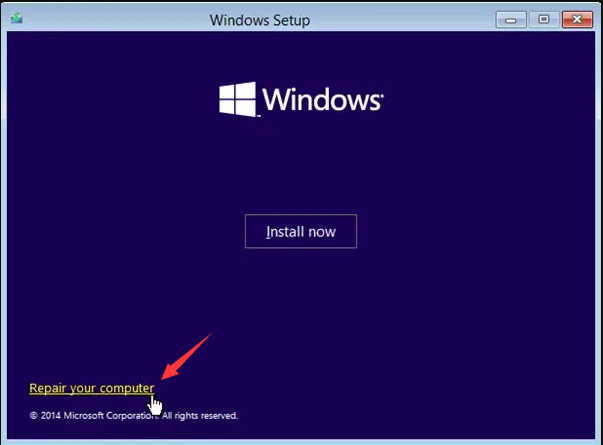
Step 1: Insert the Windows installation disk (DVD or U disk) into the computer. When starting up, press F2 or F10 or DEL or ESC shortcut keys continuously (varies with the computer brand) to enter the BIOS setting interface, set the first boot sequence to the Windows installation disk, save the settings and turn on the computer, the computer will start from the installation disk, in Select the (Repair Your Computer) option on the Windows Installer “Install Now” screen to enter the recovery environment.
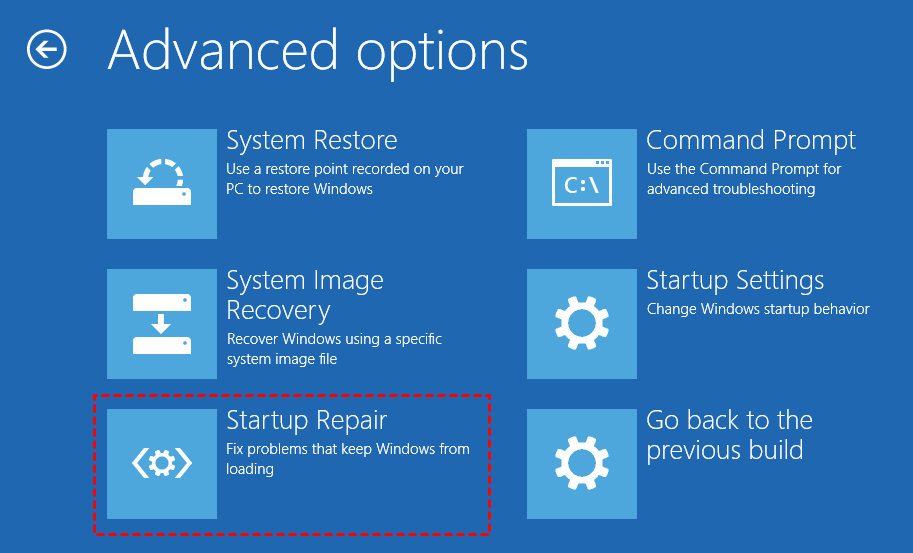
Step 2: After entering the recovery environment, select (Troubleshooting)>(Advanced Options)>(Startup Repair). After waiting for Windows Startup Repair to complete, restart the computer to see if the problem is resolved.
2. Use the Bootrec command to repair BCD
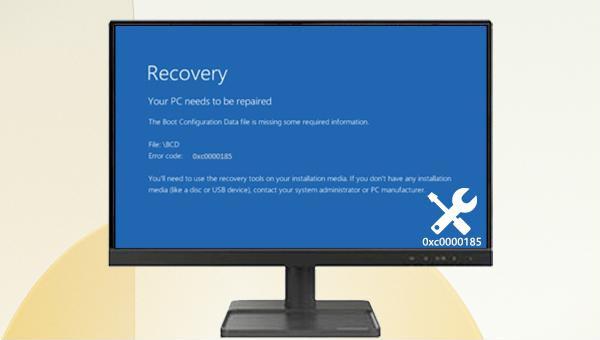
BCD (Boot Configuration Data) contains all the basic information that Windows needs to boot your computer. If this file is damaged or missing, it may prevent Windows from loading properly. The Bootrec command can repair a damaged master boot record or boot configuration data file. This method needs to enter the recovery environment to operate. Proceed as follows:
Step 1: Insert the Windows installation disk (DVD or U disk) into the computer. Continuously click F2 or F10 or DEL or ESC shortcut keys (varies with the computer brand) to enter the BIOS setting interface when starting up, set the first boot sequence to the Windows installation disk, and then save the settings to make the computer start from the installation disk and install Windows. Select the (Repair Your Computer) option on the program’s “Install Now” interface to enter the recovery environment.
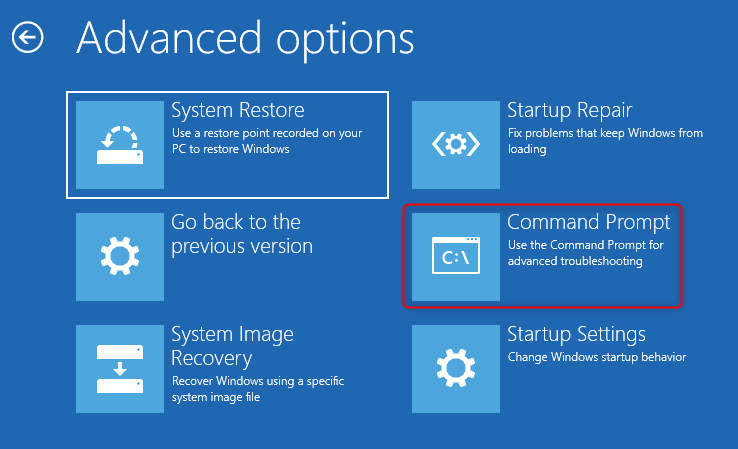
Step 2: After entering the recovery environment, select (Troubleshooting)>(Advanced Options)>(Command Prompt).
Step 3: In Command Prompt, enter the following command. Each time you enter a command, you need to press the (Enter) key. After the repair is complete, restart the computer to see if the problem is resolved.
3. Use Chkdsk to check system hard disk errors
Chkdsk is a practical tool for Windows to check the disk status. It can display the disk status, memory status and the discontinuous number of specified files in the specified path, and can also repair disk errors. The blue screen error may also be due to a problem with the hard disk, so you can use the Chkdsk tool to check and fix the error. The specific steps are as follows:
Step 1: Connect the Windows installation disk to the computer. Start the computer, click a specific key (varies by computer brand, such as F2 or F10 or DEL or ESC shortcut key) to enter the BIOS, change the boot sequence preference to Windows installation disk in the BIOS settings, then save the settings and restart computer.
Step 2: After the computer is successfully booted from the Windows installation disk, select the (Repair Computer) option in the lower left corner of the installation interface to enter the recovery environment.
Step 3: After entering the Windows Recovery Environment, select (Troubleshooting>Advanced Options>Command Prompt).
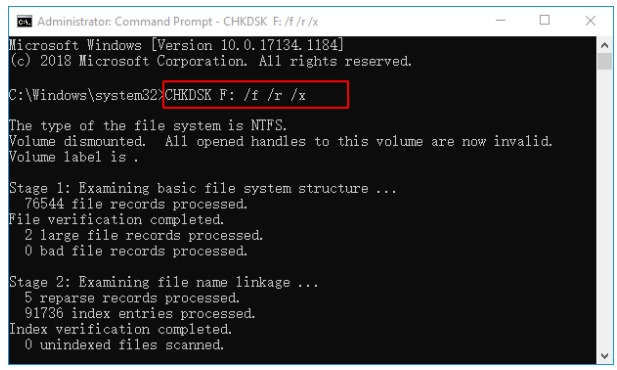
Step 4: Enter the command (chkdsk C: /f /r /x) in the opened command prompt window (C refers to the disk number of the system hard disk, /f will try to repair the errors found on the disk, /x refers to start scanning Force unmount the drive before; /r means scan for and try to fix bad sectors), and press (Enter) to fix the error. After the hard disk failure is repaired, restart the computer to check whether the problem is resolved.
4. Perform System Restore
When Windows cannot start, you can use the Windows System Restore function to restore the system to the state when the restore point was previously created, so that Windows can start normally. Note: If you have not created a restore point, this method cannot be used, and you can try other methods such as reinstalling the system. The specific operation steps are as follows:
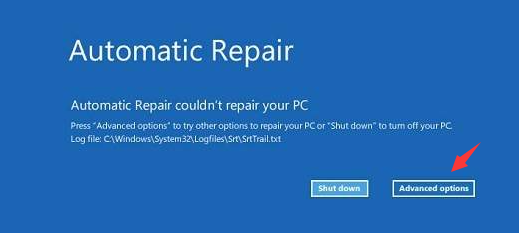
Step 1: Turn on the computer, and when the brand logo appears, press and hold the power button to force shutdown, repeat the process 3 times, then allow the computer to start completely, and select (Advanced Options) on the “Auto Repair” interface to enter the recovery environment.
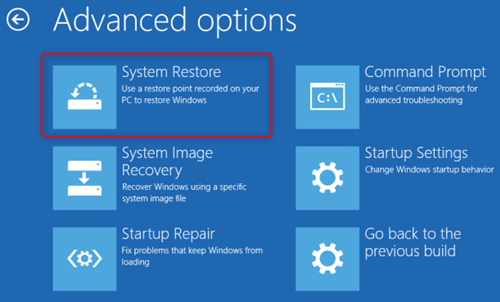
Step 2: When the screen displays to select an option, please click (Troubleshooting) – (Advanced Options) – (System Restore) in sequence.
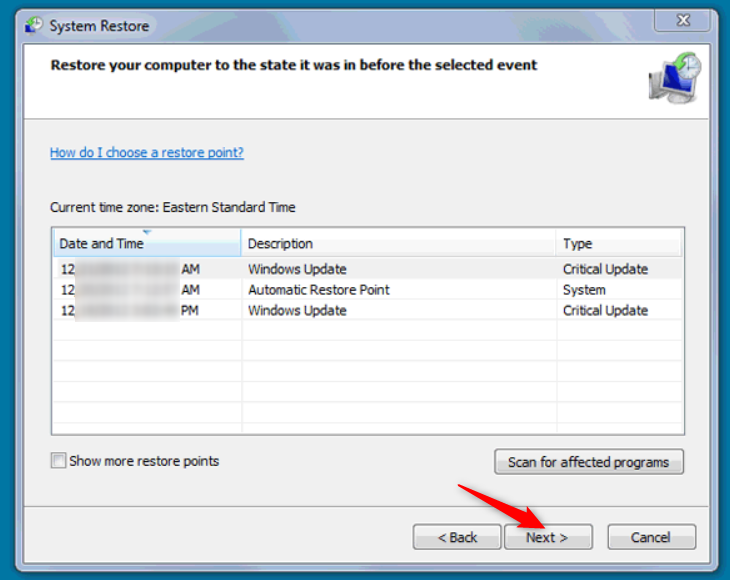
Step 3: Then, select a recent restore point before the error occurred to restore, click (Next) and wait for the repair process to complete.