author avatar
    Senior Program Developer
 

Summary
Learn how to troubleshoot the dxgkrnl.sys blue screen error on Windows and get back to using your system quickly with our expert solutions. We can also use Renee PassNow to backup and transfer the important files.


dxgkrnl sys

I. About the blue screen error dxgkrnl.sys

The blue screen error dxgkrnl.sys is related to the Microsoft DirectX driver, which is a series of application programming interfaces created by Microsoft for multimedia and games. If you are experiencing a dxgkrnl.sys blue screen error, it means that there is some graphics card driver issue on your computer, or there is a corrupted system file or other hardware problem.
Before repairing the dxgkrnl.sys blue screen error, it is recommended that you restart the computer. If you can restart normally and enter the Windows system, please back up important files in time before performing other repair operations. If you cannot restart normally and you need to back up or transfer important files, please refer to the second part.

II. When unable to enter the system, use Renee PassNow to backup or transfer important data

1. What is Renee PassNow?

Renee PassNow is a professional system rescue software, which can help Windows users clear Windows account passwords, create new administrator accounts; restore disk/memory card data, recover data after hard disk formatting; transfer disk files; erase or scan Disk files, etc. In addition, this software also supports repairing Windows system problems, such as: repairing MBR boot records, DBR error parameters, 0xc00000e, Windows system startup failure, and some problems that cause black screen or blue screen, etc. As a system rescue tool with various functions, it is perfectly compatible with multiple systems including Windows 10/8.1/8/7/XP/Vista, and can meet the system rescue needs of different users.
Hot Topic - ADsRenee PassNow – 3 Steps to transfer data from the crashed system

Easy to use 3 steps to transfer the files.

Transfer the files Transfer the important files of the computer without system.

Preview the files Preview the files while transferring the data.

Multifuctional Data recovery, Windows password reset, bootable problem recovery can be run without system.

Highly compatible Windows 10/8.1/8/7/XP/Vista. Also supports UEFI boot mode.

Easy to use 3 steps to transfer the files.

Transfer the files Transfer the important files of the computer without system.

Preview the files Preview the files while transferring the data.

Free TrialFree TrialNow 2000 people have downloaded!

2. How to use Renee PassNow to backup or transfer data?

Step 1: Download and install Renee PassNow on other computers that can log in and run normally, then connect the U disk to the PC, run Renee PassNow, and then check in “Step 1: Select creation method” (Create a Live USB) option. (Note: Before performing this operation, please make sure that the important files in the U disk have been saved in other locations, because the operation process will delete all the data in the U disk.)
Step 2: Next, select (x64) or (x86) according to the system type, click the (Download Now) button to download the ISO file, click the (Create a Live USB) button after the file is downloaded, and click the (Eject USB) button.
use renee passnow to create usb to reset passnword
Step 3: Connect the created boot device to the computer that needs to transfer data, turn on the computer, and then the shortcut key to enter the BIOS will be displayed on the computer screen (the display time of this interface is very short, maybe only one or two seconds), click continuously BIOS shortcut key to enter the BIOS setting interface, and then set the boot U disk as the first in the boot sequence in Boot Priority, then save the settings and restart the computer.
select boot order
Step 4: After booting the computer from the bootable USB flash drive and entering the application, select the option Data Backup. This option is equivalent to completely cloning the hard disk to other hard disks, so the hard disk capacity for saving backup files needs to be larger.
functions of Renee PassNow
Step 5: Select the hard disk to back up files in the source list, select the hard disk to save files in the destination list, and finally click the button clone and wait for the cloning to complete to successfully back up the computer files.
Select the drive
Step 6: If you only need to transfer some important files, the function Data Transfer will be more suitable for you.
Windows 10 recovery drive select data transfer function in Renee Passnow to sovle windows 10 won't boot from USB
Step 7: You can click on each disk drive letter (C/D/E/F, etc.) to find the files to be transferred. It is recommended that you transfer them to an external disk. The operation of transferring data is very simple. For example, if you want to transfer the data in the C drive to the G drive, you can first select the C drive on the upper left, select the G drive on the upper right, and then select the files in the C drive, and click the Copy function button in the middle. Disk data can be easily transferred. If there is a file you want to delete, you can also click the Delete button in the middle after selecting the file, but the deletion operation cannot be undone, please operate with caution.
data transfer in Renee Passnow
Kind tips If you find that files are lost during the process of backing up or transferring data, please select the option Undeleter on the main function interface to perform data recovery operations.
After backing up or transferring important files in the computer, it is recommended that you shut down the computer and remove the rescue disk of Renee PassNow. Then enter safe mode, and then perform the following repair operations.

III. How to fix dxgkrnl.sys blue screen error?

1. Update or uninstall and reinstall the graphics card driver

dxgkrnl.sys may be caused by incompatibility between Windows 10 system and graphics card driver, so you can try to update or uninstall and reinstall the graphics card startup program to solve this problem. If you just installed the latest graphics card driver and then dxgkrnl.sys error occurs, you can uninstall the newly installed driver and install the old one. Specific steps are as follows:
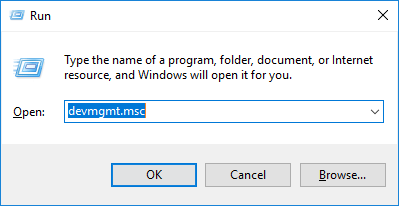
Step 1: After entering safe mode, press (Windows logo key + R) to open the run window, then enter (devmgmt.msc), and click (OK).
open device manager
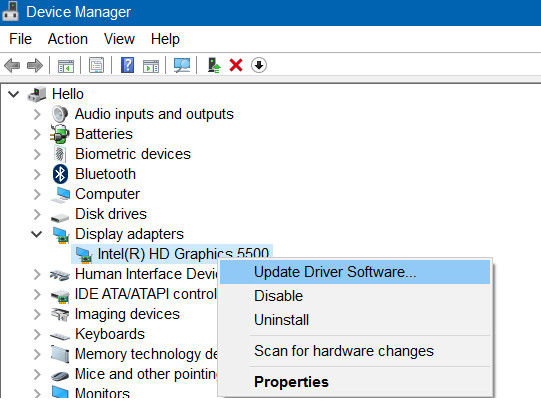
Step 2: Expand (Display Adapter) in Device Manager, right-click the display adapter device, select (Update Driver Software) > (Automatically Search Driver), and then wait for the driver update to complete.
display adapters - Update drivers
Step 3: If updating the driver does not work, you can right-click the graphics card device, select (Uninstall Device), select (Delete the driver software for this device) in the pop-up window, and finally click (Uninstall) and restart the computer.
uninstall device on display adapters
Step 4: After restarting the computer, go to the official website of the graphics card to download the appropriate driver version and install it. For example, if you are using an NVIDIA graphics card, you can open the official website (https://www.nvidia.cn/geforce/drivers/) or use the NVIDIA GeForce Experience software to download and install the driver for the NVIDIA device.

2. Use the DirectX Diagnostic Tool

dxgkrnl.sys may also be related to DirectX, and the DirectX diagnostic tool that comes with the system can help you check various hardware problems on your computer. Proceed as follows:
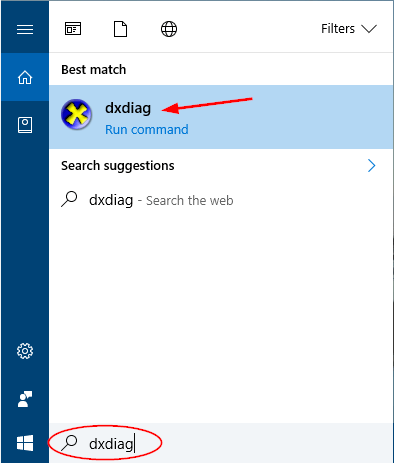
Step 1: After entering Safe Mode, click the search icon on the taskbar in the lower left corner and type (dxdiag), then click Run (dxdiag).
search dxdiag
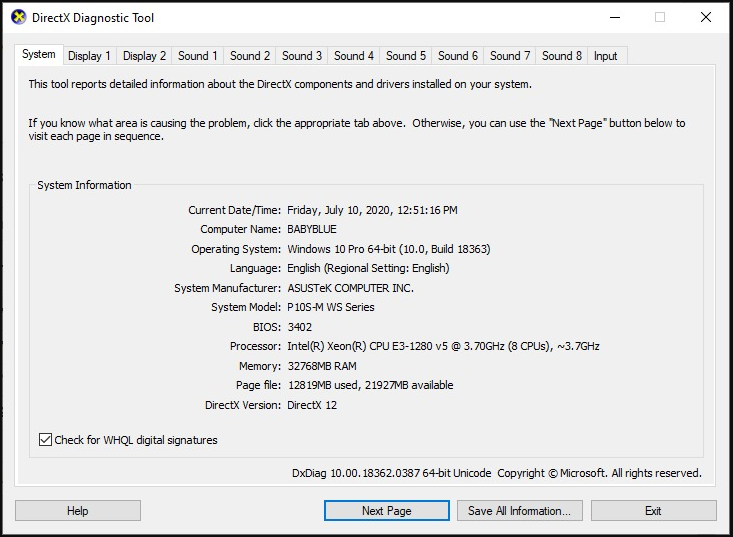
Step 2: The (System) tab bar interface of the DirectX Diagnostic Tool will appear, where you can check the system information.
system of dxdiag
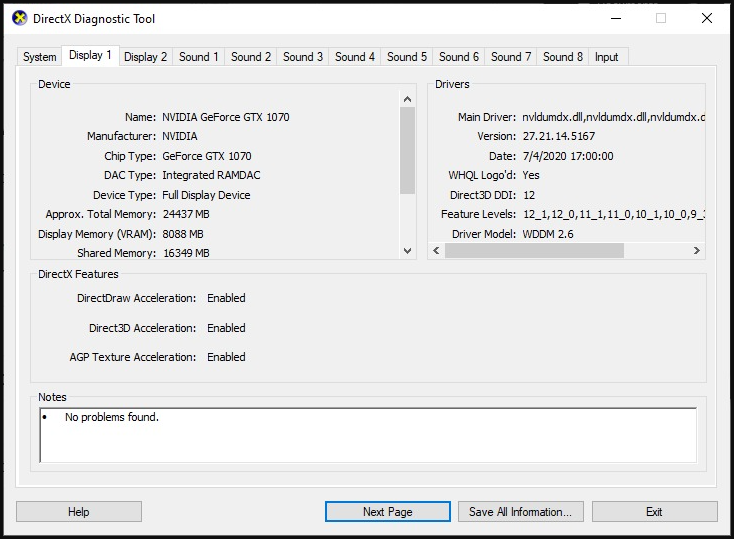
Step 3: Afterwards, you can switch to the (Display), (Sound) and (Input) tabs respectively, and check whether there is any error message displayed in the “Notes” text box. If there is, you can click the (Save all information) button to save Error information to the computer, so that you can share the error information with others and troubleshoot later.
display of dxdiag

3. Run SFC and DISM commands to scan system files

SFC (System File Checker) and DISM are Windows built-in utilities that scan system files for errors and fix them. The following is the detailed usage method:
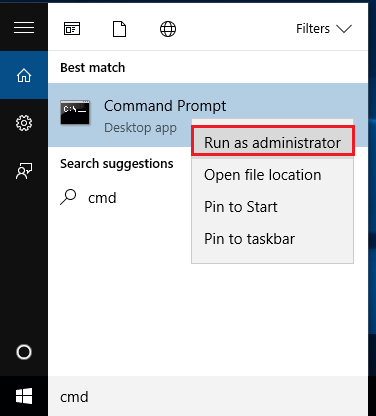
Step 1: Search (cmd) in the search box in the lower left corner, right-click (Command Prompt) and select (Run as administrator).
run command prompt as administrator in start menu
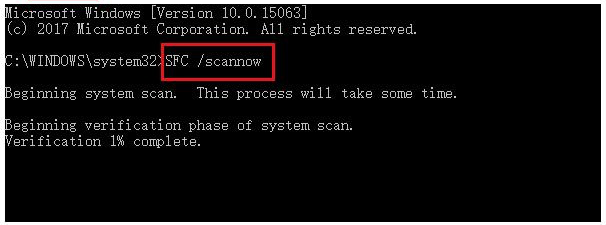
Step 2: In the opened command prompt window, enter the command (SFC /scannow) and press the (Enter) key. Next, System File Checker will perform a system scan and fix problematic system files.
Enter the sfc command
Step 3: If SFC cannot repair the damaged system files, please enter the following DISM commands in sequence and press (Enter). After the repair is complete, please restart the computer to check whether the blue screen problem is resolved.
DISM /Online /Cleanup-Image /CheckHealth
DISM /Online /Cleanup-Image /ScanHealth
DISM /Online /Cleanup-Image /RestoreHealth

4. Check hardware failure

dxgkrnl.sys blue screen errors can be caused by certain hardware errors, such as a malfunctioning motherboard or RAM module. If your computer is within the warranty period, it is recommended that you contact the official after-sales customer service for help, and under the guidance of the after-sales customer service, send the computer to the official maintenance department for inspection to see if there is a hardware failure.