

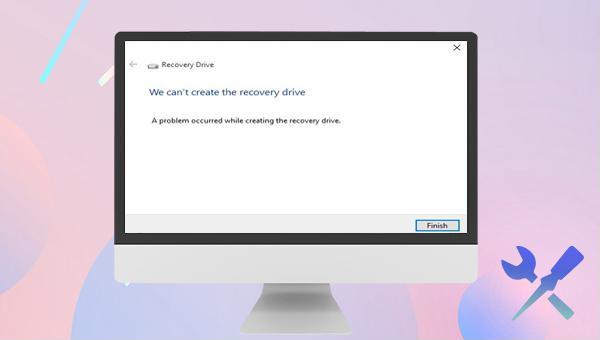
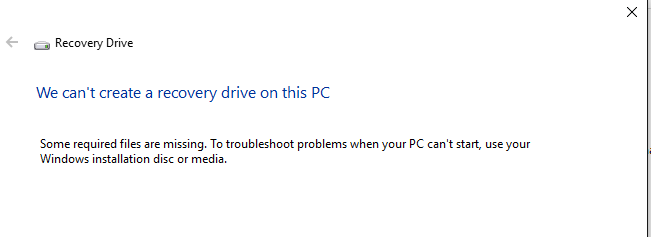
What can you do when you can’t create the recovery drive?

Summary
Follow this expert-approved guide to resolve the 'can't create recovery drive' error and safeguard your important data efficiently.


(SFC /scannow) in the command prompt window and press Enter. System File Checker will perform a system scan to fix problematic system files. If it cannot repair the damaged file, proceed to the next step.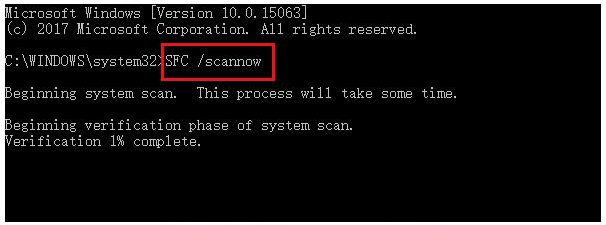
Dism /Online /Cleanup-Image /RestoreHealth in Command Prompt, press Enter, restart the computer, and check if the problem is resolved.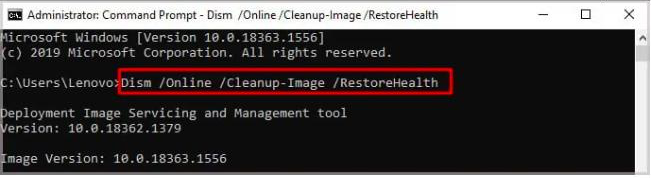

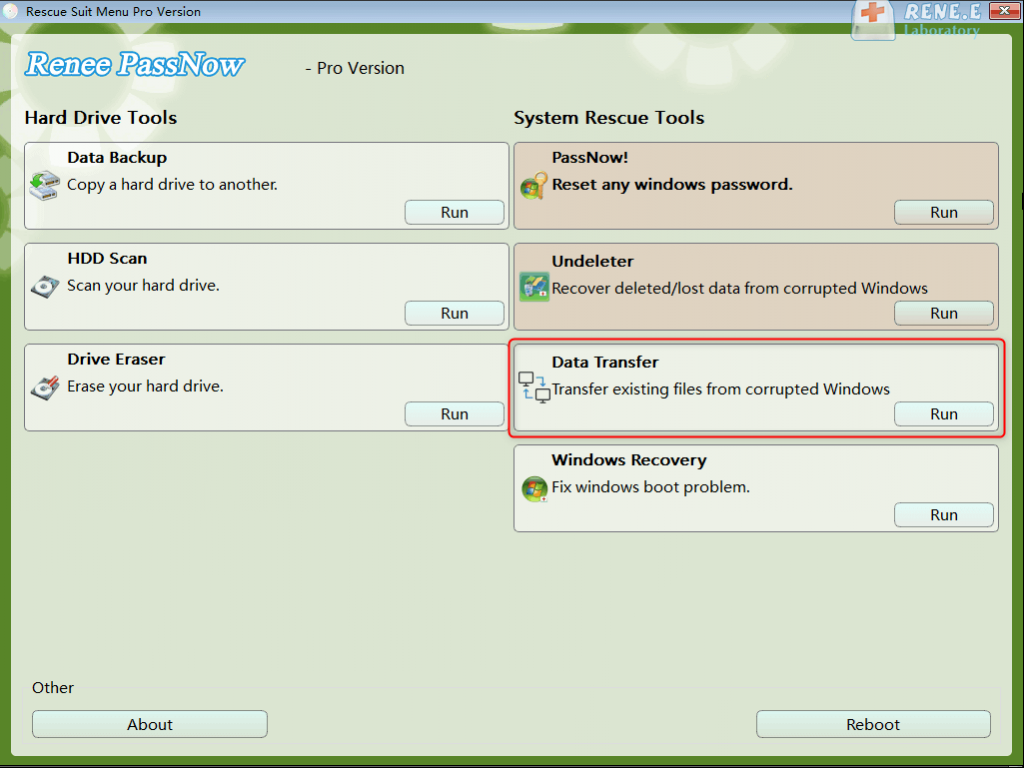
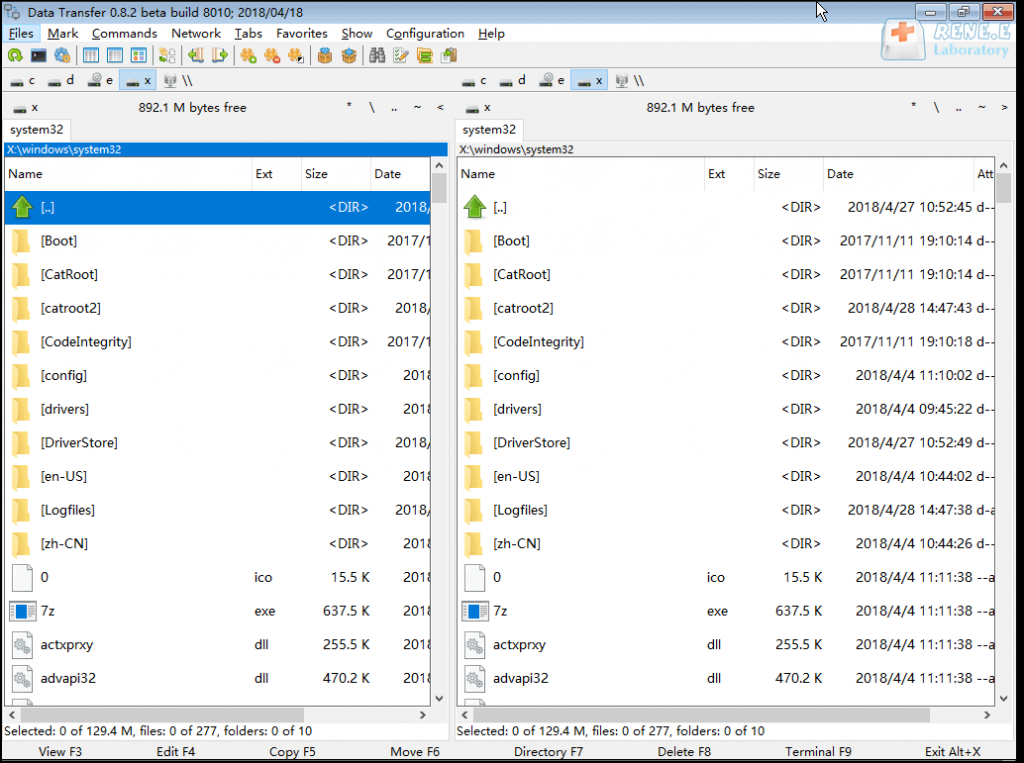
Easy to use 3 steps to transfer the files.
Transfer the files Transfer the important files of the computer without system.
Preview the files Preview the files while transferring the data.
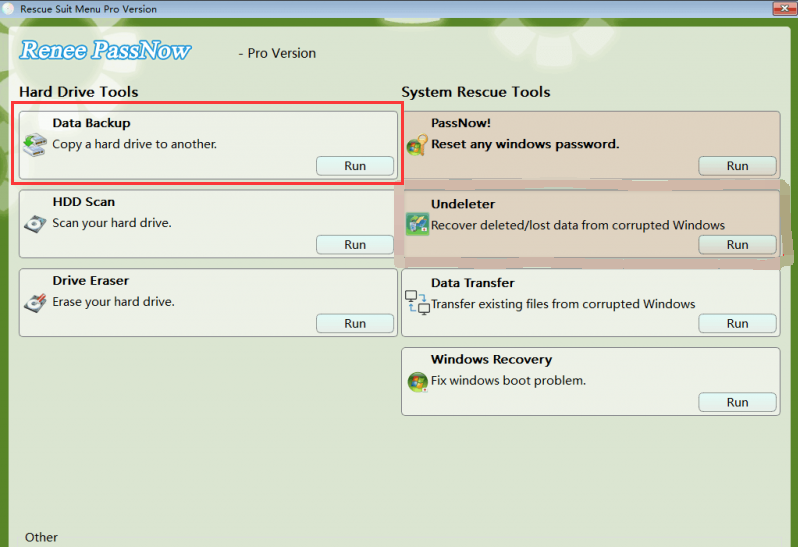
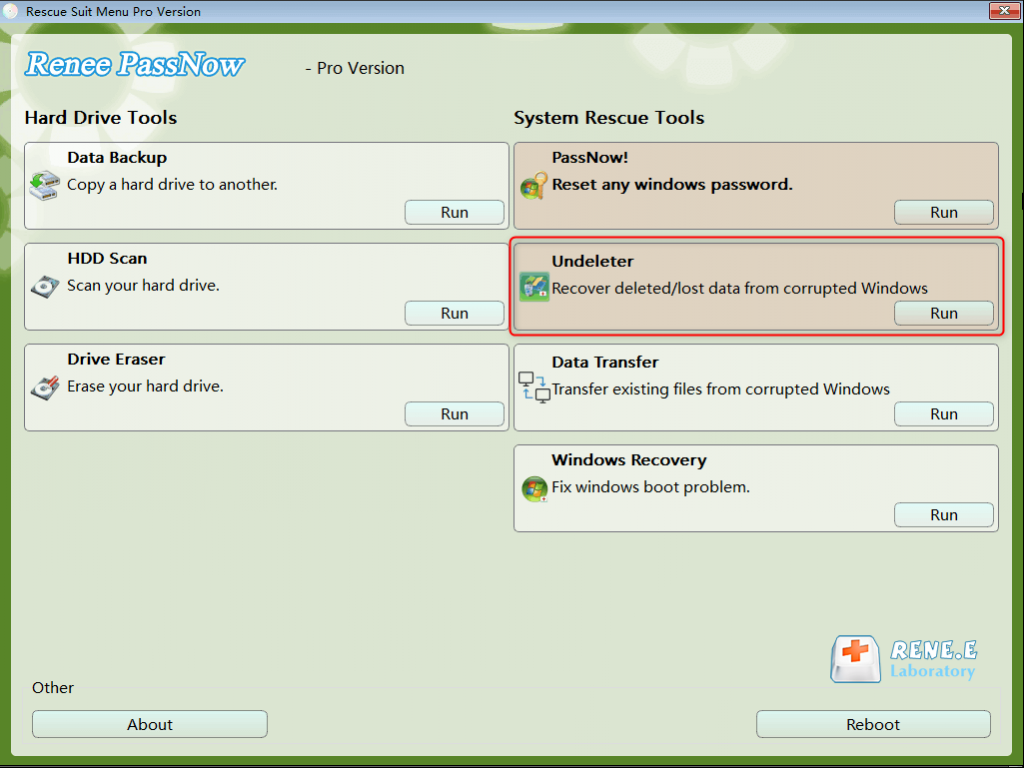
Multifuctional Data recovery, Windows password reset, bootable problem recovery can be run without system.
Highly compatible Windows 10/8.1/8/7/XP/Vista. Also supports UEFI boot mode.
Easy to use 3 steps to transfer the files.
Transfer the files Transfer the important files of the computer without system.
Preview the files Preview the files while transferring the data.
Free TrialFree TrialNow 2000 people have downloaded!
Relate Links :
Fixing dxgkrnl.sys Blue Screen Error - Quick Solutions

23-10-2023
John Weaver : Learn how to troubleshoot the dxgkrnl.sys blue screen error on Windows and get back to using your system...
How to fix the error MACHINE_CHECK_EXCEPTION on Windows 10?

18-02-2024
Amanda J. Brook : Learn how to solve the MACHINE_CHECK_EXCEPTION error on Windows 10 with these expert-approved repair methods. Say goodbye to...
Solve Windows 10's HAL_INITIALIZATION_FAILED Blue Screen Error Now

29-01-2024
Ashley S. Miller : Learn how to solve the HAL_INITIALIZATION_FAILED blue screen error. Discover the root cause and common solutions in this...
How to fix the error white screen on computer of Windows 10?
13-10-2023
Jennifer Thatcher : Learn how to fix the frustrating white screen on computer with these practical solutions. Safeguard your important files...

