author avatar
    Specialist of Customer Service Dept.
Last update by William Davis at 9 July 2026

Summary
The provided text details three primary technical methodologies to recover data from sd card image file formats, encompassing virtual drive mounting, commercial software deep scanning, and open-source signature carving. Additionally, the resource outlines cross-platform execution steps and critical safety protocols required to maintain forensic integrity during the data extraction process.


This guide walks you through how to recover data from sd card image file when you have a byte-for-byte image of a failing or corrupted SD card. We’ll cover three practical strategies: mounting the image for quick access, using professional recovery software like Renee Undeleter for complex or damaged filesystems, and leveraging open-source tools such as PhotoRec for a free, do-it-yourself solution. You’ll also find important safety tips and answers to common questions, helping you choose the most effective recovery approach with confidence.
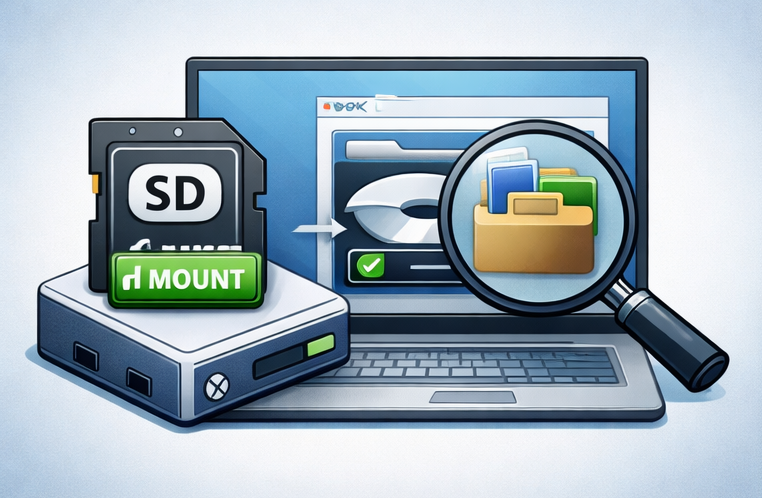
mount sd card image

Scenario and Prerequisites: Why Recover from an Image?

If you’ve already created an image of your SD card—a .img, .dd file—you’ve taken a vital step. That image is a frozen snapshot of your card’s contents, and now it’s time to recover data from sd card image file before your photos, documents, or footage are lost for good. Many users breathe a sigh of relief once the image is made, but then wonder what to do next—especially if Windows won’t mount the file or the volume shows up as RAW and asks to be formatted. This is where having the right recovery method matters most.
Recovering from an image is best practice with failing or corrupted cards. It prevents further wear on the original media, preserves its state for multiple recovery attempts, and provides a forensic baseline if needed. Here’s how different scenarios map to the best recovery approach:
ScenarioRecommended Focus

Physically failing card imaged with ddrescue or similar tools

Scan the image with recovery software that won’t stress the original card; mounting alone may not work if the file system is damaged.

RAW or corrupted file system (OS can’t read the card, but image contains raw data)

Use signature scanning - carving to extract files from an unreadable structure.

Forensic or legal requirements (need to preserve chain of custody)

Use read-only analysis tools that never modify the image; file-system-aware recovery preserves metadata.

Accidental deletion or formatting before imaging

The image holds traces of lost files; recovery tools can work on this static copy instead of the live card.

Before you start recovery, always:
- Check that your image file is complete—compare its size to the original card or verify its checksum/hash if possible.
- Make sure you have enough free space on a different physical drive (not the same disk as your image) to save recovered files.
- Treat the image file as read-only evidence—never let any tool write to or “repair” it.

Method 1: Mounting the Image for Direct Access

Mounting lets you treat the .img file as a virtual disk, so your operating system can access it just as if you’d plugged in the original SD card. This is the fastest and simplest way to recover data from an SD card image file, but it only works if the file system inside the image—FAT32, exFAT, NTFS, or ext4—is still healthy.
Advantages:
  • Fast and simple if the file system is intact
  • Allows direct file browsing and copying without specialized software
  • Read-only mounting prevents accidental modification of the image file

Disadvantages:

  • Cannot recover deleted files
  • Fails if the partition table or file system is corrupted or RAW
  • Requires third-party tools on Windows for raw .img or .dd files
If your image was made before corruption, you might see all your files and folders right away. However, mounting won’t recover deleted files and fails if the partition table or file system is damaged.

Windows

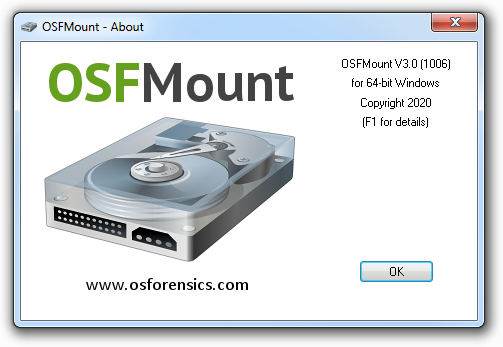
Windows does not natively support mounting raw .img or .dd files. Use a free third-party tool like OSFMount (from OSForensics) or Arsenal Image Mounter.
osf_mount

Steps

1. Download and install OSFMount.
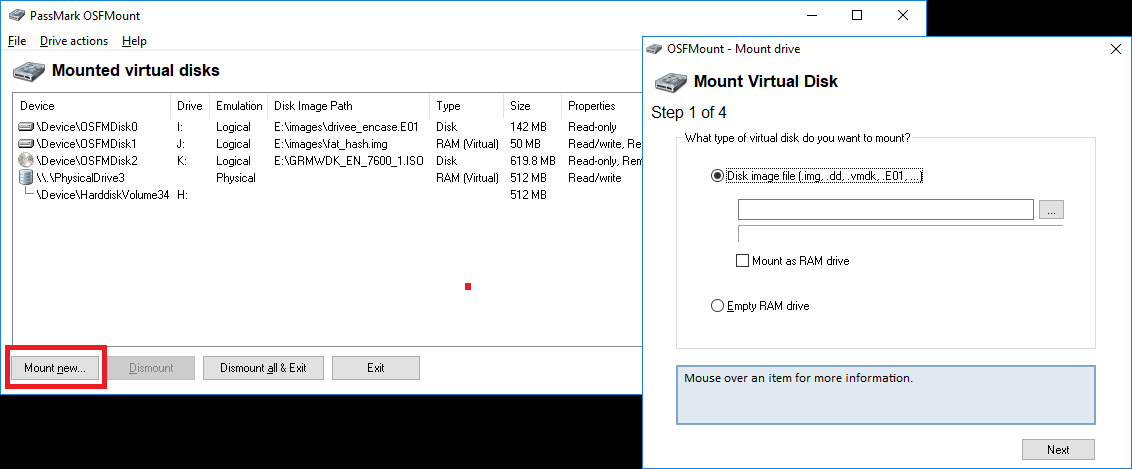
2. Launch the program and click Mount new…
osfmount_mount_new
3. Select Image file and browse to your .img or .dd file.
4. Under Mount options, choose Mount as RAM drive and assign a drive letter.
The option “Mount as RAM drive” means the image file will be loaded directly into your computer’s memory (RAM) instead of being mounted on a physical disk.
- Speed: Because it runs entirely in RAM, read and write operations are much faster than on a hard drive or SSD.
- Temporary storage: Data stored in a RAM drive disappears once you shut down or restart your computer.
- Use cases: Ideal for testing, caching, or working with files that need extremely fast access.
- Limitations: The size of the RAM drive is limited by your available system memory, so large images may not fit.
In short, it creates a high‑speed, temporary virtual disk in memory, useful when performance matters more than persistence.
5. Click OK. The virtual drive will appear in File Explorer.
If the volume appears as RAW or prompts for formatting, the file system is likely corrupted. In that case, proceed to Method 2 or Method 3.

macOS

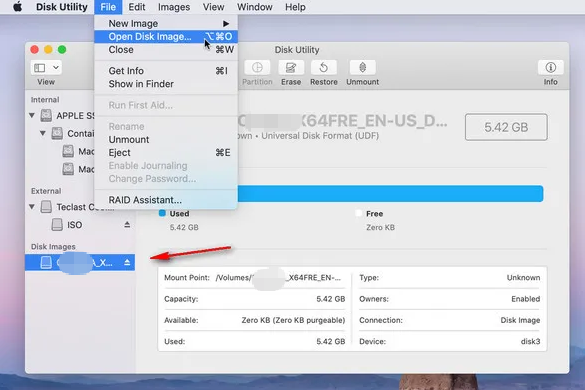
Double-click the image file. Disk Utility should mount it automatically. If not, open Disk Utility, go to File → Open Disk Image…, and select your file. The volume will appear on your desktop and in Finder, as long as the file system is intact.
In macOS, use file -> open disk image to load image file

Convert and Use Image Files with Hyper‑V or VMware

To make these image files usable in Hyper‑V or VMware, you’ll need to convert them into the appropriate virtual disk format. Several reliable tools can handle this process, each offering different options depending on your operating system and preferred workflow. The table below highlights some of the most common utilities and the steps required to perform the conversion.
ToolTarget FormatCommand / StepsNotes

qemu-img (cross‑platform)

VHD, VHDX, VMDK

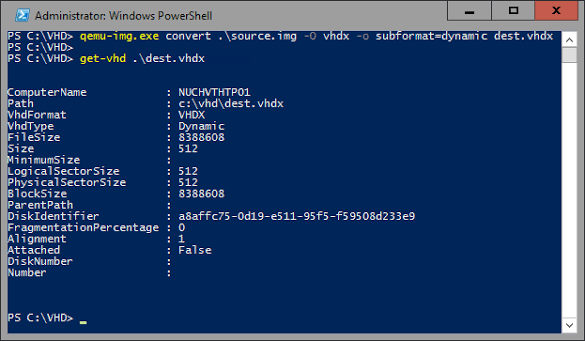
qemu-img convert -f raw disk.img -O vhdx disk.vhdx``

Works on Windows, Linux, macOS. Supports multiple formats.

VBoxManage (VirtualBox)

VMDK

VBoxManage convertfromraw disk.img disk.vmdk --format VMDK``

Included with VirtualBox; output usable in VMware Player/Workstation.

EaseUS Todo Backup (P2V)

VHD, VMDK

GUI: Tools → P2V Recovery → select .img backup → choose VMware or Virtual PC

Simplifies conversion for Windows users.

StarWind V2V Converter

VHD, VHDX, VMDK

Wizard‑based conversion

Free Windows utility; good for enterprise migration.

using qemu_img convert img to vhdx

Method 2: Professional Recovery with Renee Undeleter

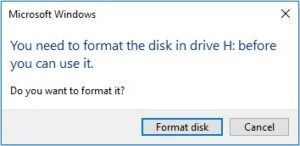
When mounting doesn’t work(file system is corrupted and Windows shows “need format” message) or you need to recover deleted, lost, or formatted data from the image, a dedicated recovery tool is essential.
Formatting is required to use the error message
Renee Undeleter is built for these situations, capable of scanning mounted virtual drives or loading raw image files directly. It combines file-system-based recovery (preserving original file names and folder structure) with deep signature scanning that recognizes over 400 file types—even if the file system is destroyed.
Renee Undeleter - Powerful Data Recovery SoftwareRenee Undeleter data Recovery software

Easy to use Only simple steps to recover data from storage devices.

Multiple scan modes Fast partition scan, whole partition scan and whole disk scan for different recovery needs.

File types Support to recover pictures, videos, audios, documents, mails, etc.

Supported storage devices Recover data from recycle bin, SD card, external disk, etc.

Supported systems Windows 11,10, 8.1, 8, 7, Vista, XP, 2000 and Mac OS X10.6, 10.7, 10.8+.

Easy to use Only simple steps to recover data from storage devices.

Multiple scan modes - 3 scan modes for different recovery needs.

Supported storage devices Recover data from recycle bin, SD card, external disk, etc.
Free TrialFree TrialFree Trial

3000 users have downloaded Renee Undeleter and found data back!

Important: Do not install Renee Undeleter on the same physical disk that holds your image file or where you plan to save recovered files. This avoids overwriting the very data you’re trying to recover.

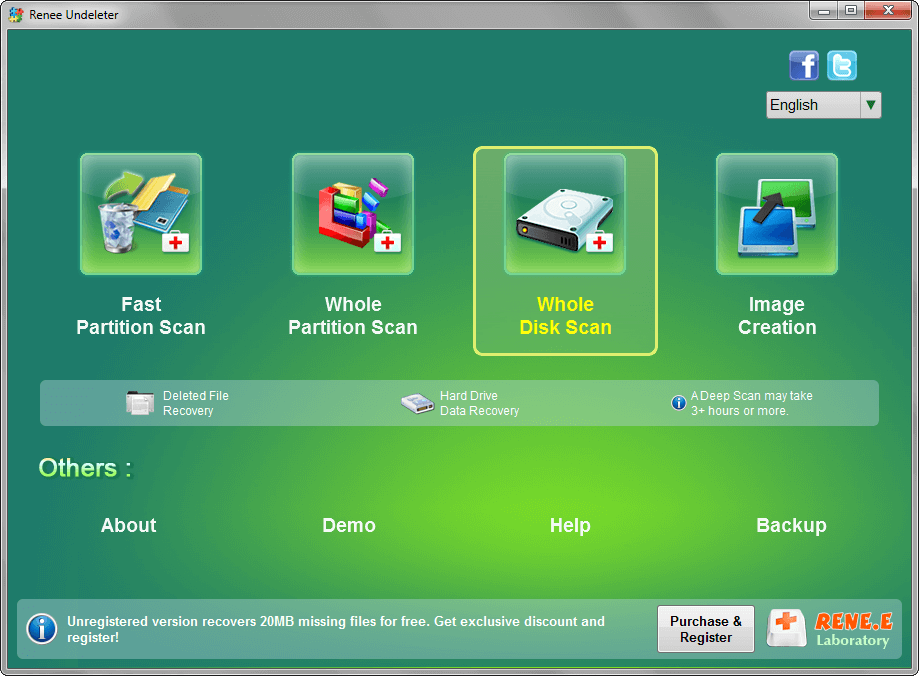
The Whole Partition Scan module is ideal for formatted, inaccessible, or RAW partitions inside an image. If your image contains an entire disk with multiple partitions, Whole Disk Scan can analyze and recover across all volumes.
Renee Undeleter Whole Disk Scan option for NAS drive recovery

Step-by-Step: Recovering Data from an SD Card Image File

Step 1: Mount the image as a virtual drive (if not done already).
Renee Undeleter works with both physical disks and mounted volumes. Use OSFMount (Windows), Disk Utility (macOS) as described in Method 1 to make the image accessible as a drive letter or mount point. Alternatively, you can load the raw image file directly in Renee Undeleter—see Step 3:
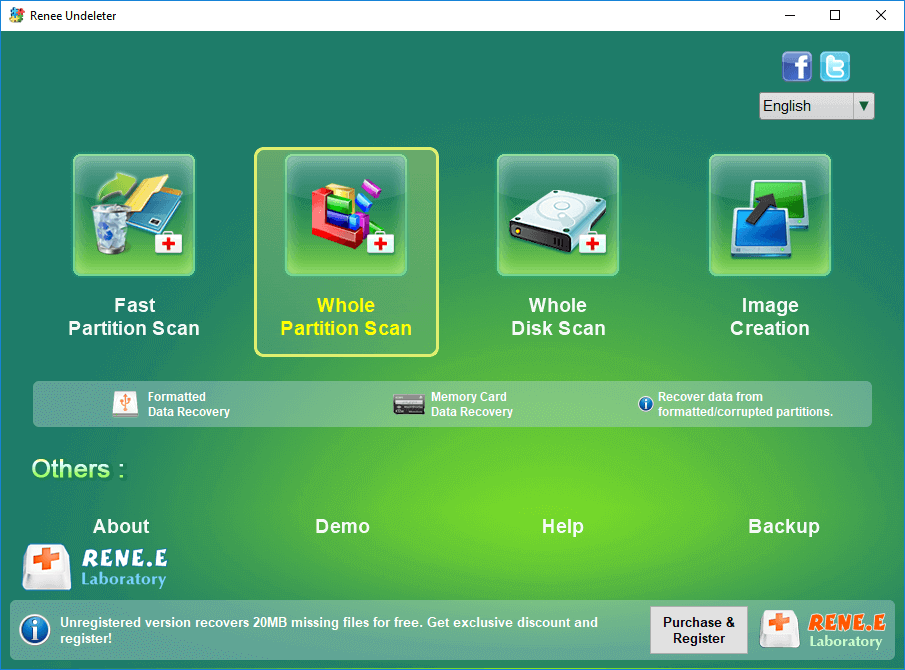
Step 2: Launch Renee Undeleter and select Whole Partition Scan.
Open Renee Undeleter. The main interface offers four modules:
- Fast Partition Scan – For recently deleted files on healthy file systems.
- Whole Partition Scan – For inaccessible, RAW, or formatted partitions—perfect for image-based recovery.
- Whole Disk Scan – Reconstructs partition info and scans an entire disk (physical or virtual).
- Image Creation – For making byte-to-byte backups (not needed if you already have an image).
Choose Whole Partition Scan.
select whole partition scan in renee undeleter to recover deleted video from sd card
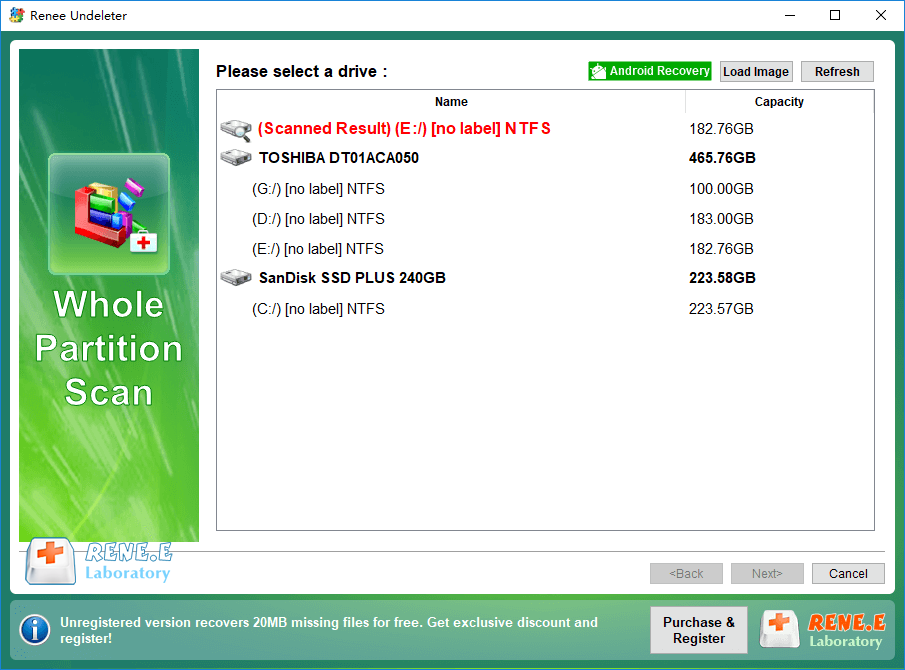
Step 3: Select the drive to scan or Load the image file.
In the drive list, you’ll see all physical and mounted drives. If you mounted the image, select that volume and click Next.
Renee Undeleter Whole Partition Scan
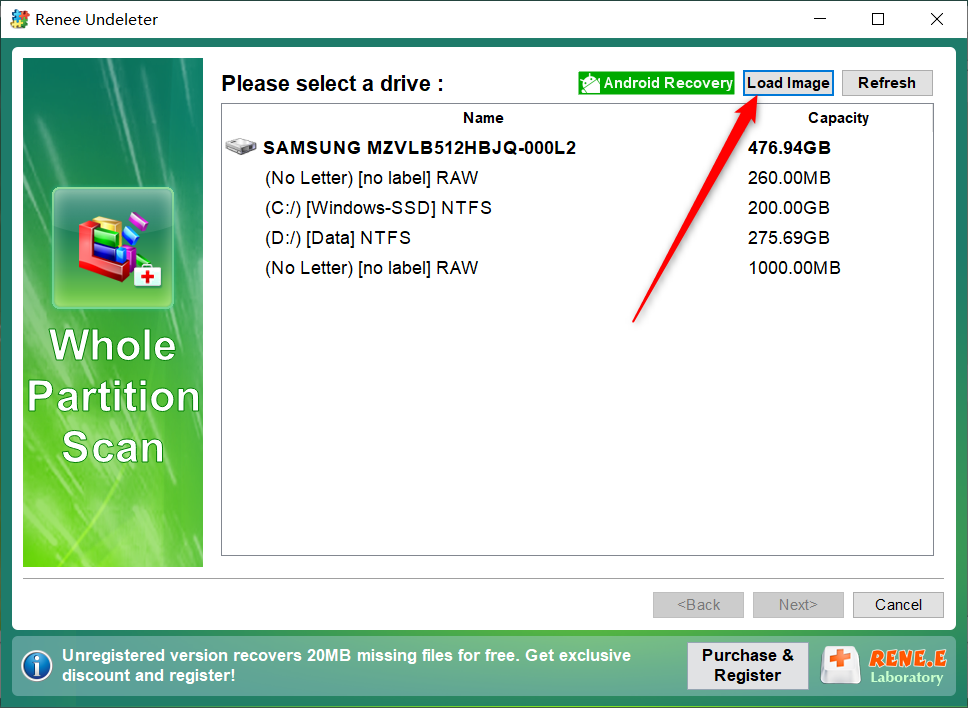
If you want to work directly with the .img/.dd file (without mounting), click Load Image, browse to your image file, and select it. Renee Undeleter will read the image and show its partitions.
Load image in Renee Undeleter
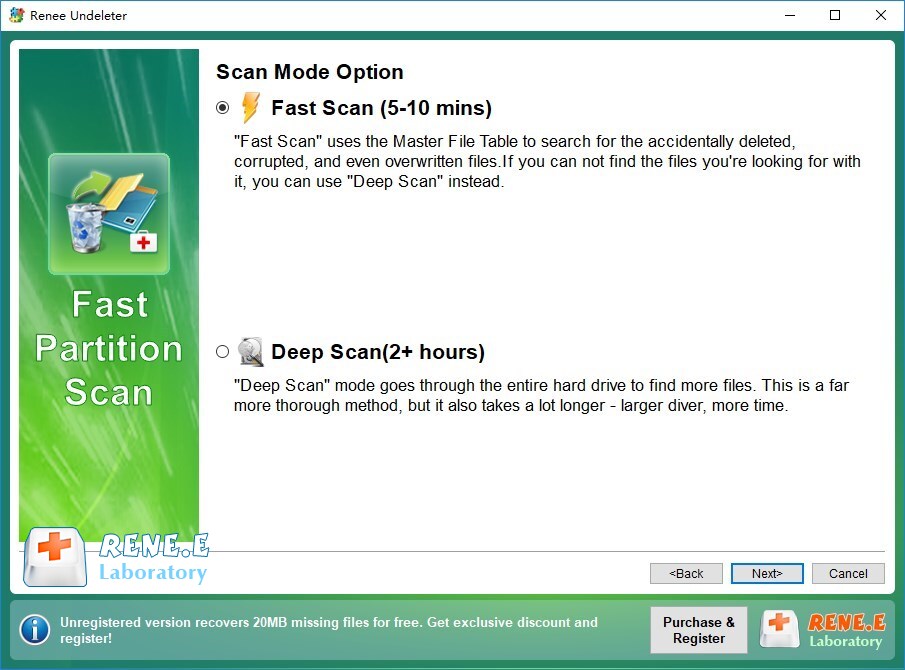
Step 4: Choose scan depth.
After selecting your target (mounted volume or loaded image), pick a scan mode:
- Fast Scan – Scans the first 30GB for files with intact file system records.
- Deep Scan – Thorough, sector-by-sector search using signature recognition; takes longer but finds files even if the file system is destroyed.
For formatted or corrupted images, Deep Scan is strongly recommended.
fast scan lost data
Step 5: Preview and recover.
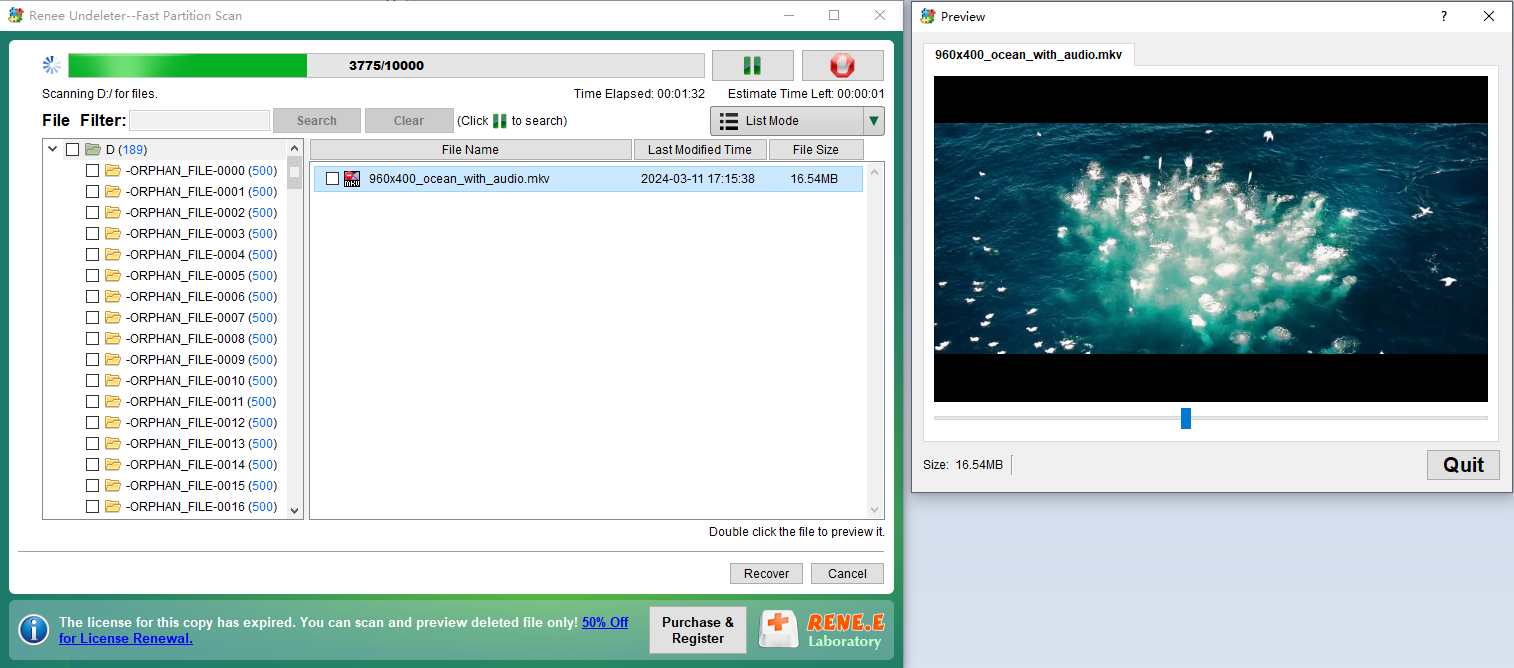
Scan results appear in real time. Double-click any file to preview it—photos, videos, and documents can be checked directly for integrity before recovery.
preview deleted mkv video file
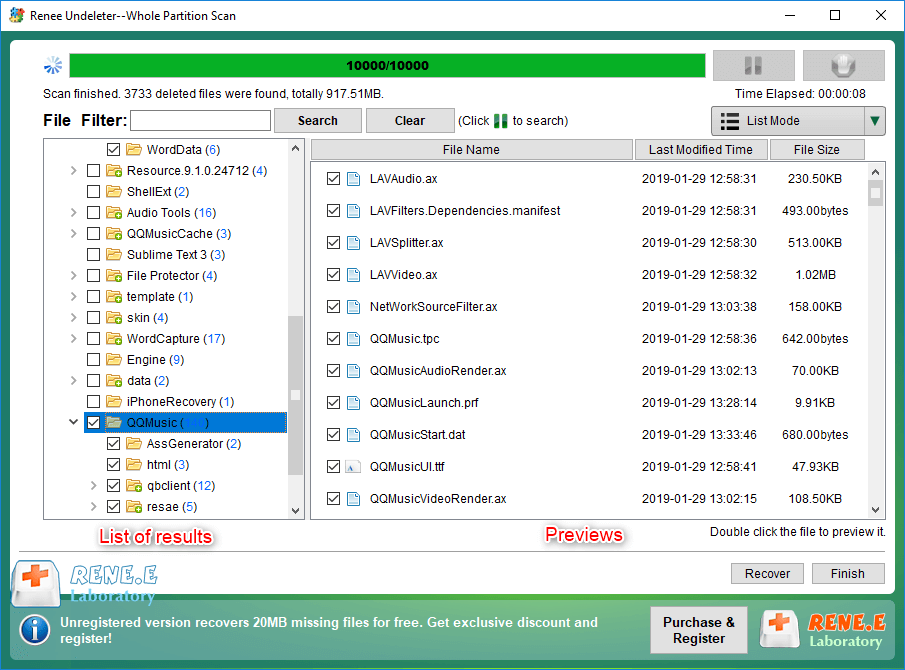
Select the files you want, tick their checkboxes, and click Recover.
preview and select the files to recover in renee undeleter
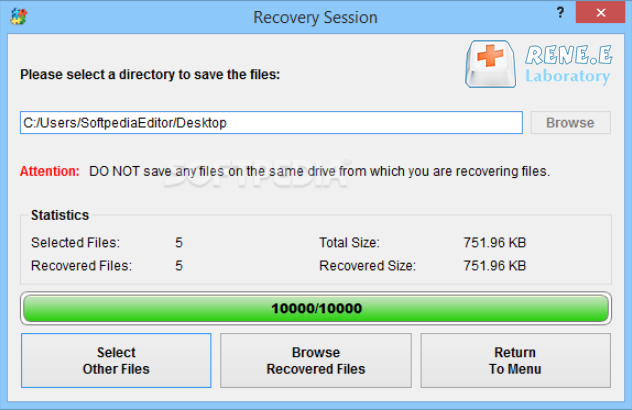
Step 6: Save to a safe location.
Click Browse and choose a destination on a different physical drive from the one hosting your image file. Saving to the same disk risks overwriting unrecovered data. Click Restore and let the process complete.
recover the whole disk data

Method 3: Open-Source Alternatives and Option Comparison

For users comfortable with the command line or working on a tight budget, free tools like PhotoRec (from TestDisk) offer another way. PhotoRec ignores the file system and performs raw file carving directly from a mounted image or the raw image file itself, identifying files by their internal signatures.
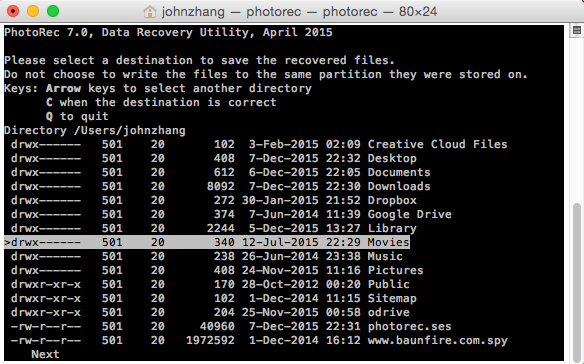
PhotoRec free sd card recovery application
How PhotoRec works: It scans every sector for known file headers and footers—JPEG, MP4, DOCX, and more. This is highly effective if the partition structure is gone, but it’s slow, assigns generic filenames (e.g., f1234567.jpg), and places all files in flat output folders. Original folder structures and file names are lost, so organizing results takes extra effort.
Advantages:
  • Completely free and open-source; no watermarks or scan limits
  • Cross-platform (Windows, macOS, Linux) and actively maintained
  • Extremely effective at carving recoverable files from severely damaged file systems
  • Can read raw img or dd files directly without any mounting step

Disadvantages:

  • Loses original file names and folder structure; files end up in generic recup_dir folders
  • Steep learning curve; entirely text-based interface with many prompts
  • Scanning is significantly slower than optimized commercial tools, especially on large images
  • Cannot preview files before recovery
  • you must sift through thousands of files afterwards
  • No built-in partition table reconstruction
  • heavily damaged multi-partition images may require extra work

Step-by-Step with PhotoRec

1. Download TestDisk (includes PhotoRec). Get it from cgsecurity.org and extract the archive—no installation needed.
2. Mount the image or use it as a file. PhotoRec can work directly on .img or .dd files, so mounting is optional.
3. Run PhotoRec as administrator/root. In a terminal, navigate to the extracted folder and launch:

sudo ./photorec_static

(On Windows, double-click photorec_win.exe and accept the UAC prompt.)
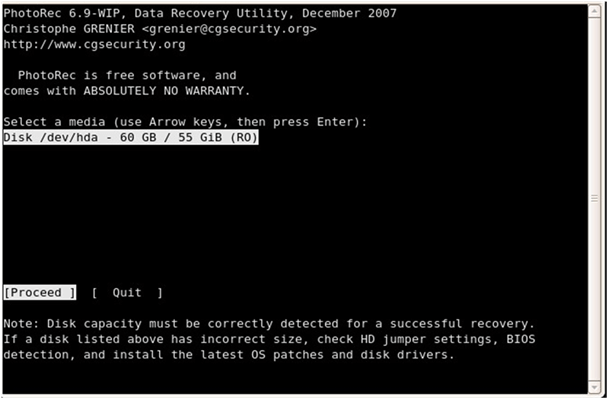
4. Select the media. Use arrow keys to choose your mounted drive or select ‘ [ Image ] ’ to open the .img file directly. Press Enter.
select disk in photorec
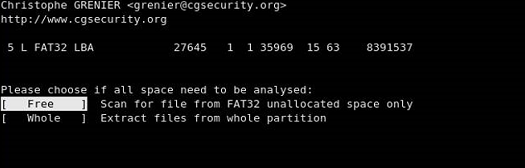
5. Choose a partition. PhotoRec will list detected partitions. For single-volume images, select the partition; for unknown file systems, choose ‘ [ Whole ] ’.
photorec_choose_whole
6. Set file system type and options. For SD cards, select ‘ [ Other ] ’ (FAT/NTFS). Enable ‘Brute Force’ only if standard carving doesn’t work—it’s much slower.
7. Select output folder. Choose a location on a different physical drive (such as an external USB drive) and press C to confirm.
8. Start recovery and wait. PhotoRec scans the image sector-by-sector. Progress is shown, but there’s no preview. When finished, recovered files are saved in the output directory.
The trade-offs are clear: free and powerful, but less user-friendly and more time-consuming than commercial tools. For many, Renee Undeleter’s blend of usability and deep recovery is the practical choice.

Quick Comparison Table

MethodEase of UseRecovers Deleted FilesPreserves Folder StructureCost

Mounting (OS tools + OSFMount)

High – familiar file browsing

No

Yes (if filesystem intact)

Free

Renee Undeleter

High – guided interface with previews

Yes

Yes (via file-system scan)

Paid / free trial

PhotoRec (command line)

Low – text-based, many prompts

Yes (via carving)

No (flat output)

Free

Best choice summary: Use mounting for healthy images when you just need to copy visible files. Choose Renee Undeleter for the best balance of deep recovery, folder preservation, and ease of use. Opt for PhotoRec if you want a zero-cost tool and don’t mind reorganizing large numbers of unnamed files.

Best Practices and Safety Tips

To maximize your chances of success and protect your image file:
- Always save recovered files to a separate physical drive. Never write them to the same disk that stores the image—this can overwrite lost data before it’s found.
- Never modify the original image file. Don’t rename it, open it with a hex editor that auto-saves, or use tools that might “repair” the image. Work on a read-only copy when possible.
- Preview files in recovery software before restoring in bulk. This helps you avoid saving corrupted or incomplete files.
- Create a working copy of your image file before any operation that could write to it (mounting with read-write access is not recommended). This preserves your original snapshot.
- Begin recovery as soon as possible. While the image itself is static, the storage device hosting it can still fail or develop issues—delaying increases risk.

Saving recovered files to the same partition as your image file can permanently overwrite the very data you’re trying to recover. Always choose a different physical disk as your recovery destination.

Frequently Asked Questions (FAQ)

Can I recover files if the.imgor.ddimage file itself is corrupted or incomplete?

In many cases, yes—at least partially. If the image is truncated or contains bad sectors, recovery tools will scan all readable portions. Files located entirely within damaged areas may be lost, but photos and documents in intact sectors can often be salvaged. Comparing the image’s checksum to the original helps estimate what’s missing.

How long does a Deep Scan typically take for a 64 GB or 128 GB SD card image?

Scan times depend on the speed of the disk holding your image and the recovery tool’s efficiency. On a modern SATA SSD, a Deep Scan of a 64 GB image with Renee Undeleter usually takes 1–3 hours; for 128 GB, expect 3–6 hours. Scans from USB drives may take longer. PhotoRec is generally slower and may require overnight scans for large images.

The recovered files have no names or strange extensions (e.g., from PhotoRec) – what can I do to identify and restore them?

Files recovered via signature scanning lose their original metadata. You can batch-rename photos using EXIF timestamps with tools like ExifTool, sort documents by content, and manually assign file extensions (e.g., rename .file to .jpg) based on file signatures. Professional tools like Renee Undeleter preserve names and folder structures, making organization much easier.
Renee Undeleter - Powerful Data Recovery SoftwareRenee Undeleter data Recovery software

Easy to use Only simple steps to recover data from storage devices.

Multiple scan modes Fast partition scan, whole partition scan and whole disk scan for different recovery needs.

File types Support to recover pictures, videos, audios, documents, mails, etc.

Supported storage devices Recover data from recycle bin, SD card, external disk, etc.

Supported systems Windows 11,10, 8.1, 8, 7, Vista, XP, 2000 and Mac OS X10.6, 10.7, 10.8+.

Easy to use Only simple steps to recover data from storage devices.

Multiple scan modes - 3 scan modes for different recovery needs.

Supported storage devices Recover data from recycle bin, SD card, external disk, etc.

Free TrialFree TrialFree Trial

3000 users have downloaded Renee Undeleter and found data back!

User Comments

Page 1

Leave a Comment


Your comment has been submitted and is awaiting moderation.