author avatar
    Technology Manager of Test Dept.
 

Summary
Discover the benefits and challenges of moving your operating system to a new drive. From saving time and preserving software continuity, to potential troubleshooting tips, this guide covers everything you need to know. Find out the best methods and recommended software to make the process seamless.
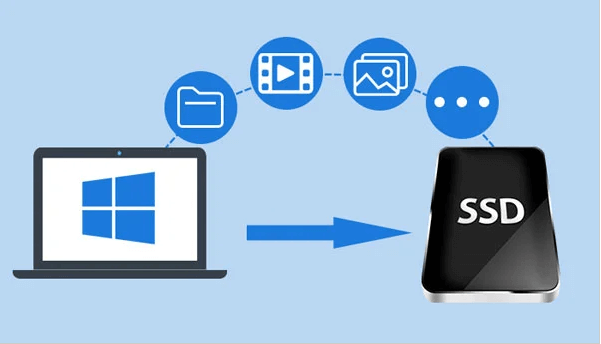


Moving your operating system (OS) to a new drive offers numerous benefits, improving your computer’s performance and user experience. Whether you’re upgrading, transferring data, or seeking a system boost, this migration can save time, preserve software continuity, and retain your license key. Discover how a simple movement can greatly impact your computer usage.

Benefits of Moving OS to a New Drive

Time-Saving
One of the biggest advantages of moving your OS to a new drive is that it can save you time. By transferring your OS to a faster drive, such as a solid-state drive (SSD), you can greatly improve the speed and performance of your computer. This means less time waiting for your computer to boot up and faster loading times for programs and applications. Additionally, moving your OS to a new drive can also save you time when it comes to installing new software and updates, as the process will be much faster on a newer, faster drive.
 moving os to new drive
Software Continuity
Another benefit of moving your OS to a new drive is that it ensures software continuity. When you move your OS, your software and applications will also be transferred, which means you can continue using them without any interruptions or compatibility issues. This is especially important if you have specialized or expensive software that may not be easily available for a re-installation.
Preservation of License Key
Moving your OS to a new drive also helps to preserve your license key. If you have purchased software and have a valid license key, transferring your OS to a new drive will not affect your license. This means you won’t have to worry about any additional costs or steps to reactivate your software.

The Process of Moving Your OS to a New Drive with Renee Becca, Detailed Step-by-Step

In this chapter, we will guide you through the process of moving your operating system (OS) to a new drive using Renee Becca software.
Renee Becca is a tool specially used for system/hard disk data backup and restoration. It can help you back up and restore important data in your computer, such as programs, system configuration, emails, photos, videos, documents, bookmarks, etc. In addition, you can also use it to clone disk and system data. The software provides three cloning methods, including hard disk cloning/cloning system hard disk; partition cloning and system migration. You can choose the most suitable cloning method according to your different needs.
In addition, Renee Becca supports 4K align and Cloning from larger partition to smaller partition. These functions can better assist you in completing system and data migration.
Here is a guide on how to use Renee Becca for cloning your Windows to a new HDD or SSD.
Step 1: Download and Install Renee Becca software on your computer. Launch the program to get started.
Hot Topic - ADsRenee Becca – Safe and Quick System Migration to SSD

Automatic 4K alignment Improves SSD performance during system migration.

Support GPT and MBR Automatically adapt to the suitable partition format.

Support NTFS and FAT32 Redeploy various files in different file systems.

Back up quickly Back up files at up to 3,000MB/min.

Overall backup schedule Support system redeployment/system backup/partition backup/disk backup/disk clone.

Automatic 4K alignment Improve SSD performance

Support GPT and MBR Intelligently adapt to a partition format

Support NTFS and FAT32 Redeploy files in different file systems
Free TrialFree TrialNow 2000 people have downloaded!
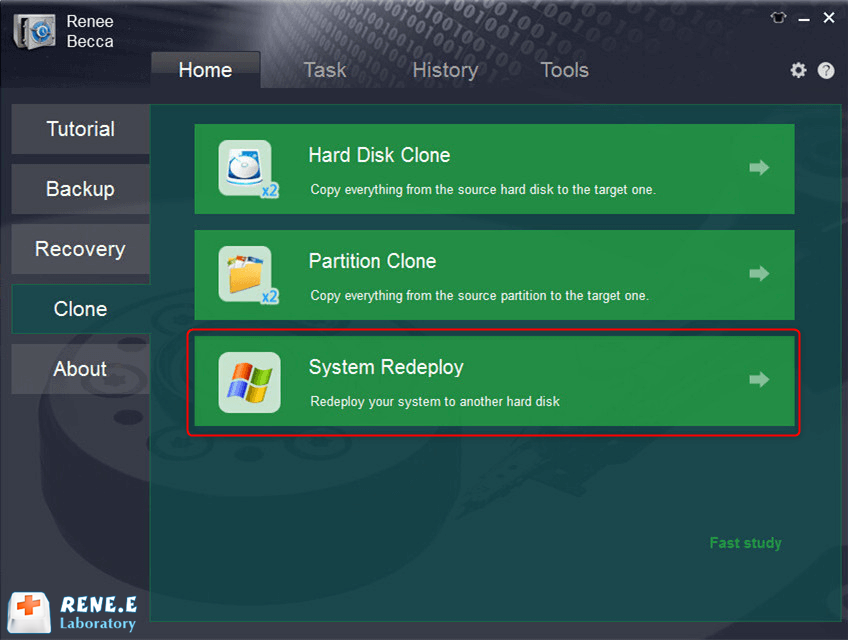
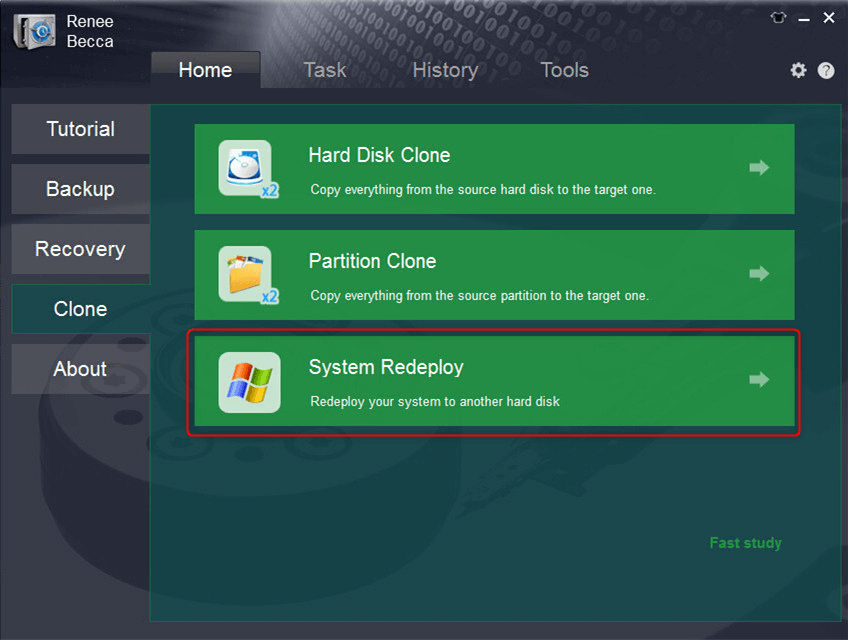
Step 2: Launch Renee Becca. In the main interface of Renee Becca, click “System Redeploy” in the “Clone” option from the main interface.
select system redeploy function in renee becca
Step 3: Select Source and Destination Drive
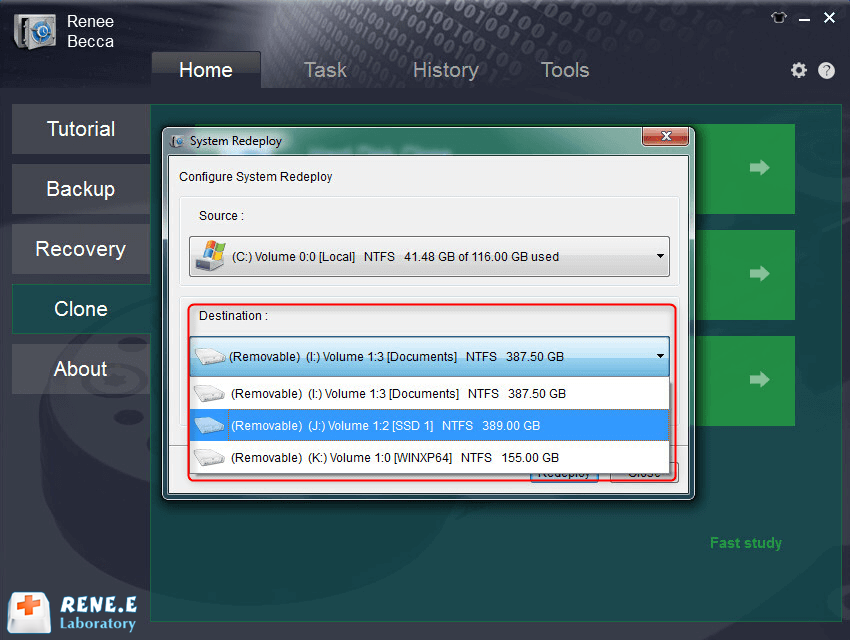
Select the source drive (your current OS drive) and the destination drive (the new drive where you want to migrate your OS to).
Step 4: Click on “Redeploy” to start the cloning process. The software will begin copying the OS to your SSD.
clone windows 10 to ssd with Renee becca
Step 5: Start the Migration Process
This will take some time, so be patient and do not interrupt the process.
Cloning your current operating system to the new SSD using Renee Becca software is a simple and quick process. It eliminates the need for a clean installation of Windows and ensures all your data is transferred seamlessly. However, it is important to be cautious and follow the steps carefully to avoid any potential errors or data loss.
Pros:
  • Allows safe migration of operating system without fresh installation.
  • Simple steps for a smooth and hassle-free transfer.
  • Improves performance and faster boot times with new SSD.

Cons:

  • Doesn't have a Mac version.Paid subscription required for full access to all features.
  • Paid subscription required for full access to all features.

Congratulations! You have successfully migrated your OS to a new drive with Renee Becca. Continue reading to learn how to ensure your system boots from the new drive after migration.

Ensuring Your System Boots from the New Drive After Migration

Transferring the operating system to a new drive involves more than just cloning; it also requires careful preparation and proper BIOS configuration to ensure a successful boot-up. Whether shifting to an HDD or an SSD, the approach varies slightly depending on your system’s BIOS type—Legacy or UEFI.
Step 1: After the cloning process, configure your system’s BIOS to boot from the new SSD. Restart your PC and enter the BIOS/UEFI settings by pressing the appropriate key (F2, F12, Del, etc.).
Here is a list of BIOS shortcut keys for different brands. Alternatively, you can observe the BIOS shortcut keys displayed on the screen during booting.
BIOS NameMethodThe Key or Keys
AcerPress Del or F2 immediately after powering onDel, F2
CompaqPress F10 while the cursor in the top right corner of the screen is blinkingF10
DellPress F2 when the Dell logo appears, or press every few seconds until the message Entering Setup appearsF2
eMachinesPress Tab or Del while the eMachine logo displays on the screenTab, Del
FujitsuPress F2 once the Fujitsu logo appearsF2
GatewayPress the F1 key repeatedly after restarting the computerF1
HPPress the F1, F10, or F11 key after restarting the computerF1, F10, F11
IBMPress F1 immediately after powering on the computerF1
LenovoPress F1 or F2 after powering on the computerF1, F2
NecPress F2 to enter the BIOS SetupF2
Packard BellPress F1, F2, or Del to enter BIOSF1, F2, Del
SamsungPress F2 to start the BIOS setup utilityF2
SharpPress F2 after the computer startsF2
SonyPress F1, F2, or F3 after turning on the computerF1, F2, F3
ToshibaPress F1 or Esc after powering on to access BIOSF1, Esc
ARLTPress Del or F11 when the respective message is shownDel, F11
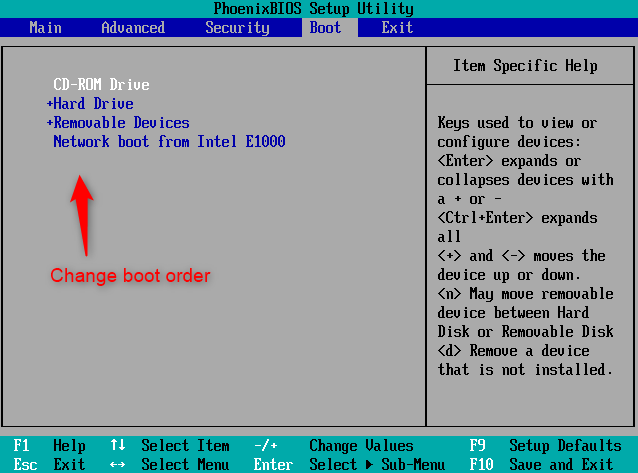
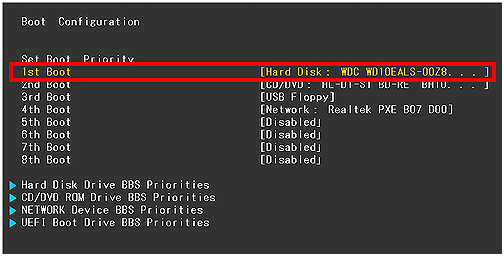
Step 2: In the boot section, adjust the boot order to prioritize the new SSD in Legacy systems or select the SSD as the boot drive in UEFI systems. Save changes and exit.
change the boot order
Step 3: If your PC successfully boots from the new drive, verify that the OS operates smoothly and all data are intact. If you encounter any issues, review the initialization and cloning steps, ensuring they align with your system’s requirements.
When performing these operations, keep in mind that during the cloning process, your PC will be inoperable. Ensure you plan accordingly to minimize downtime and disruption. Moreover, after migrating to the new SSD, it’s crucial to secure your system by updating the OS and installed applications to their latest packages. This is especially important if your data include personal, financial, or intellectual property that could be exposed to cyber threats.

Potential Challenges and Troubleshooting Tips for a Successful OS Transfer

Before undertaking the process of moving your operating system (OS) to a new drive, it is important to understand that there may be potential challenges or complications that could arise. In this chapter, we will discuss the common problems that may occur during an OS transfer and provide troubleshooting tips to help you successfully complete the transfer.
One of the biggest challenges when transferring an OS to a new drive is ensuring that all of your files, programs, and settings are preserved and functioning properly on the new drive. This can be especially difficult if you have a large amount of data or if you are using a different type of drive than your previous one. Here are a few troubleshooting tips to help you overcome this challenge:
Verify the integrity of your data
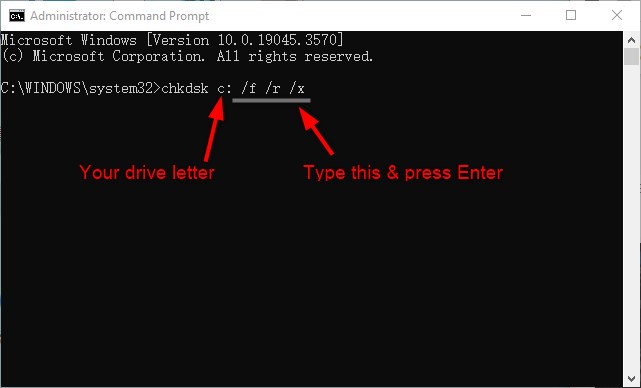
Before starting the transfer process, it is important to make sure that your files and data are not corrupted. This can be done by running a disk check to ensure the integrity of your data.
scan and fix any bad sectors in Windows
Check for driver compatibility
If you are transferring your OS to a new drive and using a different type of drive than your previous one, make sure to check for driver compatibility. Some drives may require additional drivers to be installed before they can function properly with your system.
Update your system
Before transferring your OS, make sure your system is up-to-date with the latest updates and patches. This will help ensure that your computer is running smoothly and minimize the chances of any compatibility issues during the transfer process.
Create a backup
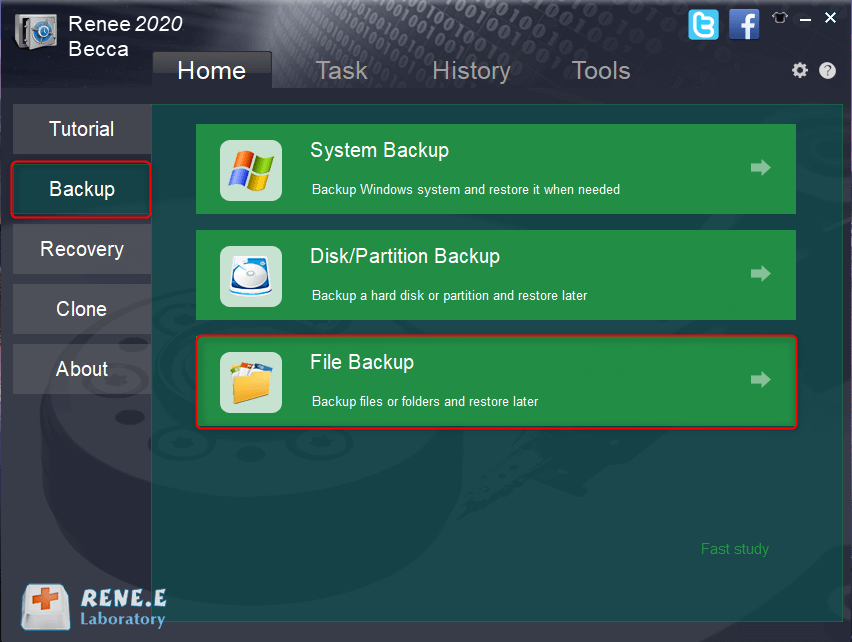
As a precautionary measure, it is always a good idea to create a backup of your data before transferring your OS. This way, if anything goes wrong during the transfer, you can easily restore your data and avoid potentially losing important files.
click to back up files in renee becca
Use a reliable transfer tool
When transferring your OS, it is important to use a reliable and trusted transfer tool, such as Renee Becca. This will help ensure a smooth and successful transfer without any data loss or corruption.
clone windows 10 to ssd with Renee becca
Verify the boot order
After completing the transfer process, it is important to verify that your system is booting from the new drive. If it is not, you may need to go into your BIOS/UEFI settings and change the boot order to prioritize the new drive.
change the boot order in hard disk in boot configuration in BIOS
Troubleshoot any booting issues
If your system is not booting from the new drive, there may be other underlying issues such as incorrect boot configurations or incompatible drivers. In this case, it may be necessary to seek help from a professional or refer to the documentation provided by your OS or drive manufacturer.
In conclusion, transferring your operating system to a new drive can be a daunting task, but with the right tools and knowledge, it can be a smooth and successful process. By following these troubleshooting tips and being prepared for potential challenges, you can ensure a seamless OS transfer and continue using your computer with minimal disruption.

Conclusion

Moving your operating system (OS) to a new drive may seem challenging, but it can be a smooth process with the right tools and knowledge. This guide explains the benefits of OS migration, including time-saving and software continuity. We also discuss the differences between HDD and SSD drives and their impact on migration. Using Renee Becca software, we provide a detailed step-by-step guide on transferring your OS. We emphasize the importance of ensuring your system boots from the new drive and offer troubleshooting tips. With this article, you have everything you need for a successful and efficient OS migration. Happy migrating!