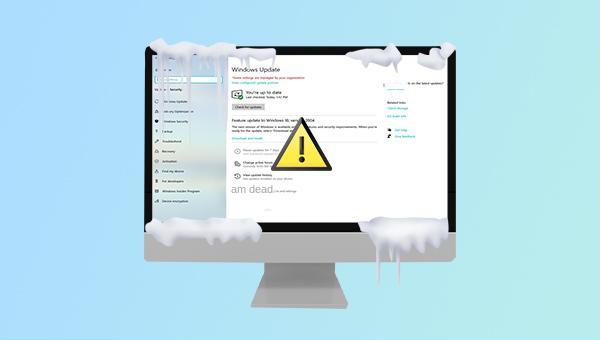
author avatar
    Specialist of Customer Service Dept.
 

Summary
Learn about the causes and common solutions for the error of computer freezing after windows 10 update. Also, discover how to transfer or recover important data if you are unable to enter the system.


computer freezing after windows 10 update

I. Why the computer freezes/crashes/crashes after Windows update?

After a Windows update, the entire system may freeze for a variety of reasons or become extremely stuck due to automatic updates on Windows 10. However, avoiding system updates out of fear of potential issues is not a viable solution. Timely updates are necessary to prevent major failures during everyday computer use.
The issue of freezing or stuttering after a Windows update is a common problem. This can be attributed to conflicts with existing software, unexpected issues that arise after running the update, or even errors within the update file itself.
Although the cause of the current problem is unknown, it is not difficult to solve the problem. Let’s learn how to solve the computer crash after Windows update.

II. How to fix computer freezing after windows 10 update?

1. Restart the computer

Restarting your computer can often resolve various computer issues, including crashes after updates. If you encounter a Windows crash after an update, try holding down the power button to force a shutdown and potentially resolve the unexpected crash. Alternatively, if your computer is only partially frozen after an update and you are still able to use the mouse, you can click on the (Start) button in the lower left corner of the taskbar, then click on (Power) and select (Restart).

2. Update the driver of the device to the latest state

When your Windows freezes after an update, it could be because of incompatible hardware and drivers. In this situation, it is advised to promptly update the driver for the affected device (such as the hard disk or other devices with an exclamation mark). If you are unable to access the system normally, you can update the driver in safe mode.
The following are the steps to update the driver in safe mode (taking the Windows 10 system interface as an example):
Step 1: You can first enter the Windows recovery environment and then enter the safe mode. Press the power button to turn it on first, then press the power button to force shutdown when the startup logo appears. Repeat this step three times to enter the Windows recovery environment.
Step 2: On the “Choose an option” screen, select (Troubleshoot) > (Advanced Options) > (Startup Settings) > (Restart) option.
clcik to restart PC in startup settings
Step 3: After the device restarts, you will see the option to launch settings. You can press the number keys to choose which safe mode to use to enter Windows, for example, press (4) to enable safe mode.
press 4 to enable safe mode
Step 4: After entering safe mode, right-click and select (This Computer)-(Management)-(Device Manager). Then right-click to select the disk or other devices that display an exclamation mark, and select the (Update driver) option.
update driver-disk
Step 5: Next, select the (Search automatically for updated driver software) option, and then follow the instructions to complete the update of the device driver. After the driver update is complete, restart the computer to see if the problem is resolved.
search automatically for updated driver software

3. Try performing a system restore

System Restore can restore the system to a system state that was working normally before, and it can help to solve the freezing problem after updating Windows. The specific operation steps are as follows:
Step 1: When the computer logo appears on startup, press and hold the power button to force shutdown, repeat more than 3 times, and let the computer enter the Windows recovery environment.
Step 2: When the screen displays to select an option, please click (Troubleshooting) – (Advanced Options) – (System Restore) in sequence.
system restore
Step 3: Then, select a recent restore point before the error occurred to restore, click (Next) and wait for the restore process to complete.
system restore point
Kind tipsIf you have not enabled System Protection and made a restore point before, System Restore may not be able to fix the problem. In this case, you can opt to reinstall the system. However, it is advisable to first try booting the computer and transferring important files before proceeding with the reload operation.

III. When unable to enter the Windows system, use Renee PassNow to transfer or restore data

1. What is Renee PassNow?

Renee PassNow is a comprehensive system rescue software designed for Windows users. It offers a wide range of features, including resetting Windows account passwords, creating new administrator accounts, recovering data from disks and memory cards, restoring data after hard disk formatting, transferring disk files, and scanning and erasing disk files. Additionally, it can also fix various Windows system issues such as repairing MBR boot records, DBR error parameters, 0xc00000e errors, startup failures, and black or blue screens. With its versatility and compatibility with multiple systems, including Windows 10/8.1/8/7/XP/Vista, Renee PassNow is the ultimate solution for all your system rescue needs.
Hot Topic - ADsRenee PassNow – 3 Steps to transfer data from the crashed system

Easy to use 3 steps to transfer the files.

Transfer the files Transfer the important files of the computer without system.

Preview the files Preview the files while transferring the data.

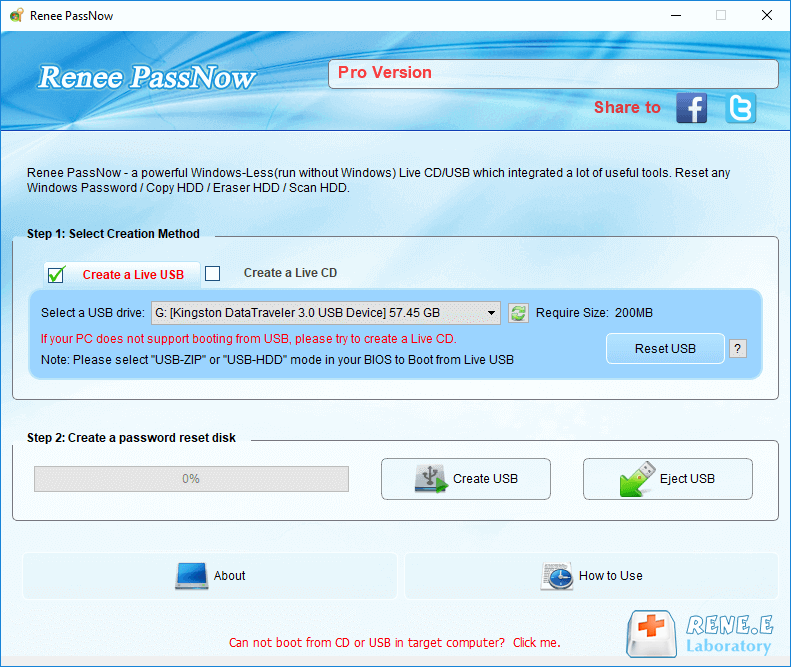
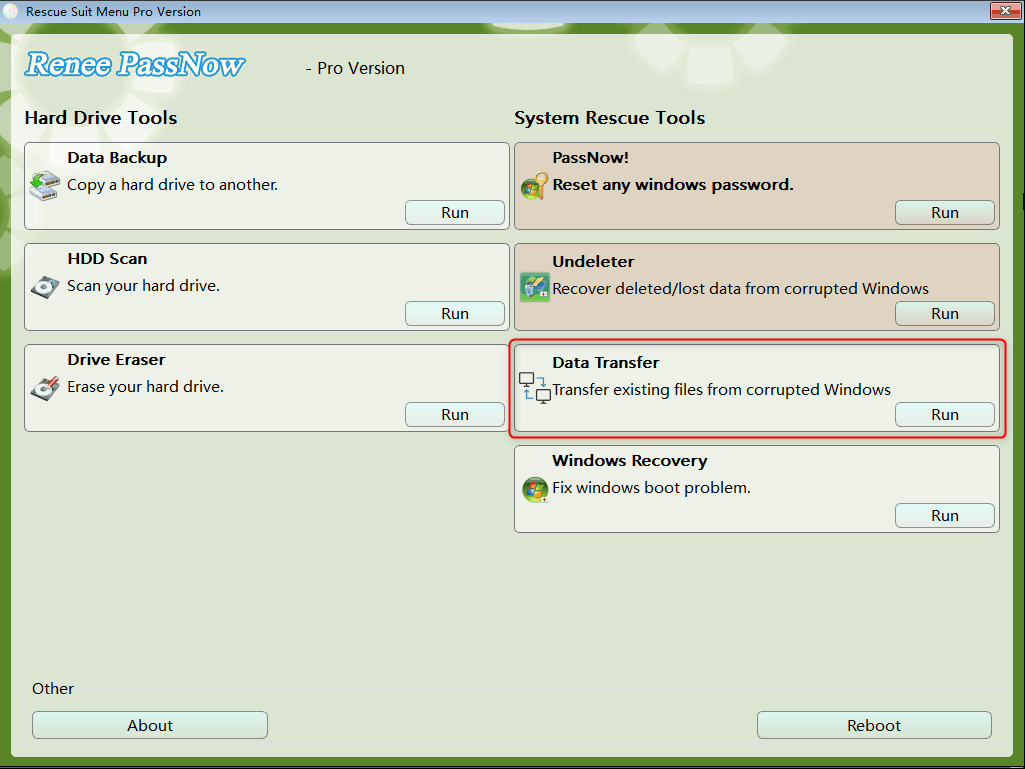
Multifuctional Data recovery, Windows password reset, bootable problem recovery can be run without system.

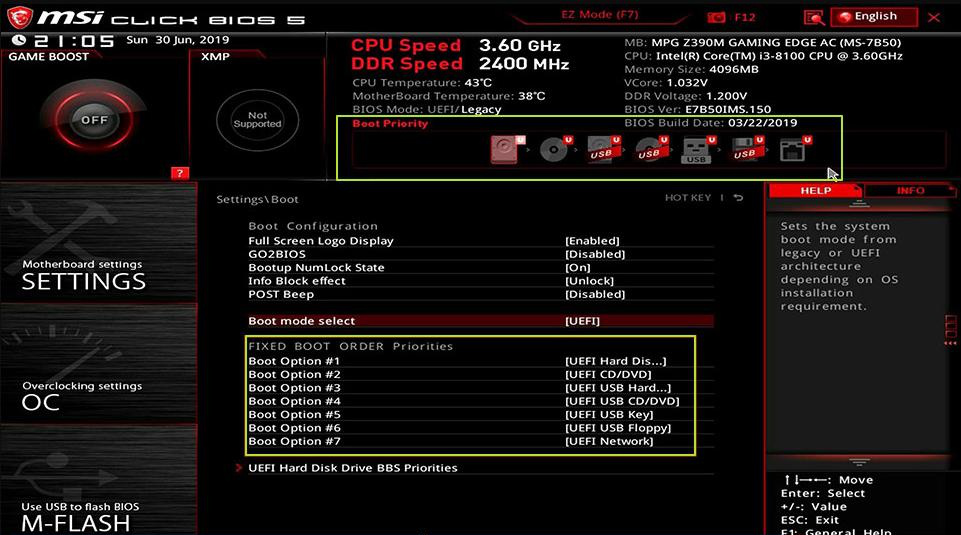
Highly compatible Windows 10/8.1/8/7/XP/Vista. Also supports UEFI boot mode.

Easy to use 3 steps to transfer the files.

Transfer the files Transfer the important files of the computer without system.

Preview the files Preview the files while transferring the data.

Free TrialFree TrialNow 2000 people have downloaded!

2. How to use Renee PassNow to transfer or restore important data?

Renee PassNow can transfer/backup/restore files in the computer without entering the Windows system. The process is to create a startup disk through Renee PassNow, then start the computer through the startup disk, and then use the functions provided by the software to transfer and backup data or restore. Specific steps are as follows:
Step 1: Download and install Renee PassNow on other computers that can log in and run normally, then connect the USB drive to the PC, run Renee PassNow, and then check in “Choose the creation method” (Create a rescue USB disk) option.

Note: Before performing this operation, please make sure that the important files in the USB disk have been saved in other locations because the operation process will delete all the data in the USB disk.

create a boot media with renee passnow
Step 2: Next, select (x64) or (x86) according to the system type, click the (Download Now) button to download the ISO file, and click the (Create USB) button. After the file is downloaded, click the (Eject USB) button.
use renee passnow to create usb to reset passnword
Step 3: Connect the created boot device to the target computer, turn on the computer, and then press the shortcut key to enter the BIOS (the display time of this interface is very short, maybe only one or two seconds), click continuously BIOS shortcut key to enter the BIOS setting interface, and then set the boot USB disk as the first in the boot sequence in Boot Priority, then save the settings and restart the computer.
select boot order
Step 4: Wait for a while, after Renee PassNow is loaded, select the (Data Transfer) function and click (Run). This option is suitable for transferring individual Windows files. If you need to transfer the entire hard disk data, you can use the (Data Backup) function.
data transfer function in Renee Passnow
Step 5: You can click on each drive letter (C/D/E/F, etc.) to check whether important files are lost. If not, it is recommended that you transfer them to an external disk.

Transferring data is a straightforward process. For instance, to move data from the C drive to the G drive, simply choose the C drive on the left, select the G drive on the right, and then pick the desired files from the C drive. Click the “Copy” button in the middle. However, be cautious when deleting files as the operation cannot be undone. To delete a file, select it and click the “Delete” button in the middle.

data transfer in Renee Passnow
Step 6: If you find that there is data loss, please select the (Undeleter) option on the main interface of the function, and click the (Run) button.
data recovery function in Renee Passnow
Step 7: Select (Whole Disk Scan) to scan the target hard disk.
scan the whole partition with renee passnow recovery function to reinstall windows 7
Step 8: After the scan is complete, select the file to be recovered, click the (Recover) button to execute the data recovery command, please save the file in another external disk, and eject the USB drive after the recovery is complete.
recovering from disk in undeleter disk scan