author avatar
    Technology Manager of Test Dept.
 

Summary
Learn how to solve the error message that windows didn't load correctly. And plus, you can ensure the safety of important data on your device by transfering or recovering the data.


Windows didn't load correctly

I. Error about Windows not loading correctly

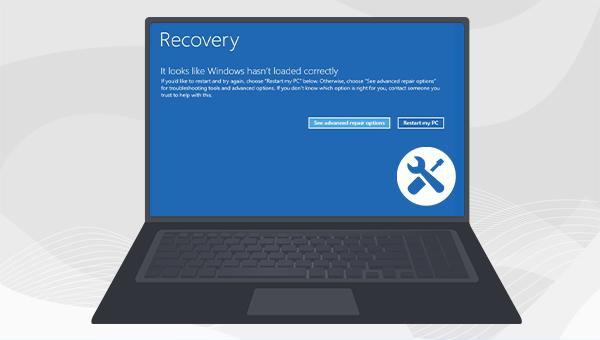
Windows didn’t load correctly error usually occurs when you try to restart the system, it is a common type of error, you may receive error prompts such as: Windows does not seem to load correctly, your computer did not start correctly, etc.
There are many reasons for this error, usually from the following aspects:
● The boot configuration data (BCD) is crucial for Windows to successfully boot up your computer. It holds all the necessary information for the operating system to load. However, if the BCD is damaged or missing, it can cause Windows to fail to start. This can happen due to various reasons such as a virus attack, disk errors, or incorrect manual BCD configuration.
●File system corruption is a common issue for Windows operating systems. The file system is essential for reading and loading files, so any damage to the hard disk’s file system can result in restricted access to Windows.
●Corruption of system files: When attacked by a virus or operated incorrectly, system files may be damaged, resulting in incorrect loading of Windows.
After understanding the possible causes of this error, let’s try the available solutions around these points one by one.

II. How to solve the problem that Windows is not loaded correctly?

1. Uninstall recently installed apps

If you encounter problems with Windows failing to load properly after installing an application, you could attempt to resolve the issue by uninstalling the recently installed application in safe mode. Here are the specific steps to follow:
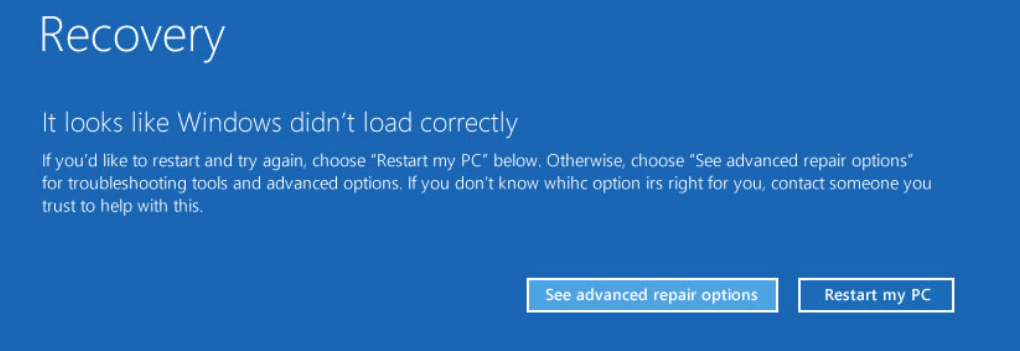
Step 1: When the “It looks like Windows didn’t load correctly” error message appears, click the (See advanced repair options) button to enter the recovery environment.
Windows did not load correctly
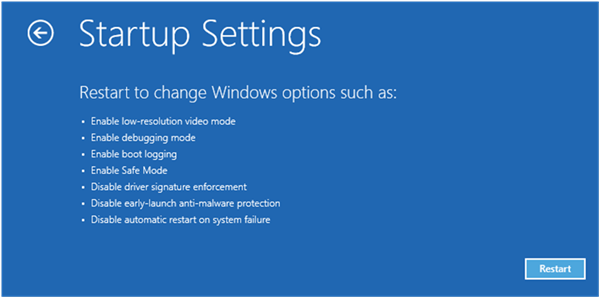
Step 2: Navigate to (Troubleshoot) > (Advanced Options) > (Startup Settings), and then click on the (Restart) button.
clcik to restart PC in startup settings
Step 3: Once the device restarts, you will be presented with the option to launch the settings. To enter Windows, you can select a safe mode using the number keys. For instance, pressing (4) will enable safe mode.
press 4 to enable safe mode
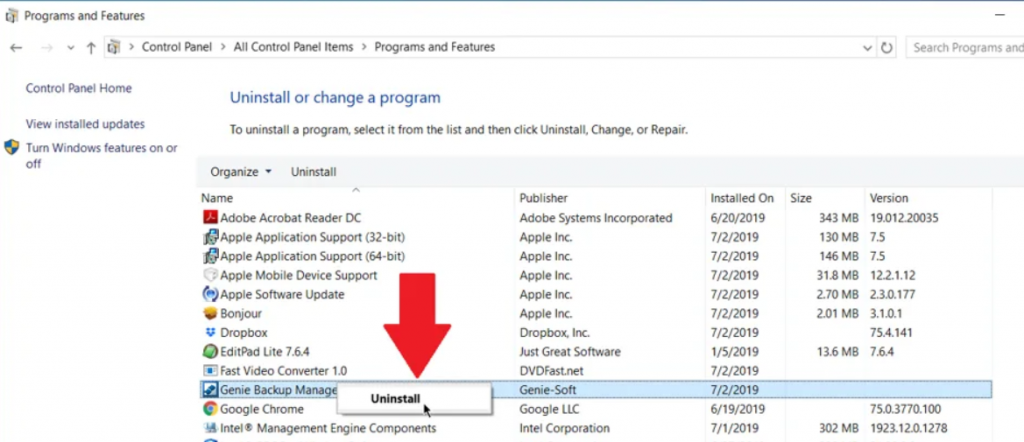
Step 4: Navigate to (Control Panel)-(Programs)-(Programs and Features). Right-click on the application, and select the (Uninstall) option. After that, restart the computer to see if the problem is resolved.
uninstall

2. Use the bootrec command to repair BCD

BCD (Boot Configuration Data) is a crucial file that contains all the necessary information for Windows to boot your computer. If this file becomes damaged or goes missing, it can hinder the proper loading of Windows. Fortunately, the Bootrec command can fix a damaged master boot record or boot configuration data file. However, this method requires entering the recovery environment to perform the repair. Follow these steps:
Step 1: Insert the Windows installation disk (DVD or USB) into the computer.

Continuously press F2, F10, DEL or ESC shortcut keys (varies with the computer brand) to enter the BIOS setting interface when starting up. Then set the Windows installation disk as the first boot sequence, and save the settings.

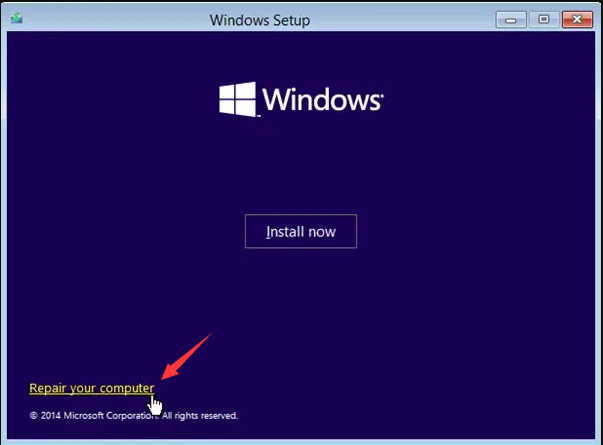
Next, the computer starts from the installation disk. Select the (Repair Your Computer) option on the “Install Now” interface to enter the recovery environment.

windows installation repair your computer
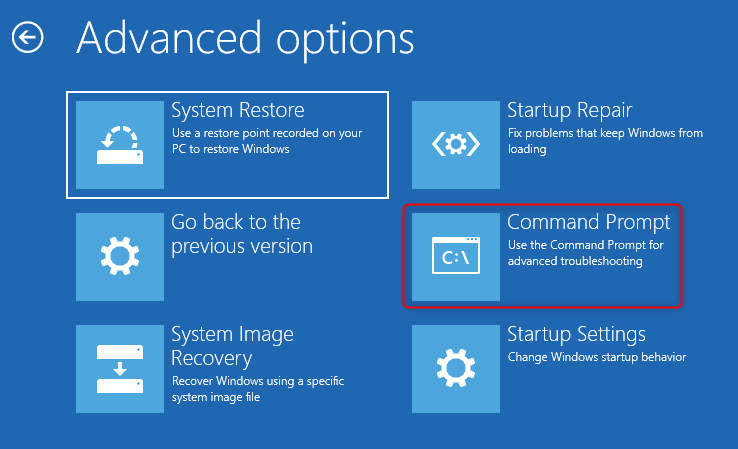
Step 2: After entering the recovery environment, navigate to (Troubleshoot)>(Advanced Options)>(Command Prompt).
command prompt
Step 3: In Command Prompt, enter the following command. Each time you enter a command, you need to press the (Enter) key. After the repair is complete, restart the computer to see if the problem is resolved.
bootrec.exe /fixmbr
bootrec.exe /fixboot
bootrec.exe /scanos
bootrec.exe /rebuildbcd

3. Use Chkdsk to repair disk errors

The Chkdsk tool is a command used by Windows to check the current status of the disk. It can show the disk status, memory status, and the number of specified files in a given path, as well as fix disk errors. Using the Chkdsk tool to repair a faulty hard disk is a straightforward process. Here are the steps to follow:
Step 1: Connect the Windows installation disk to the computer. Start the computer, press the BIOS shortcut key continuously to enter the BIOS setting interface, change the boot sequence in the BIOS to start from the Windows installation disk, then save the settings and restart the computer.
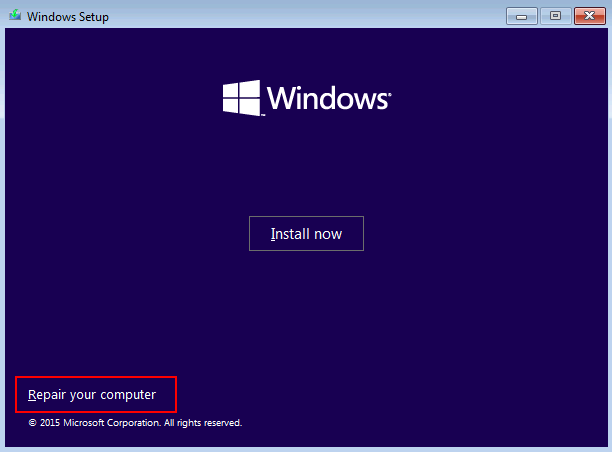
Step 2: After the computer is successfully booted from the Windows installation disk, select the (Repair your computer) option in the lower left corner of the installation interface to enter the recovery environment.
Repair your computer
Step 3: After entering the Windows Recovery Environment, navigate to Troubleshooting> Advanced Options> Command Prompt.
command prompt
Step 4: In the opened command prompt window, type in the command (chkdsk X: /r /f) where X is the letter of your hard disk drive. This can be changed to the letter of your system disk depending on your situation. The parameters /r and /f are used for chkdsk, with /r being able to detect bad sectors and recover readable data, and /f attempting to fix any errors found on the disk. Press (Enter) to initiate the error fixing process. Once completed, restart your computer and check if the issue has been resolved.
The above is a typical solution for fixing the issue of Windows not loading properly. If you are still unable to access the Windows system, it is advisable to transfer or restore important files on the device before sending it to a professional repair service. We suggest using a specialized system rescue tool, such as Renee PassNow, to transfer or restore your data. Here’s a detailed guide on how to do it.

III. Use Renee PassNow to transfer or recover data when the system is not loaded properly

1. What is Renee PassNow?

Renee PassNow is a professional system rescue software, which can help Windows users clear Windows account passwords, create new administrator accounts; restore disk/memory card data, recover data after hard disk formatting; transfer disk files; erase or scan Disk files, etc. In addition, this software also supports repairing Windows system problems, such as: repairing MBR boot records, DBR error parameters, 0xc00000e, Windows system startup failure, and some problems that cause black screen or blue screen, etc. As a system rescue tool with various functions, it is perfectly compatible with multiple systems including Windows 10/8.1/8/7/XP/Vista, and can meet the system rescue needs of different users.
Hot Topic - ADsRenee PassNow – 3 Steps to transfer data from the crashed system

Easy to use 3 steps to transfer the files.

Transfer the files Transfer the important files of the computer without system.

Preview the files Preview the files while transferring the data.

Multifuctional Data recovery, Windows password reset, bootable problem recovery can be run without system.

Highly compatible Windows 10/8.1/8/7/XP/Vista. Also supports UEFI boot mode.

Easy to use 3 steps to transfer the files.

Transfer the files Transfer the important files of the computer without system.

Preview the files Preview the files while transferring the data.

Free TrialFree TrialNow 2000 people have downloaded!

2. How to use Renee PassNow to transfer or recover data?

If the Windows system fails to load properly, you will be unable to access it normally. To resolve this issue, you can utilize Renee PassNow to create a startup disk. This will allow you to boot up your computer using the disk and utilize the software’s features to transfer or restore files. The following steps outline the process:
Step 1: Download and install Renee PassNow on another computer that can log in and run normally, then connect the USB disk to the PC.

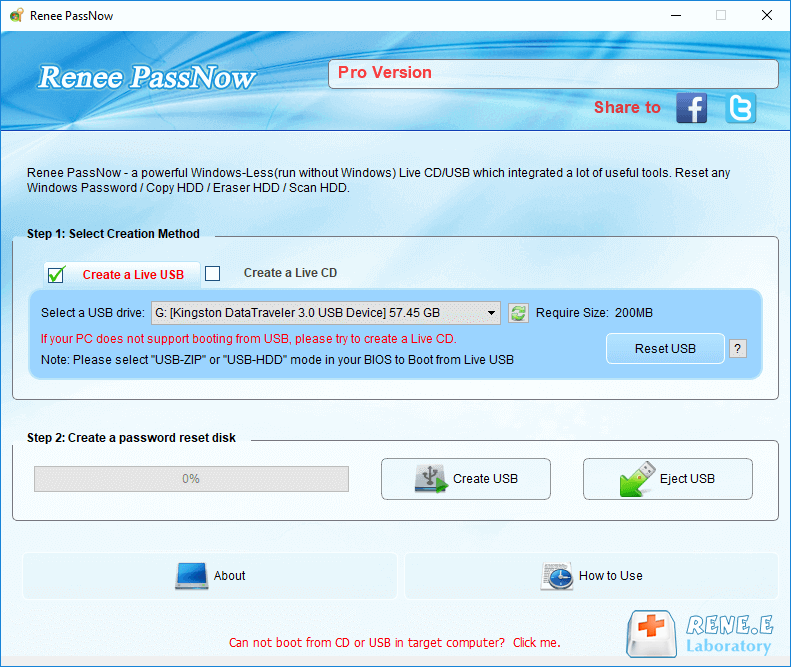
Please select the (Create a Live USB) option under “Step 1: Select creation method” in the main interface.

Note: Before performing this operation, please make sure that the important files in the USB disk have been saved in other locations because the operation will delete all the data in the USB disk.

create a boot media with renee passnow
Step 2: Next, select (x64) or (x86) according to the system type. Click the (Download Now) button to download the ISO file, and then click the (Create USB) button. After the file is downloaded, click the (Eject USB) button.
use renee passnow to create usb to reset passnword
Step 3: Connect the boot device you have created to the computer where you want to transfer data. Turn on the computer and press a shortcut key to enter the BIOS (this interface may only appear for a few seconds).

Continuously press the shortcut key to access the BIOS settings. From there, set the bootable USB drive as the first option in the boot sequence under Boot Priority. Save the changes and restart the computer.
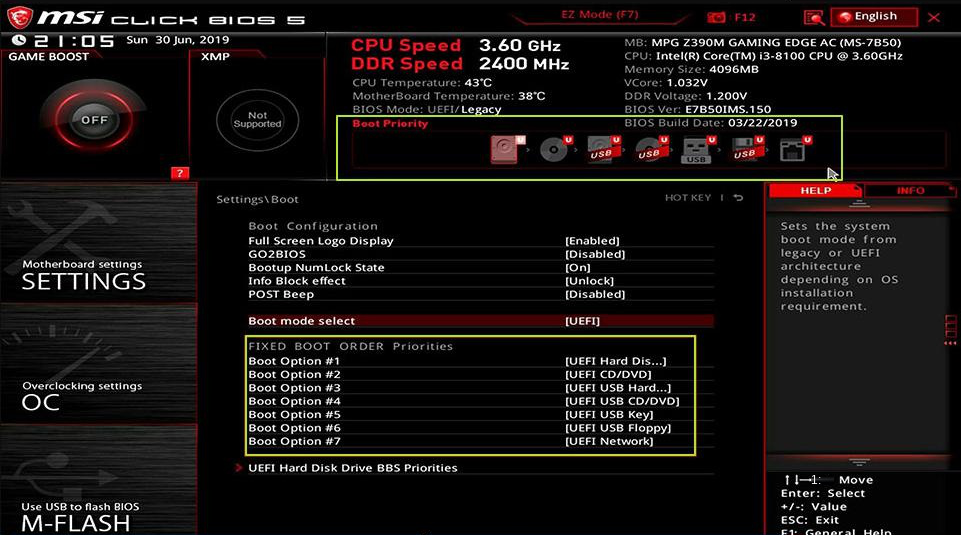
select boot order
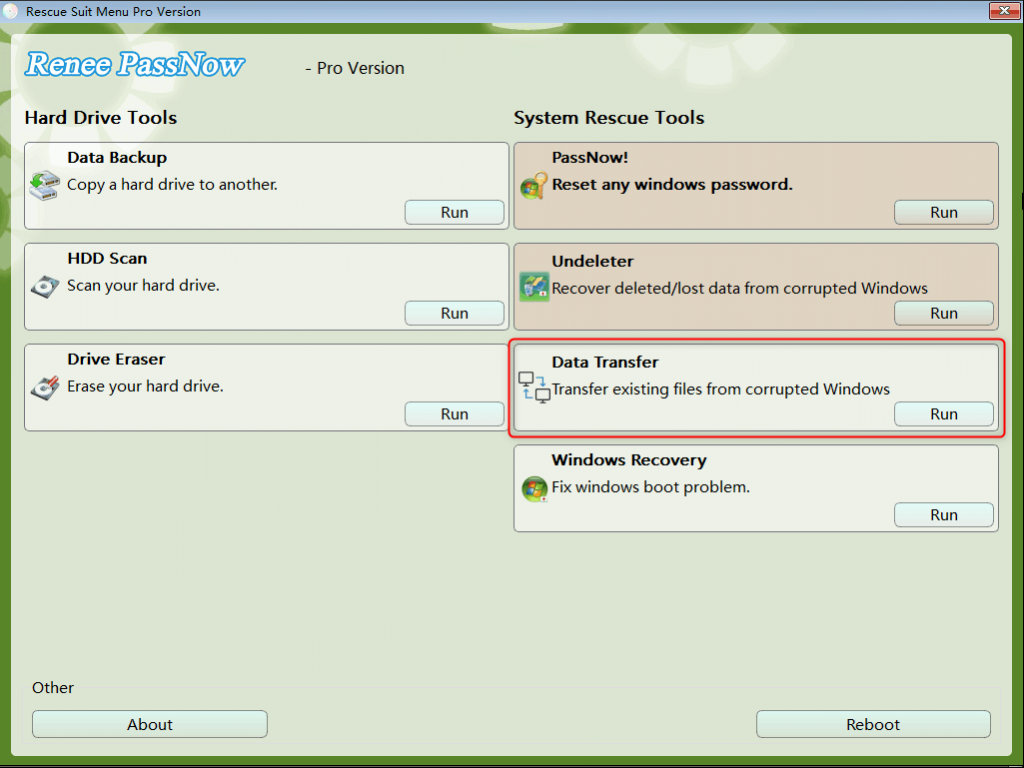
Step 4: Wait for a while, after Renee PassNow is loaded, select (Data Transfer). If you need to transfer the data of the entire hard disk, you can select the (Data Backup) option.
data transfer function in Renee Passnow
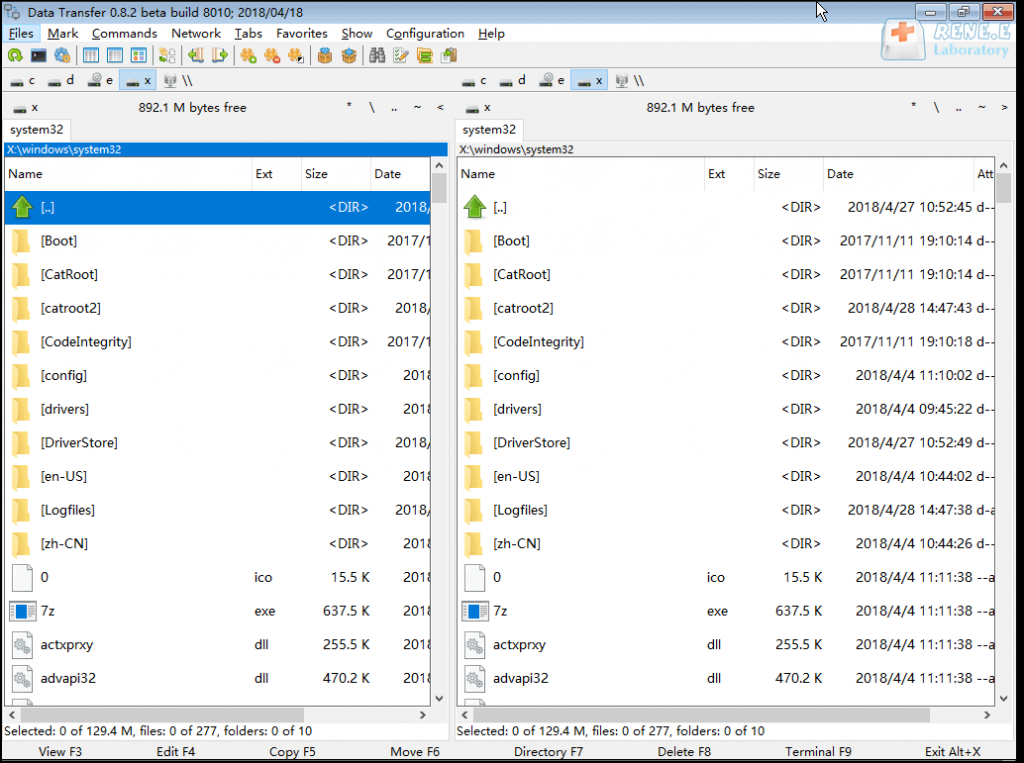
Step 5: You can easily check for any lost important files by clicking on each disk drive letter (C/D/E/F, etc.). If any are found, it is recommended that you transfer them to an external disk.

The process of transferring data is simple. For instance, if you wish to move data from the C drive to the G drive, simply select the C drive on the upper left, the G drive on the upper right, and then the desired files from the C drive. Click on the Copy function button in the middle to easily transfer the disk data.

In case you want to delete a file, select it and click on the (Delete) button in the middle. However, please note that this action cannot be undone, so proceed with caution.

data transfer in Renee Passnow
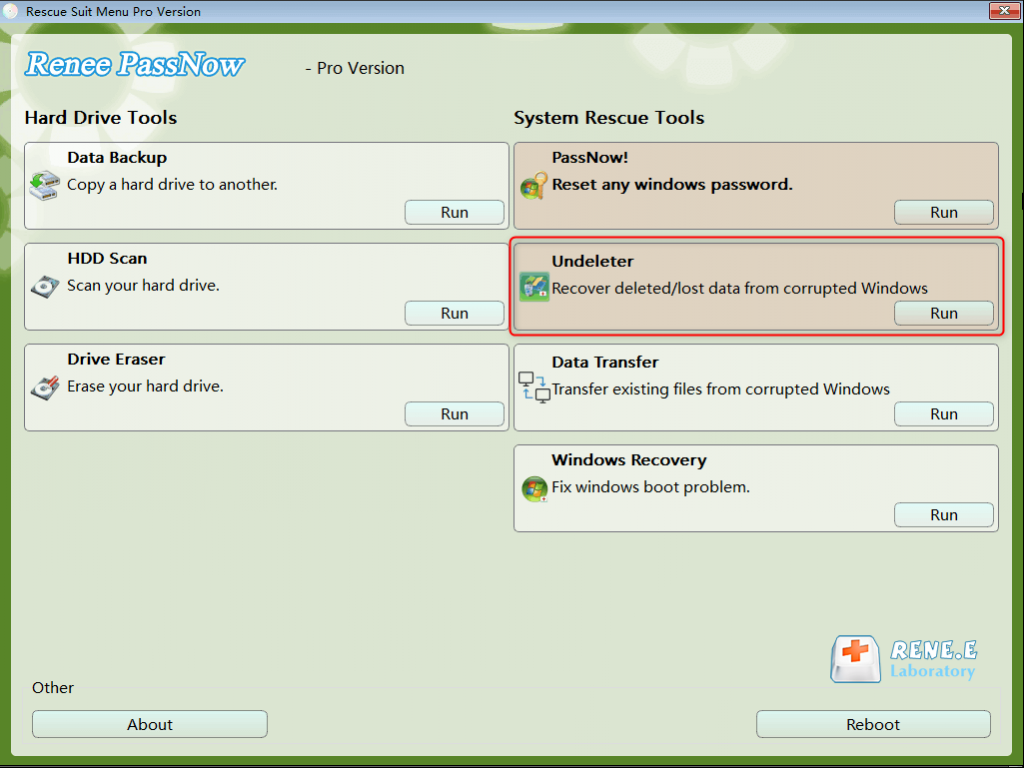
Step 6: If you find that there is data loss, please select the (Undeleter) option on the main interface, and click the (Run) button.
data recovery function in Renee Passnow
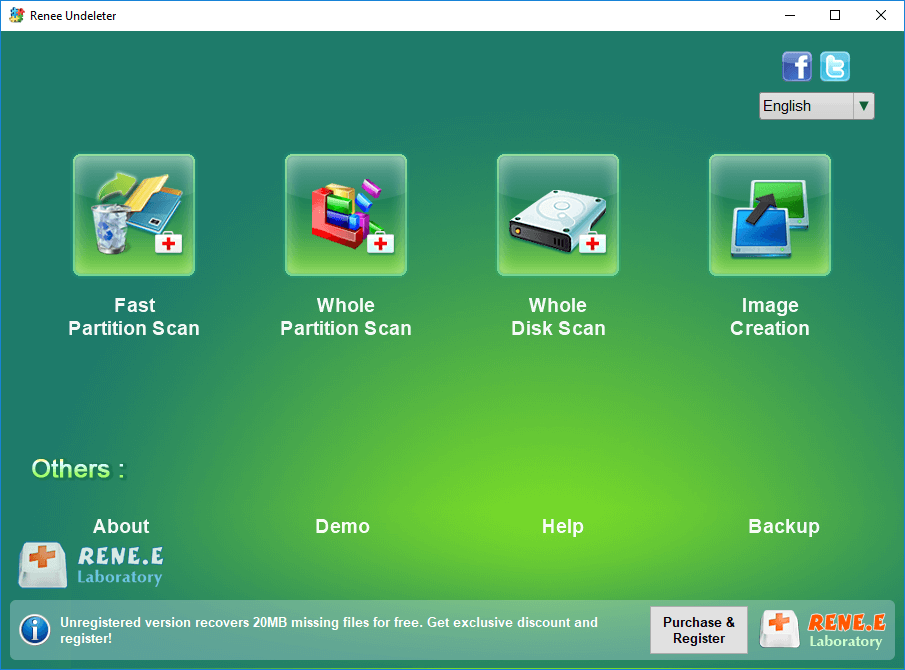
Step 7: Select (Whole Disk Scan) to scan the target hard disk.
select whole disk scan in renee undeleter
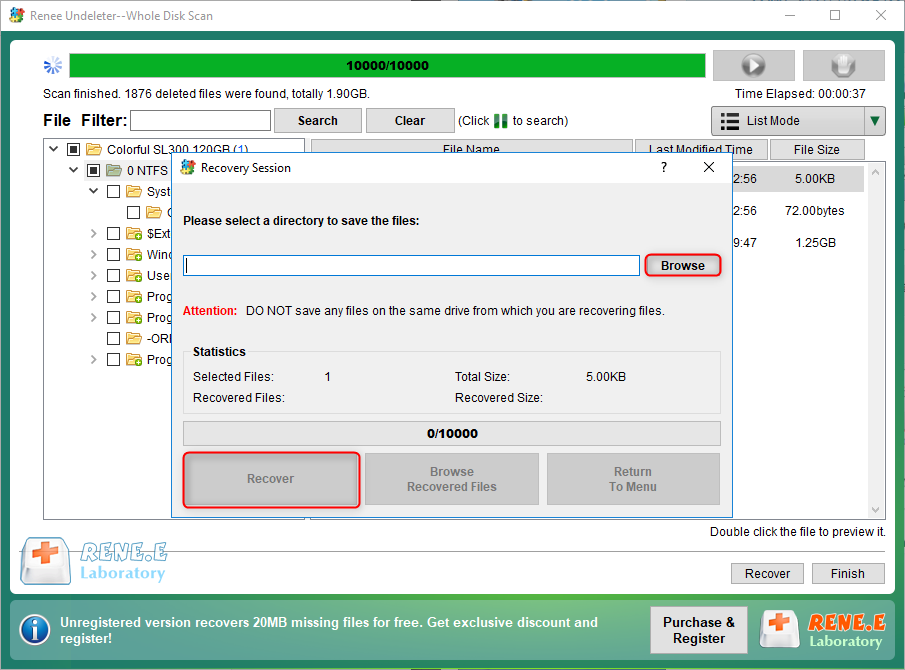
Step 8: After the scan is complete, select the file to be recovered, and click the (Recover) button to start data recovery. Please save the file on another external disk.
recover files from whole disk scan with renee undeleter