Intercepting video fragments can generally be divided into two scenarios: from a local video or from a webpage video. To meet your various clip capture needs, we will introduce different methods for these two situations below.
To capture and edit video clips, use a professional tool like Renee Video Editor Pro. It allows for personalized editing of clips easily. Learn the specific methods below.
1. How to capture part of the local video?
What is Renee Video Editor Pro?
Renee Video Editor Pro is a video recording and editing tool that integrates screen recording, video post-production, and format conversion. It allows setting the recording area and screen size, adding watermarks, cursor styles, sound sources, and saved formats, and creating automatic recording plans. Whether for online movies, meeting records, game screens, or software operation steps, it helps you record and save with one click.
This software enhances video content during post-production by editing or merging clips, cropping screens, rotating or flipping videos, adding animations, and transition effects. It allows switching between filter styles, dubbing, adding or removing sound effects, and importing or creating subtitles. After editing, convert videos to various formats. Supported formats include MXF, AVI, MKV, MP4, MOV, M2TS, M4V, AAC, AC3, and more, with free conversion between video and audio formats.
Renee Video Editor Pro – Multi-function Video Editing Software
Screen RecordingRecord screen and webcam in Windows computer.
Cut Videos & AudiosUsers are free to cut videos and audios clips with setting start and end time.
Multiple Edit ToolsMerge, crop, rotate, cut and transform video easily. Change and add background music, subtitles and remove watermark from video.
Format ConversionSupport to convert videos and audios into different formats.
Screen Recording Record screen and webcam in Windows computer.
Multiple Edit ToolsCut Videos & Audios Users are free to cut videos and audios clips with setting start and end time.
Multiple Edit ToolsMerge, crop, rotate, cut and transform video easily. Change and add background music, subtitles and remove watermark from video.
Format ConversionSupport to convert videos and audios into different formats.
3000 users have downloaded and edited videos with fun!
Steps to crop a video:
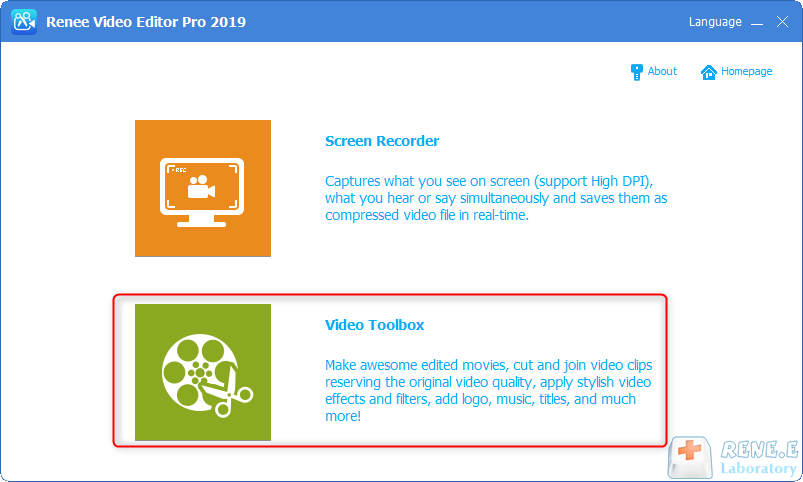
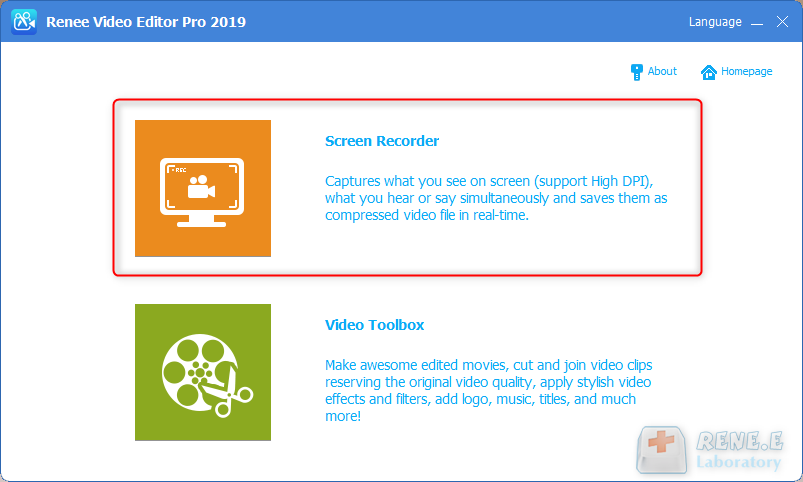
Step 1: After downloading and installing, run Renee Video Editor Pro, and click the (Video Toolbox) button to enter the video editing interface.
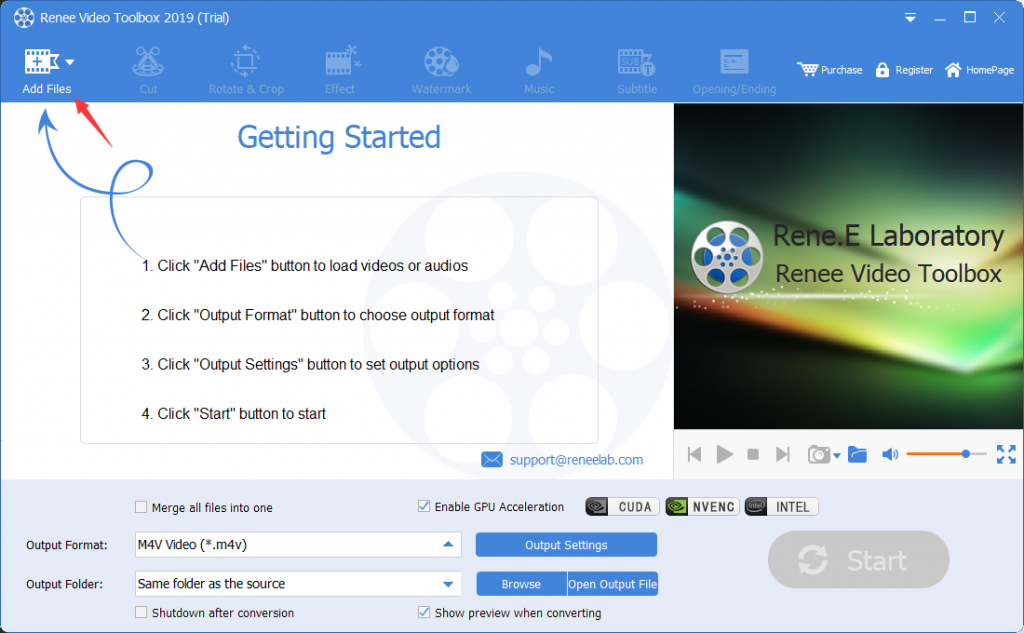
Step 2: Next, find the (Add Files) button and import the video file to be captured into Renee Video Editor Pro.
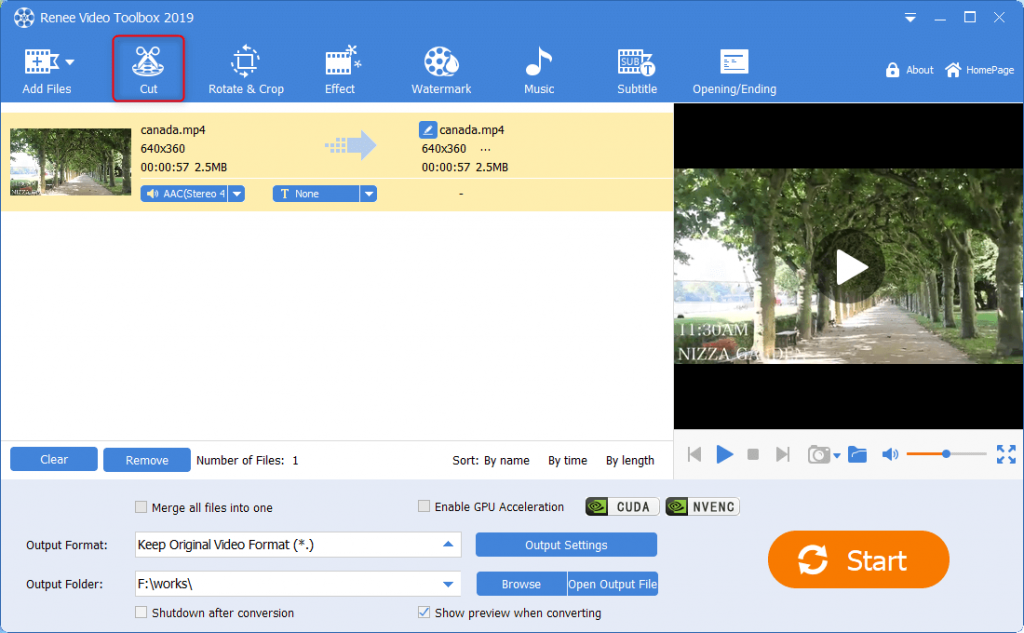
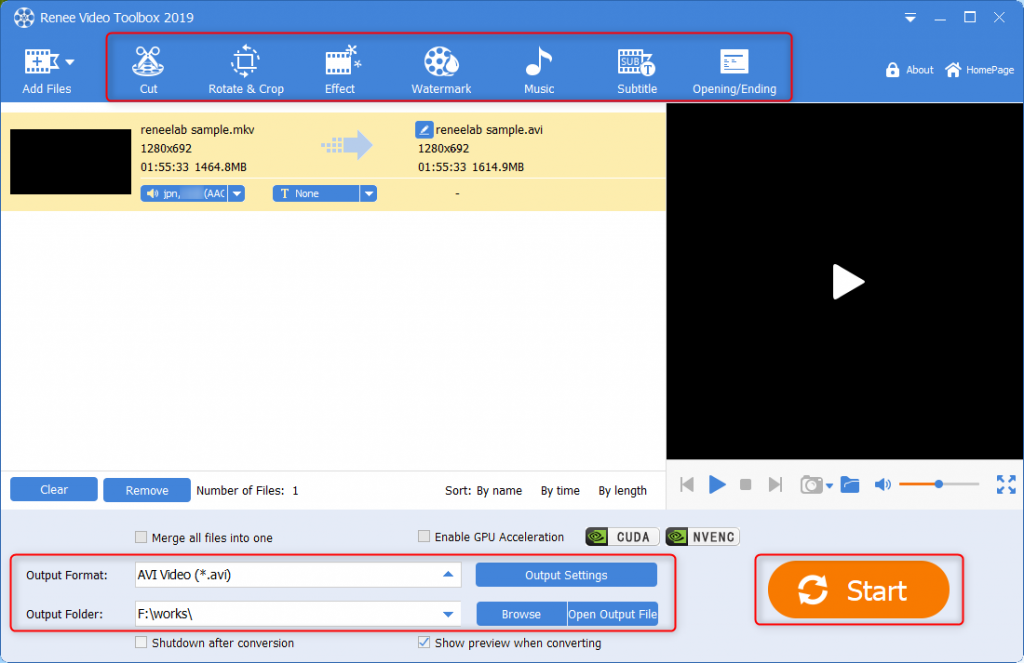
Step 3: After the video file is added, you can use the (Cut) function provided in the top menu bar to intercept part of the added video file.
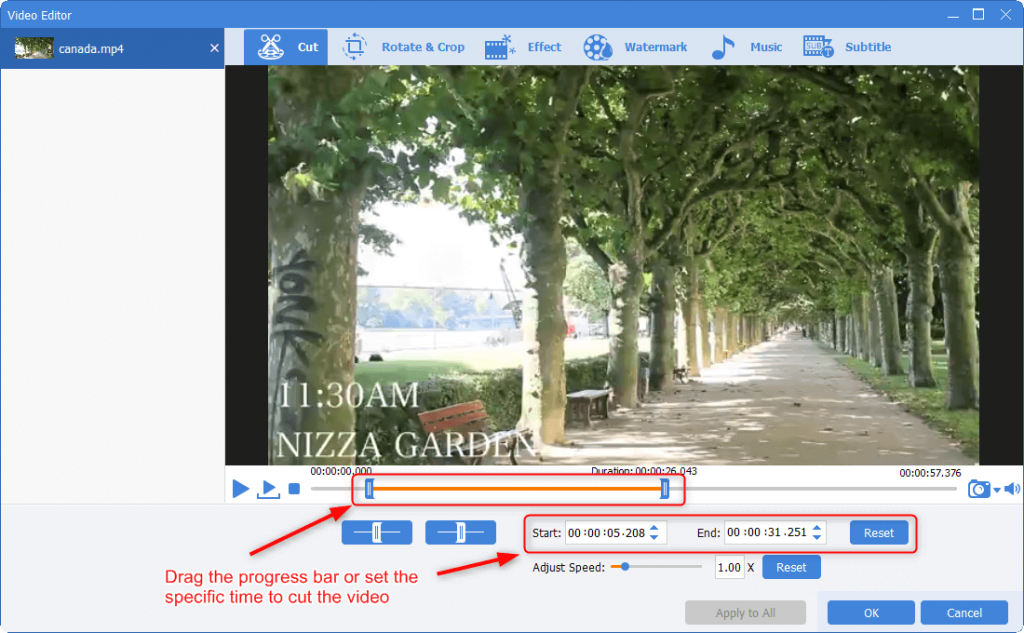
Step 4: In the detailed cutting and editing interface, drag the start and end buttons on the playback axis or adjust the start and end times to select the video clip. Click OK to return to the editing homepage.
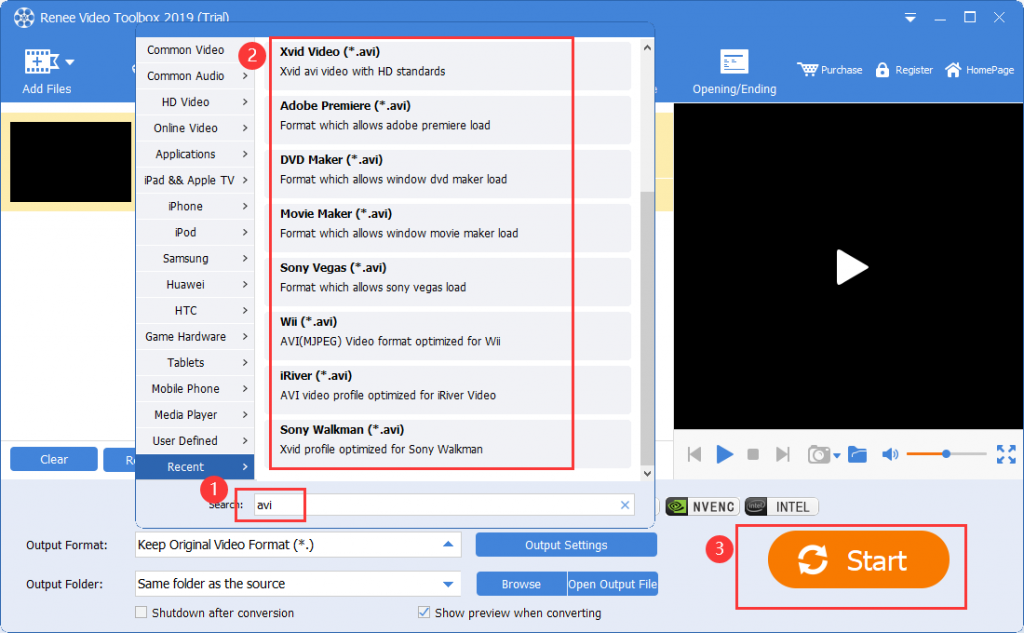
Step 5: After capturing the video, choose the format in Output Format based on your device or needs, select the save location in Output Folder, and click Start. The video will be processed and exported quickly.
In addition, you can also perform a series of editing operations on the added video files through other editing functions provided in the top menu bar, such as (special effects), (watermark), (music), (subtitles), (opening/ending )wait.
2. How to capture part of the webpage video?
If you want to capture part of the webpage video, you need to use the screen recording function of Renee Video Editor Pro to achieve it. Let’s learn the specific operation steps below.
Step 1: After running the software, click the (Screen Recorder) option on the main page.
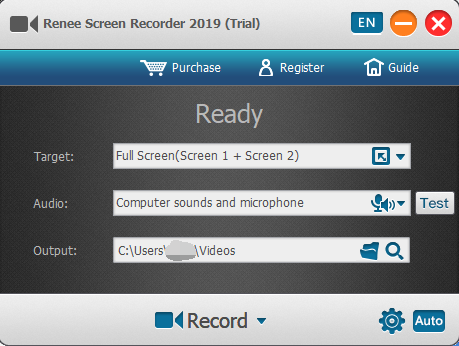
Step 2: In the “Prepare to Record” interface, personalize the recording content, target, and output directory. Select the “Custom” recording area and the option to record “Computer Sounds and Microphone”.
Settings for Recording:
Target: Supports full screen, custom area, and camera-captured images.
Audio: Supports computer sound, microphone sound, and no sound.
Output: Select the storage location for recorded files.
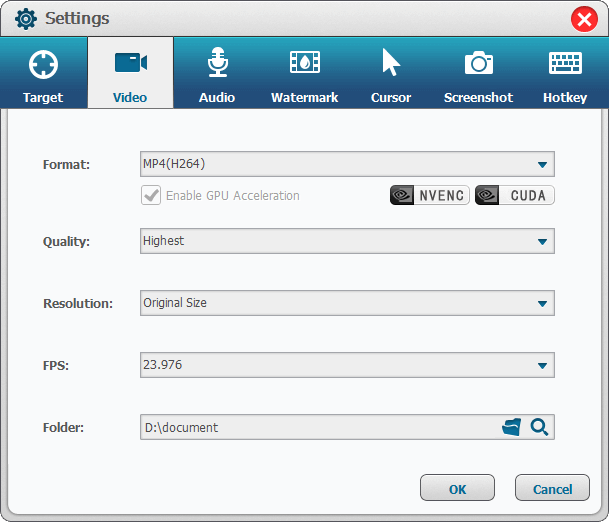
Step 3: Click the gear icon in the lower right corner to personalize the recording format, video quality, resolution, frame rate, output directory, watermark, and other parameters.
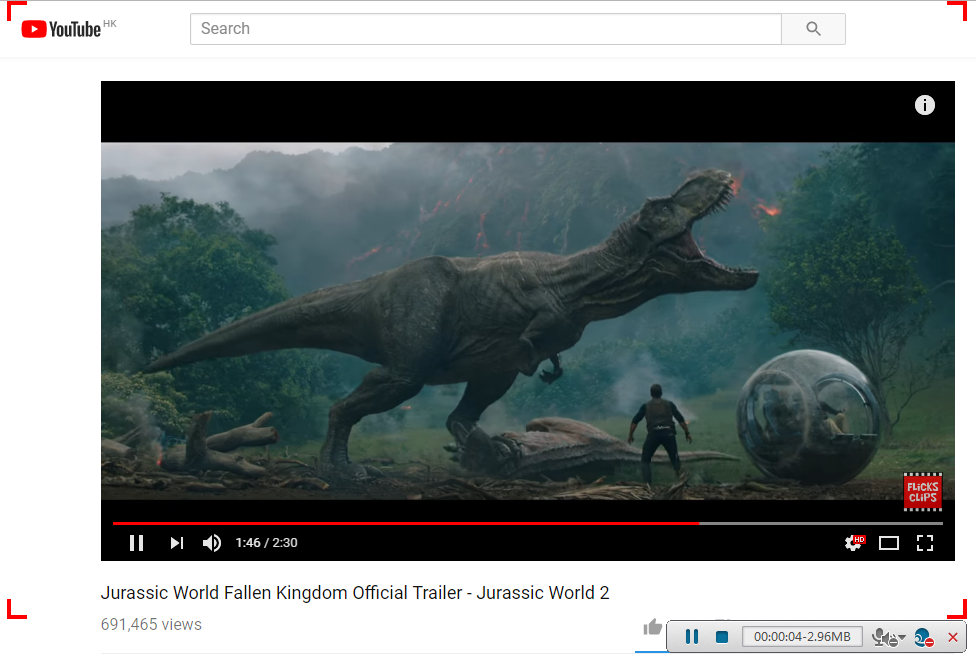
Step 4: Once all recording parameters are set, return to the Ready interface, open the webpage video you want to capture, and click the Record button. Next, select the recording area, and click the Record button in the lower right corner to start recording.
Step 5: Pause or continue anytime during recording. After completing the recording, click the small square button in the recording options box in the lower right corner to save the recorded webpage video clips to the preset path.