

Backup in Safe Mode: How to Safeguard Your Files

Summary
Learn how to back up important files in safe mode when your computer encounters failures. Access alternative file backup methods if safe mode is not accessible.

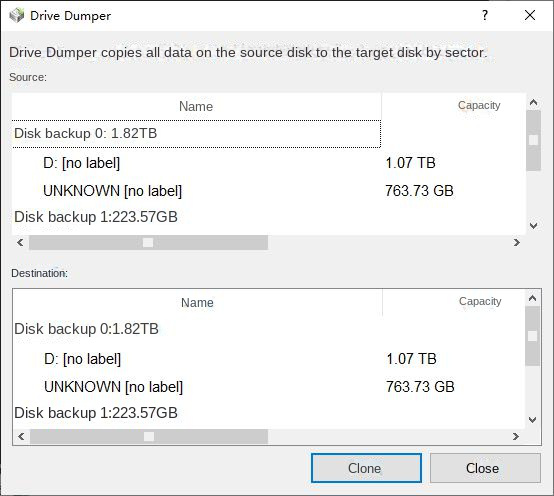
Wbadmin start backup: Run a backup.
-backupTarget: Specifies where this backup is stored.
-include: Specifies a comma-separated list of items to include in the backup. Can contain multiple files, folders or volumes. Volume paths can be specified using volume drive letters, volume mount points, or GUID-based volume names.
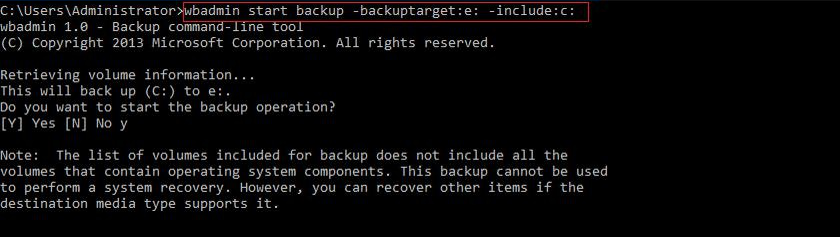
enter the following command and press Enter:
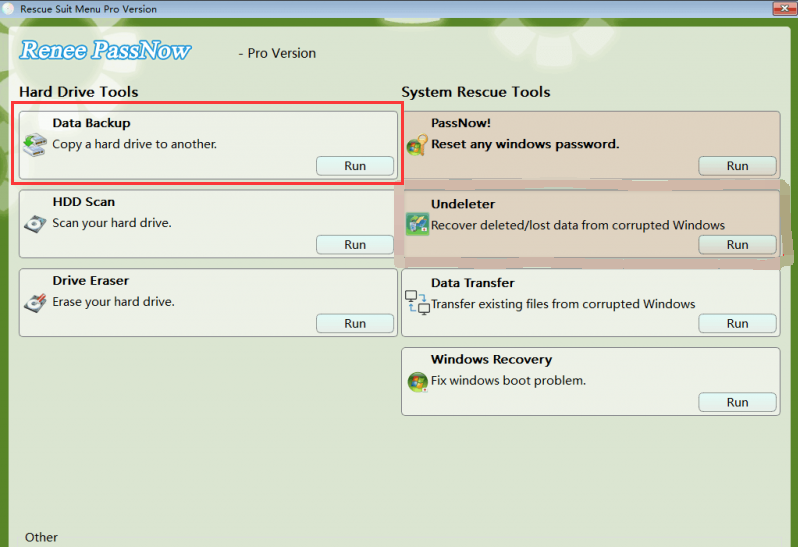
Easy to use 3 steps to transfer the files.
Transfer the files Transfer the important files of the computer without system.
Preview the files Preview the files while transferring the data.
Multifuctional Data recovery, Windows password reset, bootable problem recovery can be run without system.
Highly compatible Windows 10/8.1/8/7/XP/Vista. Also supports UEFI boot mode.
Easy to use 3 steps to transfer the files.
Transfer the files Transfer the important files of the computer without system.
Preview the files Preview the files while transferring the data.
Free TrialFree TrialNow 2000 people have downloaded!Please select the (Create a Live USB) option under “Step 1: Select creation method” in the main interface.
Note: Before performing this operation, please make sure that the important files in the USB disk have been saved in other locations because the operation will delete all the data in the USB disk.
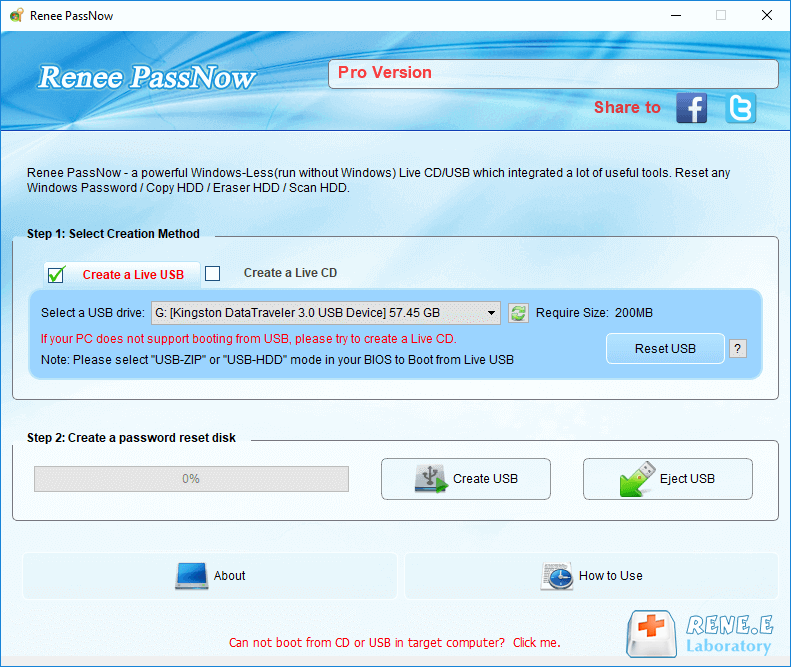

(Removable Devices) as the first boot item. If creating a rescue CD, select (CD-ROM Drive) as the first boot item. Adjust BIOS interface according to brand variation.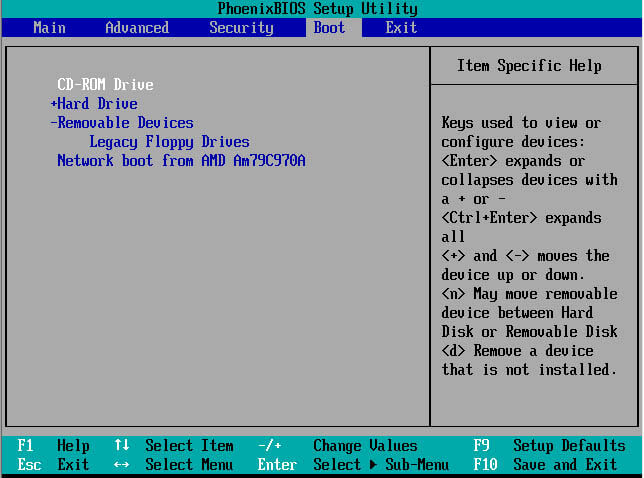
Relate Links :
Powerful Windows 10 Recovery Tool (32-bit and 64-bit System)

25-12-2023
Amanda J. Brook : Discover the Windows 10 recovery tools for 32-bit and 64-bit system to swiftly restore your computer's functionality and...
Crack the Code: A Deeper Dive into Windows System Passwords and Reset Methods

20-08-2023
Ashley S. Miller : This article offers a comprehensive guide on Windows system passwords, covering different account types, password storage, best practices,...
Windows 10 Repair Command Prompts: Simplified Guide
22-12-2023
Amanda J. Brook : Learn how to use Windows 10 repair command prompts to fix common system failures, including startup issues, blue...
Quick Tips to Fix Error "Operating System Not Found"
08-04-2024
Jennifer Thatcher : Discover the underlying causes and standard solutions for the "Operating System Not Found" error on Windows PCs. We'll...

