Experiencing slow performance, frequent crashes, virus infections, or boot failures during the use of a Windows computer may necessitate the need to format your PC. Formatting serves as a comprehensive reset, eradicating all applications, data, and personal settings from the hard drive. Windows provides various reset options, enabling you to reinstate your computer to its pristine factory condition, inclusive of the reinstallation of the original software and drivers. After the format, your computer will boast a clean system, which can effectively tackle issues stemming from third-party applications, corrupted files, system settings alterations, or malware.

I. Backup computer data

Formatting a computer resets it to the manufacturer’s original system state, erasing all data. Before formatting, it’s crucial to back up essential files and data. Two straightforward backup methods are introduced below for your reference on how to proceed.
how to factory reset a computer

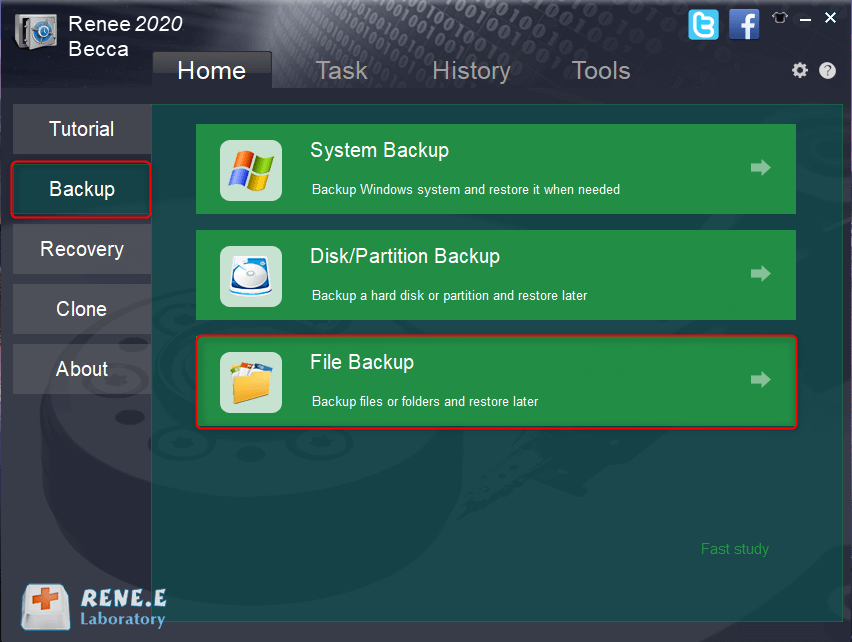
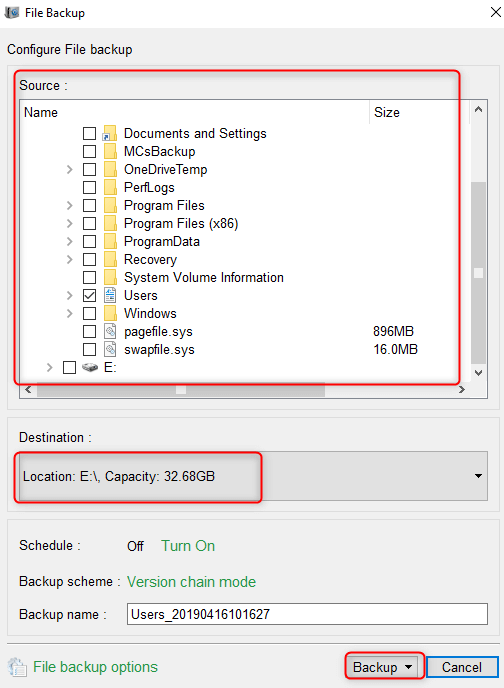
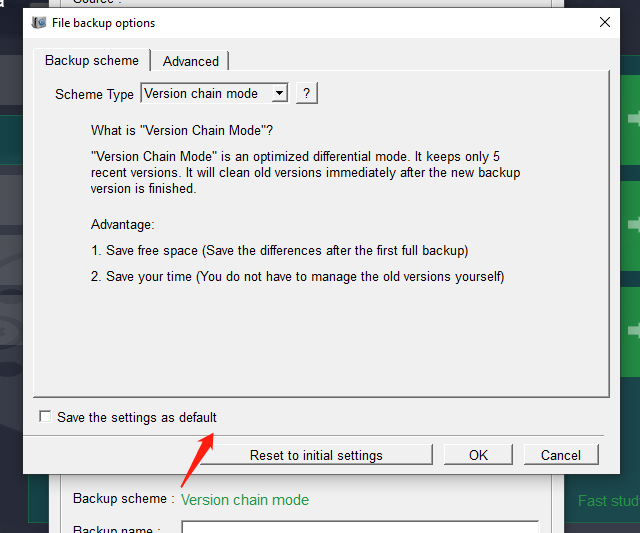
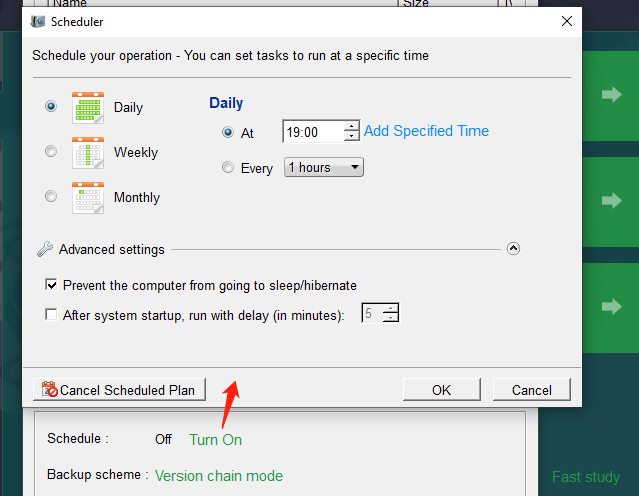
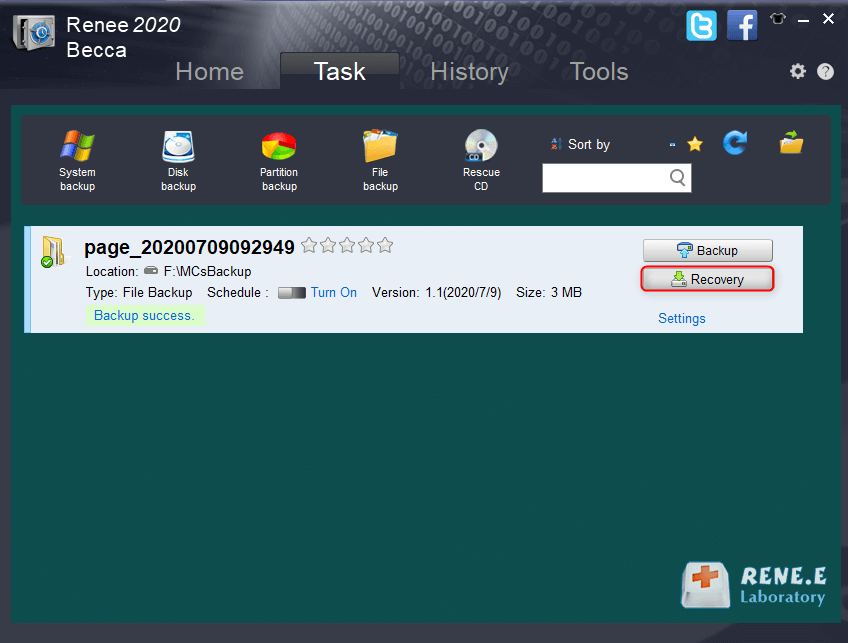
1. Use Renee Becca to backup data

To safeguard against data leakage, opt for secure and trustworthy backup solutions like Renee Becca. This software offers a user-friendly interface, rapid backup speeds, and compatibility with various file types. Renee Becca provides comprehensive backup options such as system, partition, hard disk backups, and disk cloning to cater to diverse requirements. It is fully compatible with Windows 10, 8.1, 8, 7, Vista, and XP.
Renee Becca - Reliable Data Backup & Restore Software

Quick Backup files at up to 3,000MB/min.

Fullfill different backup needs Supports system backup, disk / partition backup, file backup and disk clone.

Intelligent Automatically analyze the differences between source and backup data.

Convenient Support VSS, allowing to freely view webpages when backing up system.

Highly compatible Supports various files and storage devices.

Quick Backup files at up to 3,000MB/min.

Fullfill different backup needs Backup for disk, partition and system. Save disk space by backing up incremental /differential data.

Highly compatible Supports various files and storage devices.

Free TrialFree Trial 2000 users have downloaded and enjoy Renee Becca!
The specific steps are as follows:
① To download Renee Becca, visit the official website and click on the download link. Once the download is complete, open the application. In the main interface, click on “Backup,” and then select the “File Backup” option to proceed with backing up your desired files.
click to back up files in renee becca
② To ensure your data is safely stored, select the file you wish to back up and specify the destination where the backup should be saved. Once done, click on Backup. For enhanced security, it’s recommended to save your backup to an external hard drive.
how to back up files in renee becca
Renee Becca provides five backup schemes to choose from. It also supports scheduling automatic backups to run at specific times.
backup mode of file backup on Renee Becca
file backup schedule on Renee Becca
③ After successfully backing up your files, click on the “Task” tab to review them. In the event that your computer is formatted, this tab allows you to restore the files to your system.
recover backup files from renee becca

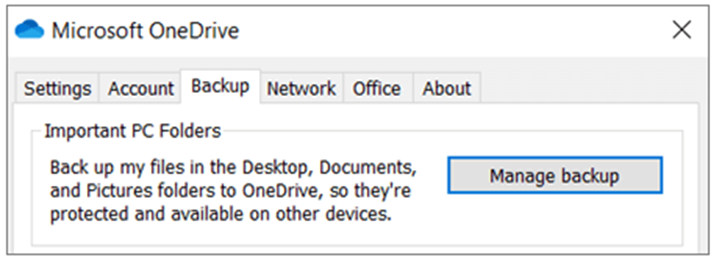
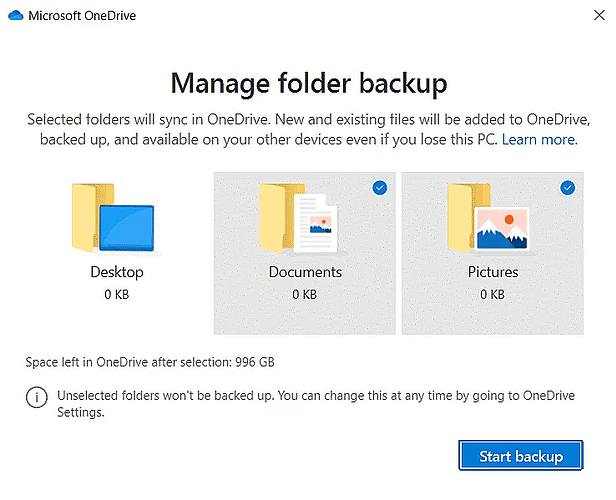
2. OneDrive backs up Windows computer data online

OneDrive, Microsoft’s online backup service, comes pre-installed on Windows 10, offering an easy way to back up your computer’s important files with 5GB of free storage. To use it, sign in with a Microsoft account and sync files across devices. By default, it backs up your Desktop, Documents, and Pictures folders, but you can select additional folders to back up. Ensure your computer has a stable internet connection for OneDrive to function optimally, as backup speed depends on your network’s performance.
The specific steps are as follows:
① Click the OneDrive icon in the system tray in the lower right corner of the screen (if it is not there, you can click to open it in the start menu), select “More” > “Settings“, and then select “Backup” > “Manage Backup“.
OneDrive backs up
② In the window, check if you have enough backup space. Then, select the Desktop, Documents, or Picture folders and click “Start Backup”. Wait for the process to finish.
OneDrive backs up
After backing up your computer, you can start formatting your computer.

II. General method to format Windows computer

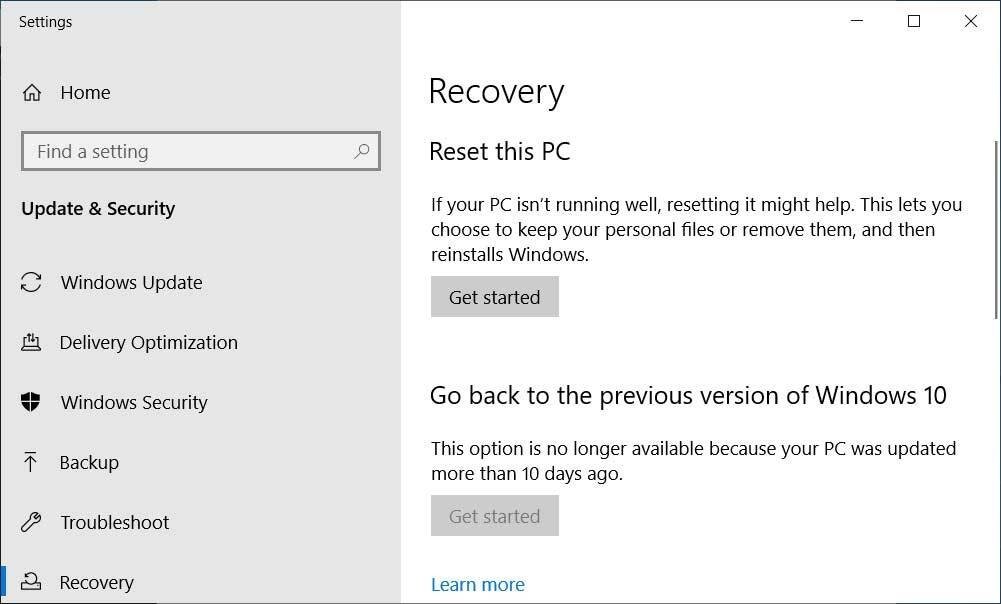
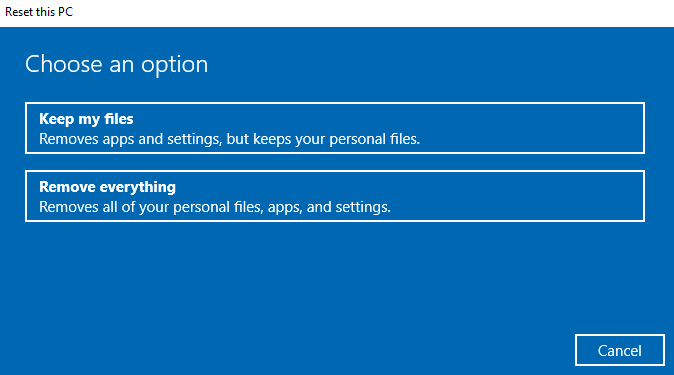
Method 1: Reset the PC in Windows Settings

For computers running Windows 10 or Windows 8 that boot normally, formatting can be achieved by utilizing the built-in “Reset this PC” feature. Adhere to the detailed steps below to undertake this straightforward process.
TipsThe “Reset This PC” feature provides a comprehensive solution for restoring Windows 10 to its default state, while Windows 8 incorporates similar capabilities with its “refresh and reset” options. In contrast, Windows 7 and Vista do not have an equivalent built-in feature for resetting the PC.
The specific steps are as follows:
① Open “Settings” on the Windows computer.Windows 10: Click Update & Security > Recovery, then under Reset this PC, click Get Started.
Reset This PC
For Windows 8: Navigate to “More Computer Settings” > “Update and Recovery” > “Recovery”. Under “Remove everything and reinstall Windows”, select “Get started”.
Reset the PC
② In the pop-up window, select “Keep my files” or “Remove everything” and follow the on-screen instructions to initialize the computer.
Remove everything in Windows 10

Method 2: Reset the computer by running the command

What if your computer has crashed and you can’t open Settings? In this case, you can reset your computer by running Command Prompt.
The specific steps are as follows:
① Click the Start button or Cortana search box, type cmd, right-click Command Prompt, and choose Run as administrator.
run as administrator
② To initiate a factory reset, open the Command Prompt and type systemreset -factoryreset. After typing the command, press Enter. A new window will appear, prompting you to choose between two options: “Keep my files” which will preserve your personal files while resetting the system, or “Remove everything” which will erase all your data and restore the system to its original state. Follow the instructions displayed on your screen to complete the process.
Remove everything in Windows 10

Method 3: Enter the Windows recovery environment to format the computer

If your computer fails to start, attempt to access the Windows Recovery Environment to reset your computer. This can reinstall software and fix corrupted system files. Windows automatically enters the Recovery Environment after three consecutive startup failures. This tool, pre-installed in a hidden partition, diagnoses and repairs critical errors like startup issues.
Tips

The Windows Recovery Environment serves to:

  • Facilitate tasks like system restoration, system image recovery, and startup repair.
  • Restore an inoperative computer while preserving personal files such as photos, music, and videos.
  • Reset the computer to its original factory state.
  • Remove updates that have caused system instability.

The specific steps are as follows:
① Turn on the computer, then press and hold the power button to turn it off before fully booting, repeat this step three times.

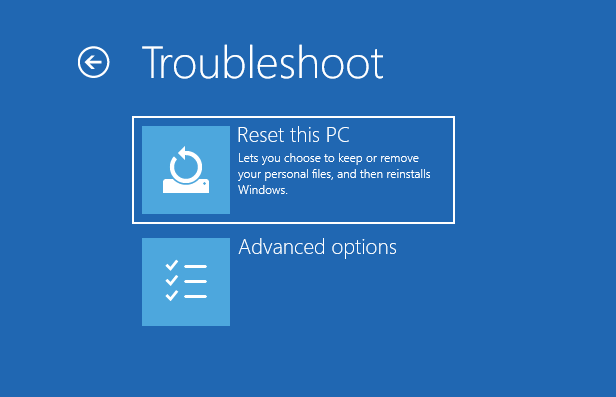
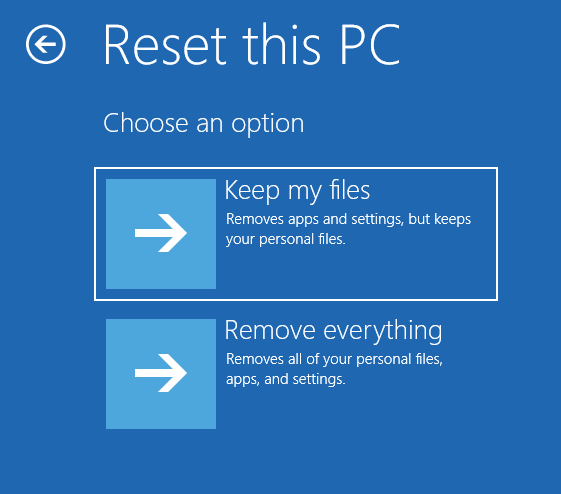
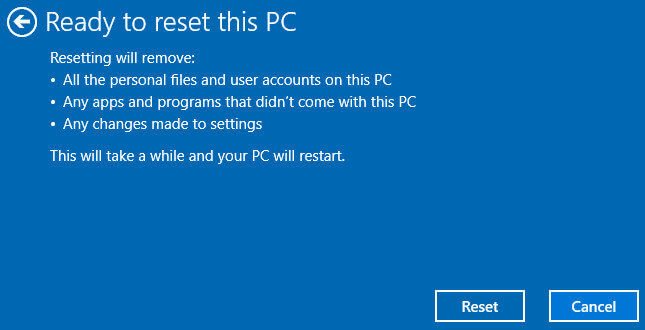
② Then when “Choose an option” appears, click “Troubleshoot” > “Reset this PC“.

reset computer
③ When resetting your computer, you can choose to Select “Keep My Files” in order to preserve your personal data. Alternatively, if you’re planning to sell or donate your computer, you might opt for a more secure option by choosing “Remove everything”. This action will overwrite existing data and significantly reduce the possibility of data recovery, protecting your privacy.
keep my files
④ After the computer automatically restarts, select a “Account Name”, enter the password if applicable, and click “Continue”.
reset PC
⑤ After verifying the reset details, press Reset. Your computer will reboot and begin system initialization. This could be time-consuming; your patience is appreciated.
reset this PC
Hot Topic - ADsProfessional Data Backup & Restore Software - Renee Beccadata bacup software Renee Becca

Provides multiple functions like backup, restore, clone, system migration.

Clone all data (including system) in HDD to smaller SSD or larger HDD. Disk could boot PC after clone finished.

Supports to migrate Windows to SSD with a few clicks.

4K alignment will be processed when clone disk, migrate system, restore disk or system.

Backup & restore system/disk/folder. Auto backup plans are available.

Provides functions like backup, restore, clone, system migration.

Clone all data (including system) in HDD to smaller SSD or larger HDD.

Backup & restore system/disk/folder. Auto backup plans are available.

Compatible with: Windows 10 / 8.1 / 8 / 7 / Vista / XP / 2008 / 2012(32bit/64bit) / Server 2008

Free TrialFree Trial

5000 people have downloaded and made the disk clone successfully!

TipsFormatting your computer and reinstalling the operating system often yield comparable outcomes. Should you opt to reinstall the OS and install a fresh system on your computer, detailed instructions are available. Please check the step-by-step guide.

III. Formatting methods of computers of various brands

Besides the previously mentioned formatting method, you can reset your computer using the manufacturer’s recovery tool. Most computer brands include a hidden partition with a recovery system that enables you to quickly restore the computer to factory settings in case of system issues.

1. Acer computer: Acer Recovery Management

If your Acer computer won’t load into the Windows operating system, you can reset the computer by visiting Acer Recovery Management before Windows starts.
The specific steps are as follows:
① Restart the computer, press and hold the “Alt” key immediately after the Acer logo appears, and press the F10 key repeatedly until the advanced startup options appear.

② Click “Troubleshoot“, and then the operation of formatting the computer is consistent with the steps in the above method 3.

2. ASUS computer: ASUS recovery partition

ASUS computers equipped with Windows feature a system recovery partition designed to restore the device to its original factory settings in the event of system complications. This concealed partition houses a recovery image that can be used for system restoration. In instances where pressing F9 fails to open the recovery partition, you may need to resort to using an installation CD or employ a standard formatting procedure.
  • Pre-installed Windows7 system
The specific steps are as follows:
① When the computer is turned on, press “F9” repeatedly when the ASUS logo screen appears

② Select “Windows Setup [EMS Enabled]” and press Enter.

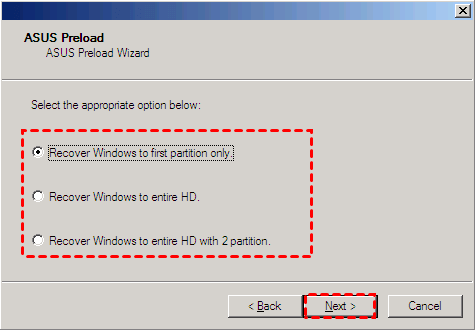
③ Select the language version of the recovery wizard and read the page of the ASUS preloading wizard in turn, and click “Next”.

④ Then, select “Recover Windows to first partition only“, “Recover Windows to entire HD“, or “Recover Windows to entire HD with 2 partitions“, and click “Next“. Then follow the guide to reset the ASUS computer to factory default settings.

ASUS recovery partition
  • Pre-installed Windows8 system
The specific steps are as follows:
① Press “F9” repeatedly when the ASUS logo interface appears after booting.

② Wait for Windows to load to the “Choose an option” interface, and then click “Troubleshoot“.

③ Click “Reset this PC” and follow the prompts.

reset computer

3. Dell Computer: DataSafe Local Backup

DataSafe Local Backup is preinstalled software on Dell computers that allows you to reset your computer.
The specific steps are as follows:
① Restart the computer, press the F8 key repeatedly after the Dell logo appears, until the “Select an option” interface appears.

② Click “Troubleshoot“, and then the operation of formatting the computer is consistent with the steps in the above method 3.

4. HP Computer: HP System Recovery or Recovery Manager

HP System Recovery removes all data and restores the original operating system on HP and Compaq computers with Windows 10, 8, 7. Initiate it by pressing F11 repeatedly upon restart. The subsequent steps mirror the third method previously described.

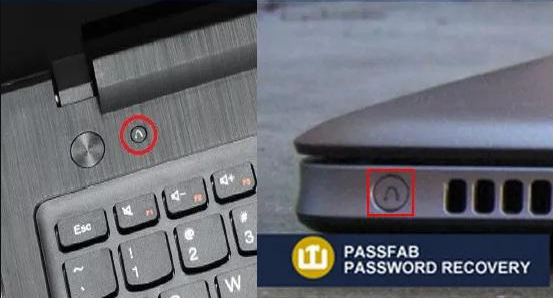
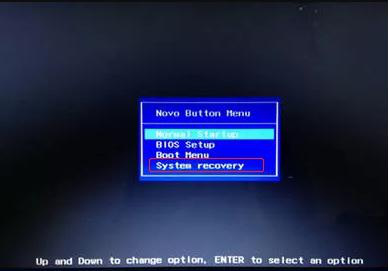
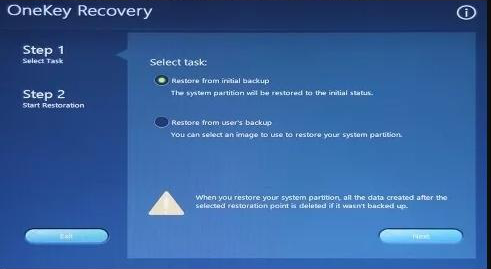
5. Lenovo computer: Lenovo OneKey Recovery reset

Lenovo OneKey Recovery 8.0 is pre-installed on ThinkPad, IdeaPad, and YOGA laptops, and it allows users to restore their computer to factory settings. On older ThinkPad models, initiate the recovery process by pressing the blue ThinkVantage button. Employ the System Recovery feature to revert the system partition to its original state, provided that you haven’t reinstalled the system or used a system image for restoration.
The specific steps are as follows:
① To locate the Novo button (OneKey recovery button) on Lenovo laptops, check either the right or left side of the laptop, or near the power button at the top of the keyboard.
lenovo-setting
② To initiate a system recovery on your Lenovo laptop, ensure that the device is completely turned off. Then, power it on and immediately press the Novo button to enter the Novo Button Menu. Next, use the down arrow key to navigate and highlight “System Recovery”. Confirm your selection by pressing the Enter key.
lenovo-setting2
③ In OneKey Recovery mode, select “Restore from initial backup” and click “Next“.
lenovo-setting3
④ After selecting Start, a message will prompt you to confirm if you wish to restore to the original state. Click “Yes” and wait for the system to complete the restoration. Once finished, choose Restart.

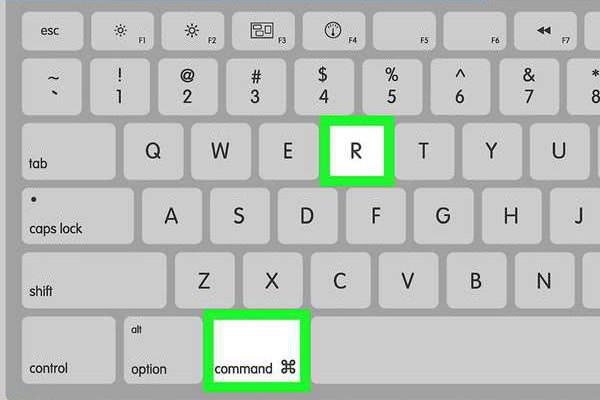
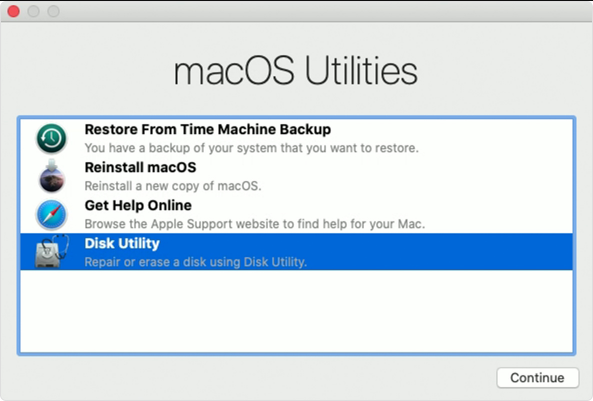
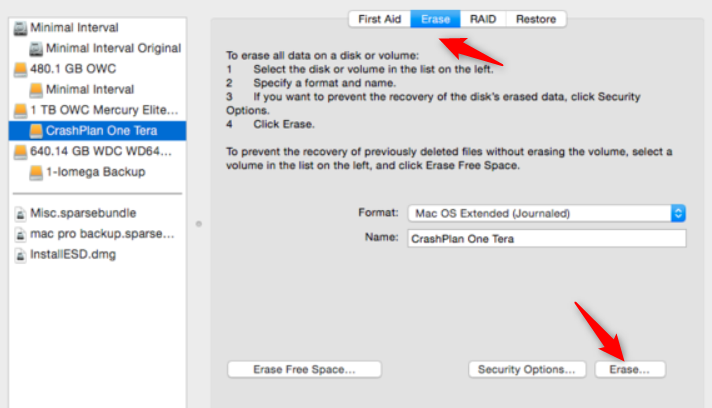
6. Restore factory settings on macOS computer

This method works on Mac Pro, iMac, MacBook, MacBook Pro, and MacBook Air. Before restoring the factory settings, users who use laptops, please plug in the laptops and connect to WIFI.
The specific steps are as follows:
① You need to restart the MacBook first. When the system restarts, press the “command + R” keys simultaneously to enter recovery mode.
Mac1
② In the macOS Utilities window, select “Disk Utility“, and then click the “Continue” button.
disk tool on mac
③ To begin the process, select the system disk and clickErase.” Next, choose Mac OS Extended (Journaled) as the format and clickErase” again to initiate the deletion process. Please wait until the operation has fully completed.
Note: If you did not rename the main hard disk, its default name is Macintosh HD.
mac disk utility erase disk
④ After clearing, select “Disk Utility” from the upper left corner of the screen, then choose “Exit Disk Utility” to go back to the macOS Utilities window.
⑤ Select “Reinstall macOS” and click “Continue.” Follow the on-screen instructions to proceed with the installation process.
Note: Before doing this, please make sure the MacBook is connected to WIFI to download the system.