author avatar
    Specialist of Customer Service Dept.
 

Summary
Learn how to solve the blue screen 0x00000024 error on Windows, analyze its cause, and find common repair methods. Plus, discover an effective way to recover lost files.


stop 0x00000024

I. What is the cause of the blue screen 0x00000024 error?

When a Windows computer encounters a blue screen with the code 0×00000024, it typically signifies a malfunction in the operating system. This error can be attributed to various factors, including:
● Virus or malware attack.
● Corrupted device drivers.
● Old or incorrectly configured drivers.
● Corrupted hard disk or system files.
● Driver conflict due to new hardware installation.
● The Windows registry is damaged due to software installation or uninstallation.
The common reasons for the blue screen 0×00000024 error on a computer include system issues and hardware problems. If the computer can be restarted and used normally after the blue screen, you can try repairing the fault using the methods mentioned below: entering safe mode or Windows recovery environment, or using the repair computer function in the Windows installer.

II. How to fix the blue screen 0x00000024 error on Windows?

1. Use the SFC command to check and repair damaged system files

If the blue screen error is caused by damaged Windows system files, you can try the SFC tool (System File Checker) that comes with the system to check and repair it. The specific steps are as follows:
Step 1: Search (cmd) directly in the search box in the lower left corner, and select (Run as administrator) to open the command prompt tool.
run as administrator
Step 2: Open the command prompt window and enter the command “SFC /scannow“. Press the Enter key. System File Checker will scan and fix problematic system files. Restart the computer after the repair is complete to check if the problem is resolved.
Enter the SFC command

2. Run the Chkdsk command to repair bad sectors

Chkdsk can help you repair file systems damaged by bad sectors. To execute the Chkdsk utility on the hard drive of a failed device, follow these steps:
Step 1: Run the computer, search (cmd) in the search box in the lower left corner, and select (Run as administrator) to open the command prompt tool.
run as administrator
Step 2: Open the command prompt window and enter the command 
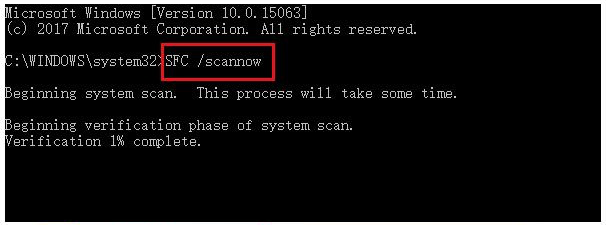
chkdsk X: /r /f (X refers to the hard drive letter). Press Enter to fix errors and restore readable information. Once the troubleshooting is complete, check if the problem is resolved.
run chkdsk
The two commonly used methods to fix the Windows blue screen error also include solving the 0×00000024 error mentioned in this article. Additionally, you will learn how to recover lost data from a faulty or unbootable computer in the following content. Let’s learn together.

III. Use Renee Passnow to Recover Lost Data When PC Fails to Start

1. What is Renee Passnow?

Renee PassNow is a professional tool for Windows users. It can clear Windows account passwords, create new administrator accounts, restore disk/memory card data, recover data after hard disk formatting, transfer disk files, erase or scan disk files, and more. This software also supports repairing Windows system problems, such as MBR boot records, DBR error parameters, startup failures, black screens, and blue screens. It is compatible with Windows 10/8.1/8/7/XP/Vista and can meet the system rescue needs of different users.
Hot Topic - ADsRenee PassNow – 3 Steps to transfer data from the crashed system

Easy to use 3 steps to transfer the files.

Transfer the files Transfer the important files of the computer without system.

Preview the files Preview the files while transferring the data.

Multifuctional Data recovery, Windows password reset, bootable problem recovery can be run without system.

Highly compatible Windows 10/8.1/8/7/XP/Vista. Also supports UEFI boot mode.

Easy to use 3 steps to transfer the files.

Transfer the files Transfer the important files of the computer without system.

Preview the files Preview the files while transferring the data.

Free TrialFree TrialNow 2000 people have downloaded!

2. How to recover lost data with Renee Passnow?

Step 1: Download and install Renee Passnow on a functional computer. Connect the USB disk to the PC and run Renee Passnow. In the “Step 1: Choose the creation method” section, select the option to create a rescue USB disk. (Note: Before this operation, ensure that important files on the USB disk are saved elsewhere, as the process will delete all data on the USB disk.)
create a boot media with renee passnow
Step 2: Select (x64) or (x86) based on system type, download the ISO file using the (Download Now) button, create a Rescue USB using the (Create USB) button, and eject the USB using the (Eject USB) button.

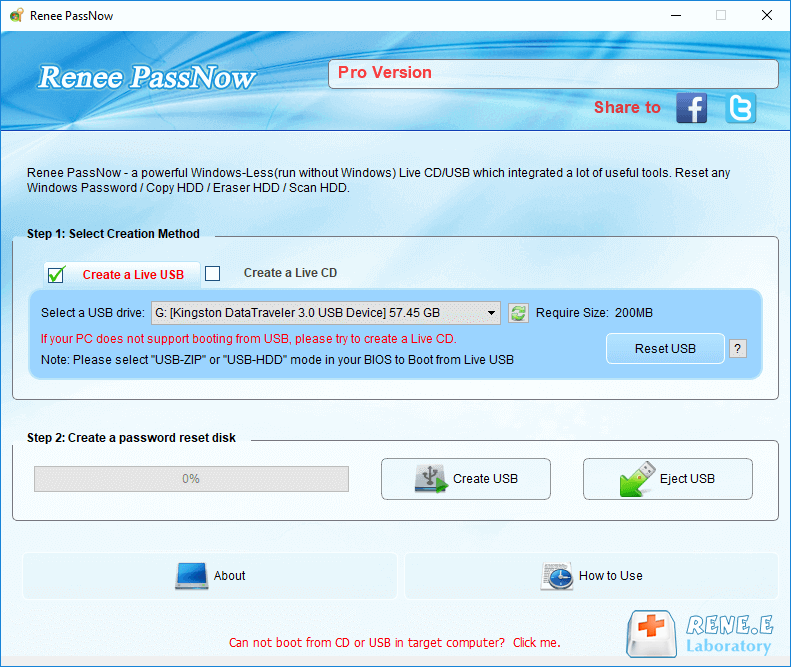
Note: To find the system type, click Start menu, select (System), and check under (About)>(Device Specifications).
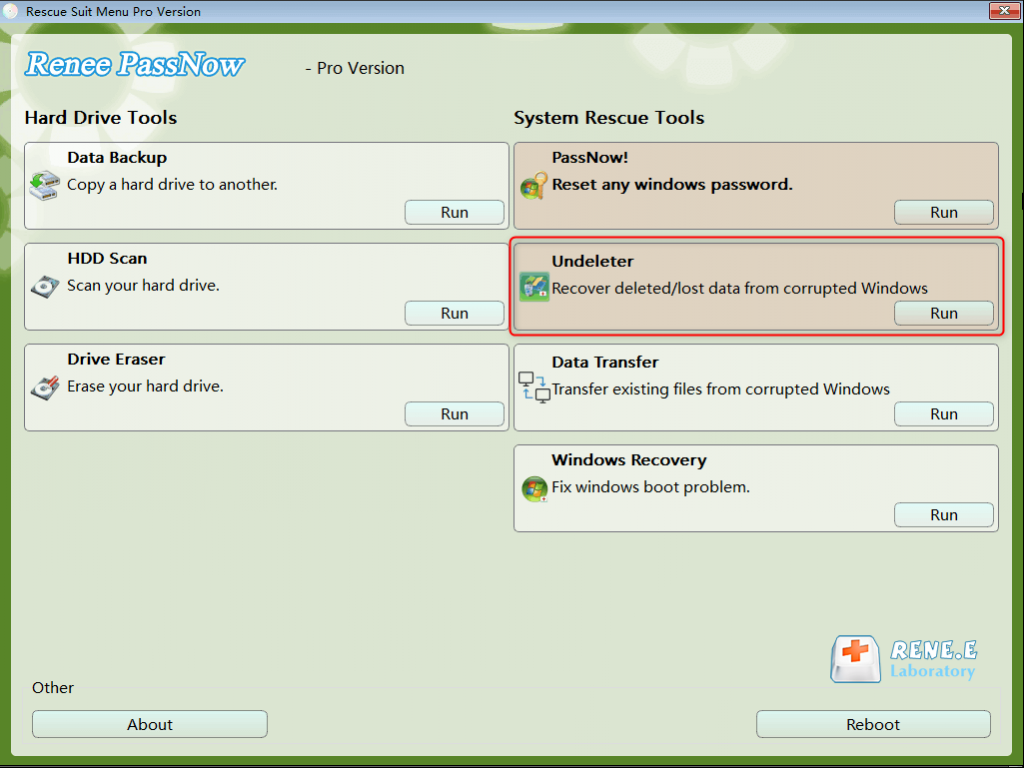
use renee passnow to create usb to reset passnword
Step 3: Connect the created boot device to the computer that needs to restore data. Turn on the computer and press the shortcut key displayed on the screen to enter the BIOS. In the BIOS (Boot) interface, set the USB device or CD-ROM drive as the preferred boot item. Save and exit. For more information, please check: How to Enter BIOS and Modify Boot Order.
Note: If you create a rescue USB disk, select (Removable Devices) as the first boot item, and if you create a rescue CD, select (CD-ROM Drive) as the first boot item.
change boot order in BIOS menu
Step 4: Start the computer using the startup disk. Select the “Undeleter” option in the Renee Passnow interface and click "Run".

It also offers a “data backup” function to clone the entire hard disk to other disks, and the Data Transfer function to transfer selected files to other disks based on your needs.

data recovery function in Renee Passnow
Step 5: Select (Whole Disk Scan) to scan the hard disk.
elect whole disk scan in renee undeleter
Step 6: After the scan is finished, choose the file to restore. Click the “Recover” button to initiate the restore command. Save the file on an external disk and remove the USB disk once the restoration is done.