author avatar
    Senior Product Manager
 

Summary
Learn how to disable and turn off secure boot and access BIOS settings in this informative article. Gain knowledge on the definition and function of secure boot along the way.


turn off secure boot

I. What is Secure Boot?

Secure Boot, or Secure Boot in English, is an important security feature on newer PCs with UEFI firmware that protects the computer’s startup process, preventing unsigned UEFI drivers and bootloaders from being loaded during startup programs, and to block some unauthorized software, such as malware. But only Windows 8 and Windows 10 have a Secure Boot certificate, and if you need to install Windows 7 on a PC that supports Secure Boot, you need to disable Secure Boot. In addition, there are some situations that need to disable Secure Boot, such as you need to run two operating systems on your PC, use external devices such as USB or CD to start Windows system on PC, use Windows password recovery tool to start Windows, etc.,
It’s important to note that Windows 11 needs Secure Boot turned on to run, which is one of the many prerequisites for Windows 11 that Microsoft claims provides users with a secure experience. Therefore, please decide whether to turn off Secure Boot according to your actual situation.

II. How to turn off Secure Boot?

1. Enter UEFI BIOS first

The Secure Boot setting is located in the UEFI BIOS menu. If you want to disable Secure Boot, you need to enter the BIOS first. Two ways to enter UEFI BIOS will be introduced below.
Method 1: Enter the BIOS interface by pressing specific keys continuously and quickly during the PC boot process. (Due to different brands of computers or motherboards, it may be F2, F8, F10, F12, ESC or Del keys). As shown in the figure below, it is the DEL button. This method may fail due to some circumstances, for example, the speed of continuously clicking the BIOS shortcut keys is too slow, or the timing of clicking the shortcut keys is not well grasped. If you keep failing with this method, you can try method 2 below.
Press the DEL key to enter the BIOS setup
Method 2: Enter UEFI BIOS from Windows Setup
① Start the Windows computer, click the Start menu, select Settings to enter the Windows settings page, and click Update & Security.
select update and security in windows settings
② Select the Recovery option on the left, and click the Restart Now button under the Advanced Startup tab in the column that appears on the right.
click restart now in recovery item
③ Next, the computer will restart and enter the “Select an option” interface. Select Troubleshooting – Advanced Options – UEFI Firmware Settings. Then the computer will restart and enter the UEFI BIOS setup interface.
UEFI firmware settings

2. Disable Secure Boot

The following takes the MSI brand as an example to introduce the steps to disable secure boot in UEFI BIOS.
Step 1: After entering UEFI BIOS, if the BIOS is in Easy Mode, you can press F7 to enter Advanced Mode.
Step 2: Go to SETTINGS > Advanced > Windows OS Configuration, then set Secure Boot to Disabled.
Step 3: Save the settings and restart the computer.
Secure Boot is set to Disabled
Kind tips If you can’t disable Secure Boot on your PC, it’s probably because your PC doesn’t have an option to disable it, and it’s up to the PC manufacturer to add the feature. Therefore, if you cannot find this option on your device, it is recommended to contact the manufacturer for assistance.

III. (Extended Information) Regular backup of computer data to protect data security

Regardless of your purpose of disabling Secure Boot, it is recommended that you back up your computer data regularly to avoid loss of important data due to system failure or misuse. Renee Becca is recommended here, which supports automatic and regular backup of data and backup of various objects (such as systems, hard disks, partitions, files, etc.). The following is the specific introduction of the software.

1. What is Renee Becca

Renee Becca is a tool specially used for system/hard disk data backup and restoration. This software adopts leading incremental/differential backup technology, which can save you more time and disk space. It can not only help you easily backup and restore important data in your computer, such as programs, system configurations, emails, photos, videos, documents, bookmarks, etc.; it also provides system backup, partition backup, hard disk backup and disk cloning. It has many functions including system migration, and the operation is also very simple.
Renee Becca - Reliable Data Backup & Restore Software

Quick Backup files at up to 3,000MB/min.

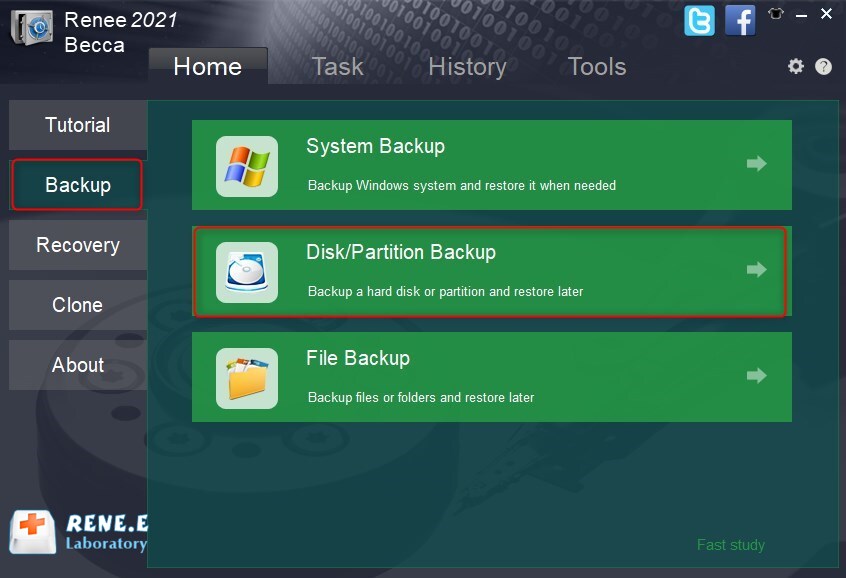
Fullfill different backup needs Supports system backup, disk / partition backup, file backup and disk clone.

Intelligent Automatically analyze the differences between source and backup data.

Convenient Support VSS, allowing to freely view webpages when backing up system.

Highly compatible Supports various files and storage devices.

Quick Backup files at up to 3,000MB/min.

Fullfill different backup needs Backup for disk, partition and system. Save disk space by backing up incremental /differential data.

Highly compatible Supports various files and storage devices.

Free TrialFree Trial 2000 users have downloaded and enjoy Renee Becca!

2. How to use Renee Becca to backup computer data regularly?

Step 1: Download, install and run Renee Becca on a Windows computer, select the Disk/partition backup option in the main interface Backup column. This option can back up the data of the entire hard disk or partition. If you only need to back up individual important data in daily life, you can also use the File backup function.
disk backup in Renee Becca
Step 2: Next, select the hard disk to be backed up in the source, and select the hard disk partition to store the backup data in the destination. If you need to back up the partition, you can select the Backup Partition option in the upper right corner.
back up disk in Renee Becca
Step 3: In the option Schedule, you can set the daily/weekly/monthly regular backup and the time to automatically start the backup.
schedule regular backup in Renee Becca
In addition, in Backup Scheme – Scheme Type, you can also choose a suitable backup scheme mode according to your personal needs. Renee Becca has 5 backup schemes to choose from, version chain mode, single version mode, full mode, incremental mode and differential mode.
select a backup mode in Renee Becca
Renee Becca has 5 backup plans to choose from:

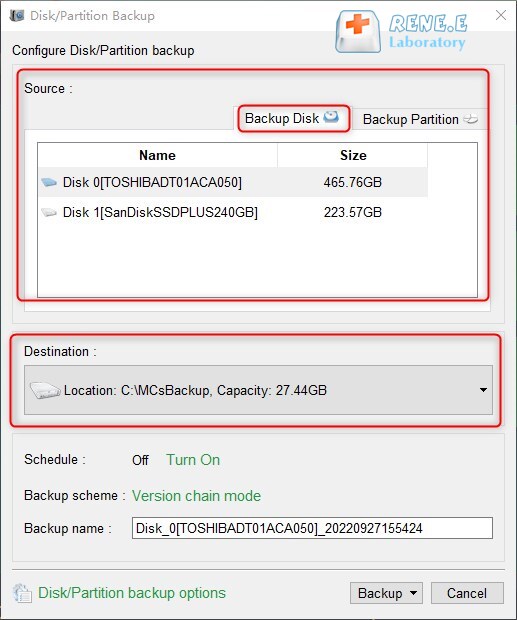
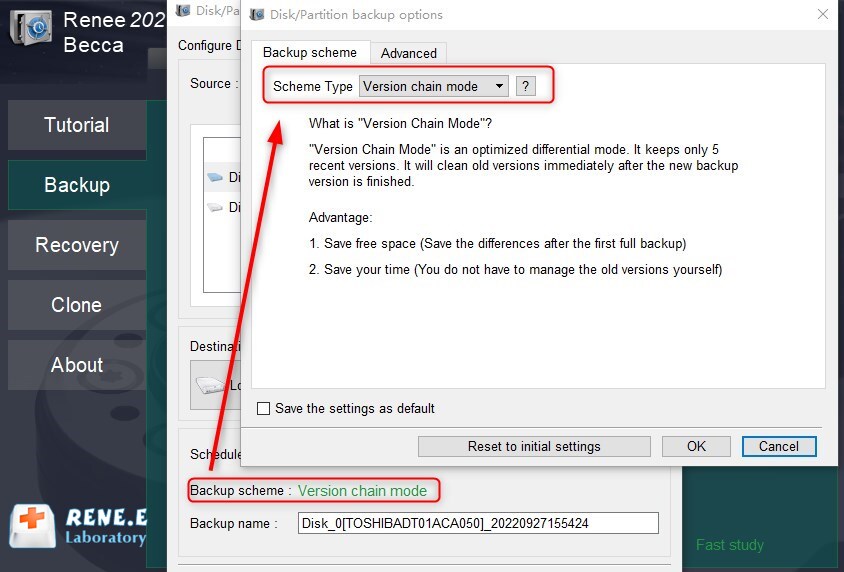
Version chain mode: Only the latest 5 versions are kept, and useless old versions are automatically deleted after the backup is completed.

Single version mode: Only the latest version is kept, and the previous version is automatically deleted after the backup is completed.

Full mode: Creates a full backup.

Incremental mode: After the initial full backup, only incremental backups are created.

Differential mode: After the initial full backup, only differential backups are created.

Step 4: Finally, click the Backup button to start executing the hard disk backup command according to your settings.
perform a backup with Renee Becca