author avatar
    Specialist of Customer Service Dept.
 

Summary
Discover practical solutions to tackle the widespread challenge of Windows 10 settings not opening. Dive into our guide and put an end to your frustration.


windows 10 settings won't open

I. How to solve the problem that Windows 10 settings cannot be opened?

Compared with the control panel, Windows 10 settings have a simpler and more direct interface. Users can control many important operations and functions through Windows settings, such as Windows updates, privacy settings, device and account management, etc. However, some users have reported that Windows settings cannot be opened. This problem may be related to system files, user account file corruption or update errors.
The following will introduce several practical solutions, hoping to help you solve this problem smoothly.

1. Try other methods to open Windows Settings

There are many ways to open Windows Settings, you can try other ways to open.
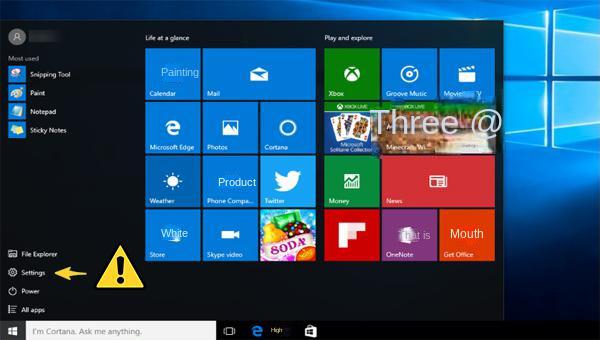
① Click (Start) in the lower left corner or press the (Windows) logo key on the keyboard, and select (Settings).
② Right-click (Start) and select (Settings).
③ Press the (Windows) logo key + (I) key on the keyboard at the same time to open Windows Settings.
④ Press the (Windows) logo key + (R) key on the keyboard at the same time, enter (ms-settings:) (the colon at the end cannot be omitted) and click (OK).
⑤ Search (Settings) in the taskbar search box and press the (Enter) key.
If none of the above methods can open Windows Settings, please continue to try the following methods.

2. Uninstall Windows updates

If Windows settings cannot be opened after you performed a Windows update, it is recommended that you uninstall the most recent update.
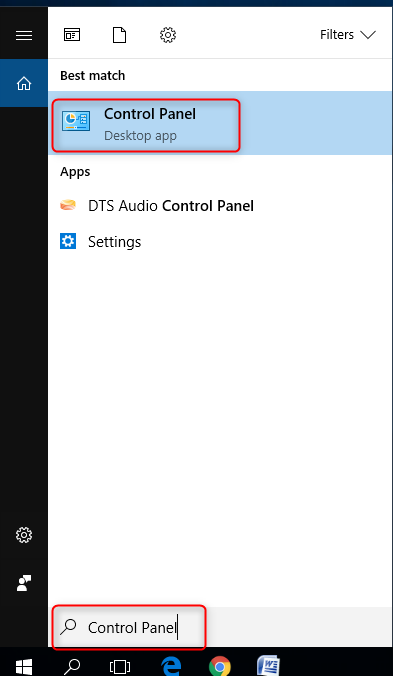
Step 1: Search (Control Panel) in the search box on the taskbar and press the (Enter) key. After entering the Control Panel, set the view mode to (Small Icons), and select (Programs and Features).
search windows Control Panel
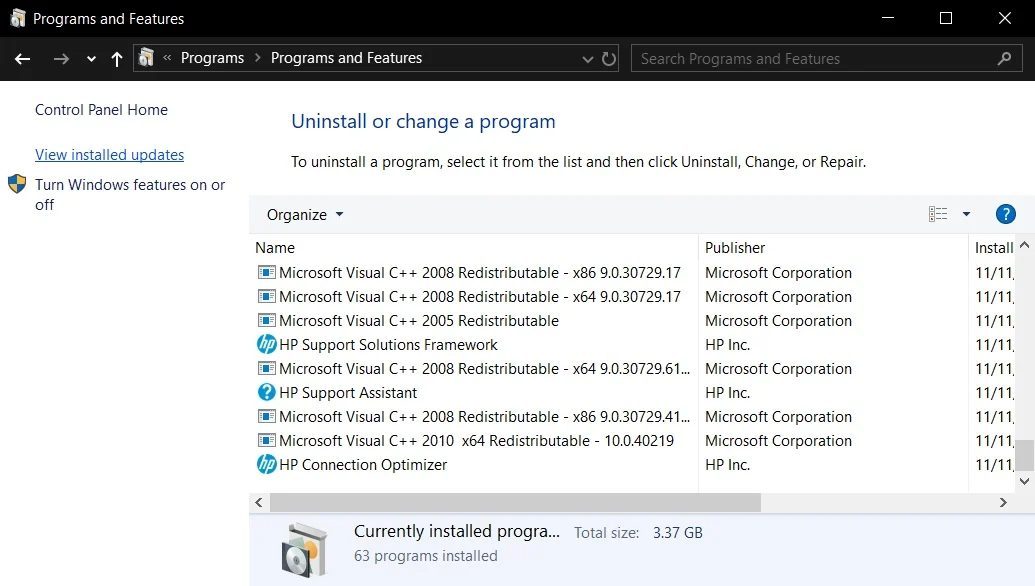
Step 2: Click (View installed updates). Select the latest update that needs to be uninstalled, and click (Uninstall). Then restart the computer to see if the problem is resolved.
View installed updates

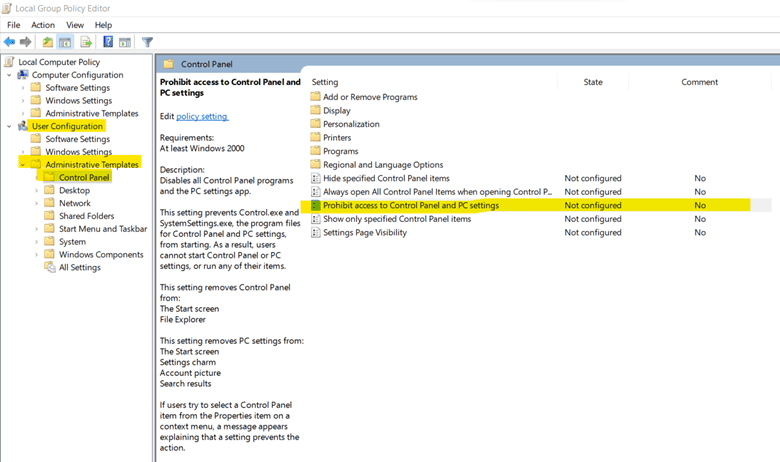
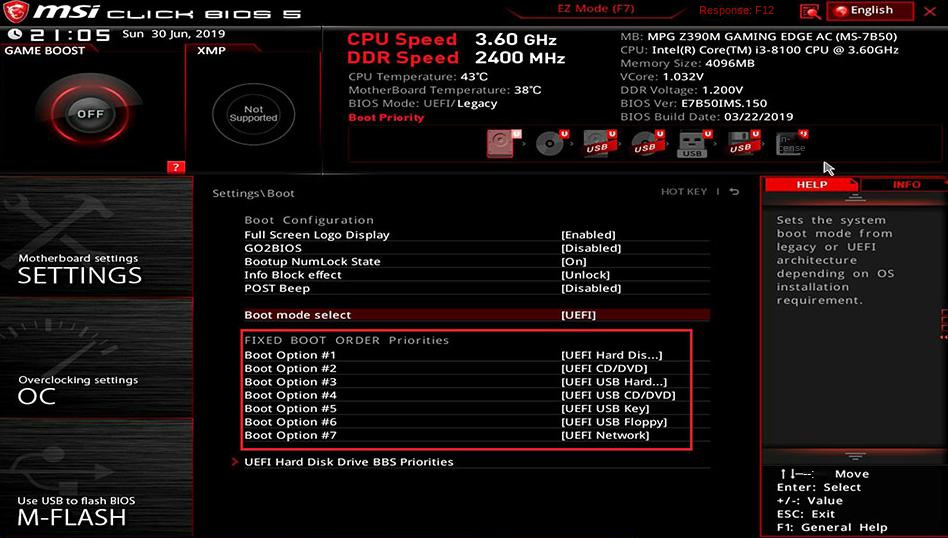
3. Check the Group Policy Editor settings

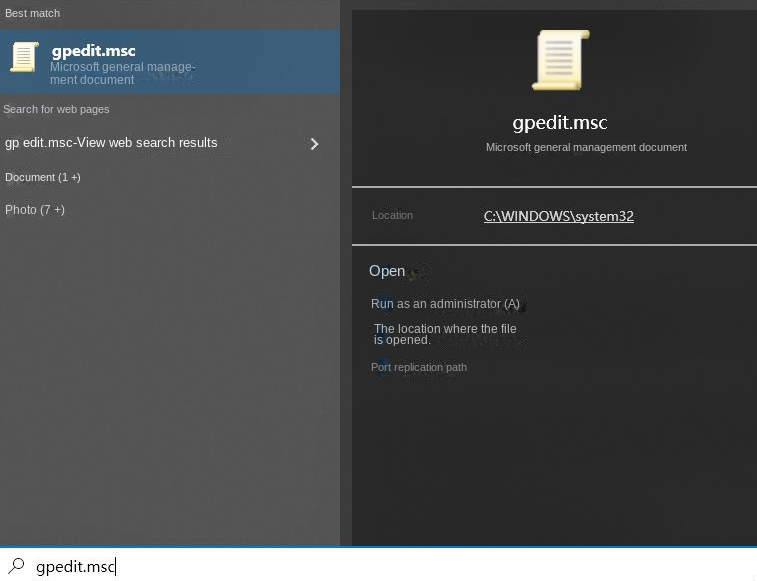
Step 1: Search for (gpedit.msc) in the taskbar search box and press (Enter) key to open the Local Group Policy Editor.
search group policy
Step 2: Go to (User Configuration) – (Administrative Templates), then select and open (Control Panel). Then double-click in the right pane (Prohibit access to Control Panel and PC Settings).
Prohibit access to Control Panel and PC Settings
Step 3: Under Prohibit access to the Control Panel and PC Settings interface, change its setting to (Disabled), then click (Apply) and (OK).

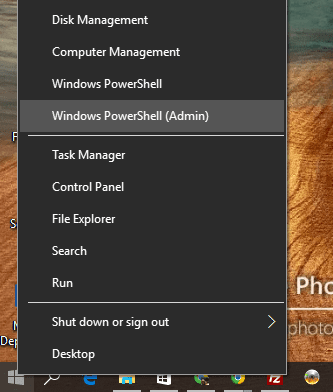
4. Reinstall the Windows Settings app

You can also try reinstalling the Windows Settings app.
Step 1: Right-click (Start), select (Windows PowerShell (Admin)).
windows powershell admin
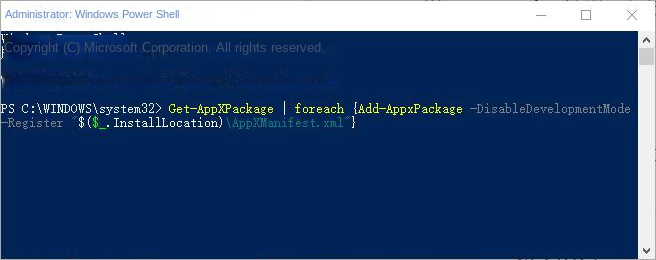
Step 2: Copy and paste the following command and press (Enter) key, it will help you to reinstall Windows settings and get full access to them. This operation will take some time, please be patient and wait for it to complete, then check if the problem is resolved.

Get-AppXPackage | Foreach {Add-AppxPackage -DisableDevelopmentMode -Register "$ ($_.InstallLocation) AppXManifest.xml"}

Enter the command to reinstall the settings app

5. Run the SFC command

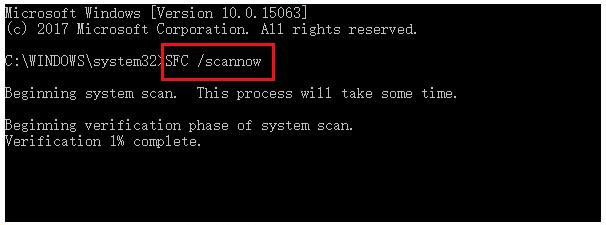
Corrupted system files may prevent Windows settings from opening, but you can fix it by scanning with SFC command. SFC, short for System File Checker, is a built-in program in Windows that can be used to scan the integrity of operating system files and restore corrupted system files if they are found.
Step 1: Select (Run as administrator) to start Command Prompt by typing (cmd) in the search box and right-clicking on the result.
run as administrator
Step 2: After opening the command prompt, type (sfc /scannow) and press (Enter).
Type sfc /scannow and press Enter
Step 3: Now, the tool will start scanning your system. This process may take some time, please be patient as it completes. After the scan is complete, restart your computer and check if the problem persists.
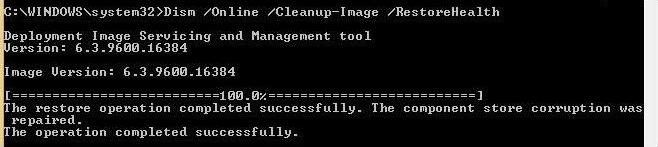
If the problem persists, you can also try a DISM scan. DISM is an image tool officially produced by Microsoft. It is usually used to check and repair system image files, and can be used to refresh all system functions, including setting applications.
The specific steps of DISM scanning: Enter the command line (DISM /Online /Cleanup-Image /RestoreHealth) in the command prompt window and press (Enter). This process will last 10-20 minutes, please do not interrupt it. After the scan is complete, please run (sfc /scannow) again to complete the repair. Then please restart your computer and check if the problem is resolved.
DISM command

6. Create a new administrator account

If your user account file is damaged, you may lose access to some Windows 10 features, including Windows settings. So creating a new administrator account may resolve the issue.
Step 1: Select (Run as administrator) to start Command Prompt by typing (cmd) in the search box and right-clicking on the result.
run as administrator
Step 2: Enter (net user new account name password /add) in the command prompt (the new account name and password should be modified according to the actual situation). Then enter (net local group administrators new account name / add) and press (Enter). Please change the new account name to your newly created account name. After that, the new user will become an administrator.
net user new account name password /add
Step 3: Then restart the computer, log into Windows 10 with the newly created administrator account, and try to open Windows Settings.
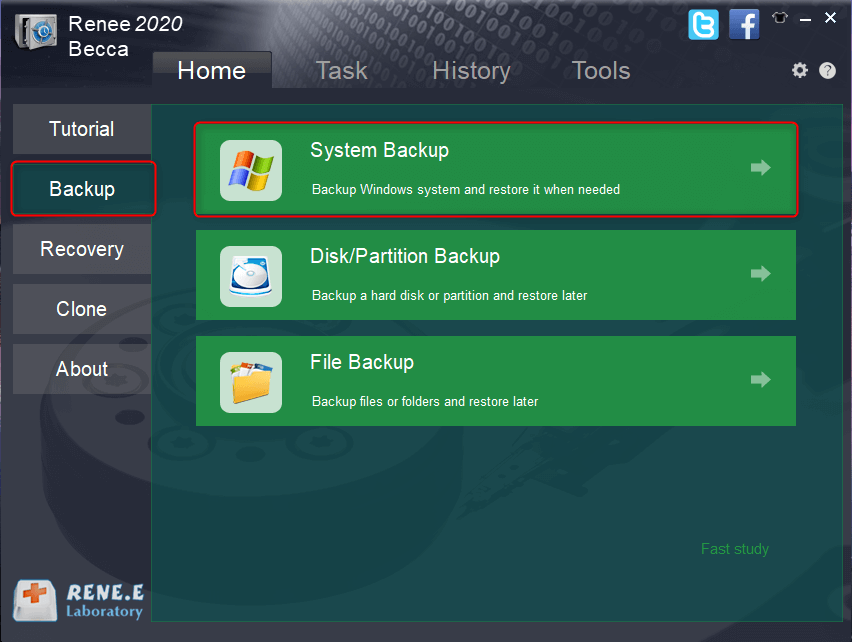
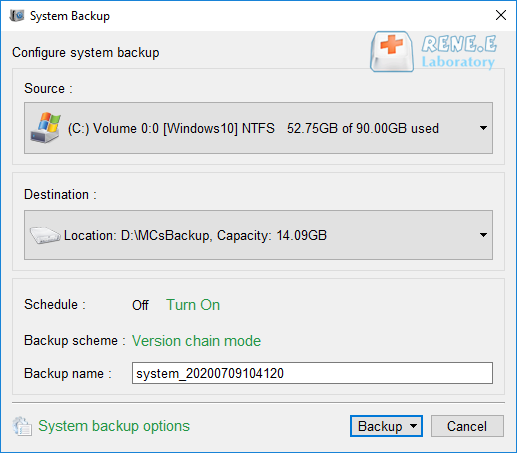
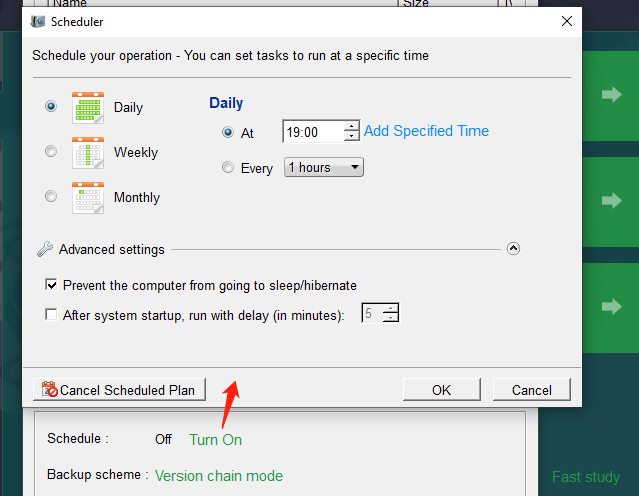
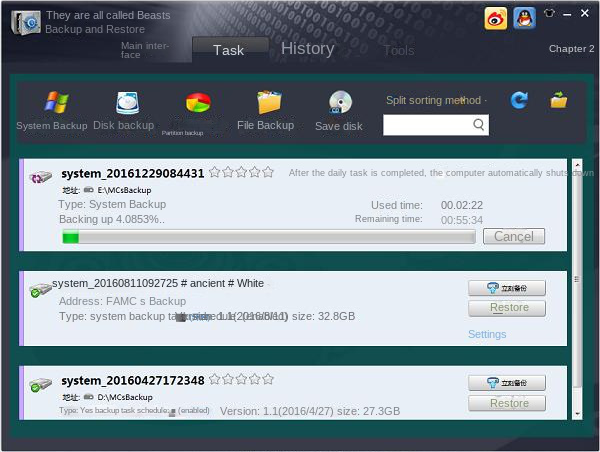
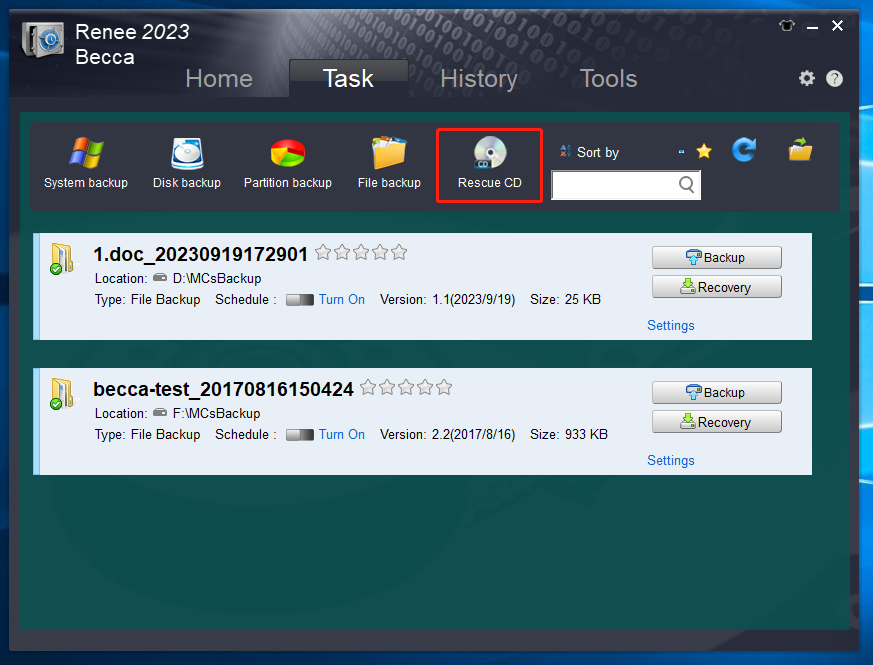
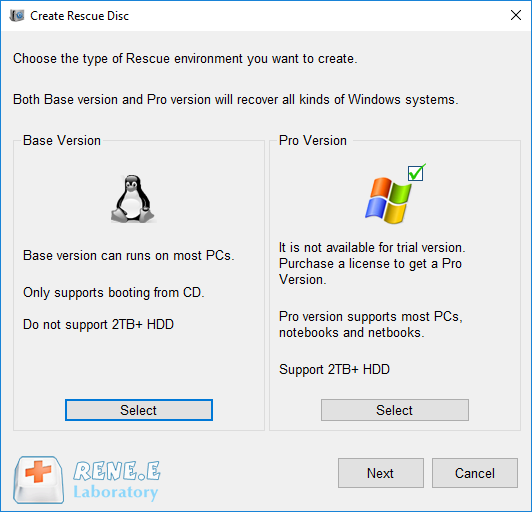
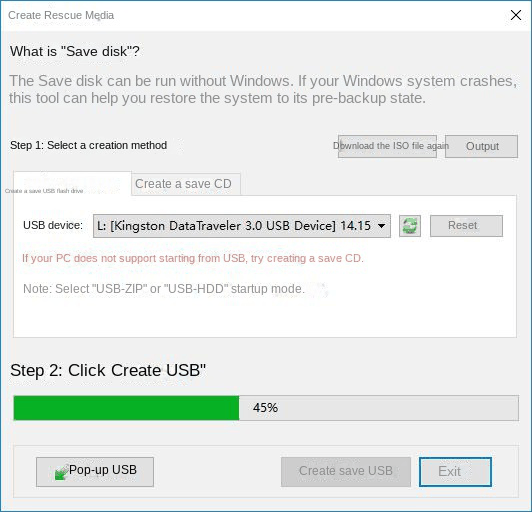
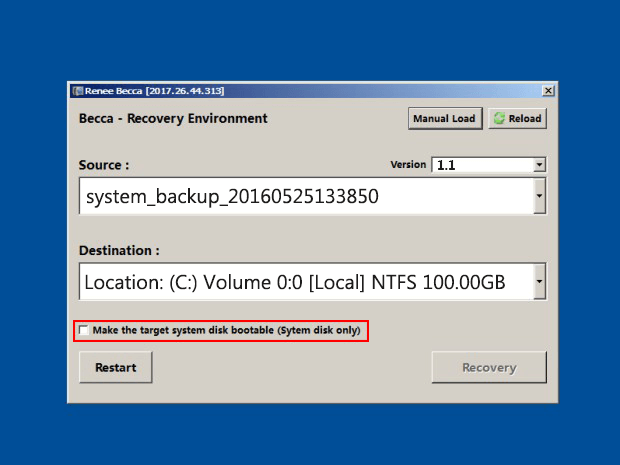
If none of the above methods can solve the problem that the Windows settings cannot be opened, you may need to reinstall the system. Please click here for the specific steps of reinstalling the system. In addition, in the event of some unexplained failures in the system, it is recommended that you back up the system in time for emergencies. The following takes Renee Becca as an example to introduce the specific operation of system backup and restoration.

II. (Extended information) Using Renee Becca to backup and restore the system

1. What is Renee Becca?

Renee Becca is a tool dedicated to system/hard disk data backup and restoration. It can help you back up and restore important data in your computer, such as programs, system configuration, emails, photos, videos, documents, bookmarks, etc. It adopts the leading incremental/differential backup technology, which can save you more time and disk space. In addition to supporting system backup, it also supports partition backup, hard disk backup, file backup, disk cloning and system migration, satisfying your different needs.
Renee Becca - Quickly and safely back up SD card data

Fast backup Backup speed up to 3 000MB/minute

Support multiple SD cards Backup data of SD card, SDHC card and SDXC card

Incremental/differential backup technology Automatically analyze data differences between source files and backup files to save disk space

Multiple backup schemes Support system backup/partition backup/hard disk backup/file backup/disk cloning

Easy to use Even newbie can handle it in seconds

Fast backup Backup speed up to 3 000MB/minute

Support multiple SD cards Backup data of SD card, SDHC card and SDXC card

Easy to use Even newbie can handle it in seconds

Free TrialFree TrialAlready 2000 users have downloaded and try Renee Becca

2. How to use Renee Becca to back up the system?

It is recommended to back up the system to a mobile hard disk, which can prevent system backup files from being lost due to system failure. It is very simple to use Renee Becca to back up the system. The specific steps are as follows:
Step 1: Connect a mobile hard disk with sufficient free capacity to store the system partition to the computer, then download, install and run Renee Becca, and select the (System Backup) option in the main interface (Backup) column.
system backup renee becca
Step 2: Next, select the source file (device) and the destination. The source file (device) generally selects the system partition by default, and the destination can choose the location where you want to save the system backup. Here, choose a mobile hard disk.
back up system with renee becca
If the capacity of your mobile hard disk is large enough, you can also set an automatic backup plan and backup mode. Turning on (task plan) can help you make a daily/weekly/monthly automatic backup plan and the time to start the backup. The software also provides Different backup modes, namely version chain mode, single version mode, overall mode, incremental mode and differential mode. After the two options are set, it can help you to automatically back up the system regularly, and automatically delete some old backup files according to the backup mode you choose, which can save time and storage space.
file backup schedule on Renee Becca
Step 3: After all the settings are completed, click (Backup Now) and wait for the system backup to complete. You can check the backup progress on the (task) interface.
system backup

3. How to use Renee Becca to restore the system?

If you want to restore the system backed up to the mobile hard disk to the computer, you can check the following.
Note: If you need to restore the system to other computer equipment, please ensure that the CPU and motherboard of the original computer equipment and the target computer are of the same brand, because when the system is installed on the computer, corresponding software will be installed according to different computer hardware. Drivers, if the hardware of the two computers is different, the system backup file may not be compatible with the target computer, or it may be necessary to enter the product license to activate the system.
Step 1: Run Renee Becca, switch to (task) in the function bar at the top of the interface, and then select the (rescue disk) option.
rescue CD
Step 2: Select the type of rescue disk to be created. Please select according to your disk and computer conditions. After the selection is completed, connect a blank CD or U disk to the computer, and click (Next) to create a startup disk. The U disk used to create the startup disk needs to be prepared separately, and it should not be created in the mobile hard disk where the system backup is saved.
make a rescue disc with renee becca
Steps to create a rescue disk
Step 3: Connect the boot disk (CD/U disk) to the computer where you need to restore the system, and enter the BIOS through the shortcut key (depending on the computer brand, it may be F2, Del, ESC, F10, etc.) interface, change the boot sequence to boot from the USB/CD boot disk. Take the picture below as an example, try to find the (Boot Priority) option, different BIOS interfaces are slightly different. Set the created boot disk to be the first in the boot sequence, save the settings, and restart the computer.
uefi set boot order
Step 4: After successful startup, select the system backup version you need to restore and the target location to restore in the window. Since the previously backed up system is stored in a mobile hard disk, please connect it to the computer and select it. At the same time, check (Let target disk can be booted) option. Finally, click the (Restore) button to start the system restore command.
recover system from rescue CD