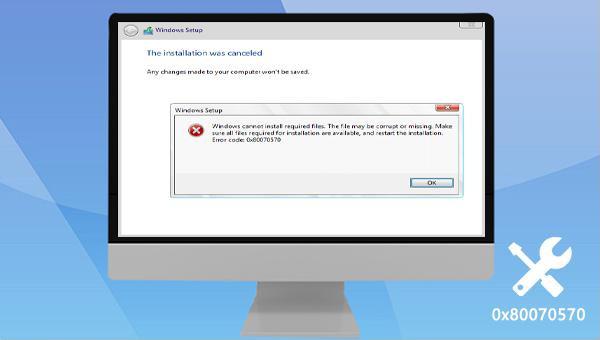
III. How to Fix Windows Error Code 0x80070570?
Restarting your computer can often resolve minor system glitches, making it the simplest solution. So, if you encounter the error code 0×80070570, try restarting your computer first before proceeding with the previous operation. This may fix the issue. If not, you can try other methods to resolve it.
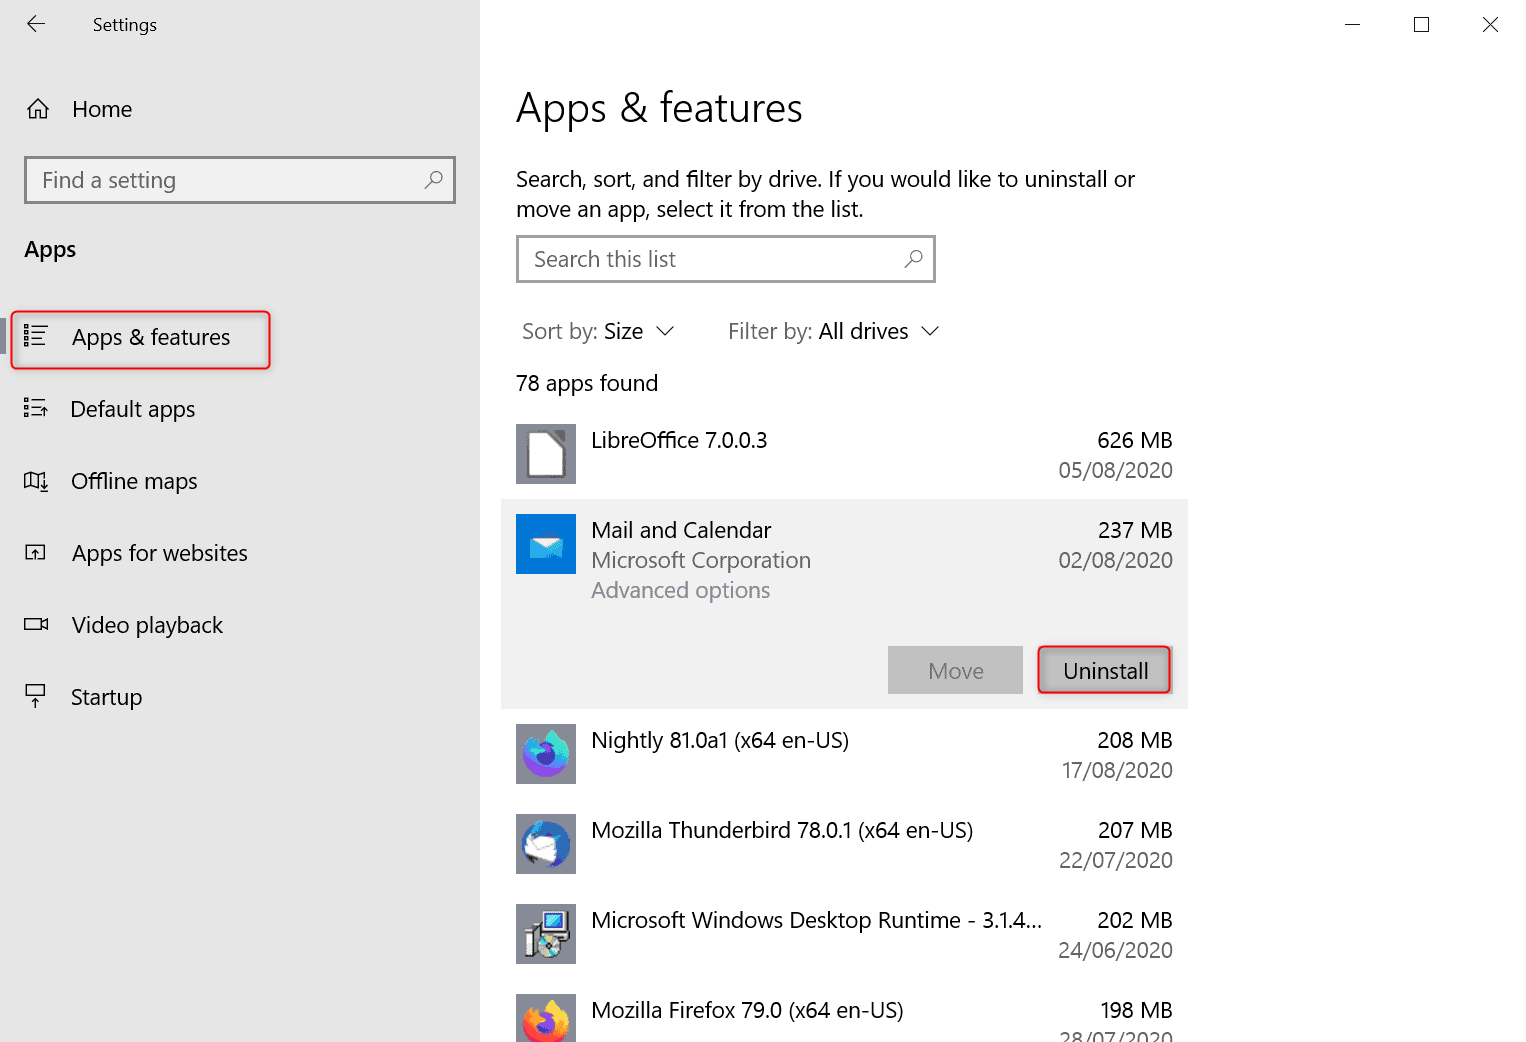
2. Temporarily disable/uninstall antivirus software
If you have installed a third-party antivirus software, it is recommended that you uninstall it. The steps are as follows: Start the Windows 10 computer, right-click (Start), select (Apps & features), choose the third-party antivirus software on the right, and click the (Uninstall) button.
If you lack third-party antivirus software, you can temporarily disable Windows Defender. Once disabled, quickly complete your task before the error reoccurs to determine if the issue is fixed. If resolved, reactivate Windows Defender or install a more compatible third-party antivirus to safeguard against malware.
3. Perform Startup Repair
The Windows Recovery Environment features the Startup Repair option which can swiftly scan and fix various system issues. Follow the specific steps mentioned below to use this feature:
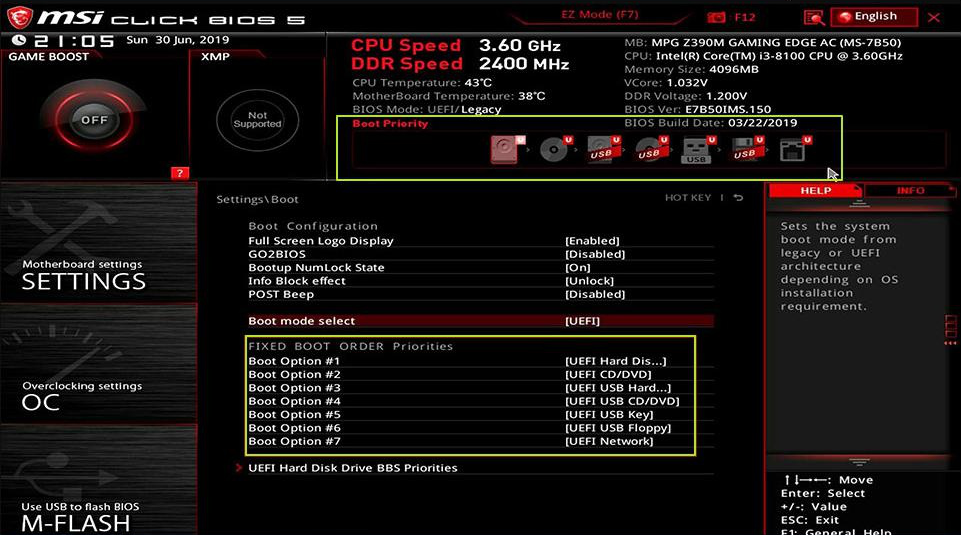
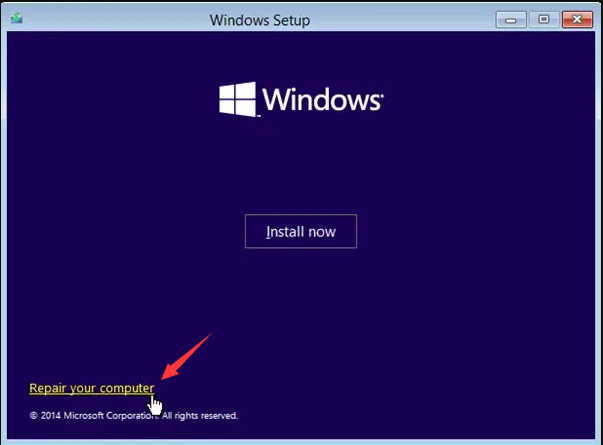
Step 1: Insert the Windows 10 installation disk into the computer. Press F2, F10, DEL, or ESC (depending on the computer brand) repeatedly on startup to enter BIOS. Set the first boot device to the installation disk, save the changes, and restart. Boot from the disk and select “Repair Your Computer” on the “Install Now” screen to access the recovery environment.
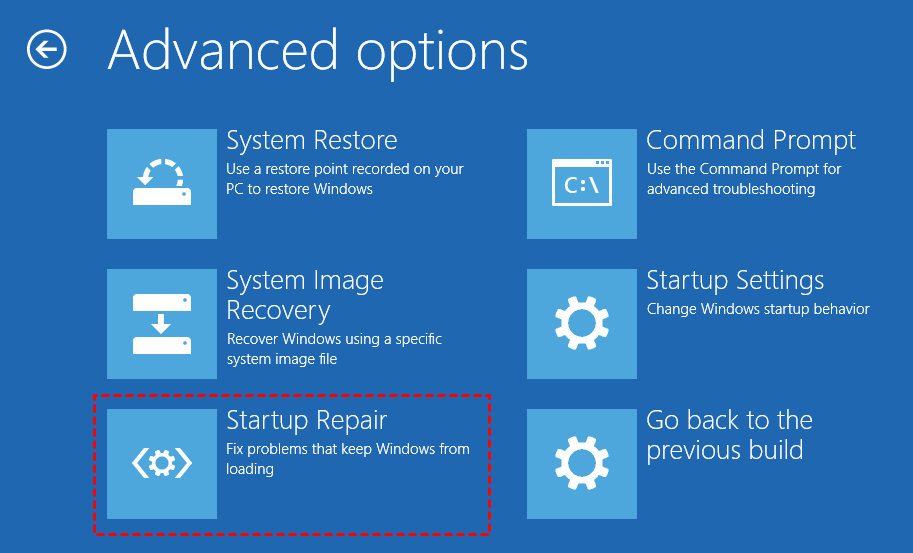
Step 2: After entering the recovery environment, navigate to (Troubleshoot)>(Advanced Options)>(Startup Repair).
4. Use the chkdsk command to repair the hard disk
Bad sectors on the hard disk may also cause error code 0×80070570, so we can use the Chkdsk command to scan and repair the hard disk, the Chkdsk command can repair hard disk bad sectors and directory errors.
Step 1: Restart the computer. If you can enter the Windows system normally, please search (cmd) in the search box in the lower left corner, right-click (command prompt), and select (run as administrator).
If you’re unable to boot Windows normally, insert the Windows installation media (DVD or USB drive) into your PC. Reboot and immediately press F2, F10, DEL, or ESC (key varies by PC brand) to access the BIOS settings. Set the boot priority to the Windows installation media, save changes, and restart. Boot from the installation media and choose the “Repair Computer” option in the “Install Now” interface to access the recovery environment. There, select “Troubleshoot” > “Advanced Options” > “Command Prompt“.
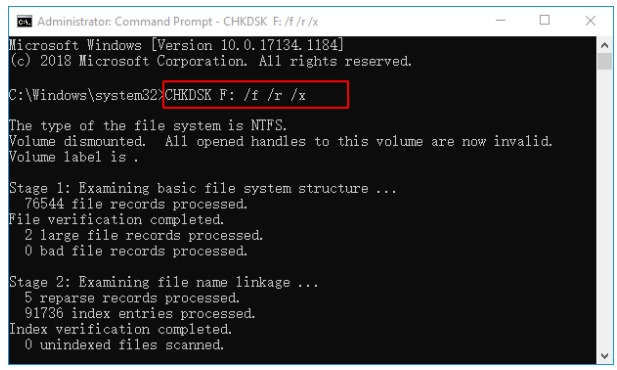
Step 2: Open the command prompt, type chkdsk C: /f /r /x (replace C with the actual drive letter if different), and press Enter. /f fixes disk errors, /x forces the volume to dismount, and /r locates and repairs bad sectors.
Step 3: If you receive the prompt “chkdsk cannot be run because the target disk is in use,” would you like to schedule the check for the next time your computer restarts? If so, press (Y) to confirm and Chkdsk will run during the next restart. Once the Chkdsk check is finished, restart your computer and attempt the operation again. If the error code 0×80070570 persists, the issue may have been resolved.
5. Delete the files in the Software Distribution folder
The temporary storage location for certain files required for Windows installation and updates is the Software Distribution folder. However, this folder can sometimes cause issues with the installation or update process. In such cases, deleting the files within the folder can aid in troubleshooting. The following are the specific steps to perform this operation:
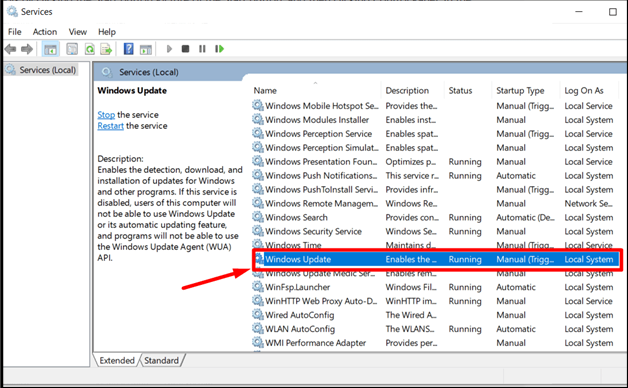
Step 1: Run the computer and press the (Windows+R) keys simultaneously to open the Run window. Next, enter the (Services.msc) command and click the (OK) button to open the Services window. After that, find (Windows Update), right-click on it, and select the (Stop) option.
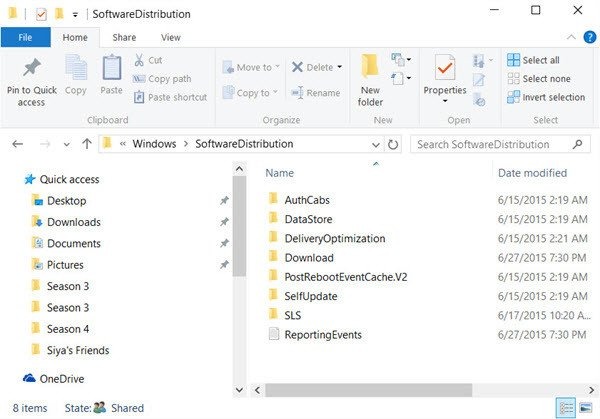
Step 2: Next, press the (Windows+R) keys simultaneously to open the Run window, then paste (C:\Windows\SoftwareDistribution) into the text box and click the (OK) key to locate the Software Distribution folder.
Step 3: Select all files listed in the Software Distribution folder, right-click them, and select (Delete), which requires administrator privileges.
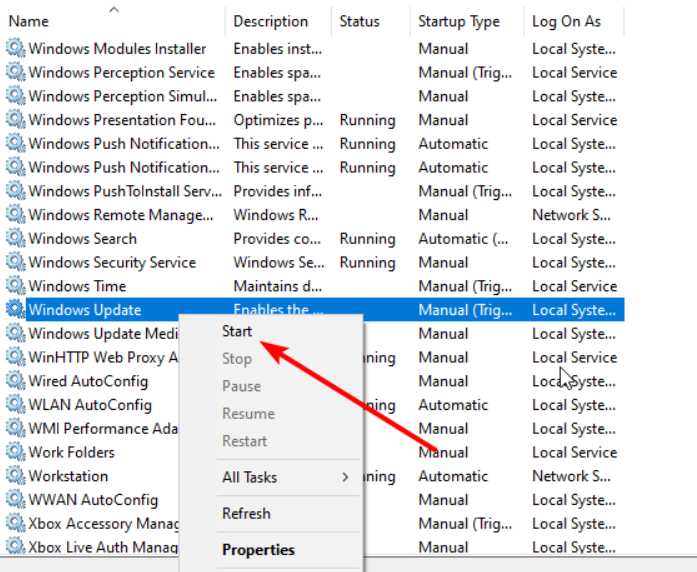
Step 4: Please follow these steps to resolve the issue: First, reopen the “Services” window by pressing the (Windows+R) key simultaneously to open the “Run” window. Next, enter the (Services.msc) command and press the (Enter) key to open the window. Then, right-click on the (Windows Update) option and select the (Start) option. Once the operation is complete, restart your computer and try installing/updating Windows again to see if the problem has been resolved.
6. Use the Windows Media Creation Tool to update and upgrade the system
Windows Media Creation Tool (Media Creation Tool) is a software developed by Microsoft that can help users update the system, install the system, and download the system image file (ISO file). Before upgrading the system, please make a data backup in advance to avoid unnecessary losses.
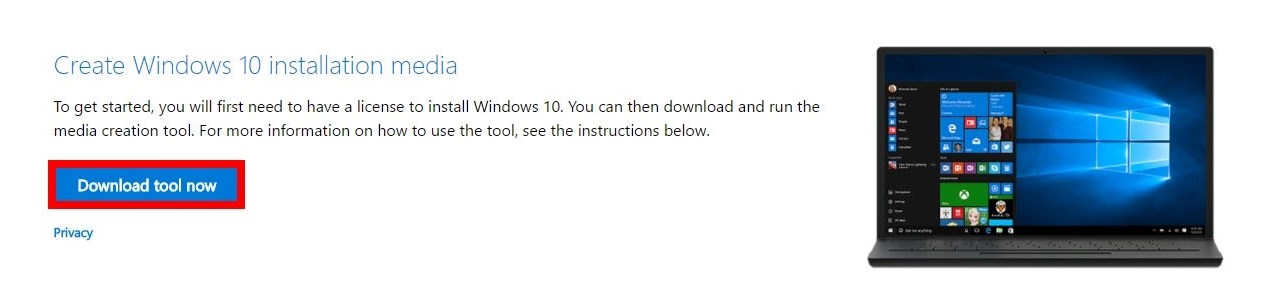
Step 1: Go to Microsoft’s official website, and download the Media Creation Tool (Media Creation Tool).
Step 2: Click (Accept) on the (applicable notice and license terms) interface. Then select (Upgrade this PC now) > (Next). It will then start downloading the latest system ISO file. Once downloaded, it will automatically create the Windows 10 media, and then it will start checking for system updates.
Step 3: If the (Applicable Notice and License Terms) screen appears again, click (Accept). After that, wait patiently for the program to run. When the (ready to install) interface appears, you can confirm whether to keep personal files and applications. You can click (Change what to keep) to make changes.
Step 4: In the (Choose what to keep) interface, you can select the (Keep personal files and apps), (Keep personal files only), or (None) options according to your needs. Then click (Next) > (Install ). After clicking (Install), the computer will restart several times, and please wait patiently.