author avatar
    Technology Manager of Test Dept.
 

Summary
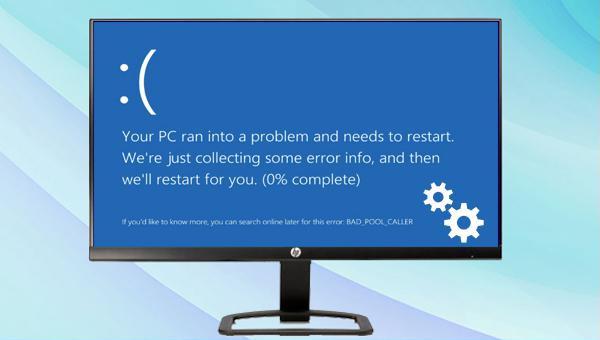
By following these methods, you can easily fix the BAD_POOL_CALLER error on Windows 10 and avoid future occurrence of this frustrating issue. Take control of your computer and banish the blue screen of death for good!


bad pool caller Windows 10

I. Why does the blue screen failure error BAD_POOL_CALLER appear?

The BAD_POOL_CALLER error, a Windows Blue Screen of Death (BSOD) issue, occurs when the system’s “data pool” containing essential files is compromised, leading to read command errors and the appearance of this error message.
Typically, this error is caused by driver issues, file corruption, memory issues, malware/virus infection, and more. Next, let’s learn a few simple repair methods below.

II. How to fix blue screen failure error BAD_POOL_CALLER?

1. Open safe mode

Safe mode is a unique startup mode in the Windows system that only initiates the essential files and drivers necessary to run Windows. It allows for easier repair of system errors and can be accessed through the following steps:
Step 1: Start the computer. When the Windows startup logo appears, immediately press the power button on the computer to interrupt the startup process. Repeat this 3 times. Then start the computer again, this time allowing the computer to fully start. Click the (Advanced options) button in the “Automatic Repair” interface. You will then enter the Windows recovery environment.
automatic repair
Step 2: Navigate to Troubleshoot > Advanced Options > Startup Settings > Restart. When the computer restarts, press the 5 or F5 key to enable Safe Mode with Networking.
startup settings windows 10 safe mode
After entering safe mode, you can proceed with the following repair operations.

2. Revert recent changes

The BAD_POOL_CALLER error may occur after making changes to your computer, such as connecting an external storage device or installing a new application. To troubleshoot, try disconnecting all external USB devices and restarting the computer to see if the issue is resolved. Alternatively, you can uninstall the recently installed application as it may not be compatible with the system, causing the error. Here’s a detailed guide on how to do it:
Step 1: Run the computer, click the (Start) button in the lower left corner, and click Settings (the small gear icon).
settings in Windows
Step 2: Afterwards, navigate to the “Settings” interface and access the (Apps) section. From there, select the (Applications and Features) option on the left and choose the specific application that caused the error on the right. Then, simultaneously click the (Uninstall) button to successfully remove the problematic program.

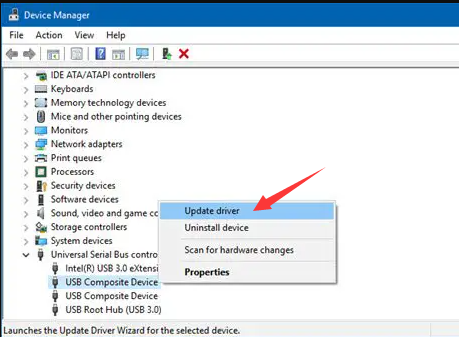
Once the application has been uninstalled, restart your computer and check if the issue has been resolved.

3. Update the driver

If your driver is not updated on time, you may encounter the error discussed in this article. The solution is to update the driver that is causing the error or has not been updated in a timely manner. Typically, the BAD_POOL_CALLER error occurs when the graphics driver, sound card or chipset, or network adapter driver is not updated on time. Therefore, it is important to check these devices for any updates. Here are the specific steps to follow:
Step 1: Run the Windows computer, and then press (Windows key + R) on the keyboard at the same time to open the running window. After entering the command (devmgmt.msc), click the (OK) button to enter the Device Manager.
open device manager
Step 2: Next, right-click the driver device that reported the error (usually a yellow exclamation point will appear for the faulty driver), and select the (Update driver) option.
update USB Driver
Step 3: Next, select the (Search automatically for updated driver software) option, and then follow the instructions to complete the driver update. After that, restart the computer and check if the problem is resolved.
update Driver Confirm

4. Run Windows memory diagnostics

Memory problems can cause your computer to lose information or stop working, resulting in a BAD_POOL_CALLER error, so you can use Windows’ built-in memory diagnostic tool to check for system memory problems and fix them. The specific steps are as follows:
Step 1: Press the (Windows+R) keys at the same time to open the run window, and then enter the (mdsched.exe) command to open the Windows Memory Diagnostic Tool.
mdshed
Step 2: Next, select the “Restart now and check for problems (recommended)” option in the Windows memory diagnostic interface.

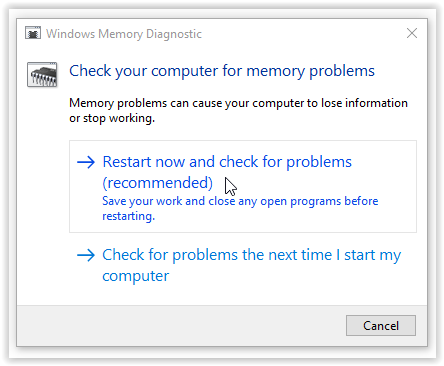
Wait patiently for the diagnostic process to complete. Restart the computer and check if the blue screen problem has been resolved.

restart now and check for the memory

5. Update the operating system

When you encounter BAD_POOL_CALLER error, you must check for Windows updates. An outdated operating system can also cause this issue. The specific steps are as follows:
Step 1: Click the (Start) button in the lower-left corner of the computer and click Settings (the small gear icon). Next, click on the (Update & Security) option in the settings interface.
Windows update and security
Step 2: Select the (Windows Update) option on the left, and click the (Check for Updates) button on the right.

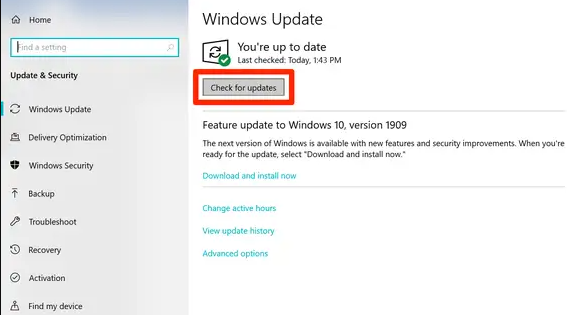
Your Windows computer will then automatically check for updates and install the latest Windows version. After the update is complete, restart your computer and check if the problem is resolved.

check for updates Windows 10
The above are the methods for solving the blue screen error BAD_POOL_CALLER, you can try them one by one. In addition, when the system crashes due to various failures, to avoid data loss, you can use the following methods to easily transfer or restore system data.

III. Use Renee PassNow to transfer or restore important data when the system crashes

1. What is Renee PassNow?

Renee PassNow is a versatile system rescue tool designed for Windows users. It offers solutions for clearing Windows account passwordscreating new administrator accounts, and restoring data from disks or memory cards—even after formatting. Users can also transfer files between diskserase or scan disk files. Additionally, it tackles Windows system issues by repairing MBR boot records, fixing DBR error parameters, resolving the 0xc00000e error, and addressing startup failuresblack screen, or blue screen errors. Renee PassNow caters to a wide range of system rescue needs.
Hot Topic - ADsRenee PassNow – 3 Steps to transfer data from the crashed system

Easy to use 3 steps to transfer the files.

Transfer the files Transfer the important files of the computer without system.

Preview the files Preview the files while transferring the data.

Multifuctional Data recovery, Windows password reset, bootable problem recovery can be run without system.

Highly compatible Windows 10/8.1/8/7/XP/Vista. Also supports UEFI boot mode.

Easy to use 3 steps to transfer the files.

Transfer the files Transfer the important files of the computer without system.

Preview the files Preview the files while transferring the data.

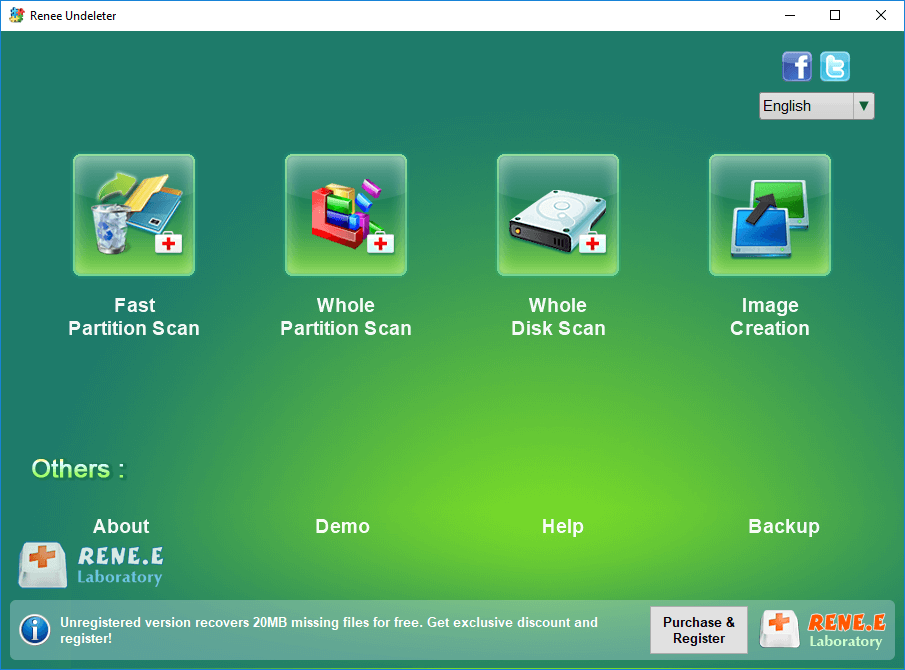
Free TrialFree TrialNow 2000 people have downloaded!

2. How to use Renee PassNow to transfer or restore data?

Step 1: Download and install Renee PassNow on another computer that can log in and run normally, then connect the USB disk to the PC.
Please select the (Create a Live USB) option under “Step 1: Select creation method” in the main interface.

Note: Before performing this operation, please make sure that the important files in the USB disk have been saved in other locations because the operation will delete all the data in the USB disk.

Step 2: Choose either (x64) or (x86) based on your system type. Then, click on the button labeled (Download Now) to start downloading the ISO file. Once the download is complete, click on the button labeled (Create USB) and then click on the (Eject USB) button.
use renee passnow to create usb to reset passnword
Step 3: Connect the boot device you have created to the computer where you want to transfer data. Turn on the computer and keep an eye out for the BIOS shortcut key, which will appear on the screen for a brief moment (usually only one or two seconds). Continuously press the shortcut key to enter the BIOS settings interface. From there, set the bootable USB drive as the first option in the boot sequence under Boot Priority. Save the changes and restart the computer.
select boot order
Step 4: After Renee PassNow is loaded, select (Data Transfer). If you need to transfer the data of the entire hard disk, you can select the (Data Backup) option.
data transfer
Step 5: You can simply click on any disk drive letter (C/D/E/F, etc.) to check for any missing important files. If any are found, it is highly recommended that you transfer them to an external disk.

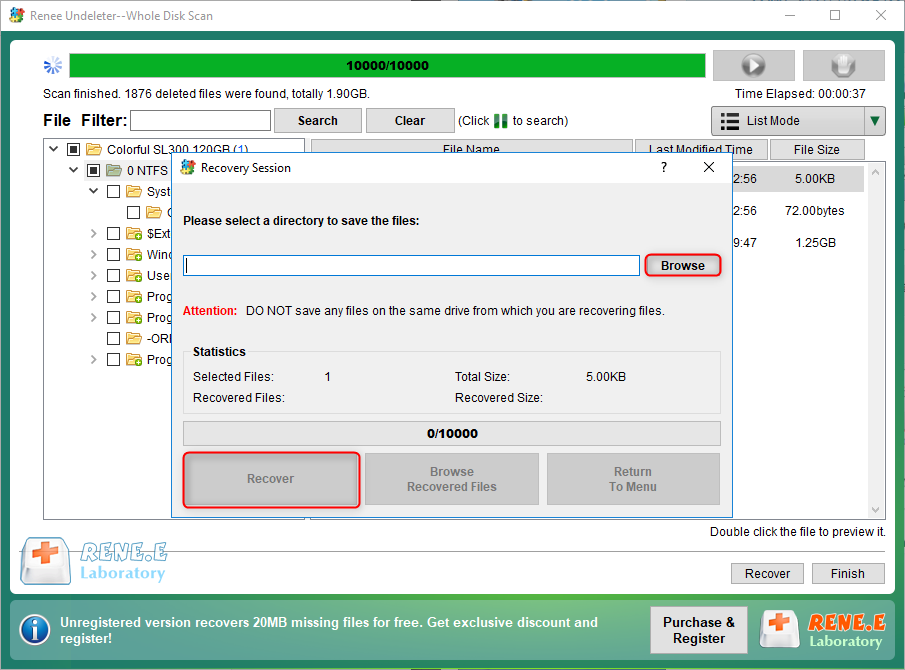
The process of transferring data is quite straightforward. For instance, if you wish to transfer data from the C drive to the G drive, you can first select the C drive on the top left, then select the G drive on the top right, and finally choose the files from the C drive. Once selected, click on the Copy button in the middle to easily transfer the disk data. In case you want to delete a file, you can also select the file and click on the Delete button in the middle. However, please note that this action cannot be undone, so proceed with caution.

data transfer in Renee Passnow
Step 6: If you find that there is data loss, please select the (Undeleter) option, and click the (Run) button.
data recovery function in Renee Passnow
Step 7: Select (Whole Disk Scan) to scan the target hard disk.
select whole disk scan in renee undeleter
Step 8: After the scan is complete, choose the file you want to recover and click the “Recover” button to initiate the data recovery process.

It is recommended to save the recovered file on an external disk. Once the recovery is finished, eject the USB disk and proceed with any necessary computer operations, such as maintenance, hard disk replacement, or system reinstallation.

recover files from whole disk scan with renee undeleter