

CRITICAL_PROCESS_DIED Windows 11: Systematic Troubleshooting & Data Safety Guide

Summary
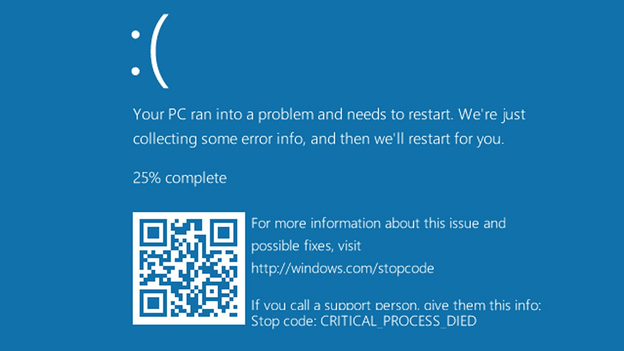
This guide addresses the critical_process_died windows 11 stop code by outlining systematic troubleshooting methods, including built-in Windows repair tools, driver management, and hardware diagnostics. Solution categories covered range from data backup procedures using bootable utilities to advanced recovery paths like System Restore and Windows reset options.

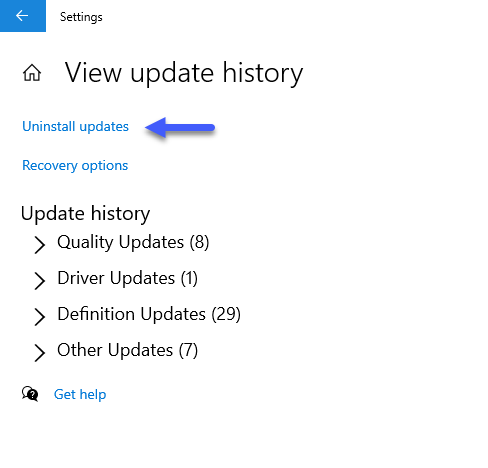
- Windows Update failures — Major rollouts like the Windows 11 24H2 preview wave in mid‑2025 and cumulative updates such as KB5074109 in January 2026 triggered widespread boot problems when installation didn’t complete cleanly or left system files in an inconsistent state.
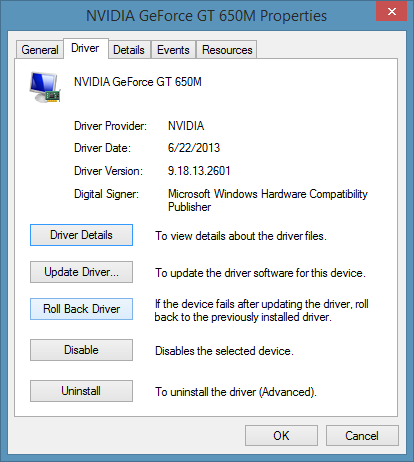
- Driver conflicts — GPU and chipset drivers pushed through Windows Update (for example, the NVIDIA Game Ready driver released on October 12, 2025) have occasionally caused immediate reboot loops or black‑screen failures after installation.
- Corrupted system files — Sudden power loss during storms, forced shutdowns, or malware incidents (notably the late‑2024 ransomware surge) often leave Windows unable to load essential boot components.
- Recent software installations — Kernel‑level anti‑cheat engines introduced by several major games in summer 2025, as well as aggressive antivirus suites, have been linked to BSODs and startup failures right after installation.
- Hardware changes — Users frequently report this error after adding RAM, swapping SSDs, or adjusting CPU undervolting/overclocking settings — especially following the 12th‑gen Intel microcode update in early 2025, which made unstable overclocks more sensitive.
- File system corruption — NTFS errors or bad sectors on aging SSDs/HDDs often surface after heavy write operations, such as large game installs or Windows feature updates.
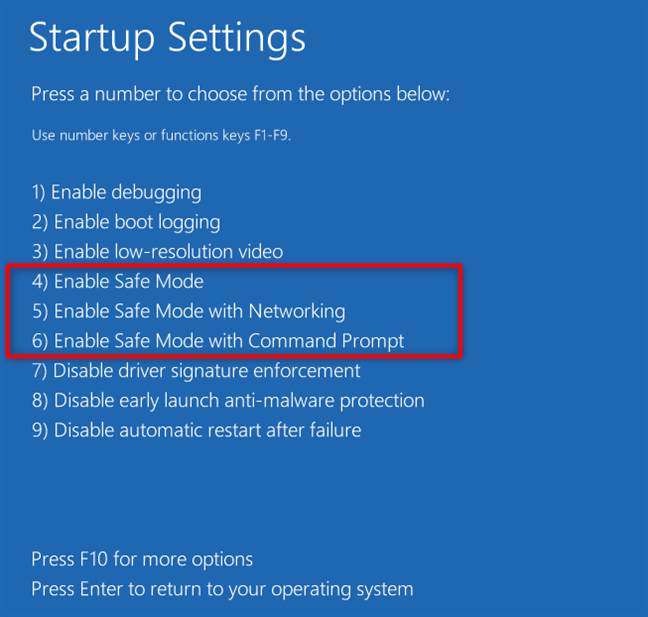
- Windows won’t reach the desktop or Safe Mode
- External drives don’t show up in the Recovery Environment
- The crash loop blocks you from logging in

Remove Windows Login Password 3 steps for whole password remove process.
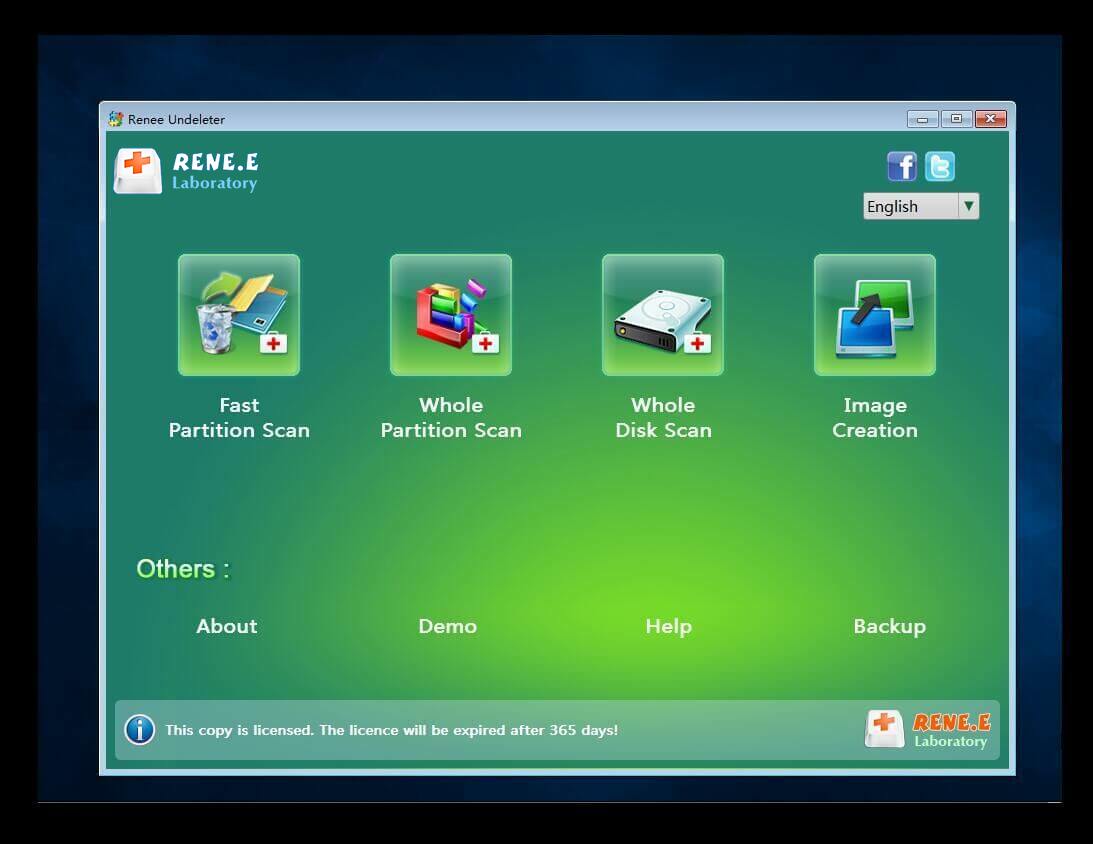
Recover the files Recover the deleted files without Windows system.
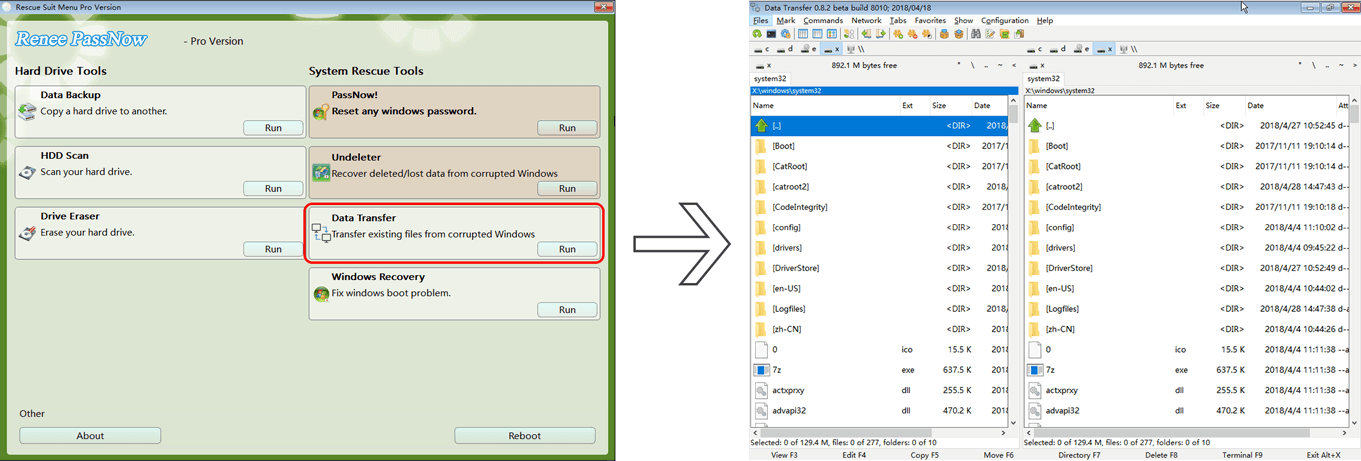
Transfer the data Transfer the important files of the computer with system.
Multifuctional Data transfer, data recovery, bootable problem recovery can be run without system.
Highly compatible Windows 11/10/8.1/8/7/XP/Vista. UEFI boot.
Remove Login Password Support Windows 11/10/8.1/8/7/XP/Vista. UEFI boot.
Recover the files Recover the deleted files without Windows system.
Transfer the data Transfer the important files of the computer with system.


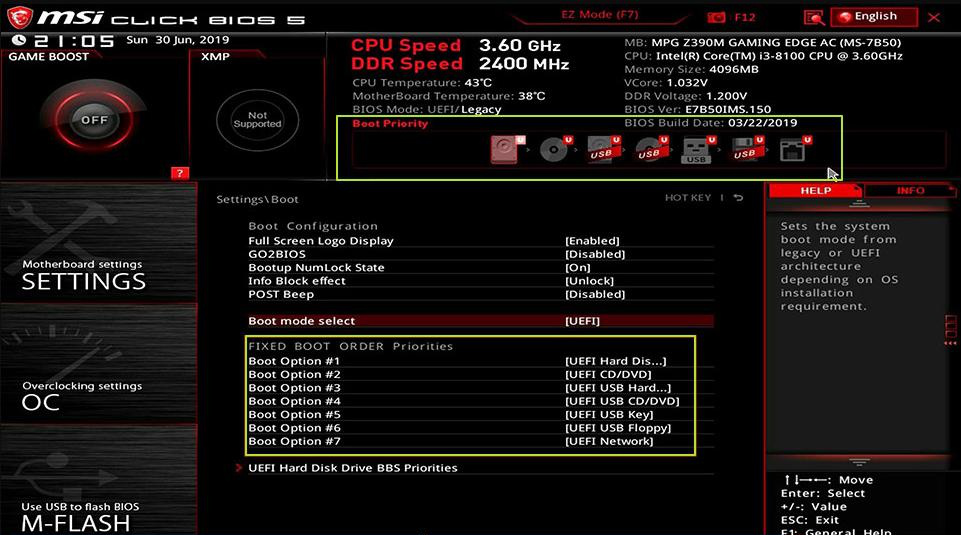
- Dell: F12
- HP: F9 or Esc
- Lenovo: F2 or Fn+F2
- ASUS/Acer: DEL or F2

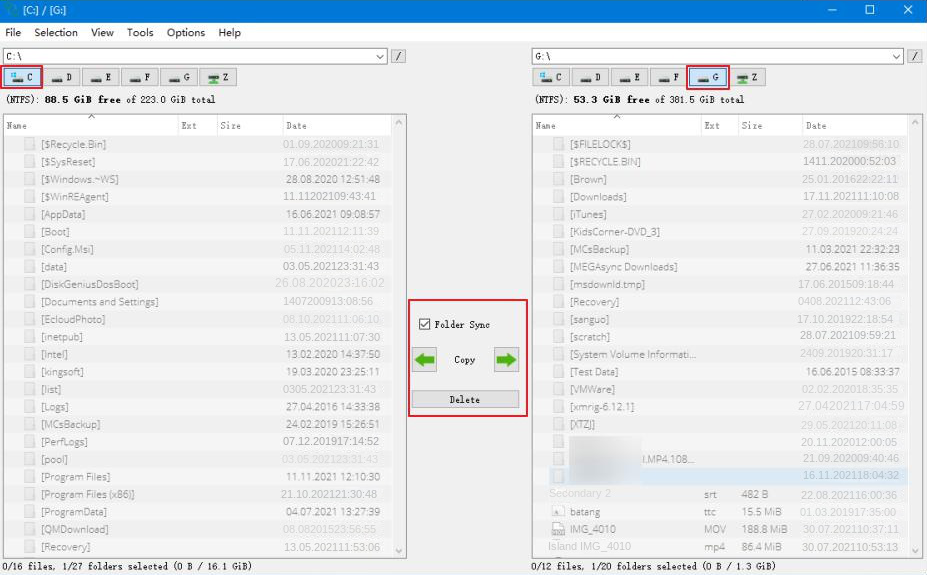
- Desktop
- Documents
- Pictures
- Downloads
- Videos
- Music


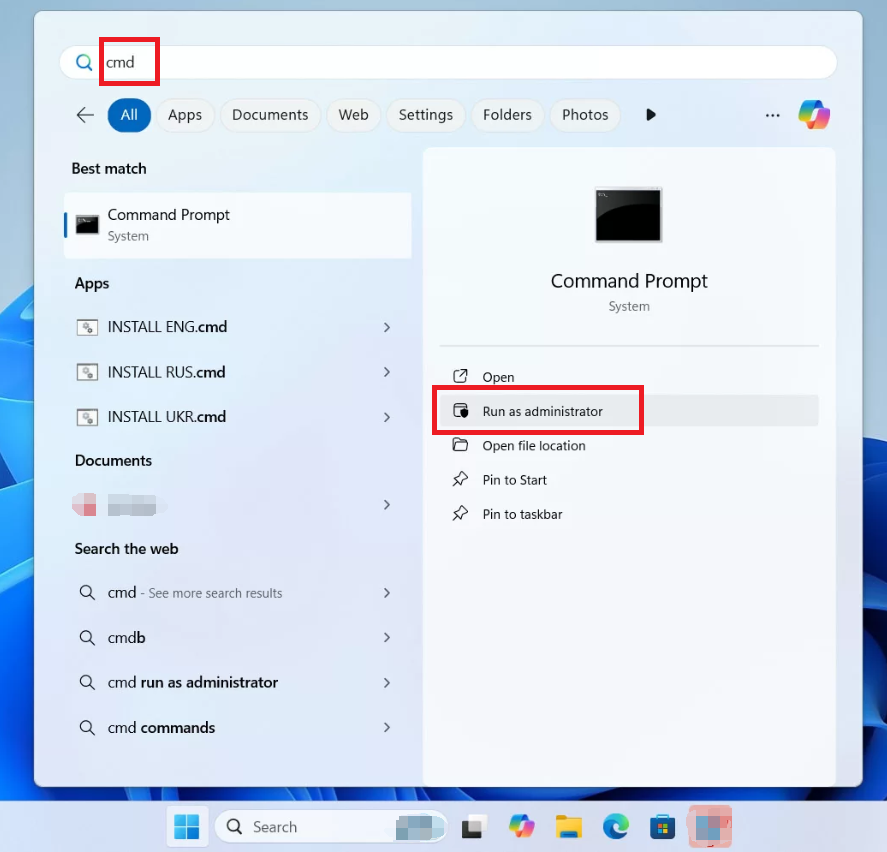
sfc /scannow
DISM /Online /Cleanup-Image /RestoreHealth
chkdsk C: /f /r

| Driver Type | Typical Manufacturers | Why It Triggers CRITICAL_PROCESS_DIED |
|---|---|---|
Graphics | NVIDIA, AMD, Intel | Direct memory access conflicts |
Network/Wi-Fi | Realtek, Intel, Killer | Kernel-level driver crashes |
Storage/disk controller | Intel RST, AMD | Corrupted filter drivers |
Audio | Realtek, NVIDIA HDMI | Interrupt conflicts |
Testing RAM with Windows Memory Diagnostic
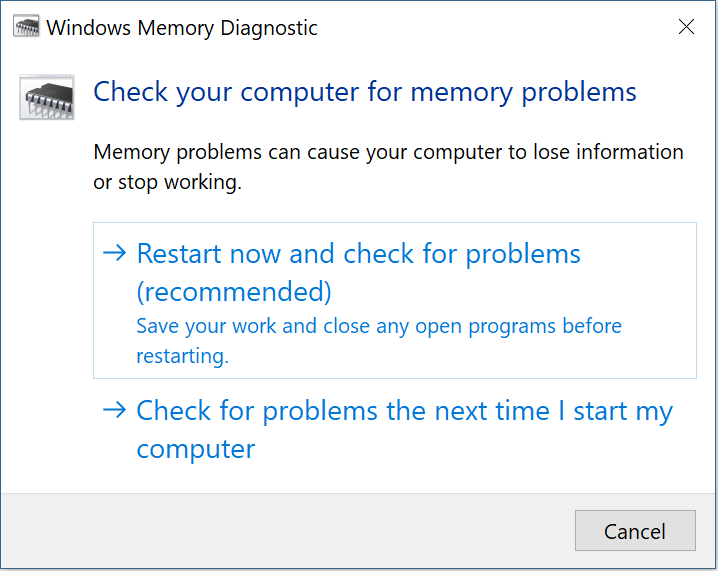
- No errors found → RAM is probably fine, but still try reseating the modules or testing one stick at a time
- Errors detected → You’ve got a faulty RAM module. Replace it.
Checking SSD/HDD Health
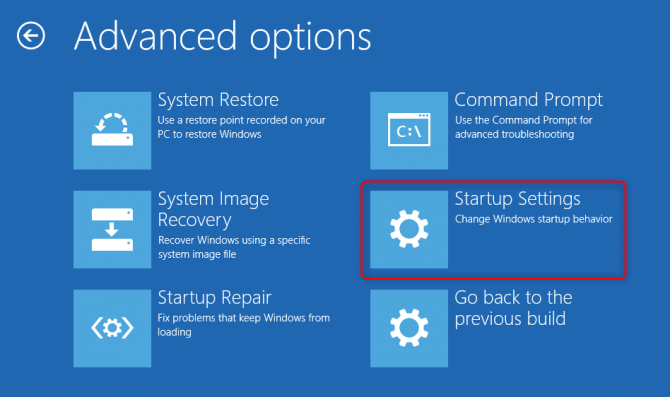
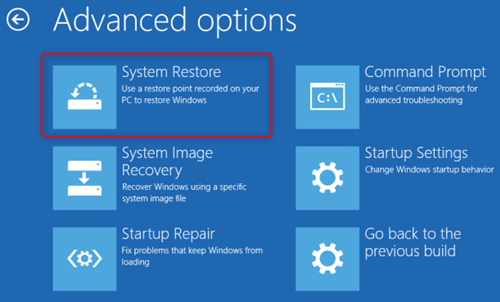
Using System Restore from WinRE

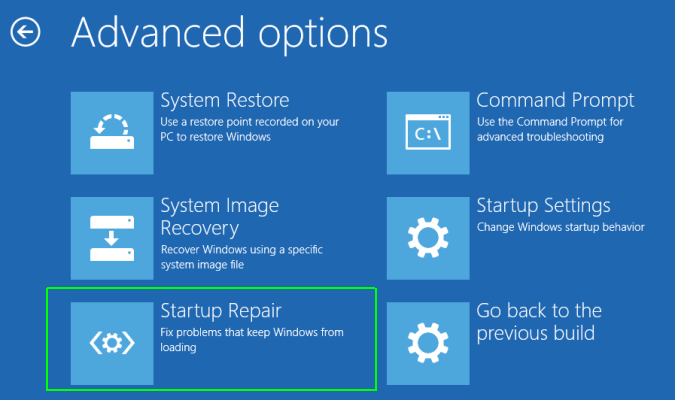
Startup Repair (Limited Effectiveness)
Reset This PC (Keep My Files Option)

When to Consider Clean Installation
Is CRITICAL_PROCESS_DIED the same as other BSOD codes like PAGE_FAULT_IN_NONPAGED_AREA or SYSTEM_SERVICE_EXCEPTION?
Why does this error appear specifically after Windows 11 updates, and how can I prevent it from recurring?
Can outdated BIOS/UEFI firmware trigger CRITICAL_PROCESS_DIED on specific laptop brands (HP, Dell, Lenovo)?
How do I recover data if Renee PassNow fails to create a bootable USB on my working computer (e.g., ISO download error or USB not recognized)?
Remove Windows Login Password 3 steps for whole password remove process.
Enable/Create Administrator One click for creating new administrator and enable the disabled account.
Widely Use New version supports UEFI boot model, which can be used on more computers, laptops and even surfaces.
Multifuctional Data transfer, data recovery, bootable problem recovery can be run without system.
Highly compatible Windows 11/10/8.1/8/7/XP/Vista.
Remove Login Password Support Windows 11/10/8.1/8/7/XP/Vista.
Enable/Create Administrator One click for creating new administrator and enable the disabled account.
Easy to use No need of any professional knowledge or password reset disk.
Relate Links :
Bug Check 0x000000EF: CRITICAL_PROCESS_DIED – Causes, Data Rescue & Proven Fixes
11-05-2026
John Weaver : The bug check 0x000000ef stop code indicates a critical Windows system process has terminated unexpectedly, triggering a full...
BSOD : CRITICAL_PROCESS_DIED Error (0x000000EF) - Data Recovery and System Repair

10-05-2026
Jennifer Thatcher : This comprehensive guide addresses the bsod critical_process_died error by prioritizing data recovery before any system repair attempts. It...
0x000000ef Windows 10: Complete Troubleshooting Guide for CRITICAL_PROCESS_DIED

09-05-2026
Amanda J. Brook : This comprehensive guide addresses the 0x000000ef windows 10 stop code by outlining systematic troubleshooting approaches for both bootable...
Critical Process Died ntoskrnl.exe: How to Fix the BSOD Error in Windows 10/11
17-03-2026
Jennifer Thatcher : This article analyzes the critical_process_died ntoskrnl exe Blue Screen of Death error in Windows environments. It outlines common...


User Comments
Leave a Comment