author avatar
    Specialist of Customer Service Dept.
 

Summary
Learn how to troubleshoot and resolve the issue "hard drive not detected in bios". Explore possible causes and advanced solutions.


hard drive not detected in bios

I. What are the reasons why the BIOS cannot recognize the hard disk?

The reasons why the BIOS cannot recognize the hard disk can be roughly divided into the following six types. You can preliminarily check the above reasons and find the best way to fix the error.
● The hard drive is not enabled in the BIOS
● The Serial ATA driver is not installed correctly
● The data cable is faulty or unplugged
● The drive is not spinning
● Incorrect jumper settings on the drive
● Hard disk failure
When faced with this issue, the first step is to inspect the computer motherboard and hard disk connector. Try reconnecting them and check for any faulty data cables or interfaces. Another option is to remove the hard disk and connect it to a different computer. If the problem persists, there are still other methods to try.

II. How to fix the problem that the BIOS cannot detect the hard disk?

1. Enable hard drive in BIOS

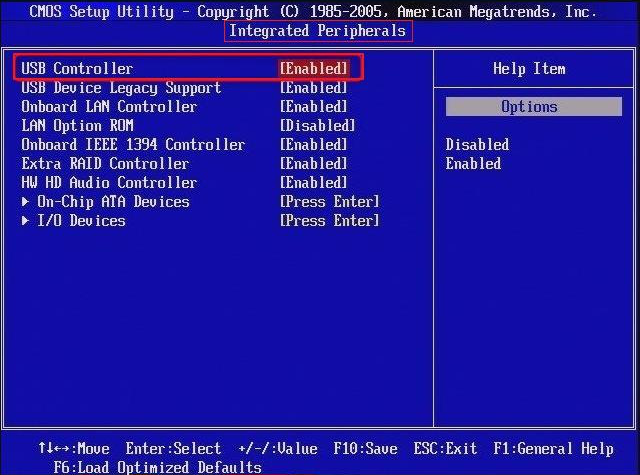
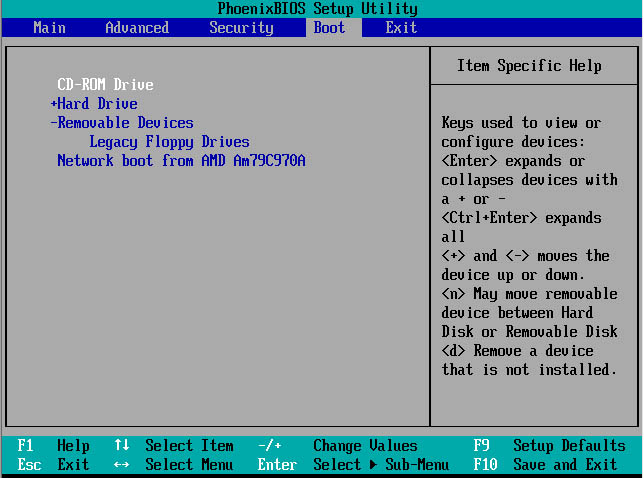
The BIOS interfaces of different brands may not be very similar. Let’s take one of the BIOS interfaces as an example to illustrate. However, if the BIOS interface is different, you can still refer to the following steps. The specific operation steps are as follows:
Step 1: Turn off the computer, then restart the computer, and then press the F2 / F8 / F11 or Delete key on the keyboard to enter the BIOS. See also: How to enter the BIOS and modify the boot order of computers of different brands.
Step 2: Use the arrow keys on the keyboard to select (Integrated Peripherals) and press the (Enter) key.
Step 3: Check the option on the right of (USB Controller), if it is (Disabled), please change it to (Enabled).
Step 4: Press (F10) to save the settings, press (ESC) to exit the BIOS. Next, restart the computer to see if the hard drive can be detected.
BIOS enable hard drive

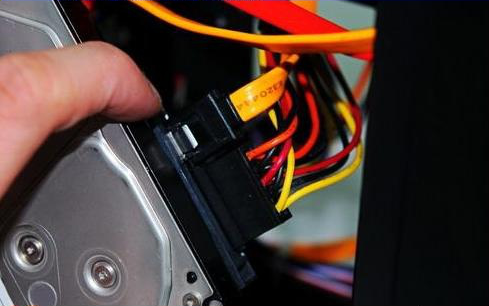
2. Check the connection between the hard disk data cable and the power cable

If the issue “hard drive not detected in bios” still occurs, there are a few steps you can take to troubleshoot the issue. First, make sure that the data cable and power cable are properly connected to the hard drive. You can try unplugging and reconnecting them while the computer is shut down. Additionally, try connecting the hard drive to a different SATA interface on the motherboard or replacing the data cable altogether to see if that resolves the problem.
HDD data cable and power cable

3. Update the driver of the hard disk

Let’s learn how to update the driver, the specific steps are as follows.
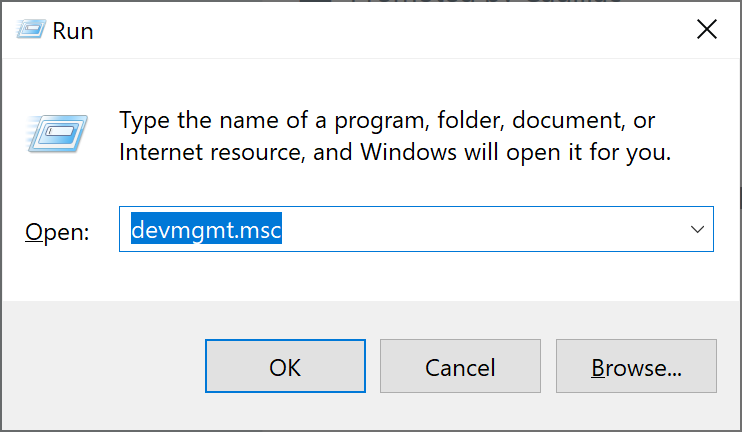
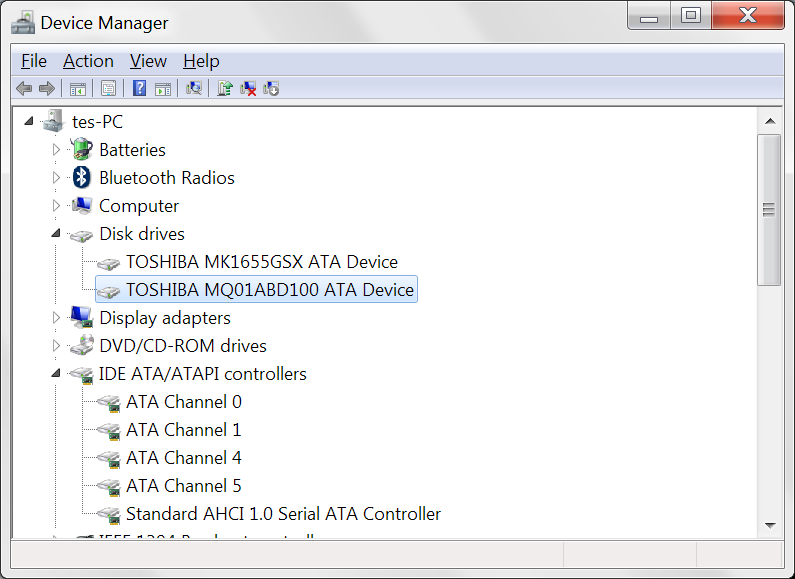
Step 1: Run the Windows computer, connect the hard disk to the computer, and then press the (Windows+R) keys on the keyboard at the same time to open the running window. After entering the command (devmgmt.msc), click the (OK) button to enter the Device Manager.
run the command devmgmt
Step 2: Next, in the “Disk Drives”, right-click to select the target hard disk, and select the (Update Driver) option.
Update Driver
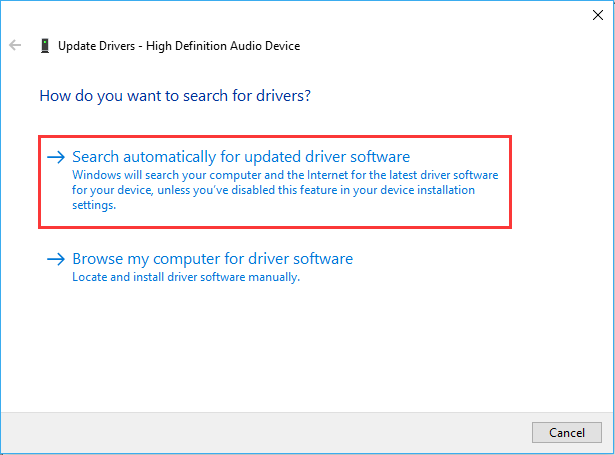
Step 3: Next, select the (Search automatically for updated driver software) option, and then follow the instructions in order to complete the update of the hard disk driver. After the driver update is complete, restart the computer to see if the problem is resolved.
Search automatically for updated driver software

4. Run the CHKDSK command to check and repair the faulty hard disk

Repairing a damaged hard drive with the help of the CHKDSK command is very simple, and the specific steps are as follows:
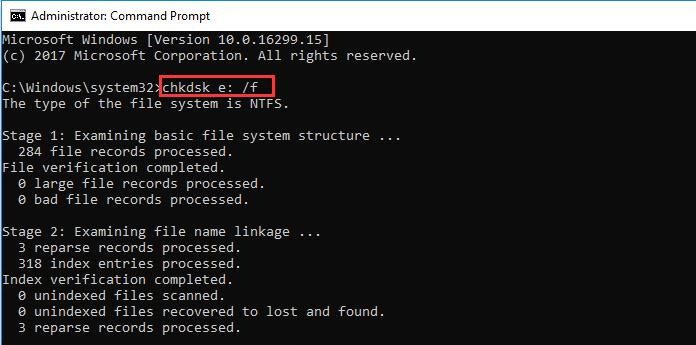
Step 1: Connect the hard disk to the computer, directly search (cmd) in the search box in the lower left corner, and select (run as administrator) to open the command prompt tool.
run as administrator
Step 2: In the opened command prompt window, enter the command ( chkdsk e: /f ) (e for the undetectable hard drive letter), and press the (Enter) key to run the repair command. After the inspection and repair process of the hard disk is completed, enter (Exit) to exit the command prompt.
Enter the disk repair command

5. Initialize the hard disk and create a new simple volume

The issue “hard drive not detected in the BIOS” often arises with new hard drives. If the hard drive has not been initialized, it will not be able to store data, making it necessary to initialize and create a new simple volume. The specific operation steps are as follows:
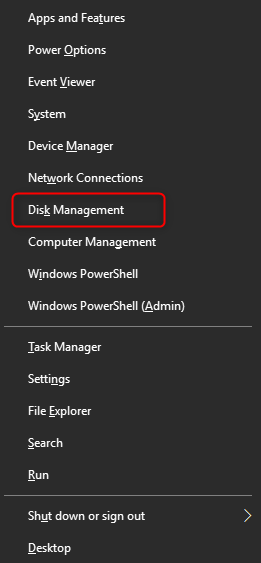
Step 1: Connect the hard disk to the computer, then press the (Windows+X) keys on the keyboard at the same time. Then in the pop-up list, select the (Disk Management) option.
open windows disk management
Step 2: Right-click the removable hard disk whose status is “Not Initialized”, and select the (Initialize Disk) option.
Step 3: Select the partition style MBR or GPT and click (OK). Choose GPT if your hard drive is 2TB or larger. Select MBR if the MBR is less than 2TB. also may click here Check out the detailed introduction of MBR and GPT.
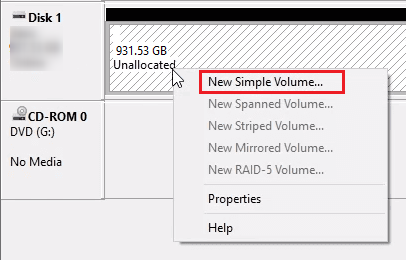
Step 4: After the hard drive is initialized, the status of the device will change to “Online”. Right-click on the unallocated space, select (New Simple Volume), and proceed to the next step.
create simple volume for SD card
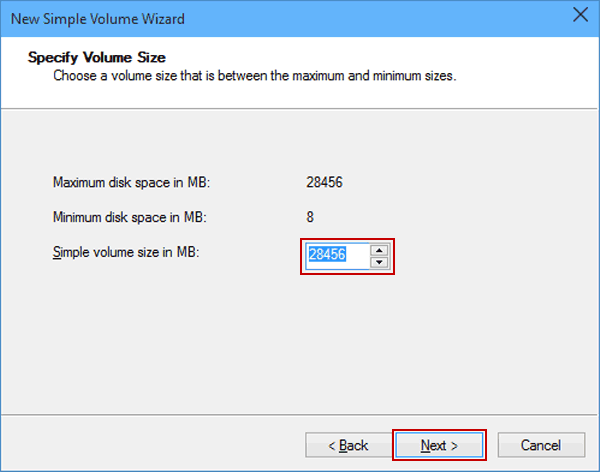
Step 5: In the New Simple Volume Wizard, set the partition size and click (Next).
set the volume size in new simple volume wizard
Step 6: Next, select the drive letter for the partition of the hard disk, and click (Next).
Step 7: Select the file system as NTFS, select the default value in “Allocation Unit Size”, and set the partition name in “Volume Label”. Then select the (Perform a quick format) option and click (Next). Finally, click (Finish) and that’s it.
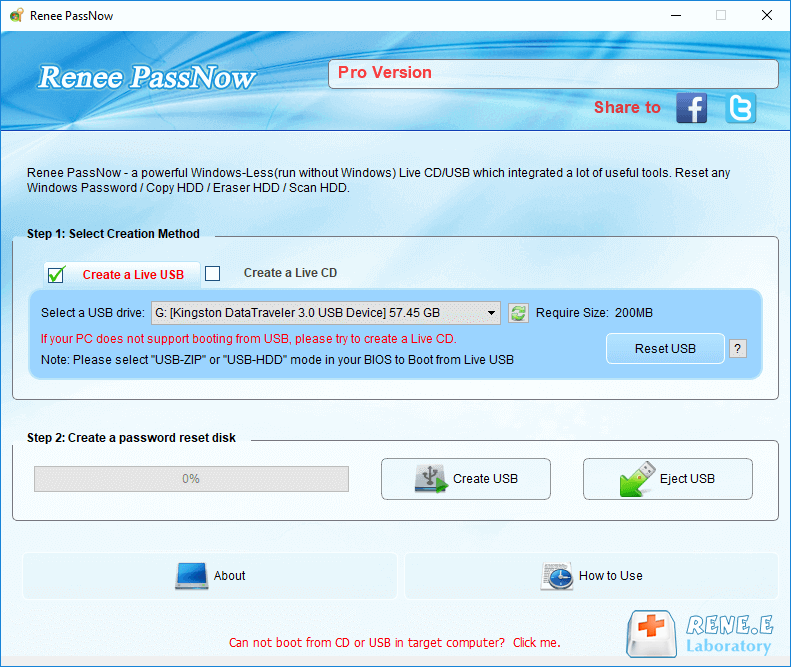
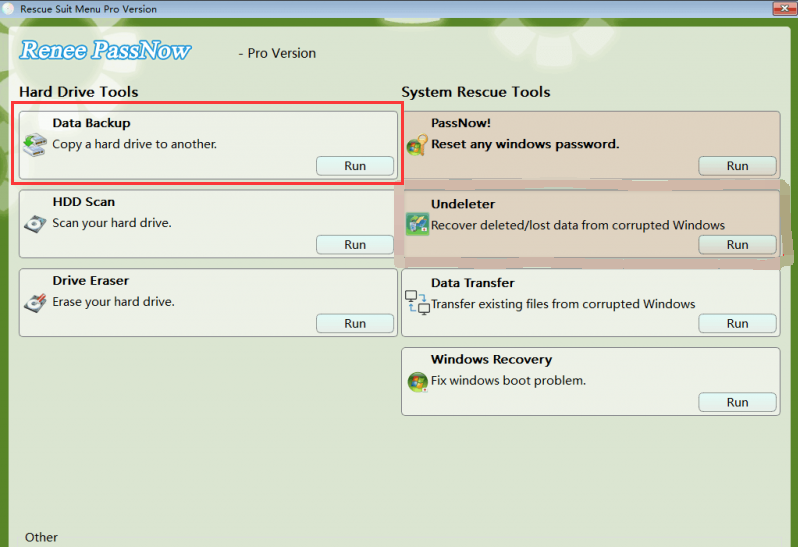
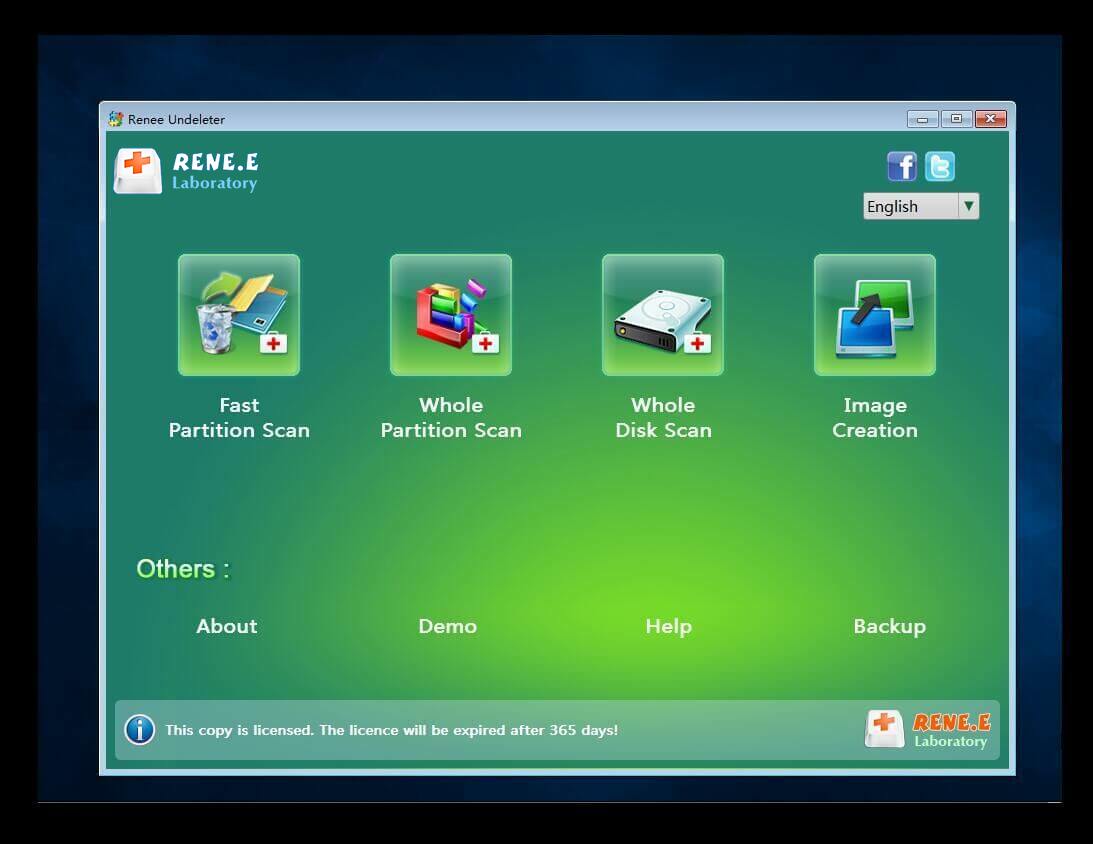
If the issue has been resolved using the aforementioned steps, the BIOS will be able to recognize the hard drive. However, if the hard drive is powered on and data is lost, you can utilize specialized data recovery software to scan and retrieve the missing file data. In the case of a failed system disk, where the Windows system cannot be accessed, you can attempt to transfer or restore the data using Renee Passnow without having to enter the Windows system. Below is a detailed explanation.

III. How to transfer or restore hard disk data?

1. What is Renee Passnow?

Renee PassNow is a professional system rescue software, which can help Windows users clear Windows account passwords, create new administrator accounts; restore disk/memory card data, recover data after hard disk formatting; transfer disk files; erase or scan disk files wait. In addition, this software also supports repairing Windows system problems, such as: repairing MBR boot records, DBR error parameters, 0xc00000e, Windows system startup failure, and some problems that cause black screen or blue screen, etc. As a system rescue tool with various functions, it is perfectly compatible with multiple systems including Windows 10/8.1/8/7/XP/Vista, and can meet the system rescue needs of different users.
Hot Topic - ADsRenee PassNow – 3 Steps to transfer data from the crashed system

Easy to use 3 steps to transfer the files.

Transfer the files Transfer the important files of the computer without system.

Preview the files Preview the files while transferring the data.

Multifuctional Data recovery, Windows password reset, bootable problem recovery can be run without system.

Highly compatible Windows 10/8.1/8/7/XP/Vista. Also supports UEFI boot mode.

Easy to use 3 steps to transfer the files.

Transfer the files Transfer the important files of the computer without system.

Preview the files Preview the files while transferring the data.

Free TrialFree TrialNow 2000 people have downloaded!

2. How to transfer or restore data using Renee Passnow

Using Renee Passnow to transfer data files is very simple, even if you are a computer novice, you can learn how to operate in a few minutes, let’s learn the detailed steps together.

① Create a live USB or CD

Step 1: Download and install Renee Passnow on other computers that can log in and run normally, then connect the external U disk to the PC through the USB port, run Renee Passnow, and then check the (Create a live USB) option.

Note: Before performing this operation, please make sure that the important files in the USB flash drive have been saved in other locations because the operation process will delete all the data in the U disk.

create a boot media with renee passnow
Step 2: Next, select (x64) or (x86) according to the system type, click the (Download Now) button to download the ISO file, click the (Create USB) button after the file is downloaded, and click the (Eject USB) button.
use renee passnow to create usb to reset passnword
Step 3: Connect the boot device you have created to the computer that requires data transfer. Turn on the computer and a shortcut key will appear on the screen to enter the BIOS (this interface may only be displayed for a brief moment, possibly only one or two seconds). Continuously click the BIOS shortcut key to access the BIOS settings interface. In the BIOS (Boot) interface, select the USB device or CD-ROM drive as the preferred boot item and save the changes before exiting. For detailed instructions on how to enter the BIOS and modify the boot sequence, please refer to: How to enter BIOS and modify the boot sequence.
Note: If you create a rescue U disk, select (Removable Devices) as the first boot item, and if you create a rescue CD, select (CD-ROM Drive) as the first boot item.
BIOS menu

②Transfer/backup hard disk data

After creating the rescue U disk and setting the BIOS to boot from the USB device, the function page of Renee Passnow will be loaded, and the steps to transfer the hard disk data are as follows:
Step 1: After Renee Passnow is loaded, select the (Data Backup) option, this function can copy/clone the hard disk data to another hard disk drive.
passnow data backup
Step 2: Select the hard disk to transfer data in the (source) list, select the hard disk to save the transferred data in the (destination) list, and finally click (clone) and wait for the cloning to complete to successfully transfer the hard disk data.

③ Recover data from hard disk

If you only need to restore a small amount of hard disk data, you can also select the (Undeleter) option, and the steps are as follows:
Step 1: Select (Undeleter) option in Renee Passnow function menu.
data recovery function in Renee Passnow
Step 2: Select (Whole Disk Scan) to scan the target hard disk, this mode can scan hard disk data comprehensively.
scan the whole partition with renee passnow recovery function to reinstall windows 7
Step 3: After the scan is complete, select the files to be recovered, click the (Recover) button to execute the recovery command, please save the hard disk files in other disks.
recovering from disk in undeleter disk scan
The above is the method to transfer or restore data from an unbootable system. After transferring/recovering data, please eject the USB flash drive, and then repair the computer. You can refer to the solution that the Windows computer cannot start.