author avatar
    Senior Program Developer
 

Summary
Learn how to clone your Mac system to a solid-state drive (SSD) for seamless hard disk replacement or booting through an external SSD. Windows users can also find guidance here.


Mac system clone to SSD

I. The method of cloning Mac system to SSD

1. Use Mac Disk Utility's Restore option to clone the Mac system to the SSD

The Mac system is equipped with a powerful disk tool. When you want to clone the Mac system or hard disk to other hard disks, this tool can help you achieve this purpose. However, in the Mac system, cloning the hard disk data to other hard disks is called “recovery” and involves restoring one hard drive to another. The following are the specific steps:
Step 1: Connect the prepared external SSD to the Mac computer. Hold down (Command + R) while starting/restarting your Mac, this will bring you to the Apple Recovery menu interface.
mac keyboard command r
Step 2: When the Apple Logo appears on the screen, please release (Command + R) and wait for the progress bar to finish loading.
The Apple logo appears on the screen
Step 3: In the macOS Utilities window, select (Disk Utility), and then click (Continue).
disk tool on mac
Step 4: Open Disk Utility and click “Display” > “Display All Devices.” Select your external SSD in the sidebar, then click the “Restore” button. A pop-up will warn that the external SSD will be erased and replaced with the selected volume’s data; this is irreversible, so ensure the SSD’s data is backed up beforehand.

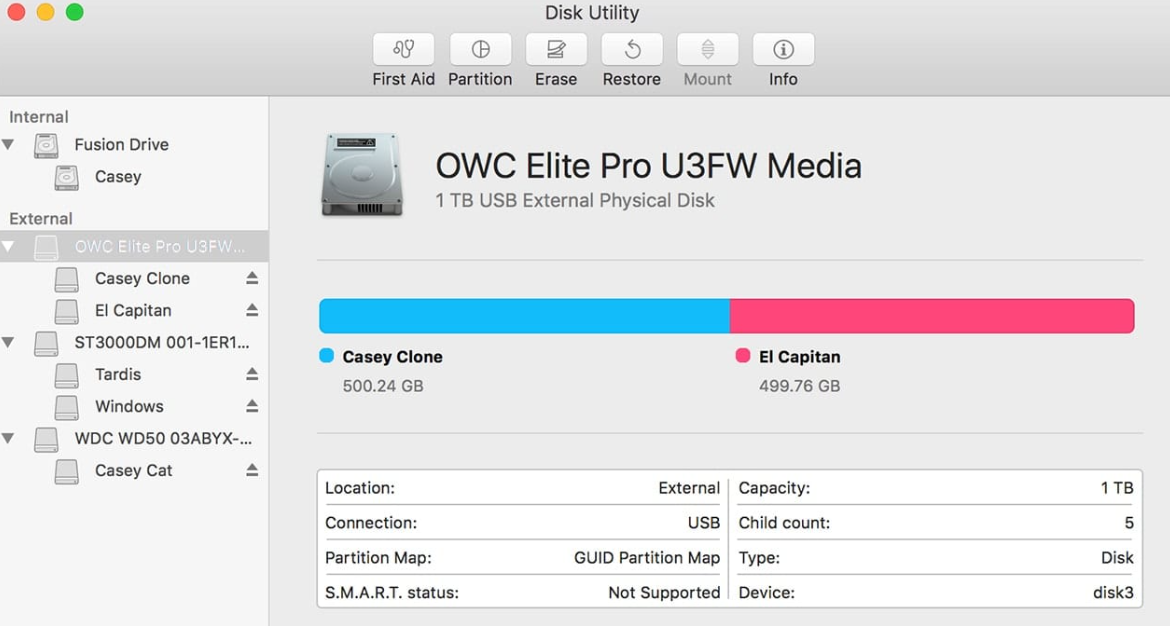
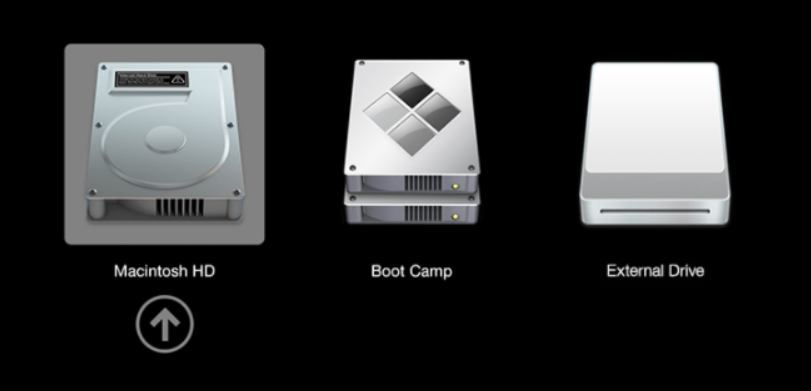
For a full system disk migration, choose the drive (e.g., APPLE SSD SMO128G Media), not the disk image (e.g., Apple disk image Media) with the macOS base system.

Disk Utility Mac
Step 5: Then click on the (Restore) button, wait for the recovery process to complete, and finally click on (Finish).

2. After the Mac system is cloned, how to boot from the SSD?

Step 1: After the Mac system is cloned/restored to the SSD, please keep the SSD connected to the computer. Then restart the Mac.
Step 2: During the restart process, hold down the (Option) key.
Step 3: A boot switch menu will then appear where you can select the cloned SSD.
Step 4: Click the arrow icon under the SSD.
mac SSD

II. Expansion: How to clone/migrate Windows system to SSD?

1. Use Renee Becca to migrate Windows system to SSD

Renee Becca is a comprehensive tool designed for system and hard disk data backup and restoration. This software ensures the protection of crucial data such as programs, system settings, emails, photos, videos, documents, and bookmarks. Additionally, it provides versatile options for disk and system data cloning, including hard disk cloning, partition cloning, and system migration to meet a variety of user needs.
Hot Topic - ADsProfessional Data Backup & Restore Software - Renee Beccadata bacup software Renee Becca

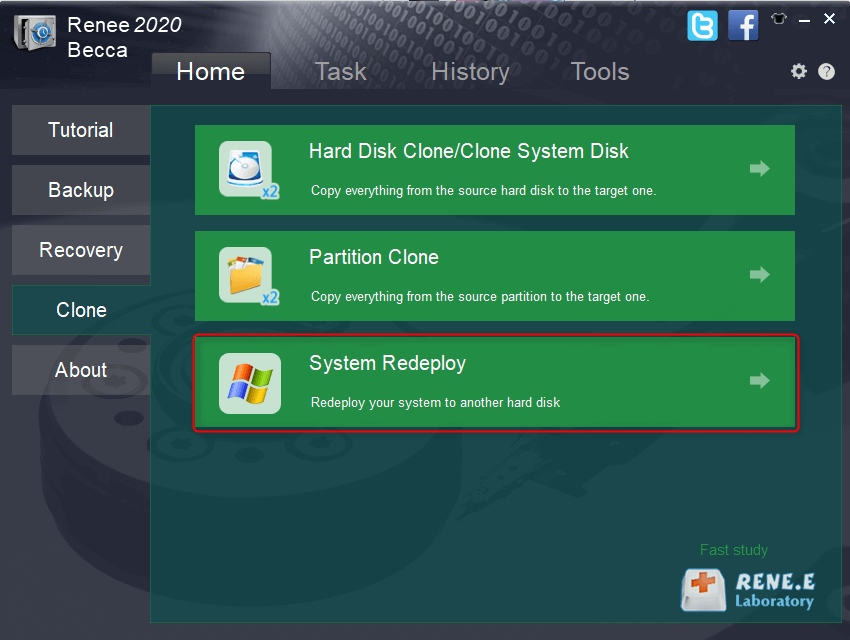
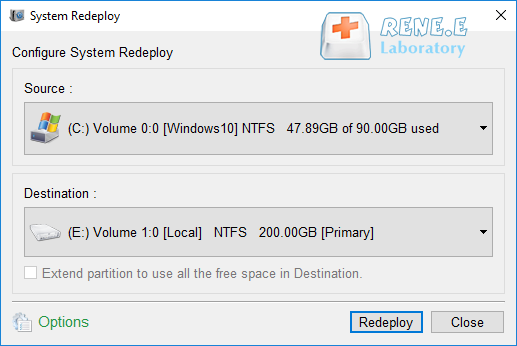
Provides multiple functions like backup, restore, clone, system migration.

Clone all data (including system) in HDD to smaller SSD or larger HDD. Disk could boot PC after clone finished.

Supports to migrate Windows to SSD with a few clicks.

4K alignment will be processed when clone disk, migrate system, restore disk or system.

Backup & restore system/disk/folder. Auto backup plans are available.

Provides functions like backup, restore, clone, system migration.

Clone all data (including system) in HDD to smaller SSD or larger HDD.

Backup & restore system/disk/folder. Auto backup plans are available.

Compatible with: Windows 10 / 8.1 / 8 / 7 / Vista / XP / 2008 / 2012(32bit/64bit) / Server 2008

Free TrialFree Trial

5000 people have downloaded and made the disk clone successfully!

With the help of Renee Becca, it is very convenient to migrate the Windows system to a solid-state hard drive and turn it into a system disk. The specific steps are as follows:
Step 1: Connect the SSD to the computer. Download, install, and run Renee Becca on the computer. Select the (System Redeploy) option in the main interface.
migrate system with renee becca
Step 2: Select the new SSD as the target location and the system partition, which is usually chosen by default, as the source. Once selected, click the “Redeploy” button to start the process. Wait until the progress bar reaches 100% to confirm a successful system migration.
select a destination to redeploy system with renee becca
Kind tips Ensure the new SSD’s total capacity exceeds the size of the system being migrated. Since all data on the SSD will be erased during migration, verify if there’s important data on the target disk and perform a file backup beforehand. Post-migration, consider optimizing the SSD to fully leverage its performance benefits.

2. How to boot from SSD after the Windows system is migrated to SSD?

After the system migration is successful, you can follow the steps below to set up to boot from the SSD.
Step 1: Insert the solid-state drive into the computer. If the SSD can be installed on the computer, it can be installed when the computer is turned off.
Step 2: Once the SSD is installed, power on your computer. During the boot-up process, press the ESC, F1, F2, F8, or F10 key to enter the BIOS.

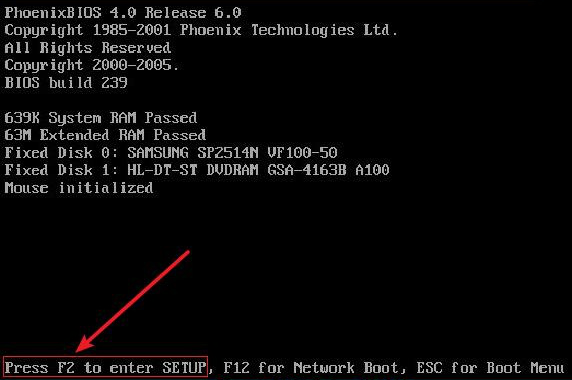
Pay attention to the on-screen prompts that typically indicate the correct key with a message such as “Press (F2) to enter BIOS settings.” It may be useful to take a screenshot or record a video as this message can appear briefly.

Press shortcut key to enter BIOS setup
Step 3: To enter the BIOS, restart your computer, and during the boot process press the necessary key (often F2, Del, or Esc). Once in the BIOS, navigate to the ‘Boot’ menu using the arrow keys. Select the SSD by using the up and down arrow keys. To make the SSD the primary boot device, press the '+' key to move it to the top of the list. Save your changes by pressing F10, and restart your computer to boot from the SSD.
Change the BIOS boot order