author avatar
    Technology Manager of Test Dept.
 

Summary
Learn how to fix normal boot failure on Windows 10 with our comprehensive guide. Keep your machine running smoothly with Windows 10 UEFI Boot Repair. Besides, you can transfer the data or recover the important files before the repairing.


Windows 10 UEFI Boot Repair

I. What is UEFI, and what is the difference between it and BIOS?

The full name of UEFI is universal Extensible Firmware Interface, that is, Unified Extensible Firmware Interface. It is an extensible and standardized unified firmware interface specification. It uses modularization, dynamic linking and C-style constant stack transfer methods to build systems. Get rid of the complex 16-bit assembly code of traditional BIOS. A personal computer system specification that defines the software interface between the operating system and the system firmware.
The full name of BIOS is Basic Input Output System, which is the basic input output system. It is a set of programs that are solidified on a ROM chip on the motherboard of the computer. It stores the most important basic input and output programs of the computer, the self-test program and the system self-starting program after booting. It can read and write the system settings from the CMOS. specific information. As an industry-standard firmware interface, its main function is to provide the computer with the lowest and most direct hardware setting and control.
Windows 10 UEFI boot repair is a process that provides a way to repair the Windows 10 boot process. This process is based on the Unified Extensible Firmware Interface (UEFI) specification, which is a modern alternative to the legacy BIOS. As such, this process can provide numerous benefits, such as providing faster booting compared to the BIOS and enabling the use of graphical user interfaces with mouse support. In addition, UEFI can enable the use of larger hard drives, including drives of up to 2TB or more and four primary partitions.

The UEFI specification allows drivers to be loaded at boot-time in order to modify certain OS kernel initialization procedures or even prevent them from running. However, this cannot be done with a boot-time driver as a large part of kernel initialization happens before any drivers are loaded. This is due to the presence of Kernel Patch Protection (KPP), also known as PatchGuard, which is a security feature that prevents modification of the Windows kernel at runtime. In addition, Microsoft’s Driver Signature Enforcement (DSE) requires that all drivers must be signed with a valid kernel mode signing certificate when loaded in Windows, unless test signing mode is enabled.

To address these concerns and enable Windows 10 UEFI boot repair, a UEFI driver called EfiGuard has been developed. This driver patches certain parts of the Windows boot loader and kernel at boot time in order to effectively disable KPP and optionally DSE. With these mechanisms disabled, it is possible to modify the Windows 10 boot process for purposes such as repairing or reinstalling an operating system and replacing damaged system files.
Tips Although the boot mode is divided into UEFI and BIOS, many users still collectively call it BIOS. In order to further distinguish the two, some users currently call UEFI firmware UEFI BIOS, and BIOS is called Legacy BIOS (traditional BIOS).
After confirming that the boot mode matches the system hard disk partition type, if there is still a startup problem, you can refer to the following methods to fix it.

II. How to fix UEFI boot issues on Windows 11/10/8/7?

1. Perform Windows Startup Repair

Windows Startup Repair fixes problems that prevent Windows from loading and replaces missing or damaged files. The following takes Windows 10 as an example to introduce the detailed steps of Startup Repair. If you want to know about the Windows 7 startup repair function, you can click here to view the detailed graphic steps.
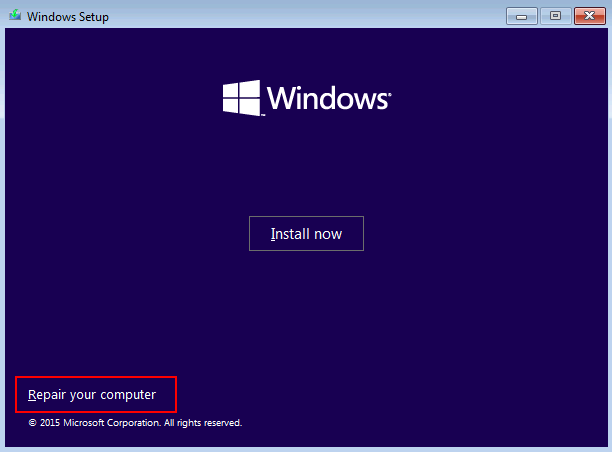
Step 1: Insert the Windows 10 installation disk (DVD or USB flash drive) into the computer. Continuously click F2 or F10 or DEL or ESC shortcut keys (varies with the computer brand) to enter the BIOS setting interface when starting up, set the first boot sequence to the Windows installation disk, and then save the settings to make the computer start from the installation disk and install Windows. Select the (Repair Your Computer) option on the program’s “Install Now” interface to enter the recovery environment.
Repair your computer
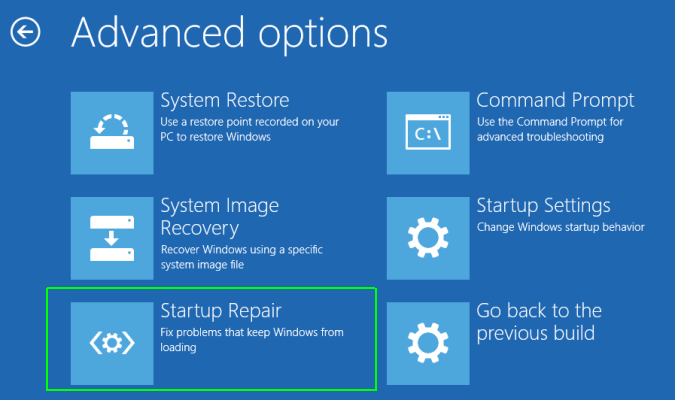
Step 2: After entering the recovery environment, select (Troubleshooting)>(Advanced Options)>(Startup Repair). After waiting for Windows Startup Repair to complete, restart the computer to see if the problem is resolved.
startup repair in Windows

2. Repair the UEFI bootloader using the command line

Next, we will teach you how to restore UEFI boot loader, which is applicable to Windows 10/8/7 system.
Step 1: Connect the Windows installation medium to the computer, set the installation medium as the first boot device in UEFI BIOS, save the settings and restart the computer, when the computer starts from the installation medium, it will enter the installation program, select (Repair computer) option.
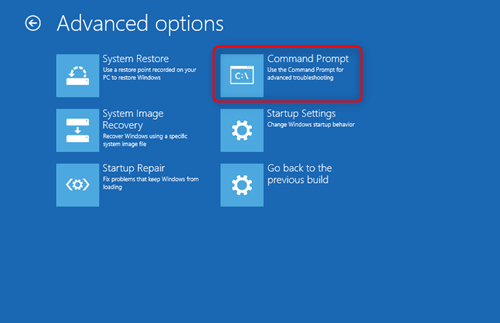
Step 2: Then find the (Command Prompt) option. The location of this option varies depending on the system version. You can refer to the tips below.
● Windows 7: Select the operating system and click (Next). Choose (Command Prompt) from the menu.
● Windows 8/8.1: Select (Troubleshoot), choose (Command Prompt) from the menu.
● Windows 10: Choose (Troubleshoot) > (Advanced Options) > (Command Prompt).
select command prompt in advanced option
Step 3: Next enter and run the following command. Press the (Enter) key after entering each command.
(Diskpart)
(List disk) (will list all disks in the computer)
(select disk 0) (select disk 0)
(list vol) (list all volumes in disk 0)
In the volume list, we need to find the EFI partition, which is usually on the system disk, and the size is about 100MB, and the file system is FAT32. According to the figure below, volume 2 is the EFI partition we are looking for, please continue to enter the following commands and press (Enter) after each command.
(select volume 2) (2 is the volume number of the EFI partition)
(assign letter=z) (Assign a drive letter Z to this partition to repair it, and it can be replaced with other letters according to the actual situation)
(exit) (exit diskpart)
Step 4: Next, continue to repair the boot record through the command prompt, enter and run the following commands in sequence.
(cd /d Z:\EFI\Microsoft\Boot\) (Z refers to the drive letter just assigned to the FEI volume)
(bootrec /FixBoot)
Step 5: Rebuild the BCD storage afterwards. The next steps are the same for all operating systems. First run the (ren BCD BCD.old) command to back up the old BCD, and then enter (bcdboot C:\Windows /l zh-cn /s z: /f ALL) to rebuild the BCD. After everything is done, you can remove the Windows installation media and restart your PC to check if the problem is resolved.
Command description:
C: Windows refers to the location where the Windows system is installed. If you installed the system on the D drive, you can change C to D.
/s z: In /f ALL, /s specifies the volume number of the system partition, and z is the letter you assign to the EFI volume, which can be modified according to the actual situation. /f specifies the firmware type, specifying ALL after /f means that BCDBoot will create ALL and EfiMicrosoftBoot directories at the same time, and copy all necessary boot environment files for BIOS and UEFI to these directories.

Kind tipsFor detailed information about the BCDBoot command line, you can click here to view Microsoft’s official instructions.
Above, that’s how to fix UEFI boot issues on Windows 11/10/8/7. If none of the above methods can solve the problem, and the system still cannot be started, you can use a professional system rescue tool to transfer or restore important files in the computer, and then perform computer maintenance or other repair operations. Here’s how to do it in detail.

III. Use Renee PassNow to transfer or recover important data when the system fails to boot

1. What is Renee PassNow?

Renee PassNow is a professional system rescue software, which can help Windows users clear Windows account passwords, create new administrator accounts; restore disk/memory card data, recover data after hard disk formatting; transfer disk files; erase or scan Disk files, etc. In addition, this software also supports repairing Windows system problems, such as: repairing MBR boot records, DBR error parameters, 0xc00000e, Windows system startup failure, and some problems that cause black screen or blue screen, etc. As a system rescue tool with various functions, it is perfectly compatible with multiple systems including Windows 10/8.1/8/7/XP/Vista, and can meet the system rescue needs of different users.
Hot Topic - ADsRenee PassNow – 3 Steps to transfer data from the crashed system

Easy to use 3 steps to transfer the files.

Transfer the files Transfer the important files of the computer without system.

Preview the files Preview the files while transferring the data.

Multifuctional Data recovery, Windows password reset, bootable problem recovery can be run without system.

Highly compatible Windows 10/8.1/8/7/XP/Vista. Also supports UEFI boot mode.

Easy to use 3 steps to transfer the files.

Transfer the files Transfer the important files of the computer without system.

Preview the files Preview the files while transferring the data.

Free TrialFree TrialNow 2000 people have downloaded!
2. How to use Renee PassNow to transfer or recover data?

When the Windows system cannot start normally, you can create a startup disk through Renee PassNow, and then start the computer through the startup disk, and then use the functions provided by the software to transfer or restore data. Specific steps are as follows:
Step 1: Download and install Renee PassNow on other computers that can log in and run normally, then connect the U disk to the PC, run Renee PassNow, and then check in “Step 1: Select creation method” (Create a Live USB) option. (Note: Before performing this operation, please make sure that the important files in the U disk have been saved in other locations, because the operation process will delete all the data in the U disk.)
Step 2: Next, select (x64) or (x86) according to the system type, click the (Download Now) button to download the ISO file, click the (Create a Live USB) button after the file is downloaded, and click the (Eject USB) button.
use renee passnow to create usb to reset passnword
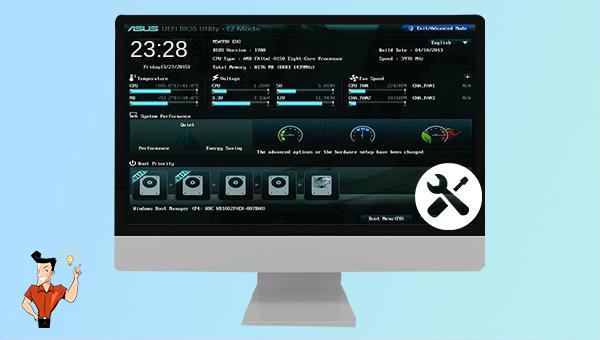
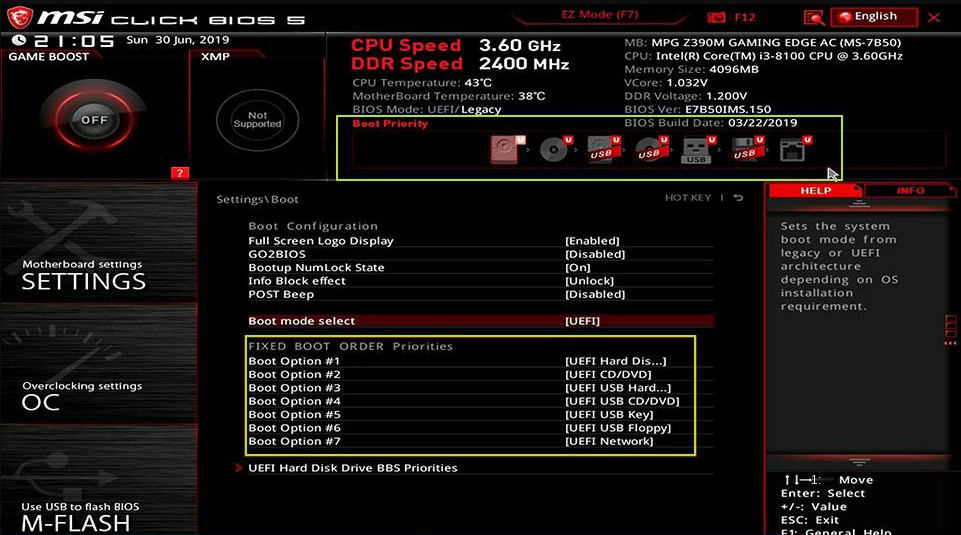
Step 3: Connect the created boot device to the computer that needs to transfer data, turn on the computer, and then the shortcut key to enter the BIOS will be displayed on the computer screen (the display time of this interface is very short, maybe only one or two seconds), click continuously BIOS shortcut key to enter the BIOS setting interface, and then set the boot U disk as the first in the boot sequence in Boot Priority, then save the settings and restart the computer.
select boot order
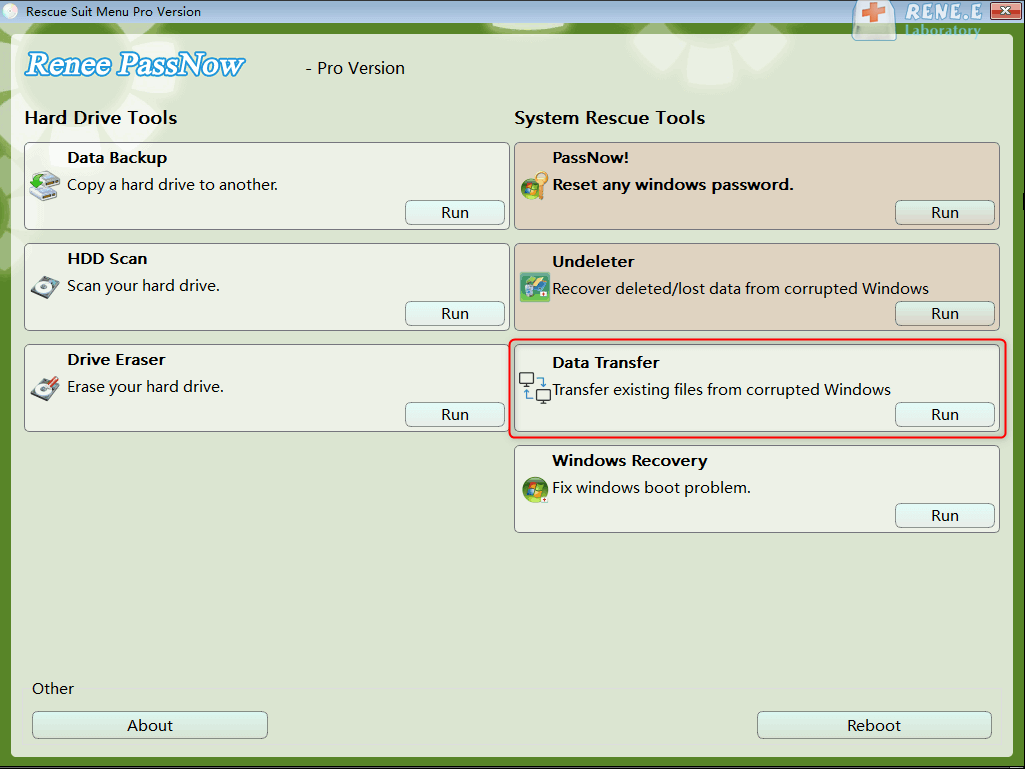
Step 4: Wait for a while, after Renee PassNow is loaded, select (Data Transfer). If you need to transfer the data of the entire hard disk, you can select the (Data Backup) option.
Windows 10 recovery drive select data transfer function in Renee Passnow to sovle windows 10 won't boot from USB
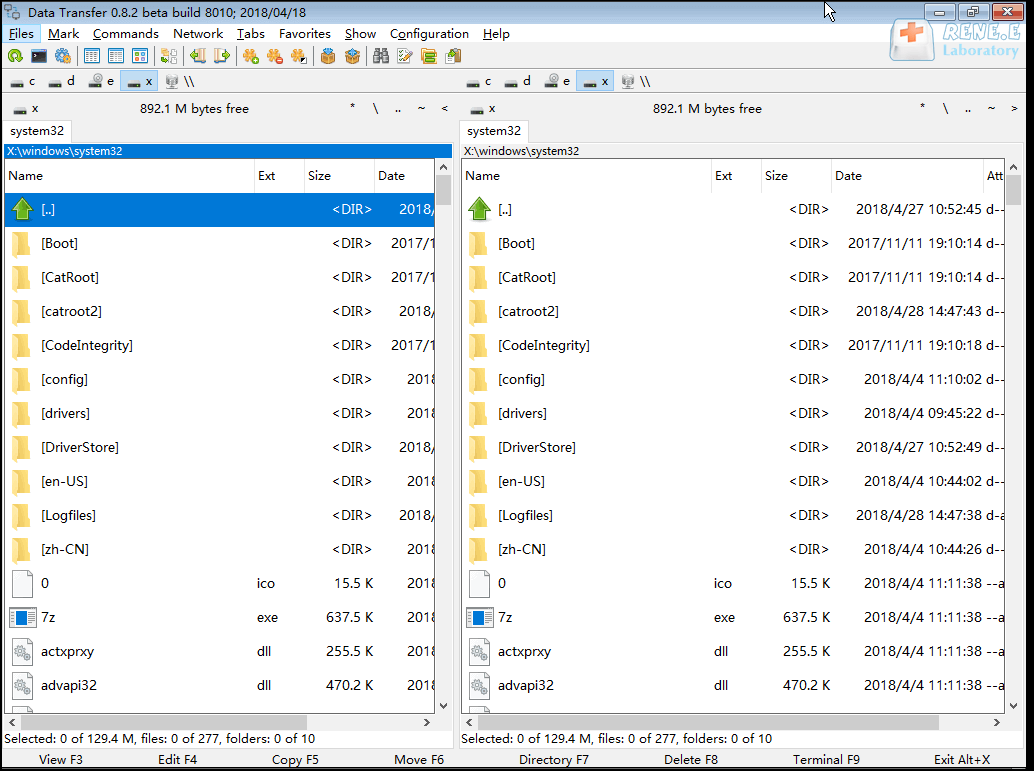
Step 5: You can click on each disk drive letter (C/D/E/F, etc.) to check whether important files are lost. If not, it is recommended that you transfer them to an external disk. The operation of transferring data is very simple. For example, if you want to transfer the data in the C drive to the G drive, you can first select the C drive on the upper left, select the G drive on the upper right, and then select the files in the C drive, and click the Copy function button in the middle. Disk data can be easily transferred. If there is a file you want to delete, you can also click the (Delete) button in the middle after selecting the file, but the deletion operation cannot be undone, please operate with caution.
data transfer in Renee Passnow
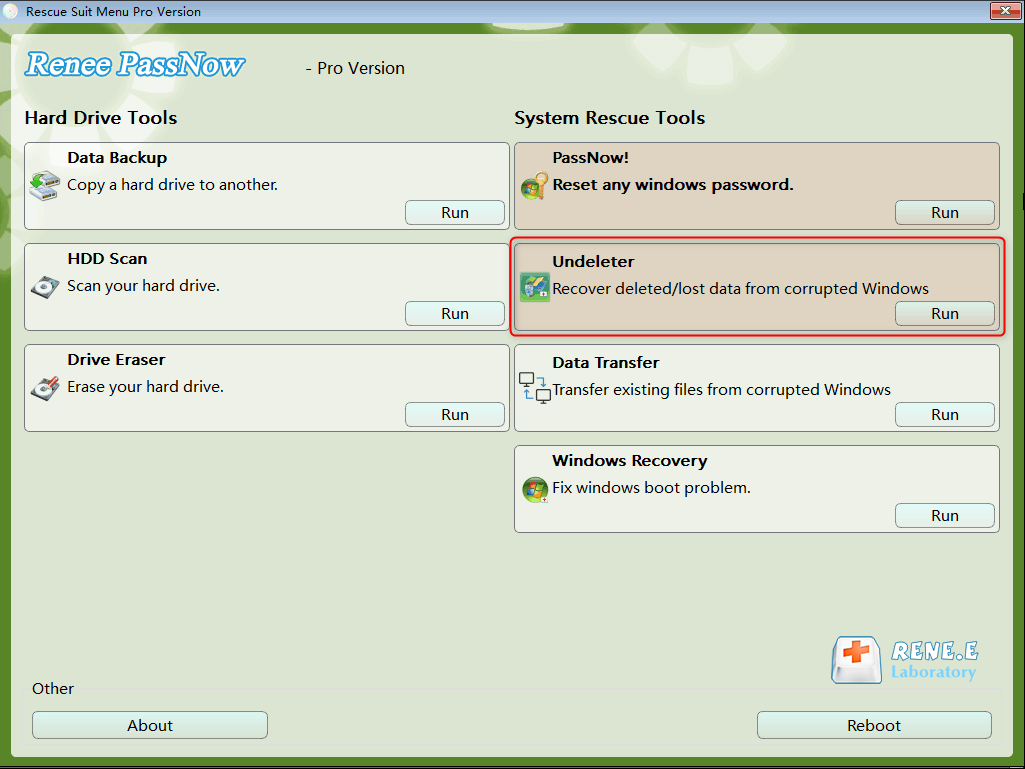
Step 6: If you find that there is data loss, please select the (Undeleter) option on the main interface of the function, and click the (Run) button.
data recovery function in Renee Passnow
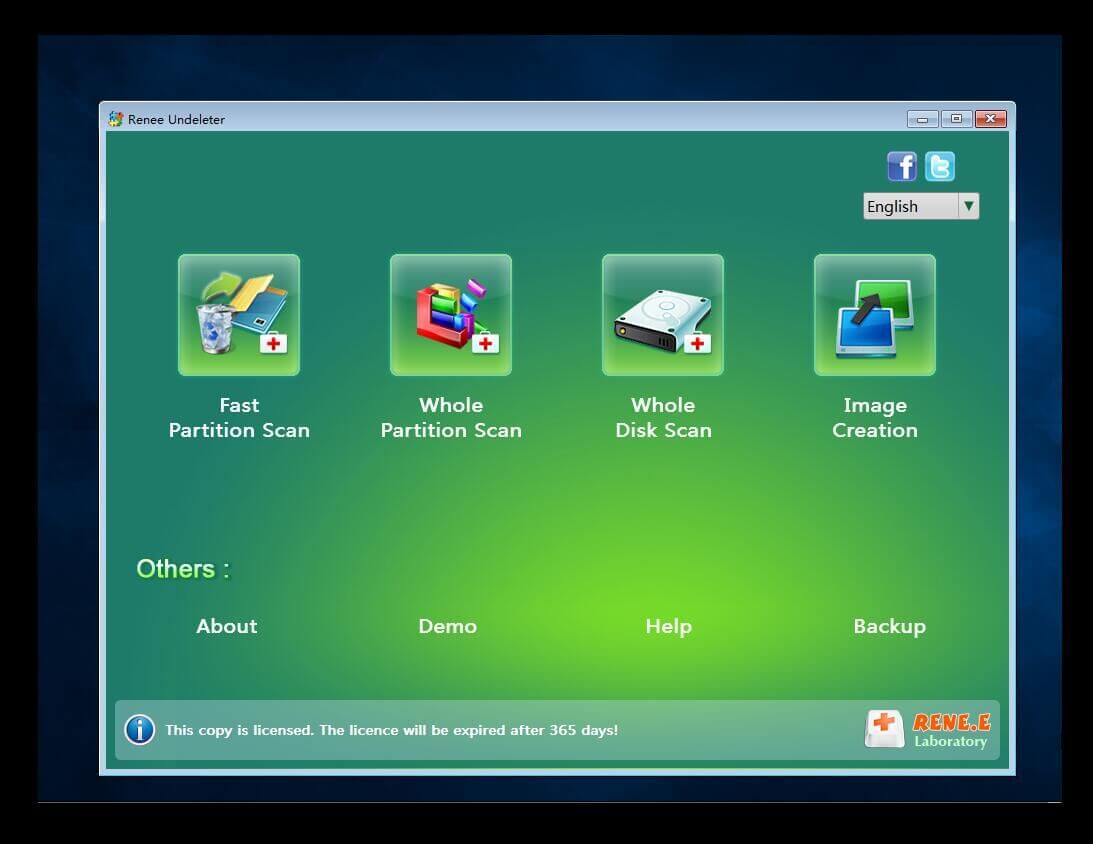
Step 7: Select (Fast Partition Scan) to scan the target hard disk.
show undeleter functions through passnow
Step 8: After the scan is complete, select the file to be recovered, click the (Recover) button to execute the data recovery command, please save the file in another external disk, eject the U disk after the recovery is complete, and then perform other operations on the computer, such as maintenance , replace the hard disk or reinstall the system, etc.