author avatar
    Senior Program Developer
Last update by James Smith at 2 September 2026

Summary
This guide shows effective ways to move the recovery partition so you can extend your C drive when unallocated space sits behind it. It covers native Windows methods that use WinRE management as well as third-party partition tools for a smooth layout.


You’ve just cloned your old drive to a larger SSD, booted successfully, and opened Disk Management expecting C: to use the extra space. Instead, you find unallocated space sitting behind a small Windows Recovery Partition —and the Extend Volume option for C: is grayed out.
Move the recovery partition to extend the C drive
This layout is common after cloning, shrinking another volume, or with many OEM setups. The recovery partition ends up between C: and the free space, blocking expansion.
This guide will help you understand what’s causing the issue, how to identify the correct recovery partition, and walk you through two solutions: using Windows tools to temporarily disable and delete the recovery partition, or using a third-party tool like Renee Becca to clone again to make full use of the free space. We’ll also show you how to verify your results and protect your data before you begin.

Why the recovery partition prevents you from extending C:

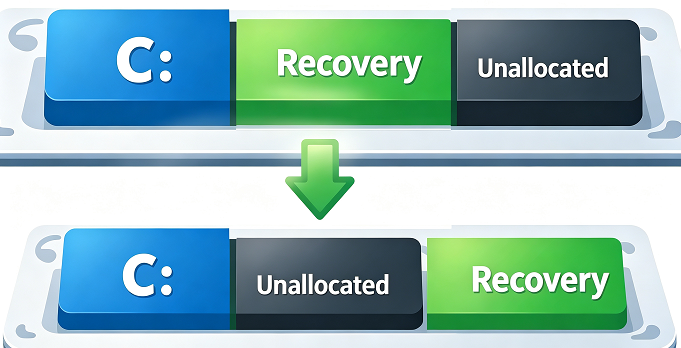
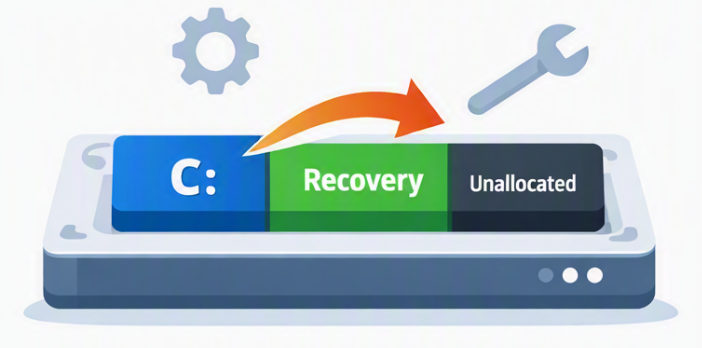
Windows Disk Management can only extend C: into unallocated space that sits directly to the right of C:. It cannot skip over other partitions. On many cloned drives—or after certain disk operations—the layout looks like this:
Cannot extend C due to recovery partition
Because the recovery partition sits between C: and the unallocated space, Windows cannot extend C: into that free area. This layout commonly occurs after:
- Cloning an old hard drive to a larger SSD
- Shrinking D: or E: to create free space
- Some OEM factory disk layouts
For example, after cloning a 512 GB NVMe drive to a 1 TB NVMe SSD, you might see C:, a 1 GB recovery partition, and about 476 GB of unallocated space.

Your options: move the recovery partition or delete it temporarily

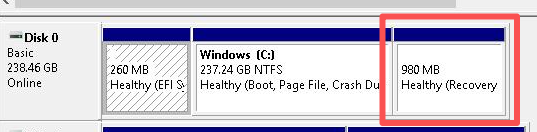
Before making any changes, first identify which recovery partition belongs to Windows. Open Disk Management (right-click the Start button > Disk Management ) and look for a small partition labeled Recovery or Healthy (Recovery Partition), usually 500 MB–1 GB in size and on the same disk as C:. Back up your important data and, if possible, create a full system image.
Windows Recovery Partition in Disk Management
Here’s a table that explains the pros and cons of each method. Please review it carefully before deciding what to do.
Method Risk Level Pros Cons Best For

Using a third-party partition tool

🟢 Low Risk

✅ Safe and beginner-friendly

✅ Keeps recovery features intact

✅ Minimal manual steps

⚠️ Requires installing extra software

⚠️ Some tools may require a paid license

Cloned drives where you want to keep recovery functionality

Disabling WinRE and deleting the partition

🟠 Medium Risk

✅ Frees up space quickly

✅ Works well with simple disk layouts

⚠️ Recovery environment temporarily lost

⚠️ Must re-enable WinRE manually later

Systems with straightforward partition structures and enough free space

Deleting and manually recreating the partition

🔴 High Risk

✅ Full control over partition layout

✅ Can fix corrupted recovery partitions

⚠️ Complex and time-consuming

⚠️ Risk of data loss if done incorrectly

Advanced users or those repairing damaged recovery partitions

Tip: Suspend BitLocker or save your recovery key before making partition changes.

Important Notes for BitLocker-Encrypted Systems

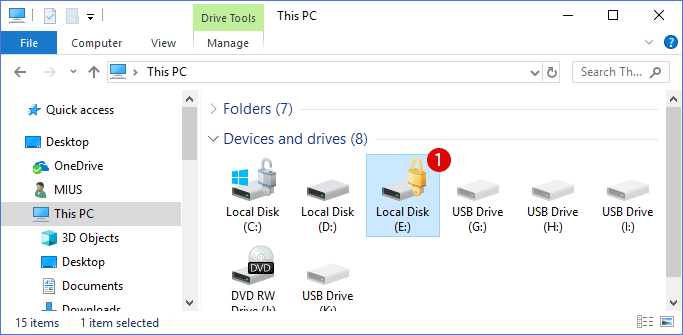
How to unlock BitLocker without a password and recovery key
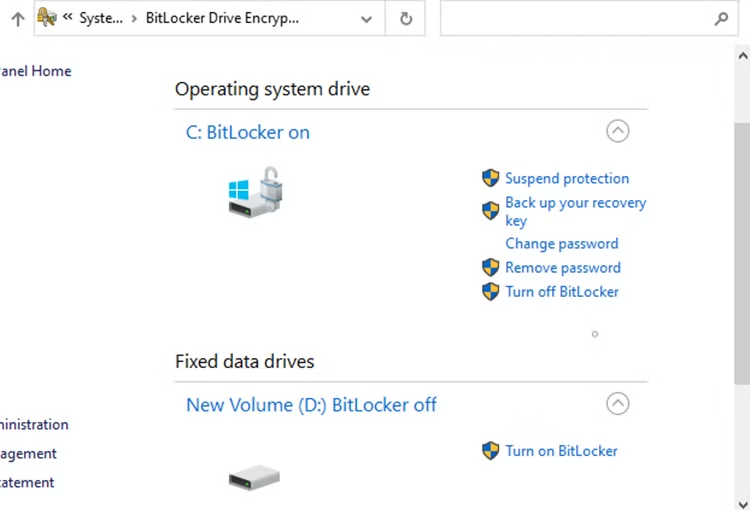
If BitLocker is enabled, suspending protection prevents a recovery prompt after partition changes. Go to Control Panel > BitLocker Drive Encryption, select Suspend protection for C:, and keep your recovery key handy.
Important: Before modifying any disk partitions, click “Back up your recovery key.” If you skip this step, Windows may trigger BitLocker’s protection mechanism during partition changes. This can lock your system and require the recovery key to unlock it. Without that key, the only way to regain access is to erase all data and reinstall Windows.
Suspend BitLocker protection option in Control Panel
Download Renee Becca for Safe System Migration with Recovery Partition

Automatic 4K alignment Improves SSD performance during system migration.

Support GPT and MBR Automatically adapt to the suitable partition format.

Support NTFS and FAT32 Redeploy various files in different file systems.

Back up quickly Back up files at up to 3,000MB/min.

Overall backup schedule Support system redeployment/system backup/partition backup/disk backup/disk clone.

Automatic 4K alignment Improve SSD performance

Support GPT and MBR Intelligently adapt to a partition format

Support NTFS and FAT32 Redeploy files in different file systems

Free TrialFree TrialNow 56337 people have downloaded!

How to move the recovery partition and extend C:

Before you start

- Identify the correct recovery partition in Disk Management.
- Back up your files and create a system image if possible.
- Suspend BitLocker if it’s enabled on C:.
Warning: Deleting the wrong recovery partition can make the Windows Recovery Environment unavailable.

Native method: disable WinRE, delete it, extend C:, and recreate WinRE later if needed

This method uses built-in Windows tools plus a free third-party backup tool. It temporarily disables Windows RE, deletes the recovery partition, extends C: into the now-adjacent unallocated space, and lets you recreate WinRE later if needed. This is a good choice if you prefer built-in tools and already have a backup.
Key point: Disabling Windows RE and deleting the recovery partition will not affect your personal files. The recovery partition contains the Windows Recovery Environment tools (used for Startup Repair, system reset, etc.). Once removed, those tools are unavailable until you recreate the recovery partition.
Pros:
  • Uses built-in Windows tools
  • Backup software recommended
  • Fast for simple layouts

Cons:

  • Windows RE is temporarily disabled
  • Recovery partition is deleted
  • Risk of selecting the wrong partition
1. Open Disk Management to confirm the layout.
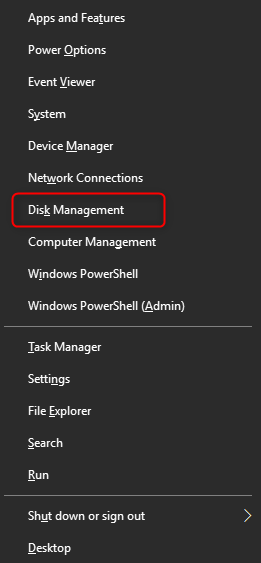
Right-click the Start button and select Disk Management.
Right-click on Start to open Disk Management
Note the disk number and recovery partition number. The layout should look like “C: | Recovery Partition | Unallocated Space” .” In the following screenshot, the disk number is 0.
Windows Recovery Partition in Disk Management
Mark down the disk ID shown in Disk Management — you’ll need this identifier in the next steps.
2. Open an elevated Command Prompt and disable Windows RE.
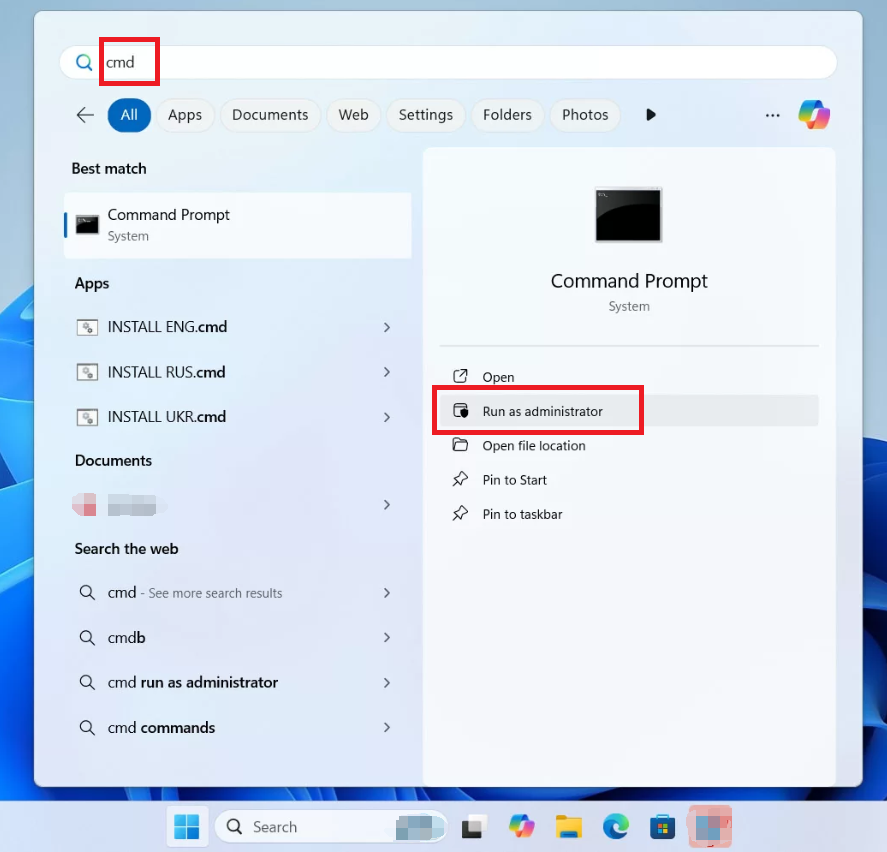
Windows 11 - Run cmd as administrator
- Press the Windows key and type cmd.
- Right-click Command Prompt and choose Run as administrator.
- Approve the User Account Control prompt.
Run this command:

reagentc /disable

The /disable argument turns off Windows RE and removes the recovery environment registration. Wait for a success message. If Windows RE is already disabled, you can continue.

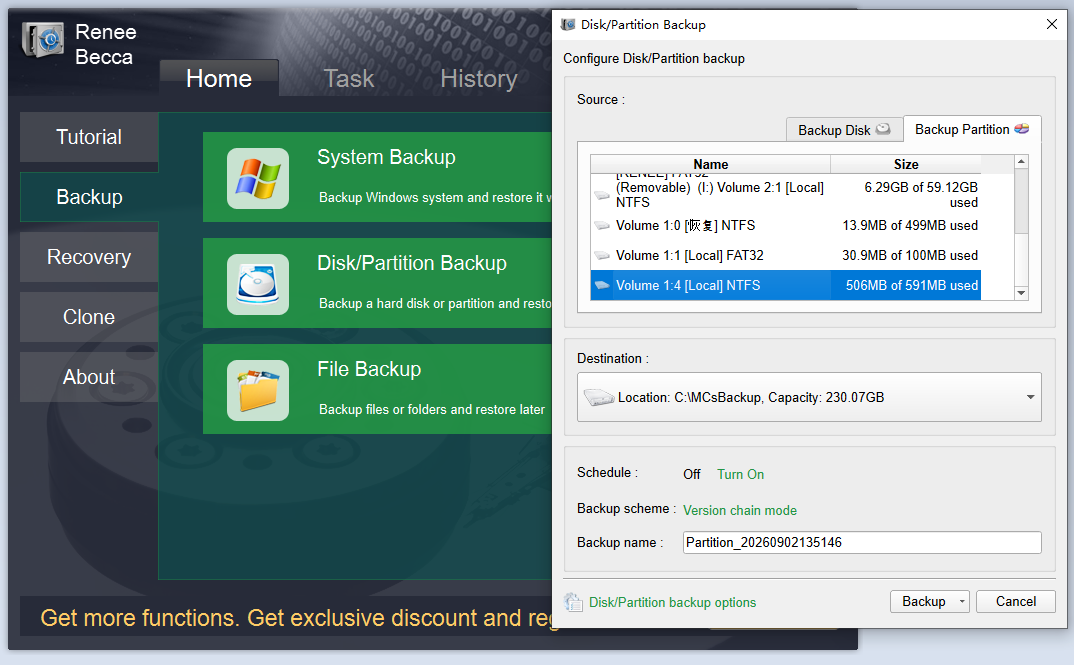
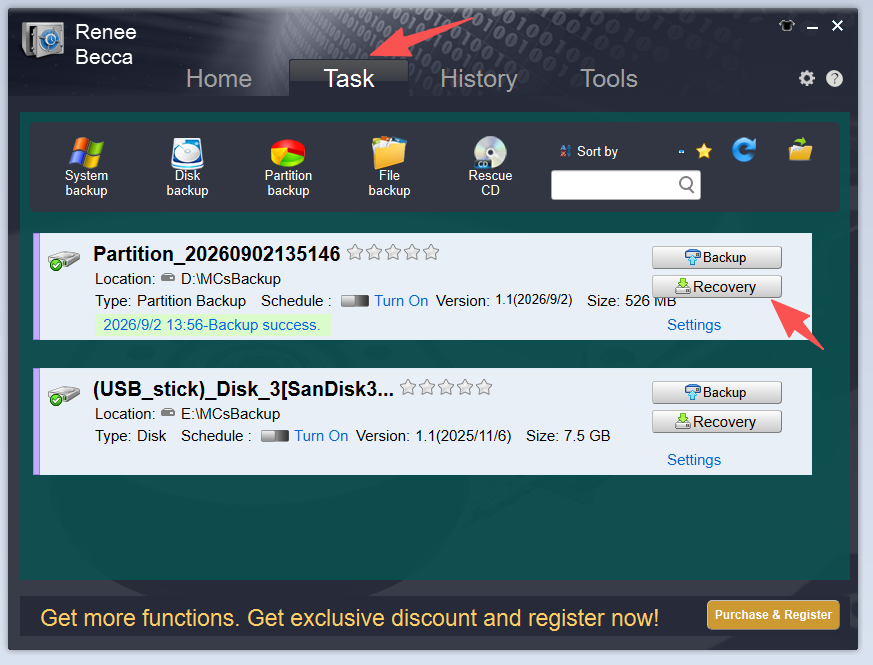
3. Use Renee Becca to back up the recovery partition as an image.
The Partition Backup feature in Renee Becca is free and works well for this purpose.
Back up the recovery partition in Renee Becca
Because Windows doesn’t mount the recovery partition, you won’t see a drive letter for it. In most cases, the recovery partition is located at the end of the disk, typically around 500 MB to 1 GB in size and usually 70% or more full.
4. Delete the recovery partition with diskpart (High risk: proceed with caution). 
Disk Management can’t delete recovery partitions. Instead, open Command Prompt as administrator and use diskpart to remove it.
You must disable Windows RE before deleting the partition; otherwise, Windows will not allow it to be removed.

If diskpart still refuses after Windows RE is disabled, you’ll need to use a third‑party partition tool such as GParted to delete it.

To delete a Windows Recovery Partition using diskpart, follow these steps:
(a) Open an elevated Command Prompt and start diskpart:

diskpart

(b) List all disks and select the one that contains the recovery partition

list disk

select disk X

replace X with the correct disk number in step 1 “1. Open Disk Management to confirm the layout.”.
(c) List partitions on that disk and select the recovery partition:

list part

select partition Y

Replace Y with the recovery partition number. (The Recovery partition always mark as “Recovery” and the size is between 500MB to 2GB)
(d) Change the partition type to a standard data partition so it can be removed:
– For GPT disks:

set id=EBD0A0A2-B9E5-4433-87C0-68B6B72699C7

- For MBR disks:

set id=07

(e) Delete the partition with the override option:

delete partition override

If the partition still refuses to be deleted, it may be OEM‑locked. In that case, you’ll need a third‑party partition tool such as GParted, DiskGenius, or AOMEI Partition Assistant to remove it.
5. Extend C: into the adjacent unallocated space.
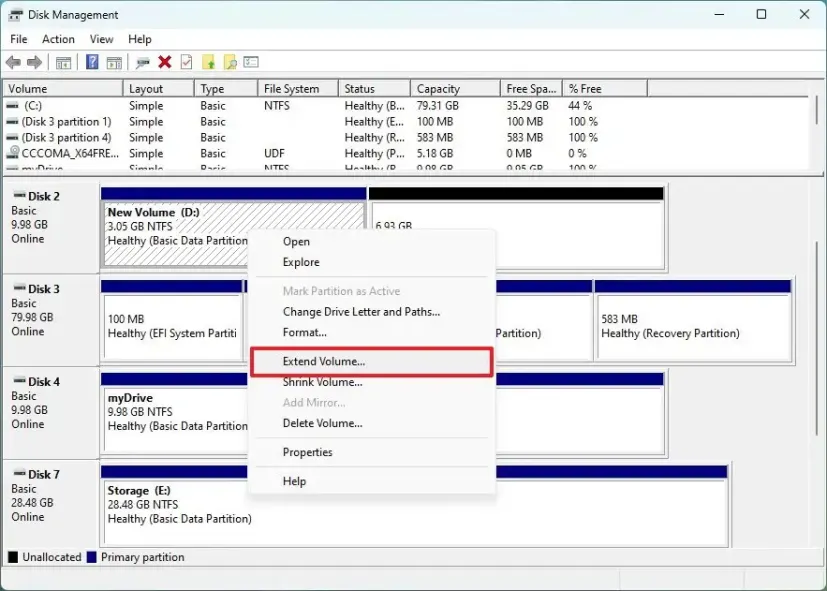
Go back to Disk Management, right-click C:, and select Extend Volume. Follow the wizard to add the unallocated space. Afterward, C: should show the increased size.
Important: Leave at least 1 GB of free space at the end of the disk. This space will be used later to create the new recovery partition.
Extend Volume in Windows
6. (Recommended) Recreate WinRE later if needed.
If you want to restore Windows RE, you can create a small NTFS recovery partition at the end of the disk and register it with Windows again.
Create a small NTFS partition at the end of the disk, mark it as a recovery partition, and restore the Windows RE image from your backup.
Restore a partition backup image in Renee Becca
Open Command Prompt with Administrator privileges.
Register the created recovery partition by running reagentc /setreimage /path \\?\GLOBALROOT\device\harddisk1\partition5\Recovery\WindowsRE and reagentc /enable from an administrator Command Prompt. Because exact steps can vary, refer to official Windows recovery media or your backup for guidance.
If you’d rather keep the recovery partition and avoid deleting it, use the third-party tool method below.

Third‑party Partition Tool Method: Reclone the Disk with an Expanded C Drive

Renee Becca offers a disk clone feature that can migrate both the system partition and Windows recovery partition together, helping you avoid this layout in future clones. Instead of deleting the recovery partition, you can use the disk clone feature to resize and rearrange partitions during the cloning process, placing the recovery partition at the end of the drive.
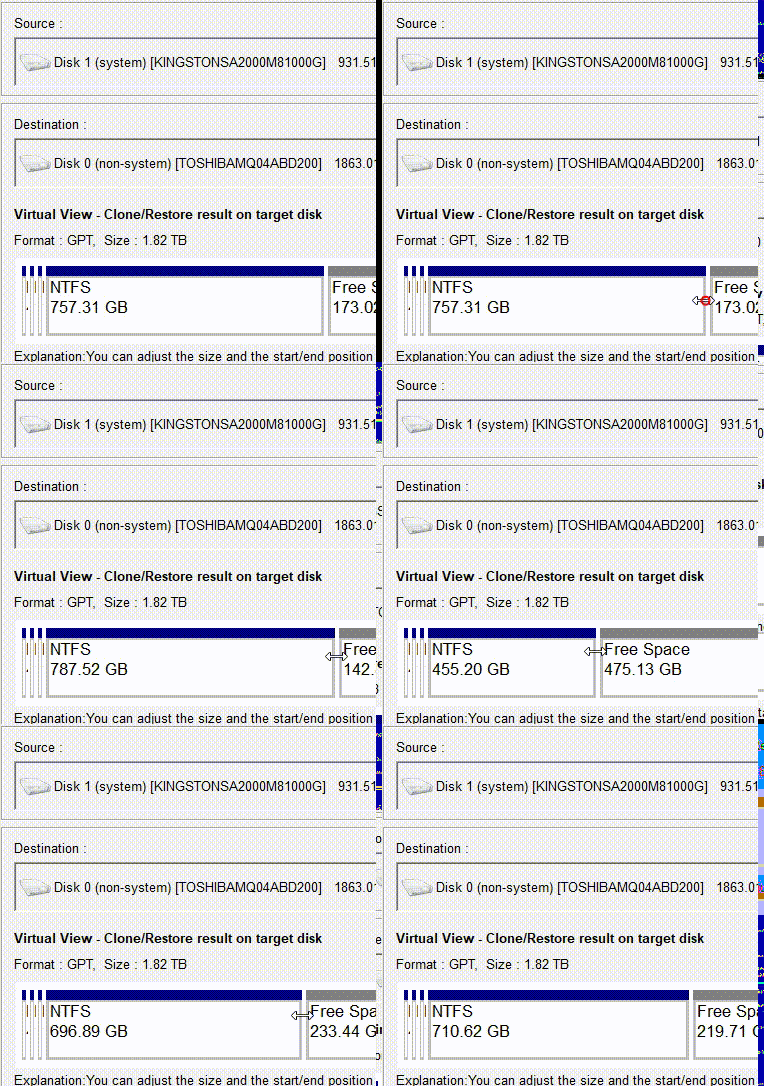
Most third-party tools use a drag-and-drop interface. Select the recovery partition, drag it to the right end of the disk, and apply the change. Renee Becca handles the move while keeping Windows RE intact.
Adjusting partition layout during clone via drag-and-drop in Renee Becca
After cloning with partition adjustment
This keeps the recovery environment intact and avoids re-enabling Windows RE afterward.
Get Renee Becca for Safe Partition Adjustment & System Migration

Automatic 4K alignment Improves SSD performance during system migration.

Support GPT and MBR Automatically adapt to the suitable partition format.

Support NTFS and FAT32 Redeploy various files in different file systems.

Back up quickly Back up files at up to 3,000MB/min.

Overall backup schedule Support system redeployment/system backup/partition backup/disk backup/disk clone.

Automatic 4K alignment Improve SSD performance

Support GPT and MBR Intelligently adapt to a partition format

Support NTFS and FAT32 Redeploy files in different file systems

Free TrialFree TrialNow 56337 people have downloaded!

How to confirm C: was extended correctly

Open Disk Management and verify that C: now shows the larger size. The unallocated space should be gone, or it should appear to the right of the recovery partition.
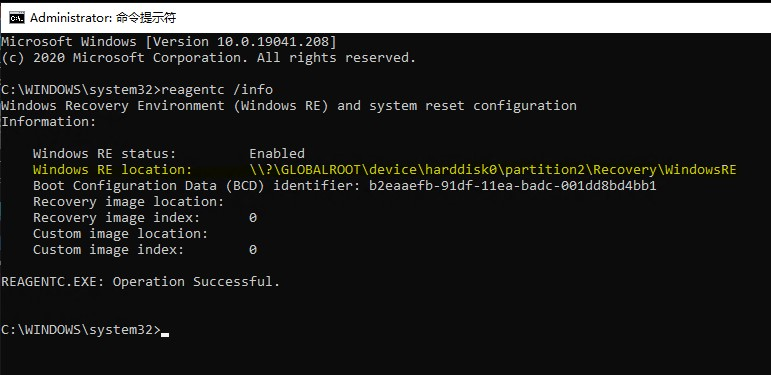
Check Windows RE status by running:

reagentc /info

reagentc /info
The /info argument shows the current Windows RE configuration. If you used the third-party move method, Windows RE should still be enabled. If you used the native delete method, it may show as disabled until you recreate WinRE.
If Extend Volume is still grayed out, refresh Disk Management and make sure C: is immediately followed by unallocated space. If the recovery partition is still in the way, repeat the move or delete steps.

FAQ

What happens to my factory reset option if I delete WinRE?

Deleting the recovery partition makes the Windows Recovery Environment (used for Startup Repair, system reset, and system image recovery) unavailable until you recreate it. If your device has a separate manufacturer factory reset partition, that may still work, but Windows RE itself will be disabled.

Is it safe to use third-party tools to move the recovery partition?

Yes, as long as you back up critical data, suspend BitLocker, and use a reputable tool. Moving the recovery partition is generally safer than deleting it, because Windows RE remains intact.

Why is Extend Volume still grayed out after I deleted the recovery partition?

The unallocated space may still not be directly to the right of C:, or another small partition could be blocking the way. Refresh Disk Management and check the layout. If needed, reboot and check again. For diskpart users, make sure you deleted the correct recovery partition and that the unallocated space now follows C:.
Renee Becca – Safe and Quick System Migration to SSD

Automatic 4K alignment Improves SSD performance during system migration.

Support GPT and MBR Automatically adapt to the suitable partition format.

Support NTFS and FAT32 Redeploy various files in different file systems.

Back up quickly Back up files at up to 3,000MB/min.

Overall backup schedule Support system redeployment/system backup/partition backup/disk backup/disk clone.

Automatic 4K alignment Improve SSD performance

Support GPT and MBR Intelligently adapt to a partition format

Support NTFS and FAT32 Redeploy files in different file systems

Free TrialFree TrialNow 56337 people have downloaded!

User Comments

Page 1

Leave a Comment


Your comment has been submitted and is awaiting moderation.