

How to Factory Reset Panasonic Laptop & PC Without Password

Summary
Discover how to factory reset Panasonic laptop & PC without password using proven methods. This guide covers secure solutions for unlocking, wiping, and restoring your Toughbook or other Panasonic models—even if you're completely locked out.

Table of contents

Before You Reset: Unlock and Backup with a Local Windows Tool

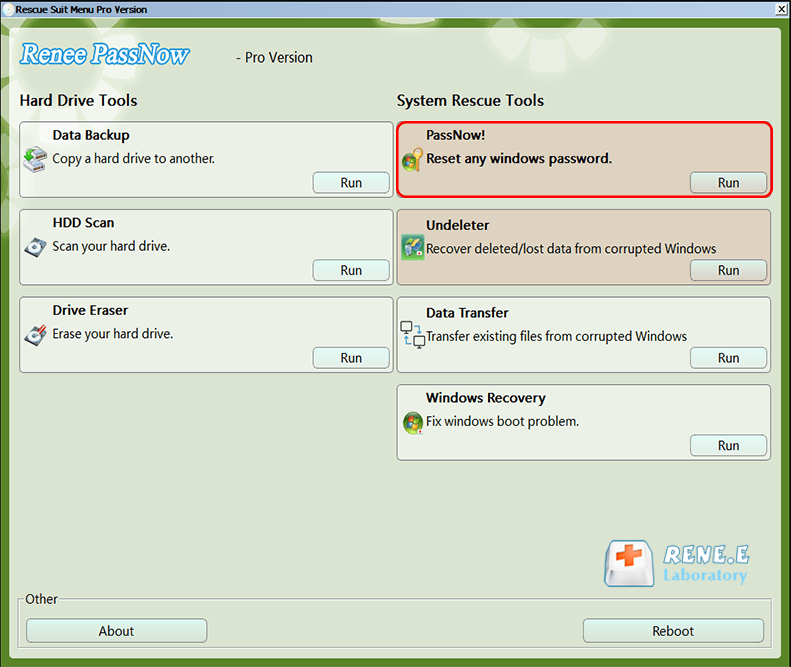
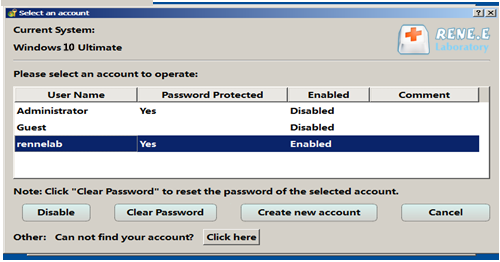
Remove Windows Login Password 3 steps for whole password remove process.
Recover the files Recover the deleted files without Windows system.
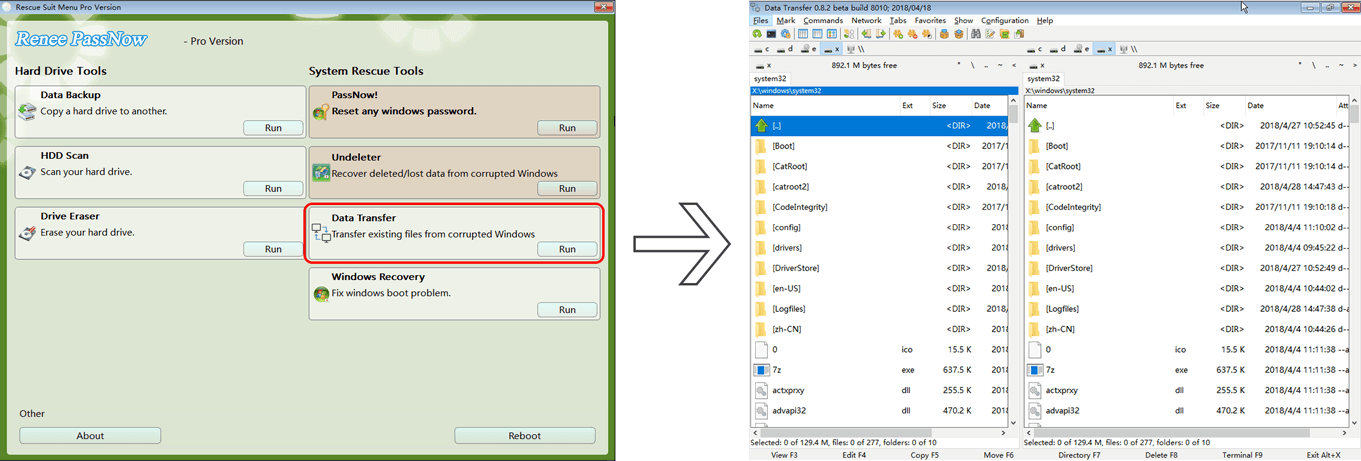
Transfer the data Transfer the important files of the computer with system.
Multifuctional Data transfer, data recovery, bootable problem recovery can be run without system.
Highly compatible Windows 11/10/8.1/8/7/XP/Vista. UEFI boot.
Remove Login Password Support Windows 11/10/8.1/8/7/XP/Vista. UEFI boot.
Recover the files Recover the deleted files without Windows system.
Transfer the data Transfer the important files of the computer with system.

| Model Series | BIOS Entry Key | Boot Menu Key |
|---|---|---|
| All Toughbook (CF‑31, CF‑54, CF‑19, CF‑33/FZ‑33, FZ‑40, FZ‑55) | F2 (sometimes Delete on older models) | F12 |
| All Let’s Note (FV4, SR4, LX/AX/RZ series) | F2 | F12 |
Remove Windows Login Password 3 steps for whole password remove process.
Recover the files Recover the deleted files without Windows system.
Transfer the data Transfer the important files of the computer with system.
Multifuctional Data transfer, data recovery, bootable problem recovery can be run without system.
Highly compatible Windows 11/10/8.1/8/7/XP/Vista. UEFI boot.
Remove Login Password Support Windows 11/10/8.1/8/7/XP/Vista. UEFI boot.
Recover the files Recover the deleted files without Windows system.
Transfer the data Transfer the important files of the computer with system.
| 🔧 Method | 📋 Steps | 💻 Applicable Models / Windows Versions | 🎯 Best Use Case | 🔑 Password / BitLocker Needed? |
|---|---|---|---|---|
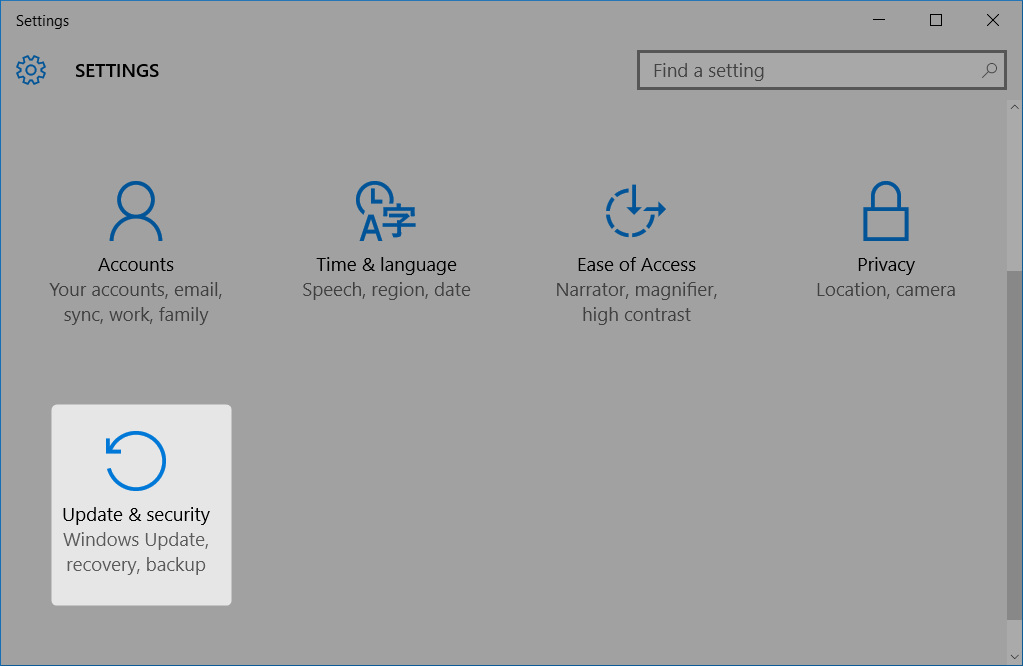
| Windows Settings Reset | Log in → Settings → Update & Security → Recovery → Reset this PC | Toughbook CF‑54, CF‑33; Let’s Note FV/SR series; Windows 10/11 | Fixing software glitches or malware when you can still log in | ✅ Yes (Windows login required; BitLocker key if encrypted) |
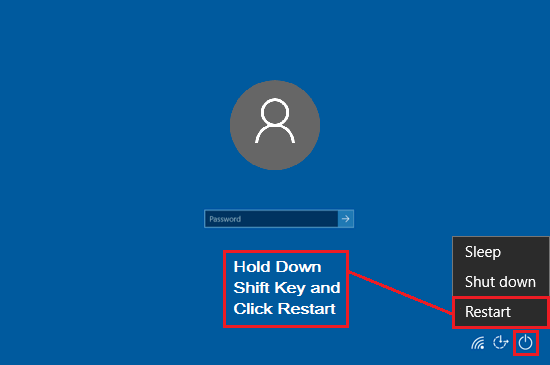
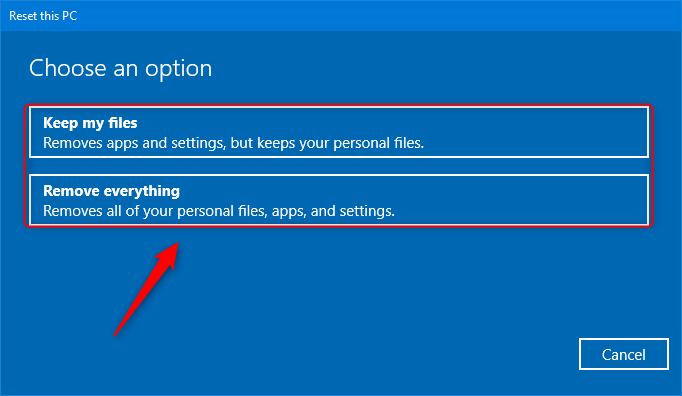
| Shift + Restart (Lock Screen) | At lock screen → Hold Shift → Click Restart → Troubleshoot → Reset this PC | Most Toughbooks (CF‑31, CF‑54) and Let’s Note models; Windows 8+ | Quick recovery when locked out but can reach lock screen | ✅ Yes, BitLocker may still prompt |
| Recovery Partition | Enter BIOS (F2/Delete) → Select Recovery option | Older Toughbooks (CF‑19, CF‑31, CF‑52) and Let’s Note LX/AX/RZ; Windows 7/8/10 | Full factory restore if recovery partition is intact | ❌ No password needed; BitLocker key if encrypted |
| Contact Panasonic Support | Visit support site or call → Provide proof → Get guided reset or recovery media | All Toughbook/FZ and Let’s Note models; Any Windows version | Warranty cases, official recovery, or second‑hand devices without DIY confidence | ❌ No password required; official recovery media provided after verification |
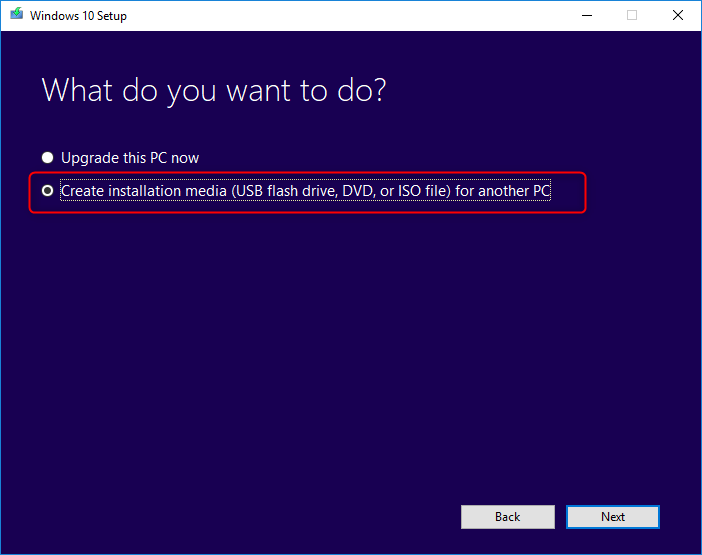
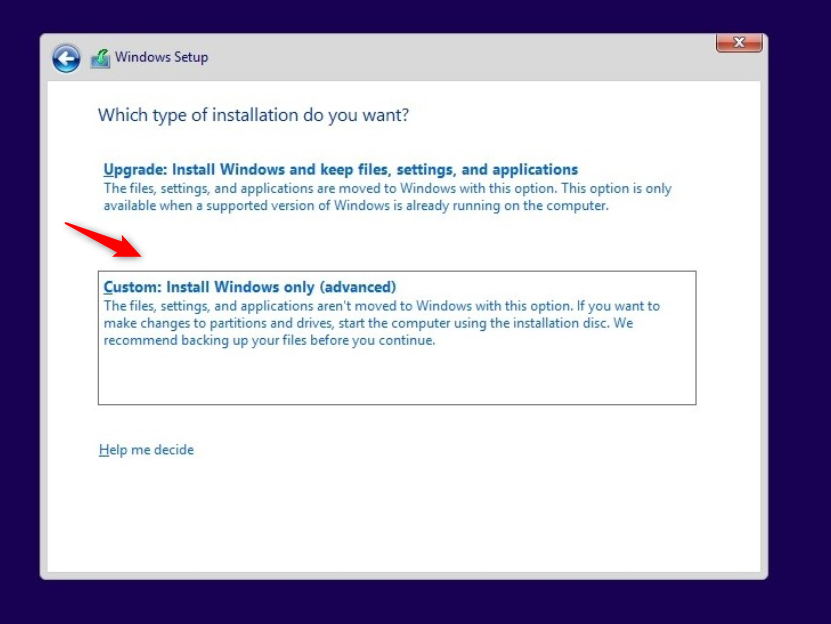
| Windows Media Clean Install | Download Microsoft USB tool → Boot → Delete partitions → Reinstall Windows | All Toughbook/FZ and Let’s Note models; esp. newer FZ‑40, FZ‑55, FV4; Windows 10/11 | Best for corrupted partitions or when a full wipe is needed | All Data will be lost; ❌ No password required; BitLocker key if prompted |
Steps


Steps

Steps


Handling Lost Recovery Partition

| Windows Version | Download Link | Requirement |
|---|---|---|
| Windows 11 | https://www.microsoft.com/software-download/windows11 | Internet access; 8GB+ USB; TPM 2.0 required for install |
| Windows 10 | https://www.microsoft.com/software-download/windows10 | Internet access; 8GB+ USB |
| Windows 8.1 | https://www.techworm.net/2023/03/download-windows-8-1-iso-files.html | Product key required; 4GB+ USB |
| Windows 7 (SP1) | HeiDoc.net ISO Archive | Requires valid product key; use with Rufus to create bootable USB |
Additional Tip: CMOS Battery Removal for BIOS Resets
Is it possible to factory reset my Panasonic Toughbook without losing all data?
What if my Panasonic laptop has a BIOS password that blocks booting?
Can I use these methods on older Panasonic models like the CF-18?
Will factory resetting fix performance issues on my Panasonic PC?
What precautions should I take before resetting without a password?
How long does a factory reset take on a Panasonic Toughbook?
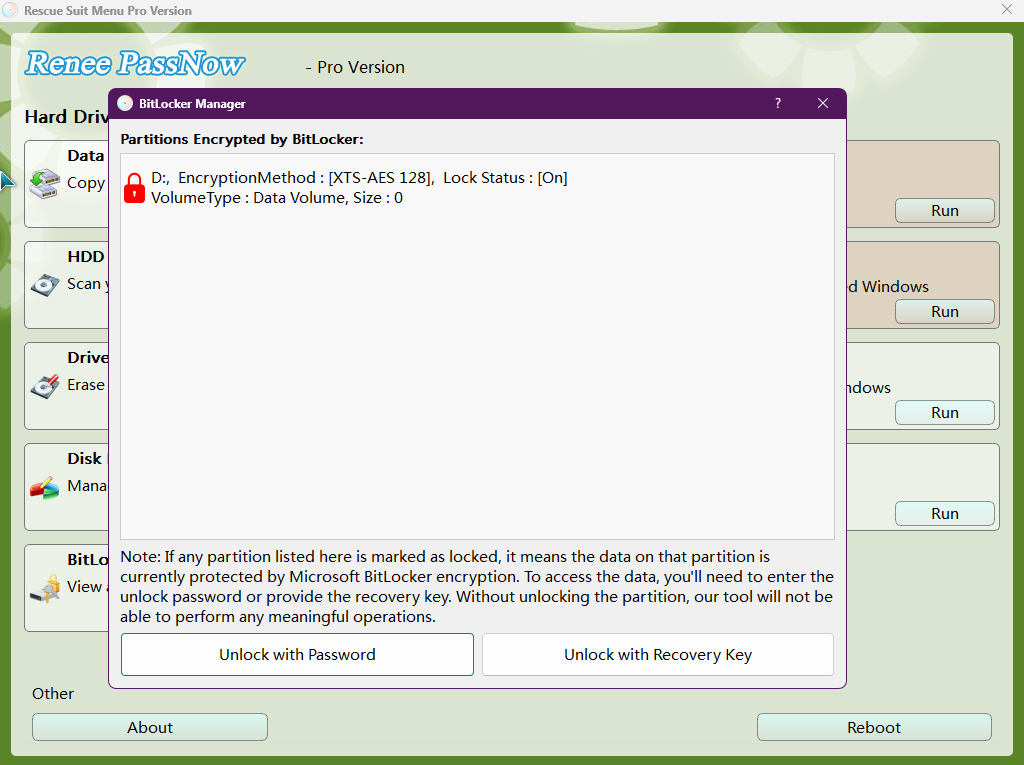
How Do I Handle BitLocker on Win11 Toughbooks During Reset?
Remove Windows Login Password 3 steps for whole password remove process.
Enable/Create Administrator One click for creating new administrator and enable the disabled account.
Widely Use New version supports UEFI boot model, which can be used on more computers, laptops and even surfaces.
Multifuctional Data transfer, data recovery, bootable problem recovery can be run without system.
Highly compatible Windows 11/10/8.1/8/7/XP/Vista.
Remove Login Password Support Windows 11/10/8.1/8/7/XP/Vista.
Enable/Create Administrator One click for creating new administrator and enable the disabled account.
Easy to use No need of any professional knowledge or password reset disk.
Relate Links :
[2025] How to Factory Reset Windows 7 Without Password: Simple & Complete Guide

25-09-2025
Ashley S. Miller : Learn how to factory reset Windows 7 without password using simple, reliable methods. Our updated guide covers step-by-step...
[2025] How to Factory Reset Your HP Laptop Without a Password: Step-by-Step Guide
12-10-2025
Ashley S. Miller : This guide on how to factory reset HP laptop without password walks users through step-by-step solutions, using built-in...
How to Use Command Prompt to Reset Computer to Factory Settings
27-08-2025
Ashley S. Miller : This guide explains how to use command prompt to reset computer to factory settings, covering essential precautions to...
How to Recover Lost Files After Factory Reset on Windows 10
23-09-2024
Ashley S. Miller : Factory resetting a Windows 10 PC removes third-party applications, settings, and potentially some personal files, restoring the system...


User Comments
Leave a Comment